Whole buildings are built from clay-mud all over the world. They last for centuries and can be huge. They are all built basically like coil-pots.
I build the structure of the big sculptures in much the same way, add on the artwork and then cut them up (hollowing where necessary) for firing. These days I use this method for most of my sculpture but with smaller pieces (under 2 metres)I work quite intuitively. The big ones you need to plan like a military campaign because supports will need to be built in from the outset in order to be rigid enough to work and to cut the piece up. Budgets must be stuck to and Volunteer’s time is very precious.
This is a very different method from building with un-fired Bricks, which is mostly a subtractive, carved process. Using the raw clay allows for a lot of adding and modelling. They are both great techniques and Gwen Heeney’s excellent book ”Brickworks” is well worth reading. It is full of good advice.
After talks/workshops with the local community, research, writing a plan-of-work, time-table and making a Scale Model, draw the out-line of the sculptures foot-print onto the floor.
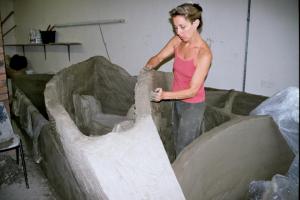
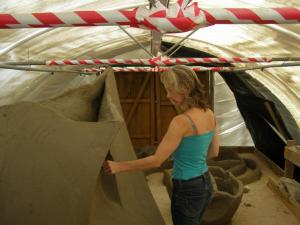
Using very soft Brick-clay lay down first layer at around 5 cm thick. Allow to stiffen. Soften top edge w/ water, rub to a slip, add next layer (approx 10kg clay ‘coil’ 40cm long), ensure good join, draw the clay upwards. You can get about 30 cm in height. You can lay a strip of plastic along the top to keep that edge soft for the next join. Joints must be perfect so that the final sections are strong enough to handle.
Note the finger marks; leave these: use them as strengthening for the walls in the manner of corrugation.
Inner ‘Support Walls’ are built thinner, inside the form. Clay supports shrink with the Sculpture. They will be discarded and re-cycled when the Sculpture is cut up.
Like all coil-pots, lower sections are wrapped in plastic to prevent over-drying; you will need to be able to cut through all layers so they must not get too hard and over-drying/shrinking will cause nightmare cracks. The thickness of the walls can be reduced as you go up to reduce weight.
Chunks of memory-foam can be put inside to support horizontal walls; the foam will shrink w/ the clay.
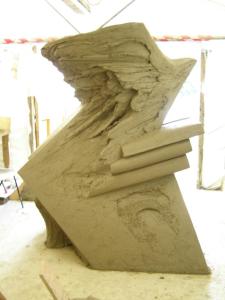
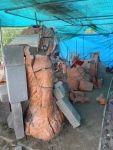
Memorial for Maerdy Workingman’s Hall built in the polytunnel w/ Groundwork Aberdare. On the bottom-left of this sculpture you can see a clay support holding up that leaning wall, built in from the first layer. This will be removed once the huge weight (2 tons) of the upper parts of the sculpture are cut away during the dismantling .
Wooden supports can’t shrink w/ the form so may cause bad cracks but they have their place.
We made 7 adjustable metal/plank brackets to support a wall that leaned outwards by nearly 40 degrees. They had to stay in place until upper sections were removed. There are whole sofa cushions inside supporting the roof!
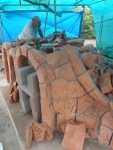
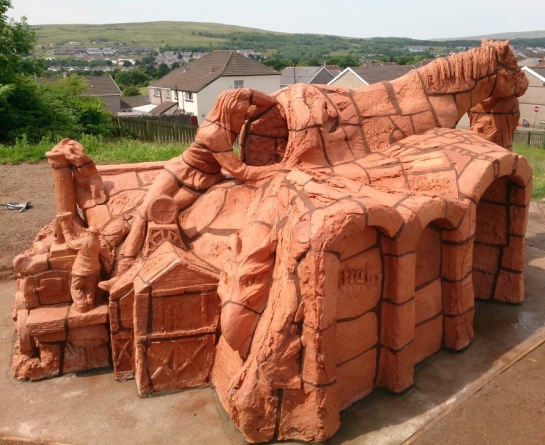
Balarat is 6 metres long x 2 m high and took 7 tons of clay. We built it at the same time as Ocean Colliery Pit Marker (5m long, 5 tons of clay), seen in the background. There is a lot of drying (timing is everything) so having 2 on the go really maximises the use of your budget; we were able to build and install these both for £40,000. Countless wonderful people were involved and it all took over a year.
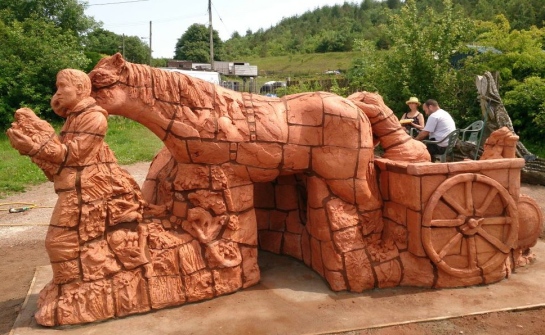
The Sirhowy Wyvern has a tunnel running through it (with art-work inside of children working in coal mines, some done by kids like these awesome girls from the Youth Club). We had one clay support-wall half way along to support the roof and this allowed us to get inside from either end to work.

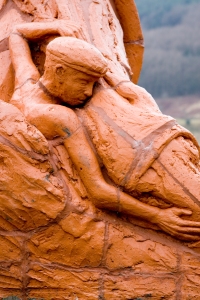
Guto Nyth Bran Memorial detail; the Salmon, oldest and wisest of all the creatures in Celtic Mythology.
To add on art-work: spend a lot of time softening the surface, add clay, ensure a good join, add clay to block-out art work, wrap in plastic to allow the water to travel from the soft clay into your hardened wall. Un-wrap when the clay has all reached a similar hardness + complete the art-work.
As walls are complete they can be smoothed, carved and art-work added and refined. All the tools are normal sized pottery tools and bits of wood. Plastic wrapping and containers of water placed inside can slow the drying, fans (pointed towards walls, not at the clay) and dehumidifiers can speed it up.
Calon Lan was the first really large build I did with a group and only the 3rd one I had done. Many people worked on this piece, using all sorts of techniques and styles. We had lively discussions about the building methods and art-work and worked it out between us. Especially with these early pieces it was terrifying! With each sculpture I have changed the technique a bit. You will do the same, adapting it to your style and clay.
This wall on Balarat was built extra thick in preparation for the remarkable volunteer, Wendy Sage, to carve on this fantastic view of the village taken from archive photographs. Wendy worked on this panel for 6 weeks and did a lot of the other art work on the Blaengarw Sculptures.
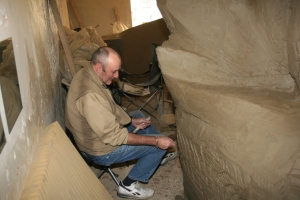
Jim, an ex-miner and excellent painter, gave countless hours to all the Blaengarw Sculptures.
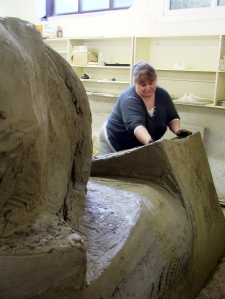
Sharon started out reluctantly helping with the foliage on Calon Lan and quickly became invaluable, working on all aspects of the Sculpture. Here she’s building the dram on Ocean Colliery Pit Marker.
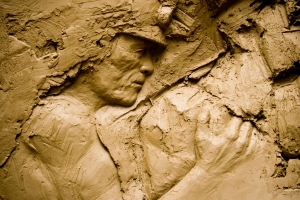
We all worked on this difficult panel, taking turns to model or advise. Jim knew the ‘feel’ we were after from his time under-ground.
As soon as the top area is firm enough to handle you need to start dismantling the Sculpture. Cracks will be showing up as the whole thing tries to shrink.
Take photos all around the Sculpture. Enlarge + photocopy.
Start cutting from the top with a normal ‘cheese-wire’. Aim for around 30 cm square; sections that are too large will be hideously heavy, crack and worst, warp in the firing. Try and keep the edges of the sections at 90 degrees to the front surface for yourInstaller’s sake. Lay the sections onto memory foam so they don’t distort/get damaged. Draw on your photocopy Photo-Map the cut’s shape and record the number. Mark the number on each side of the edges of the section (incase one number gets smudged). These Maps, numbers, a tracing, on plastic, of the outline left on the floor of the foot-print of the sculpture and the Scale model are now your most treasured possessions until the sculpture is installed and loosing them will haunt the many nightmares you will have about the whole process.
Once sections are stiff enough to handle without distorting trim away the excess thickness leaving a good 5 cm minimum. ‘Gouge’ out, using loop-tools (or an electric drill on leather-hard sections) a random pattern of channels in the back of the sections that will reduce the thickness to 2cm at any point, act as a grid of braces to deter warping and give excellent grip to the cement that will hold them all together. It’s got to be said: this is not the fun bit….
Dry slowly using a dehumidifier/memory foam support/regular turning for at least 5 weeks. Fire SLOWLY!!! Bear in mind that many brick-clays contain stones; these must be fired extremely slowly passed 500 degrees C to allow vaporised minerals to escape or your sections will ‘bloat’. Luckily I’ve never had this happen thanks to the kind guidance from the guys at Coleford Brick and Tile who don’t find bloating a laughing matter even though a bloated brick looks like a rugby ball! Be wary, too, of the low melting point of some brick-clays.
I fired all the sections packed in the kiln on their edges (flat seems to invite cracks/distortion) in my Cromartie 16 cu ft Workhorse Electric Kiln in batches of up to 40 sections. 1 ton of sculpture seems to yield about 50 sections.
Installation needs an imaginative Builder with the patients of a saint who will, non-the-less, come to hate your guts. Lay a strong foundation w/ reinforced concrete, build an internal structure of breeze-blocks/infill/steel bars,’clad’ with the sections of sculpture and point up joints. Installation will generally use half your budget.
You can copy/print this next bit for your installer:
Installing a ceramic sculpture with sections.
Sculptures made in brick, using any of the various techniques, is incredibly laborious. But they are more durable than any other material. They are the archaeology of the future. More people can be involved in making them and they can be much more affordable than other materials. The process of the installation will be more like dry-stone walling than brick laying.
Using the Scale Model:
The scale model was used to build the form in wet clay. Changes will have been made to enhance the form in it’s full scale.
There is an 18% shrinkage from wet to fired with Coleford Brick clay so the scale model will be 18% too small.
Spacing and pointing will also affect the installed size.
So the scale model is only a useful guide during installation.
The Sections:
The sculpture is built as one in soft clay and then cut up.
Once the form is built it under-goes a controlled drying period to the point where it can be cut. Obviously the lower layers are very hard by that time, and the upper layers less so.
Cutting has to be done in such a way that the fragile form does not collapse. That is why the numbers follow the sequence they do and why the cuts are where they are.
Cutting up is very difficult and hard work. At each cut the Map is marked, numbered and the section numbered. Mistakes are easily made.
The sections are heavy and can be awkward to lift. They are set down on memory foam and then trimmed back as much as possible. A grid of gouges in the back helps to hold the shape during drying/firing. Happily they also provide excellent grip during installation. Every care is taken but inevitably some get damaged. Once the clay has passed a certain point in drying it is best to repair this damage after the firing.
Each section section is carefully handled/supported/turned during a long, very slow drying period of 6 weeks.
The sections will have been divided over a number of firings. No firing is the same and where the section was in the kiln also creates unique conditions. Because the shrinkage is so high ( 18%) and the Coleford Brick clay is being fired to a temperature close to it’s melting point to gain the near vitrification and strength, this may make significant differences to the fired section’s size.
So sections may well have warped, shrunk un-evenly and cracked. They can be trimmed or cut with power tools. Badly warped ones can be cut into several pieces so that they can set well in the form.
Priorities:
The parts that will be focal points and define the sculpture.
Edges. Carvings. Holes.
The hole is focal- people will usually go up close to the holes if they can. But they can be ground with power tools.
Edges can also be ground into line to a certain extent but it is very difficult to re-produce the right texture.
All three are very important but the carvings are the part that needs to be set most carefully.
The Foundation:
The installed sculpture may be solid with infill and very heavy. The foundations need to be adequate. Steel re-bars should be set to re-enforce /anchor the sculpture.
The Layers:
The installation can only progress one layer at a time, starting at the base. If the base layer is angled wrongly that error will magnify with each subsequent layer making it very difficult to look after your 3 priorities ( above).
Careful planning of each layer will make a big difference.
Sections can be trimmed and spacing can be varied. Have a box of spare mosaic tiles/pebbles to decorate very wide gaps. Leave enough gap to point: This sculpture will stand for centuries and all precautions should be taken against water/ice.
– Using the maps sort the sections into groups.
- Using a washable paint write the numbers on the out-side of the section.
- Using a marker-pen write the number of the adjacent section shown on the map, on the inner-edge. Also mark ‘top’, ‘base’ or a this way up arrow.
- With smaller sculptures or parts like figures:
Place paper or plastic on ground.
Starting with the top layer, place the sections using stones/bricks/breeze blocks to support them. Make wedges/spacers and hold in place w/ duct tape.
where necessary fix sections together with quick drying cement ( this can be knocked off later.)
Photograph/measure/make notes.
Trace the ‘foot-print’ onto the paper. Cut it out and use to guide the next layer down.
-With large/wide sculptures:
Set the base layer. Support/space well as above. Hold the next layer sections to each join to check the consequent angles. Lay that next layer on the ground around the installed layer and check as much as is necessary that the fit is good.
- Once you are sure they are correctly placed, fix them in with cement. When that is set put in your next layer of re-bars and infill.
Pointing:
Coleford brick clay is very dense and has extremely low porosity. Ensure your pointing material is suitable to the ceramic.
Red sand gives a good, long lasting match to terracotta colours.
Coloured mortar from Tarmac (http://www.tarmac.com/mortar/mortar/coloured-mortar/ ) are good.
Colour dyes do not last well in sun-light.
The Sirhowy Wyvern, Sirhowy Green, Tredegar, South Wales
The whole process is spectacularly laborious!! And exquisitely low-tech. There is a job there for every Volunteer of every ability, from teen-age lads building the structure to Grans, kids and every-one in between doing art-work, people who like to stay clean doing research and collecting reference material, the local Cafe feeding you all the vast amounts of cooked dinners it will take to fuel the gruelling lifting and shifting required, people stepping in off the street to give you an invaluable ‘fresh eye’ on how it looks. The finished Sculptures will last for many generations, become landmarks and the pride of the area and finally the archaeology of the future.


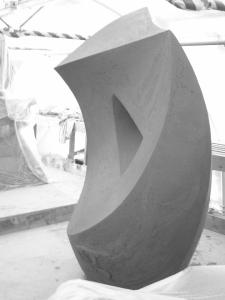










Once again I am gobsmacked by the scale and standard of Rebecca s wonderful sensitive work.
LikeLike
Pingback: Coil-Building Master-Class. | Rebecca Buck
Pingback: How to do Coil-building, from small to monumental. | Rebecca Buck
Pingback: What do artists do all day? Guest-speaker Talk for Carmarthen School of Art. | Rebecca Buck
Pingback: Rebecca Buck, Osprey Studios. |
Amazing .how was it fired?
LikeLike
Hi Clive, In sections in my Cromartie Work Horse top loading electric kiln. You have to fire very slowly to allow the stones in an un-refined clay this go through gaseous stages or you will get dramatic bloating! On this brick clay there is a sudden transition to lava too so you have to be careful not to exceed the top temperature of only 1065. All terrifying, I’ve switched to easier clays now but I still love this stuff.
LikeLike
Good to know thanks 🙏
Sent from my iPhone
>
LikeLike