
Over Half a Century III.

Half a Century VIII.

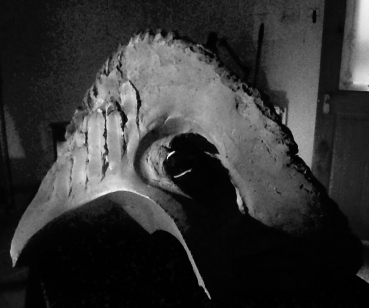
The Edge VII

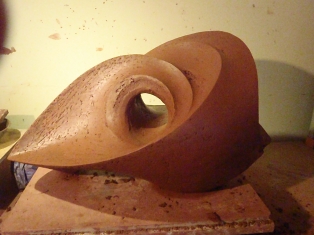
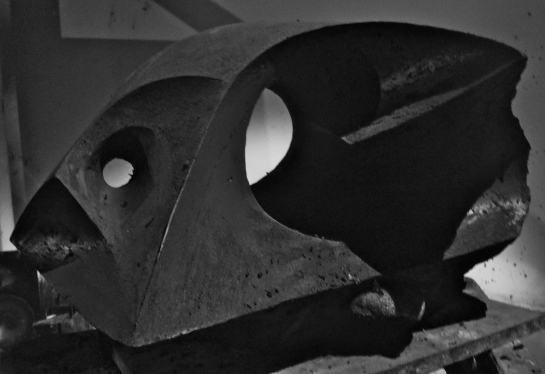
Wyvern VIII, 2015, 39cm H x 71cm L x 34cm D, ceramic.

Up is Down VII, back view

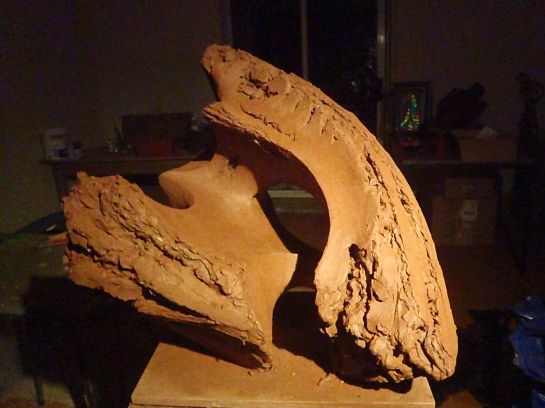
Up is Down V, 44cm H x 58cm L x 50cm D,

Up is Down VI, second view.

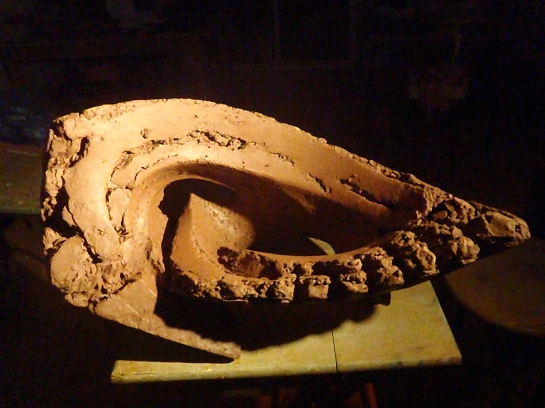
Up is Down V, back view
Making Abstract Sculpture can feel very elusive; where to start, when to stop? This post aims to de-mystify the process and give you an ideal technique that will allow you to go with your flow to make beautiful Abstract forms that express those things that are not easily put into words or naturalistic art.
Because there is no right or wrong with Abstracts you are better off with a technique that allows you to feel your way around the form and to change your mind any time you want to. Building the piece in solid clay allows you to separate the ceramic-technical needs from the flow of creativity for the most part. You do need to make good joins as you go along but with the right clay that is not a distraction. It’s a great method for pieces up to 1 metre. For larger Sculptures I often use it over a hollow clay-armature to reduce the over-all weight. Use a clay designed for sculpture and hand-building with plenty of grog (gritty bits like sand). Scarva’s ES 50 is fab and excellent value for money.
I work to music and usually have a theme I am following. When you start out with Abstracts you need to put some boundaries in place; have a theme (an emotion, geometry, etc) or abstract a known form like a figure or an animal. All the pieces above were made using this technique. All but one are made in combinations of Scarva’s black clays.
Gill Tennant-Eyles, Emma Bevan and Tez Roberts came to Osprey Studios for a Workshop. We had an excellent day going over this technique and sharing each other’s ideas.

Make a block of clay that has the approximate hight/width/depth you feel you need at this point. Rough out the beginnings of a form.

Work all around the form in stages, giving each area equal attention, refining with each rotation.

Add or subtract clay. A paddle will be very useful.

When the piece starts sagging leave it to harden up a bit. Use plastic to keep the drying even.
For larger pieces the process is the same. Use props or leave temporary supports of clay to hold up the form until it hardens. These might stay there until you have hollowed out the sculpture and reduced the weight.


Once the piece is leather-hard carve/scrape the surface. You can still add clay but pay attention to the joins.

At the point where the form is complete apart from finishing the surface, stop building and get ready to hollow-out. The piece should be firm enough to resist a thumb-print. On very large pieces you might start hollowing the top while the lower parts are still too damp; the hollowed clay walls will need to be able to support themselves with-out distorting. Don’t let the form get too hard or you wont be able to cut it open.
How thick the clay can be to fire well depends on the amount of grog, the denseness of your modelling style, drying time and the speed of your firing.
Air bubbles trapped in the clay will expand with the heat. Grog and/or a loose surface will allow the air to seep through the clay. The same is true with water but steam expands fast. If your piece breaks into big bits during the fire it was trapped air and you will be able to see where the bubbles were in the shards. If it blows up into a trillion smithereens it wasn’t properly dry!
I dry thick sculptures slowly under plastic which I turn daily for 4 weeks minimum and then 1-2 weeks in a plastic tent with a dehumidifier. A long dry allows the water to level out as water loves to do and that will enhance the structure of the clay within it’s new sculpture shape. You will get less cracks or distorting in the fire.
I fire very slowly with an 18 degree C rise until 600 degrees C.
Generally 3cm is a fair maximum thickness for a well grogged clay.
Choosing where to cut is easy: Starting at the top make the first cut at the point where you can reach all the parts that need hollowing to leave 1-3cm walls. That may mean cutting off a very small piece and hollowing barely a few scoops, for example the head of a figure: drill a tool down the neck and then your next cut would be low on the chest, etc. Always ensure there is an air outlet for each hollowed area. Hard to reach areas can be skewerd from the inside or outside to make channels for the air/water to escape.

Horizontal cuts are best because gravity is on your side while the piece is drying. Lay the cut section on foam.

Hollow the cut section first, leaving a wall approx 1.5-2cm thick. Do not smooth this inner surface: it will make it difficult for any trapped air to pass through the clay during firing. You can leave ‘buttress’ type support walls. Score the edges with a serrated kidney (NEVER make deep scores with a pointy tool. Tiny bubbles of air will get trapped there all along your join and possibly cause a crack.) Moisten w/ water/slip so that the edge can soften while the section is upside-down. Then hollow into the rest of the form going as far as you can reach. Mark how far you reached on the surface to help you decide where to make the next cut.

Quality Joints: Once both edges are softened put the pieces back together and move back and forth until you feel the edges lock together. Genuine joins are formed when the chains of platelet-shaped particles from each section inter-lock. Picture a magnified image of hair. Score marks do not give the surface ‘tooth’; they allow water into the clay-body. On vertical surfaces they hold the water in place to give it time to sink in. Slip is not ‘glue’, it is clay particles spread out in water and has little strength, especially when it has dried. It is ideal for holding a lot of water in place to give it time to be absorbed to soften the area of leather-hard clay. Once both edges are softened put the pieces back together and move back and forth until you feel the edges lock together.
Manipulate the softened clay at the join to encourage further integration of those particle-chains and to disturb the straight line of the join; cracks love to zing along a nice straight slip-weakened join during the firing when the pull of shrinking stresses the sculpture.

Smooth the now recessed join with water + rub until a slip is lifted from the join’s surface. Make a coil 1.5cm thick by squeezing. Do not roll your coils; it packs the finer particles on the coils’s surface making them resistant to joining. Attach one end and inch the coil into the join; press in then squeeze the coil to force it to inch forward along the join; this friction creates the bond between the surfaces. Coiling explained here.

Blend the coil in, leaving it raised. The excess clay will slowly release it’s water into the join, slowing drying. Wrap the piece in plastic and leave for week or so until the coil has the same hardness as the rest of the form. Then you can scrape it away, compressing the clay as you go to leave a strong join that wont recess during the firing.

Make your next cut and repeat.

Once those coils have hardened under plastic you can complete the Sculpture’s surface and edges. Then set to dry very slowly (min 4 weeks) under a 5-sheets-thick-newspaper or cardboard box. For very large forms you can use a double layer of bed-sheets. If you use plastic turn it regularly so that condensation doesn’t drip onto the clay and spoil it. Or stick plastic over your selves to make a micro drying-room.
Work in progress by Gill Tennant-Eyles
Work in progress by Emma Bevan

Work in progress by Tez Roberts

These sculptures were all made with this excellent, versatile technique.

The Edge VIII, in progress.
Up Is Down IV, in progress.

Up Is Down II, in progress.
Up Is Down V, in progress.
Up Is Down X, in progress.
Over Half a Century, in progress.

Wyvern VIII, in progress.
What Was the First Abstract Artwork?
click on this title to see the original article. Artsy has some really interesting reviews and is a great place to see stunning art-work.
-
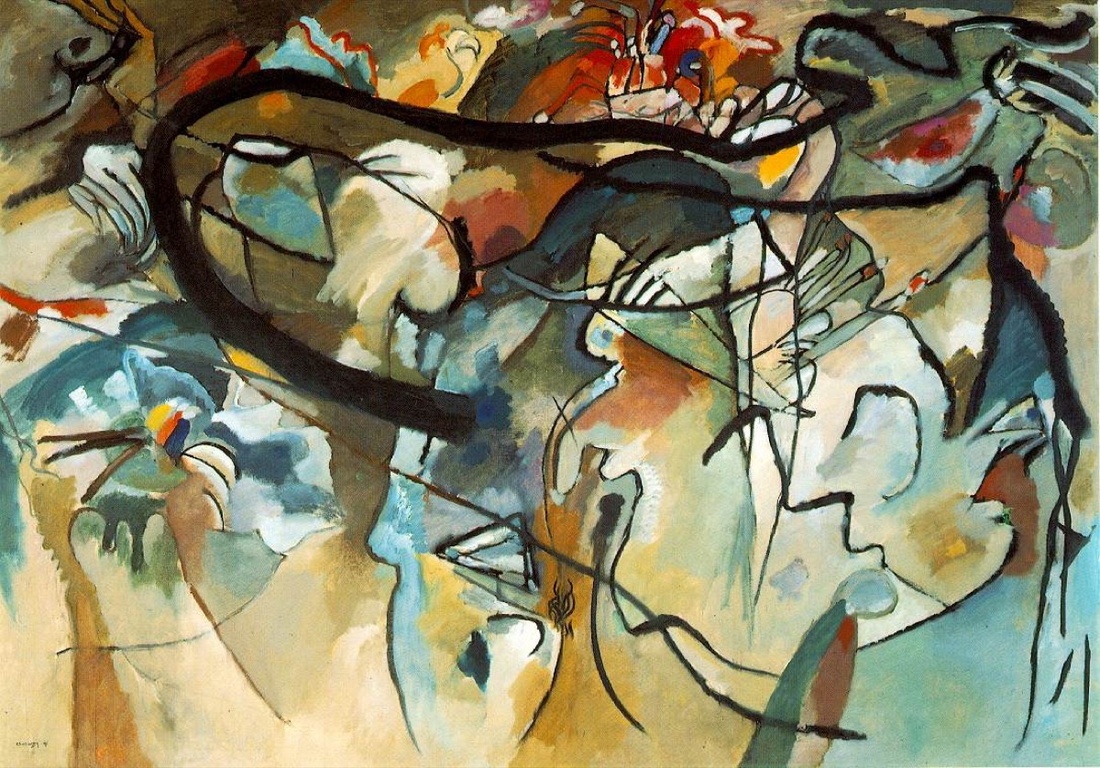
Wassily Kandinsky, Composition V, 1911. Image via Wikimedia Commons.
Who made the first Western abstract painting? That was the question that Wassily Kandinsky’s widow, accompanied by a team of researchers, set out to answer in 1946. Her late husband, a Russian painter who was among the pioneers of abstraction in the early 1910s, had himself been personally invested in the answer.
In 1935, Kandinsky had penned a letter to his gallerist in New York to insist on his preeminence. “Indeed,” he wrote of a 1911 work, “it’s the world’s first ever abstract picture, because back then not one single painter was painting in an abstract style. A ‘historic painting’, in other words.”
Kandinsky wasn’t the only artist interested in preserving his legacy. He and several early abstract painters—including Robert Delaunay, Mikhail Larionov, Natalia Goncharova, and Kazimir Malevich—backdated their works, in some cases several years before they were actually completed.
This artistic jostling reflects a focus on invention as an individual act, notes curator Leah Dickerman in an essay for MoMA’s 2012 show “Inventing Abstraction, 1910-1025: How a Radical Idea Changed Modern Art.” But, as she goes on to say, that approach is in some ways misguided. Rather than the work of a solitary genius, abstraction “was an invention with multiple first steps, multiple creators, multiple heralds, and multiple rationales.”
At the turn of the 20th century, the world was becoming increasingly connected. Steamships, cars, and trains facilitated international travel, while telephones, telegraphs, and radios allowed for conversations between people on opposite ends of the globe.
Within the art world specifically, journals sprang up in droves; in Paris alone, some 200 reviews of art and culture appeared in the decade leading up to World War I. Subscribers were scattered across Europe and America, allowing a wide swath of creatives to stay abreast of the latest developments in art. And this period also saw the beginning of a traveling exhibition culture, led by the Italian Futurists.
“Historians talk about ‘conditions of possibility,’” Masha Chlenova, a curator who worked with Dickerman on “Inventing Abstraction,” told Artsy. “For example, photography was also invented by three people at the same time. Daguerre just happened to be the best at marketing and patenting.”
Similarly, while Kandinsky is today hailed as the father of abstract painting, he was by no means the only player in the development of non-representational painting. His work Komposition V did, admittedly, jumpstart public interest in abstract painting. Exhibited in Munich in December 1911, this monumental work was just barely representational.
It was the first such work to be put on display, and “for some artists and intellectuals, abstraction not only began to seem plausible, but also took on the character of an imperative,” Dickerman writes.
Kandinsky had been thinking about abstract art for years beforehand. His manifesto On the Spiritual in Art, which appeared as a draft in 1909 and was published the same month as Komposition V went on display, laid out the tenets of abstraction. But it would still be several years before Kandinsky would finally break free from recognizable forms in his art. As Chlenova put it, “he theorized abstraction before he made painting.”
-
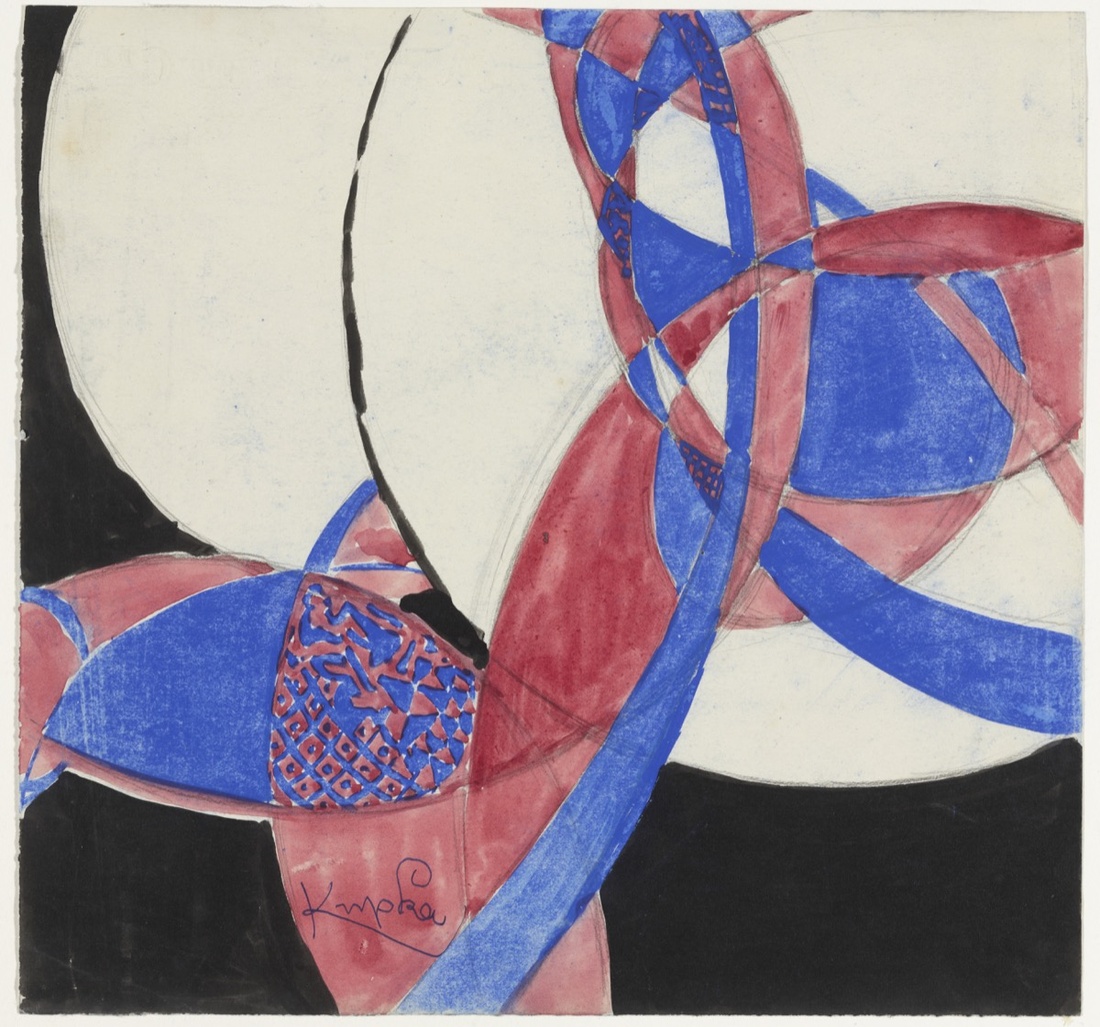
František Kupka, Amorpha: Fugue in Two Colors, 1912. Courtesy of The Museum of Modern Art, NY. © 2017 Artists Rights Society (ARS), New York / ADAGP, Paris. -
František Kupka Study for Amorpha, Warm Chromatic and for Fugue in two colors; Study for The Fugue, 1910–11. The Solomon R. Guggenheim Foundation Peggy Guggenheim Collection, Venice, 1976. © 2017 Artists Rights Society (ARS), New York/ADAGP, Paris.
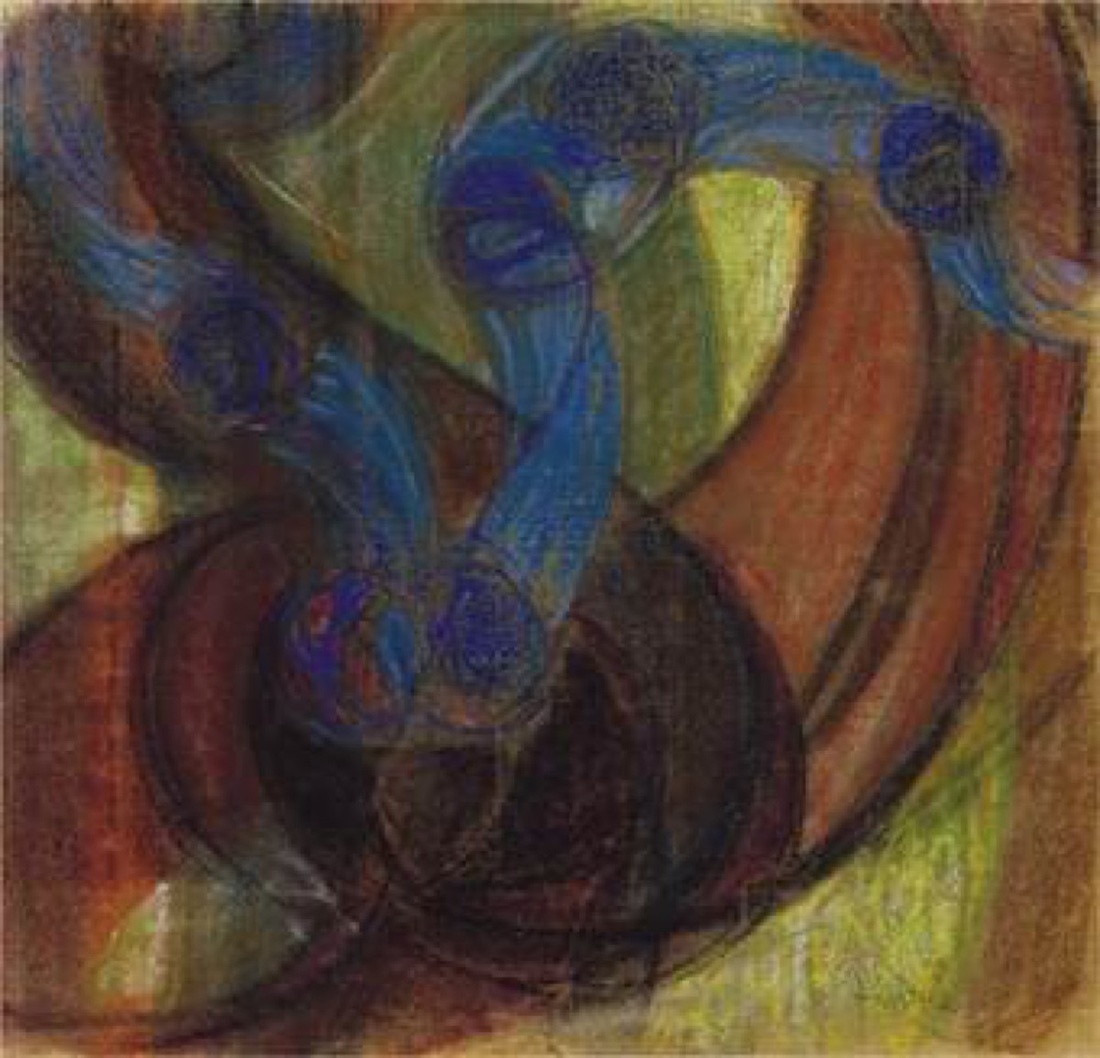
Dickerman references Czech-born artist František Kupka as the first to display works that were a complete break from representational painting. His compositions Amorpha, Chromatique chaude and Amorpha, Fugue à deux couleurs were shown at the Salon d’Automne in Paris in October 1912, filmed for the newsreels, and then broadcast across Europe and America.
Dickerman believes that Kupka’s willingness to publicly defy convention was related to his personal history. Although he grew up in Prague and Vienna and started out as a Symbolist, he later moved to Paris and developed close ties with the city’s avant-garde—which, as Dickerman notes, granted “him an insider/outsider status that seems particularly fertile for paradigm-shifting thought.”
But further complicating the question of “first” is that it can be difficult to determine the threshold of abstraction. When, precisely, does a work go from “abstracted” to “abstraction”?
French avant-garde artist Francis Picabia, for example, is sometimes credited with the first abstract painting. His watercolor Caoutchouc (Rubber) was completed in 1909, which would predate even Kandinsky’s theories on abstraction. But other academics have pushed back, noting that the work still retains some semblance of form, reminiscent of a bouquet of flowers.
For “Inventing Abstraction,” Chlenova said she and Dickerman began by establishing clear criteria for what they considered abstract work. “Our main criterion was the artist’s own position and their statements that they’re doing something abstract,” she said. “The terminology is a slightly different question because the word ‘abstract’ would not necessarily be used. But there was a very clear awareness from the artists that were sensitive to what was happening.”
-
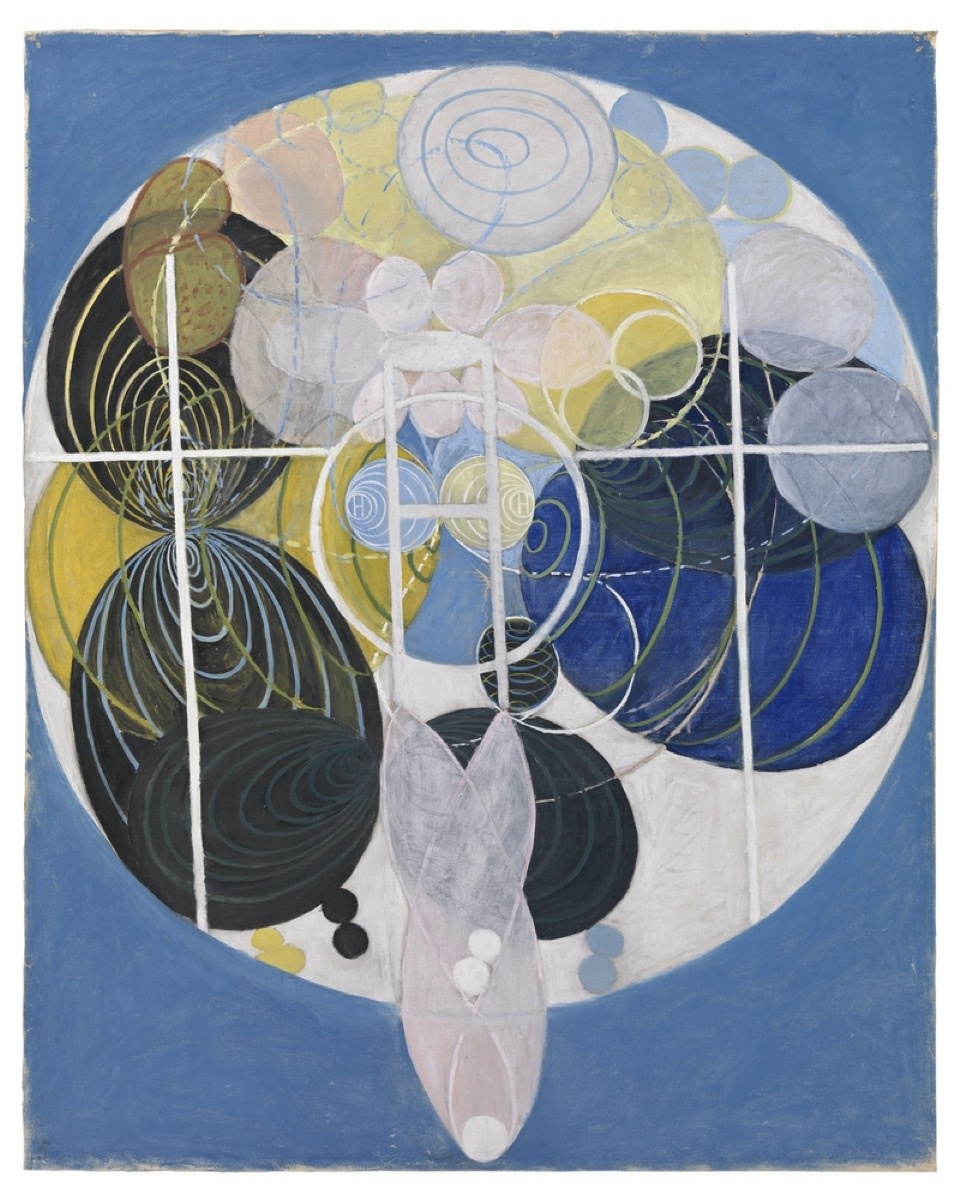
Hilma af Klint, The Large Figure Paintings, No. 5, Group III, 1907. Image via Wikimedia Commons. -
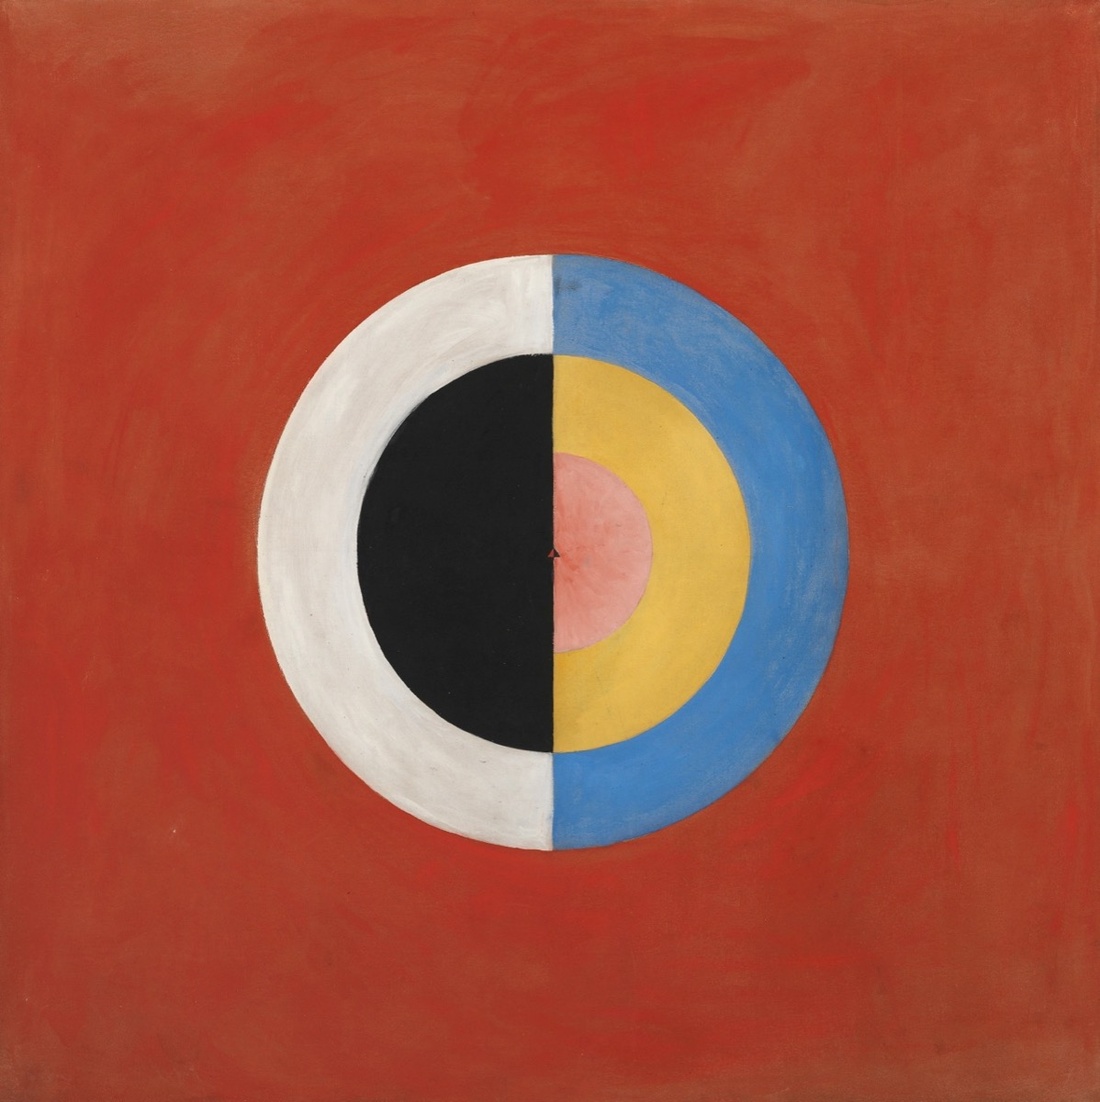
Hilma af Klint, Svanen (The Swan) No. 17, Group IX/SUW, The SUW/UW Series, 1914-1915. Image via Wikimedia Commons.
This is why, she explained, Swedish artist Hilma af Klint was not represented in the MoMA exhibition. Since 2013, when Moderna Museetheld the first-ever retrospective of her work, af Klint’s oeuvre has received renewed attention from the public. Known in her lifetime as a landscape painter and portraitist, it was revealed decades after her death that she had also been experimenting with abstraction. As early as 1906, af Klint had been painting colorful works full of organic shapes, spirals, and curlicues.
This date places her several years before Kandinsky even theorized abstraction, let alone acted on his ideas. But af Klint’s works sprang from her interest in the occult—during the 1890s, she started organizing seances with four artist friends where they practiced automatic drawing and writing.
Later, when she began her largest body of non-representational paintings, she claimed that spiritual forces were directing her hand. And for an artist to be included in “Inventing Abstraction,” Chlenova explained, they had to “formulate their practice as a conscious rejection of any reference to the outside world.”
Others disagreed with this reading, arguing that a mystical approach should not negate her contribution to developing abstraction. “‘Spiritual’ is still a very dirty word in the art world,” curator Maurice Tuchman toldthe New York Times in 2013. “When the prejudice against the idea of the spiritual life in af Klint’s work is overcome, which will require scholarship, then perhaps she will really take hold in the broader conversation.”
But there’s no disagreement that the invention of Western abstraction revolutionized art production in the 20th century, nor that it was predated by centuries of abstracted forms and patterns in non-Western traditions.
“One can treat abstraction a little bit more abstractly, if you will,” Chlenova laughed, “without ultimately being too concerned about who was first.”
—Abigail Cain

Pingback: How to do Coil-building, from small to monumental. | Rebecca Buck
Pingback: What do artists do all day? Guest-speaker Talk for Carmarthen School of Art. | Rebecca Buck
Pingback: How To Make A Head; Clay Armatures and building Hollow. | Rebecca Buck
Wonderful to see and read, thank you! My question is how to go about firing a big sculpture like that? Does it need a huge own or do you fire it in parts and then join together?
Look forward to your answer
Best wishes
Helene
LikeLiked by 1 person
Hi Helen, Build the sculpture as one with supports and then cut in sections to fire.This post takes you through the whole process for medium sized sculptures cut into large sections:https://ospreystudios.org/category/the-tumble-commission/
This one tells you about the really big ones that are cut into smaller sections: https://ospreystudios.org/2013/05/24/building-with-brickclay-on-a-monumental-scale/ xR
LikeLiked by 1 person
Thank You Rebecca! I´ve been working in concrete for so long now so I really want to put my hands on clay again.
LikeLiked by 1 person
Great! Do you have any web-stuff for us to see about concrete? x
LikeLike
Pingback: How to make Animals using clay armatures. | Rebecca Buck
Pingback: How To Make A Head; Clay Armatures and building Hollow. | Rebecca Buck
Pingback: Mastering Abstract Clay Sculpting Techniques - Clay Scupting Techniques