
The Scale Model for a lovely commission for a beautiful Care Home in Carmarthenshire got a very warm and positive response and after months of workshops, planning and very careful thought the build has started.
As usual I’ve over -designed for the budget… but that’s my prerogative- I always stick to my quoted fee and how many hours I put in is up to me.I get a buzz out of challenge and this piece has steep leans , a very complex form and very strong themes that must be stuck to.

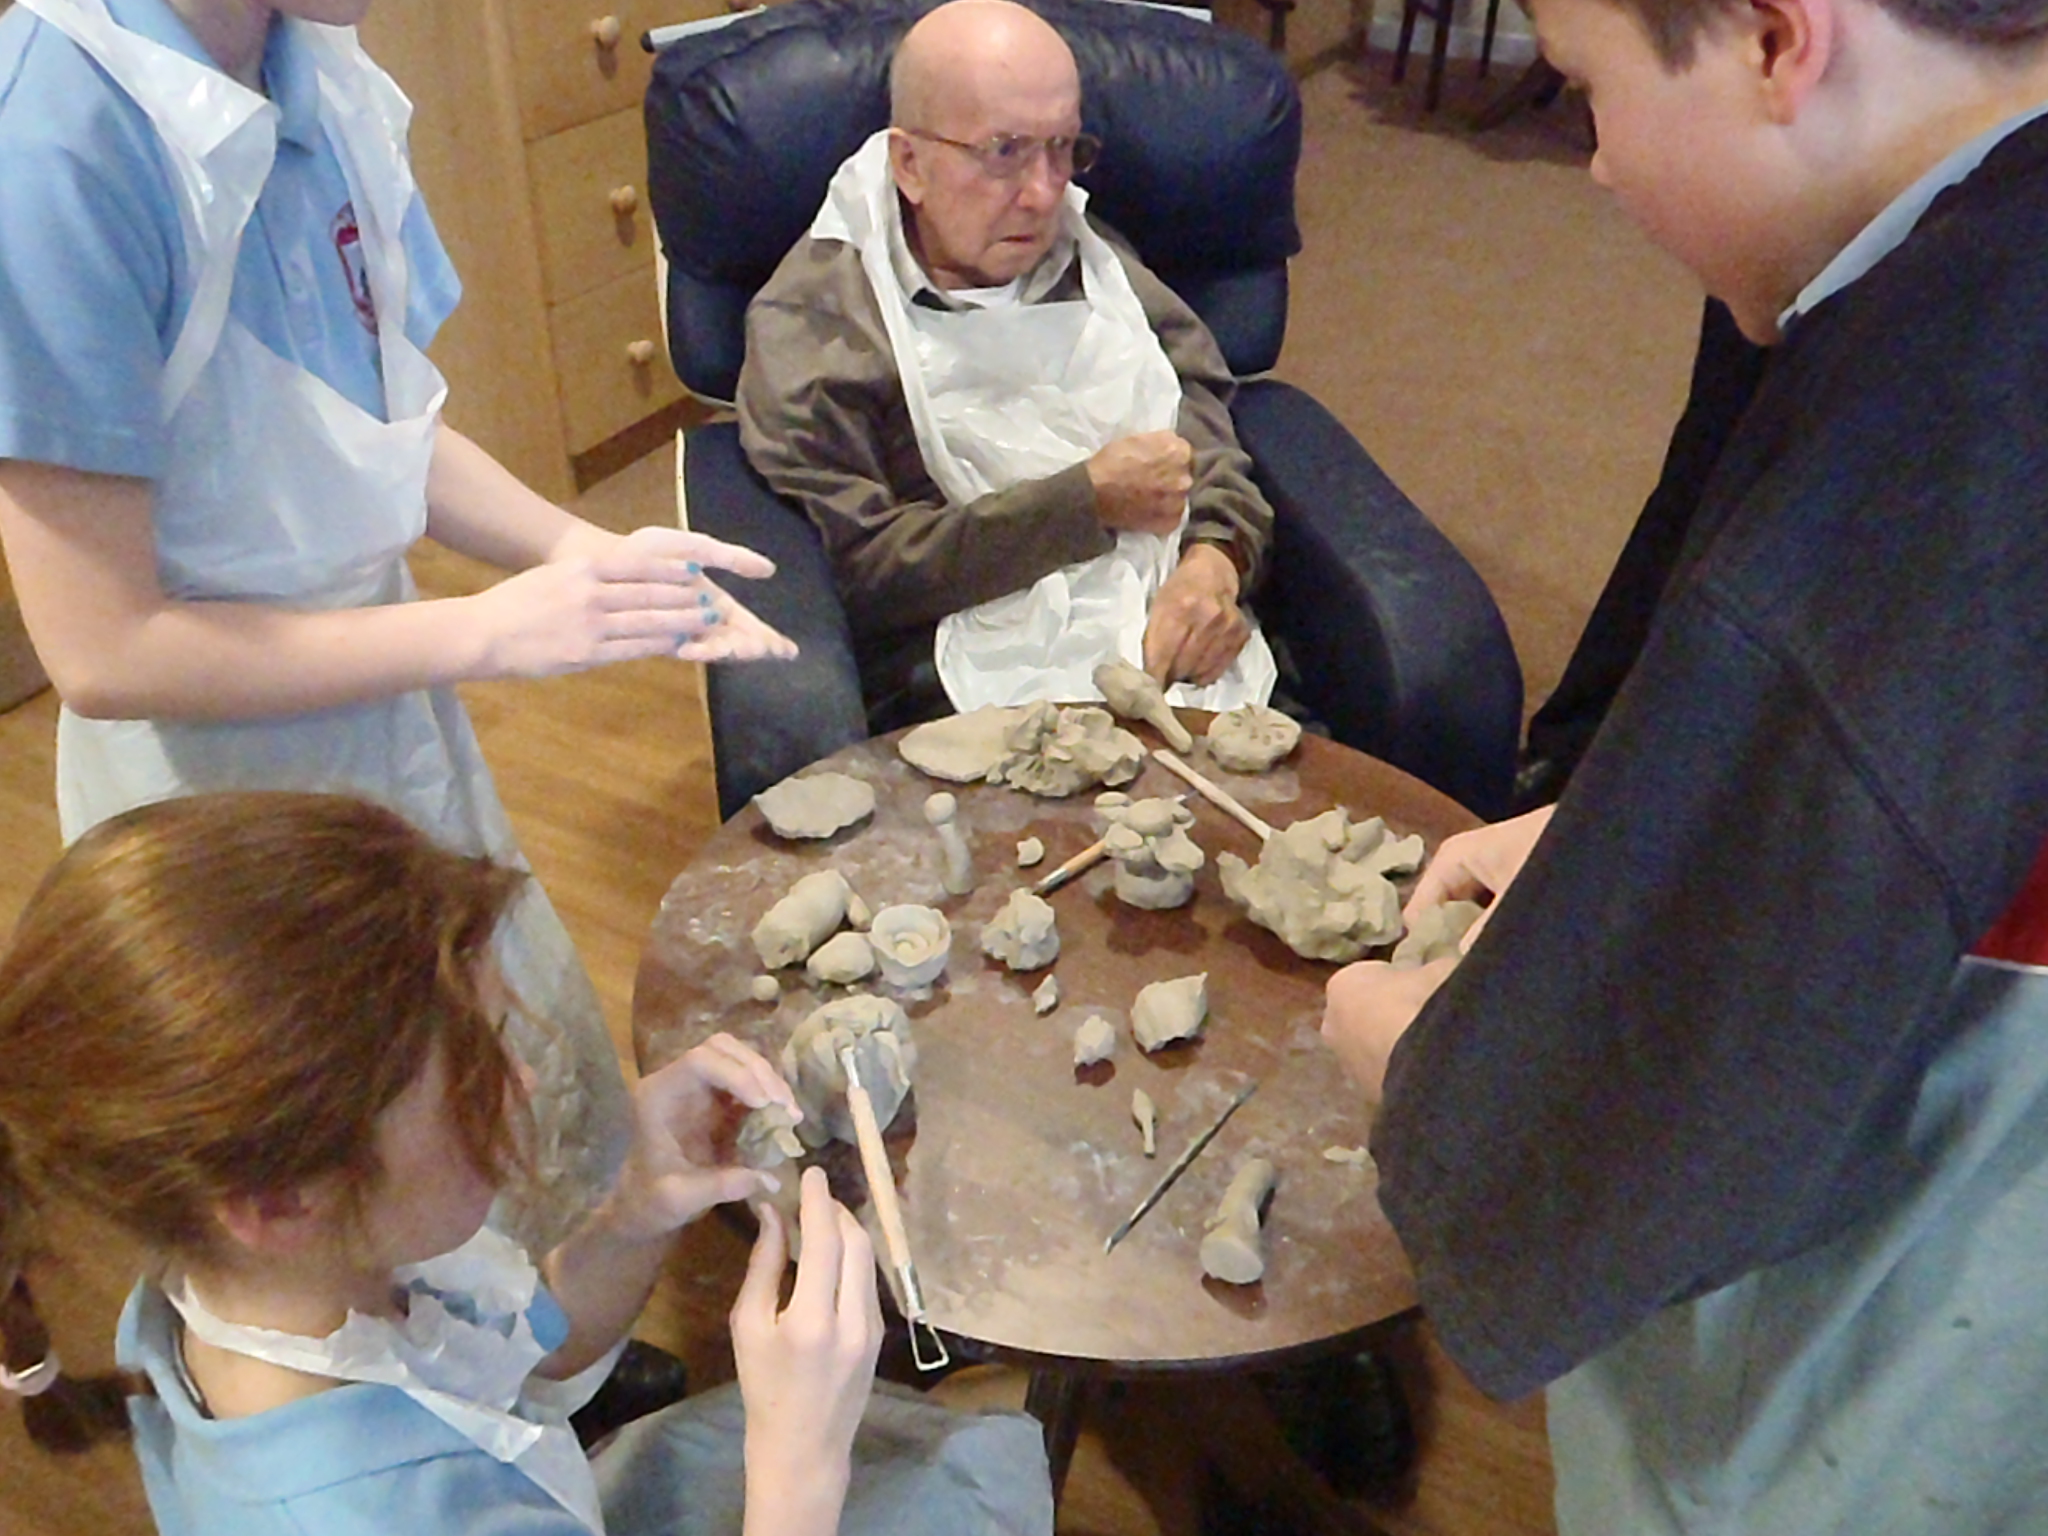
It has been developed from content gathered from other Artists on the Team working in a range of creative styles and with some extraordinary Primary School pupils.
The children’s ideas were so sophisticated, profound and complex. For example; After spending a series of workshops with the Home’s Residents making tiles for the Plinth, they built the idea that life is a journey full of change and phases so they wanted to see a pathway that traveled around the sculpture. They wanted a warm , welcoming form that harnessed the rain ( that falls very regularly here in Wales!) to create pools and flowing rivers that represented the Love that is all around us and flows through our lives. Wonderful!
Many of the Residents have Dementia and all are very disabled. But they joined in, charmed by these adorable kids, and it was their warmth and sincerity the children picked up on. They talked about many of the harsh realities of their long lives; war, poverty, mining, loss.And the joys; the beautiful landscape of the country they love, pets, family, work.


When your Commissioners pour so much of themselves into the consultation phase you owe them something stunning. That includes Arts Care Gofal Celf who are running this 2 year ,multi -Artist project with Gwalia and they are both a joy to work for.
So this piece is full of metaphors and symbols. And, I hope, the grace and integrity of the many people who brought it together.


Near the Studio is the beautiful valley I go to regularly (the River Series came from there) and it is the perfect place to support this Sculpture. And it certainly rained enough this winter.


The Sculpture will be 1metre 40cm high plus the Plinth and 1m 80cm wide.

I always make scale model people too so I have the eye-lines right. They help to illustrate the scale.
Measuring carefully from the Model the piece is coil-built using a variety of coil methods . The details are roughed in as the lower sections will necessarily get hard to support the weight of the following layers. Timing is everything. I do use fans and supports but if you mess too much with the drying phases you may well get cracks. If you work too fast it will collapse and I hate it when that happens.


There are internal support-walls and buttresses. The piece will be cut in large sections for the firing and these are pre-planned very carefully. The structure has be strong while wet , when dry,when being dismantled and moved to the kiln , through the fire, when being installed and then when it stands for decades, centuries even, in a public place. The site in this instance is a very lovely , sheltered Court-yard Garden with handsome landscaping. There wont be a problem with people climbing on it etc so I could allow some delicacy but non-the-less it is a sturdy design although I am aiming for a light, flowing feeling.

The build method is the same as for the Monumental Sculptures but scaled down. The walls are thinner , the coils smaller , but the same sort of supports are used. The final sections will be much bigger so where the cuts will be needs to be pre-planned and internal structure put in to support the sections through the fire.

Because the form shrinks as it dries, internal supports are clay and shrink with the form and external ones need to allow shrinkage or only be used for short periods. Quality memory foam is ideal because it lets the clay shrink yet will hold up surprising amounts of weight.The finger marks also support the walls and are left on the inside and only smoothed away on the outside after the section has gone firm.

The clay is Scarva’s Earthstone Crank Material, ES50, and it is awesome. Their previous Crank had fantastic build quality but it was a minging colour wet and fired unless you put something made in Black Chunky in the kiln with it – then it took on a lovely gold shade. This new Crank is even better to use and will fire to very nice pale gold ideal for the setting.

The lower section will stay wrapped most of the time to slow the drying and allow the water time to drop. I believe this makes the walls stronger but that might be nonsence. Each Clay-person develops their own relationship with their clay and techniques that are a breeze for one might be chaos for another. I started as Coil-builder 34 years ago and over time I’ve added a lot of side-shoots to my method.
It is 3/4 built, 225kgs of clay, 95cm high. I have definatly done the easy bits – from here on up it will be very slow; smaller coils added in small doses. In-between I’ll work on the surface images and the edges. This initial stage is building the basic form. A lot of clay will be added to bring out the curves and images. That will be left to harden and then the whole piece will be re-fined with subtractive methods. 3 steps forward , 2 steps back, slow and steady.
The shape looks crazy at this point.


The first draft of the details can go on; the most important thing right now is to get good joins for the clay.


When the clay has hardened these can be touched up by carving with a delicate tool. These images were taken from archive pictures of 2 mines and the Railway local to Tumble. Apparently the Train that ran from Great Mountain Colliery was the first ever passenger line.


I’m using smaller coils and each stage is taking longer.It is just approaching the point where the central hole will form and the top edges start to meet- lets hope my measurements were right! If it doesn’t meet properly I’ll cut out large sections and re-do them.
The props are getting more inventive!


Those out-side supports will stay in place until after the upper parts are cut and lifted off. In theory it would be self-supporting….but if it collapsed it would do it fast! The final, fired and installed Sculpture will have cement and steel rods inside so it will be strong enough to climb on.


Almost there- it’s down to finishing touches now. I’ve re-done the head about 90 times and I’m still not happy with it. The Sculpture is wrapped in plastic to rest and settle.I will un-wrap it with fresh eyes and be better able to see what’s needed. In theory. Once the top feels firm I will remove those internal supports- a scary moment ; it could collapse which is why you need to have a ‘sensibly'(pessimistically ) long build time! The supports have to come out because they are restricting the shrinkage and soon they will start causing damage. That broom will never be the same. The outside supports will stay to the end and those sections will get their finishing touches during dismantling.


Andrew Preece of Smart-fix, my expert Installer came over and we plotted the sections. It’s great having his early input. I never compromise on the form but Andrew can advise on structural issues so that the Installation goes smoothly and we get the best result.

That hole in the top left is the last bit to go in. The fired colour will be a stony pale yellow.

The Sculpture is in the early drying stage, wrapped in plastic. Once I’m sure the upper sections are firm enough (including the internal supports) I’ll get my Assistants in and we will cut the sections and lift them onto memory-foam for a long, slow, dry.

This is a lovely stage; the clay is still full of water and it holds the light beautifully. I have been over the whole piece with a fine modelling tools.


Photographs by Stephen Foote.

You learn a lot about your own work from watching a skilled Photographer taking pictures of it. You get a more objective view. The lights are certainly a merciless test of your planes and edges. Stephen Foote’s top quality lenses will pick up every flaw.

I went over the whole piece with fine portrait tools and his perfect pictures reward that.

After a spell of controlled drying it’s time cut the sections. Luckily I have a fantastic Assistant, Michael Preece. I spent a lot of time planning the cuts; we have opted for large sections and I needed to ensure they would fit in the kiln and be handleable. Mike used a variety of tools to make the cuts and he and my son Daniel lifted the sections to thick memory foam where they will stay for at least a month.

Working in clay you always have an eye on the Drying and Firing -Plan; accommodating these long drying periods where the atmosphere needs to be controlled and having the right sized pieces ready to pack nice full kilns that will distribute the heat evenly.

I went round all the edges of the cuts and tidied them and repaired any dings. I will cover the sections with sheets to ward off drafts and turn them regularly. Most cracks form at this stage although they may not show up until after the Firing.
From the outset the many people from Arts Care Gofal Celf, Gwalia and Mynydd Marw involved in this 2 year , multi-fasceted, Baring Foundation ‘Yma a Nawr’ project have put in their all to make it out-standing. After the excellent Installation of the Sirhowy Wyvern I knew that Andrew Preece and his team at Smartfix Property Maintenance would also do whatever it takes to make this Sculpture look fantastic. They are incredibly picky and fastidious, it’s marvellous. Best materials, committed craftsmanship, and they always stick to the Budget no matter how much extra time they have to put in.


The charming tiles, made by pupils at Llannon Primary School and residents at Mynydd Mawr are laid out in a measured pattern.


The Celebration Day at Gwalia Mynydd Mawr, 5 November 2014
A perfect , clear blue day for the un-veiling of the Sculpture and a celebration of the whole Project and all the lovely, dedicated people who were involved from Arts Care Gofal Celf, Gwalia, the Primary schools in the area and the extraordinary Staff and Residents at Gwalia Mynydd Mawr.


