We animals are frequently surprisingly similar and identifying those differences can be really difficult. Furriness or our perceptions built around our relationships can confuse the information and make it hard to see. Skinny legs supporting big bodies or building on larger scale where the weight of the clay is a huge issue causes a lot of problems.
This is the same technique I now use for making heads. A simple clay armature supports the weight throughout the build and gives you a central point that you can work outwards from, allowing that most important key to success: making loads of mistakes and fixing them. You get to avoid hollowing out so that you can play around with textures while you are building. And you will be using the process to reorganize the information in your head: there is no better way to do that than hands-on.
The skeleton is a stick-figure with the right proportions (so important when you are being species specific) set out clearly and unambiguously. Fur, muscle shapes changing with the pose and fore-shortening in photos can confuse you leading to sculptures that are a cross between lifeless, amateur taxidermy and stuffed toys.

The key reason making naturalistic forms is so hard is that our perception (the way we take in our knowledge) that we have built up over our lifetime of what shape the thing is, is based around our general experience of that animal. Making a sculpture of that living, moving, person requires going against what ‘feels’ right and using information we are unlikely to have bothered with before. Portraiture has a system to organise the huge quantity of subtle details. Learning this system will broaden your knowledge, and your access to more knowledge, enormously. That’s why the study of Portraiture and Figurative Sculpture is traditionally the bed-rock of making Art.
The more you practice these invaluable skills the more you will see improvement in all your artwork, your general concentration and your ability to see. Like a pianist ‘doing scales’ you will build up the small muscles, motor-skills and neural pathways involved in this challenging, rewarding activity.
It is not rocket science and you can do it.
Because clay shrinks as it dries and is floppy when very wet, a Clay Armature that will support and shrink with the form through the drying and the firing is invaluable. All other types of Armatures must be perfect in shape or they will ruin the sculpture. And they limit your option to change your mind. Most cause disruption because they have to be removed: clay will shrink as it dries and crack around a rigid armature.
Most techniques for building hollow, coiling or slabs, have a strong ‘voice’ of their own and will influence the final look of the piece. They can demand that you harden lower sections before you can build upwards and you are then unable to change them when you later realize they are wrong. This is a real disadvantage irregardless of your skill level. It is better to work solid over a clay armature especially if you are not using a scale-model and hollow out just before finishing touches. It’s not difficult. That technique is detailed here: Working solid and hollowing out.
Working solid is an excellent method. You set aside the ceramic requirement for certain thicknesses in the clay until you are sure you have the best sculpture you can make at that point. The armature holds the weight up. Some areas can be built hollow too. When you essentially have the look you want but just before finishing touches, hollow it out.

The key to all sculpture is this:
1- Block out the form: decide the dimensions (height, width, length) including the base. Your clay armature will do this.
2- Work in rotations refining the whole sculpture at each turn (by adding or subtracting in the case of clay).
Working on a Small Scale.
Starting small will allow you to get your head around the issues and get results quickly.
Ideally use a clay with lots of grog in it because it will sag less, crack less, fire better or be stronger as self-hardening clay. Here I used Scarva ES50 Crank, an outstanding sculpture clay.
All Pottery Suppliers Online will be happy to recommend clay if you tell them what you want to make. Clays are made from recipes so there are endless kinds. You want a Hand-building clay with fine-medium grog ( pre-fired grit). Throwing Clay for the wheel will resent being an animal and be hard to handle. Many ‘Self- Hardening ‘ clays are over-priced and difficult or unpleasant to use.


Fix them down by blending the clay into the base. This can be changed right up until the piece is dry. You could cut off a leg or any other part and redo it at any time. That’s one of the great things about working in clay.

Focus only on the essentials: the proportions NOT details.
Each bit affects how the other bits look: you might think the head looks wrong but actually the head is good, it is the neck that is wrong and so on.


The joints show you where the bendable bits are. Muscles can shrink or stretch.

Use very little water or you will get a mushy, sticky mess prone to cracking later.

This is still the Blocked-Out ARMATURE. You have used the Craftsmanship of Portraiture to get everything in it’s key, horse-like place

Once you have the proportions right you can create the pose, type, age, character and mood of your animal.
A simple turn of the head brings it alive!


Now walk away and look at something far away for a few minutes to clear your eyes. Turn back: what is the first thing you notice? That is probably a bit that needs fixing or it might be the best bit. Sort out any problems now. On this one the back legs are set wrong, looks like he’s peeing…


The style you use should be consistent over the whole form: don’t over-do the face unless your whole animal is very detailed or it will look like a mask. Keep the features in proportion to the skull or it will look like a disease.


A minimum of 5 Rotations with increasingly small tools: make additions of clay where ever you spot the need. Change tool and do a rotation of subtraction of clay. Then a rotation of adding etc, until you hit a rotation where you can’t see any more you could do. That means you have done your best on this piece.


Self-hardened this will be delicate but last forever so long as it doesn’t get wet. Firing will make it stronger and water-proof. When it is dry/fired paint/wax/stain the surface : a simple all over bronze colour always looks great.
Working on a larger Scale.
I ran the following workshop over two days at the wonderful North Devon Ceramics Academy and Studio. Nicola Crocker and Taz Pollard have created a fantastic, fun, supportive and practical space for learning and sharing creativity in clay. I absolutely love teaching there. Nicola and Taz have a very genuine commitment to empowering other people and sharing their open and imaginative approach to the vast potential within ceramics. The Studio is spacious, bright and comfortable and the atmosphere is friendly, unpretentious and very encouraging.
This amazing group of all experience levels were a joy to work with. And they came up with some great improvements to the technique. You will also adapt it to suit your hands and ideas.
We are using the out-standing Scarva ES50 Crank clay (a stoneware clay with a lot of grog (ground up ceramic grit) in a variety of sizes from coarse to dust making it much easier to hand-build with because of the way it reacts with water (allowing for excellent joins) and it’s superb strength when leather-hard and also when dry. You can use different clays for the armature and exterior but using the same one means everything shrinks at the same rate during drying and firing.
Many thanks to Nicola Crocker for the great photos of the workshop.
The Technique:


Build outwards using images of the animal to assess the widths. Use comparative measurements: the rib-cage is twice the width of the head etc.


Squirrel.
This piece is all about the energy and character of this squirrel. The ‘fluffy tail’ can be a meaningless cliche and has not been used here.


Birds
Making birds is notoriously difficult because of their insane relationship with gravity. Work slowly in stages allowing the parts to firm up and add to the support system. Remove parts of your clay-armature cautiously in small stages.


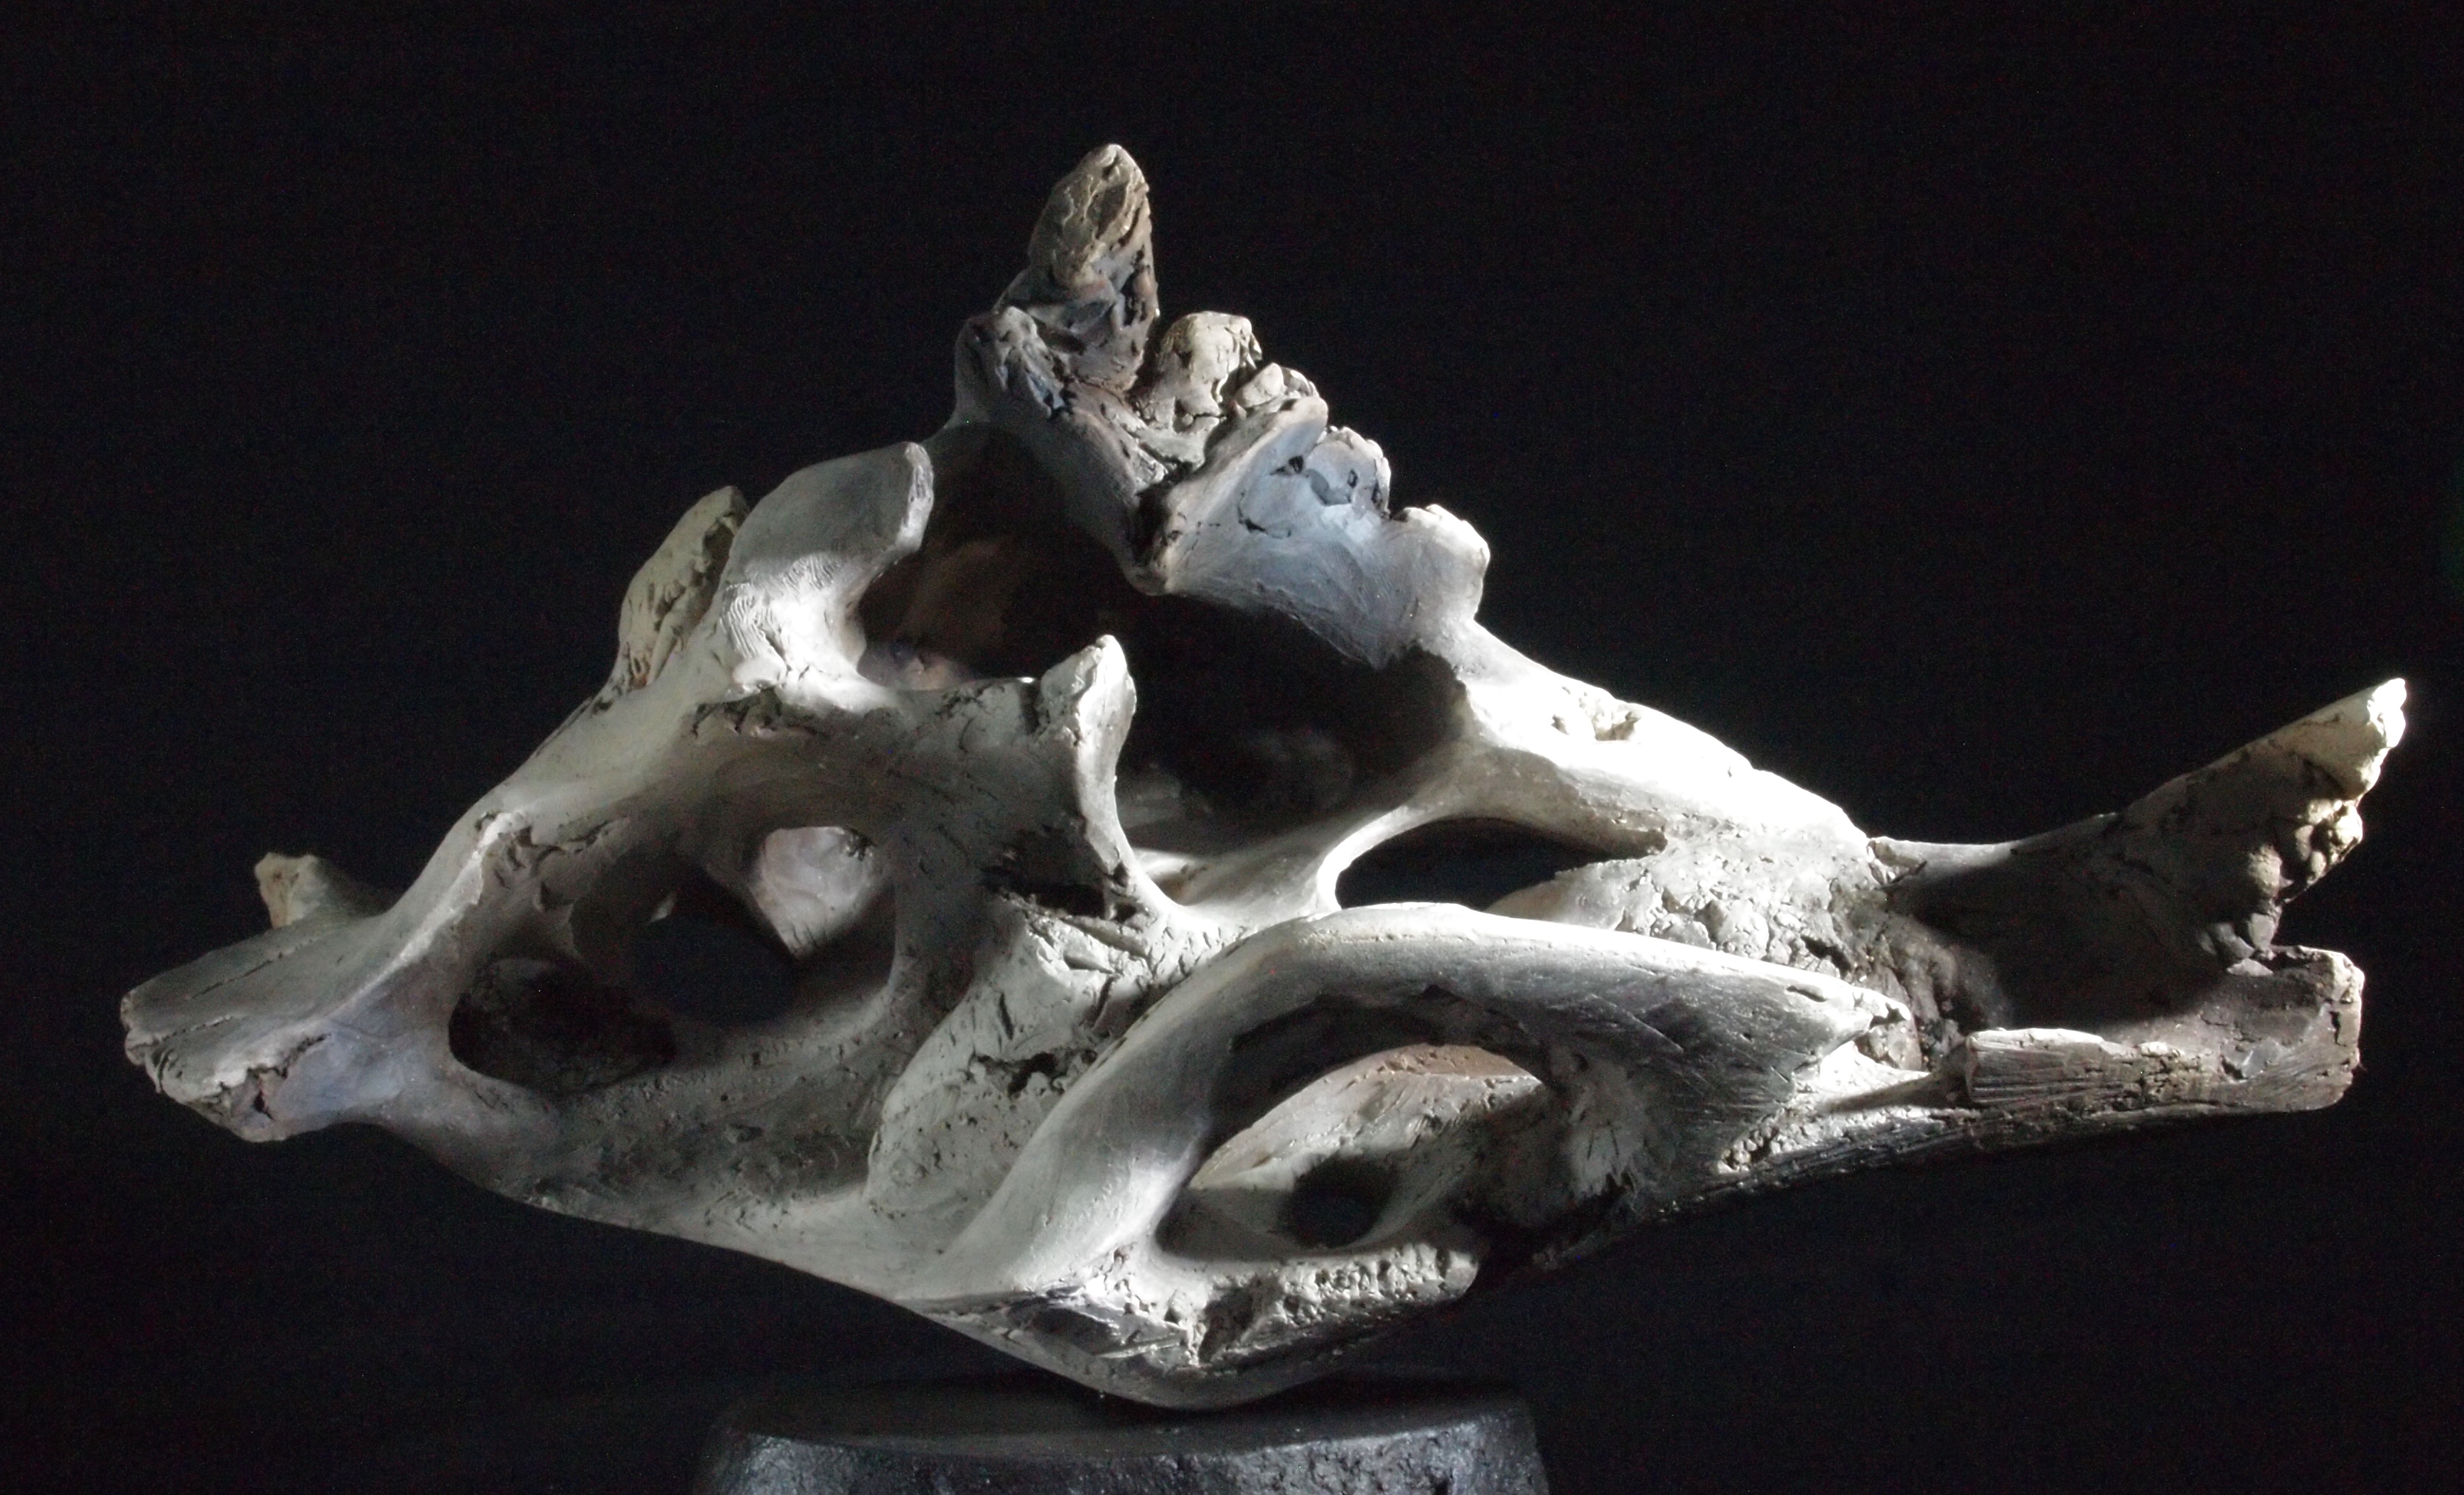
This flexible technique can take you places you hadn’t thought of. Here the internal space has become part of the sculpture.

Because the weight is supported and the skeleton provides strong boundaries you can play and feel your way around the form. The finished piece will need it’s own supports but here you can try various alternatives until you are happy with the look, strength and feel.

Lots more trial and error will happen to this fascinating bird-scape in the next weeks.

Take breaks, look out side to clear your eyes then glance at your sculpture and note what you first notice. If you hit a wall with it cover with a bag and walk away! I sometimes leave sculpture wrapped for months. I check regularly to mist with water and see if I can move forward again. Taking photos can be a good way to get some perspective. Ask others ‘what they see’ and compare that to what you want them to see. A dog that looks like a donkey has too big a head and too-tall ears for example.
Giraffe
A wonderful form where negative shapes play a stunning role. Their grace and movement is enchanting and very tricky to capture.


Five points of contact with the ground could give this piece stability but at this small scale those legs and feet are still so small. This elegant solution, where the central support is tidied up attractively and immediately becomes neutral, eliminates the distracting fragility.

Wild Boar
This animal is iconic and has held it’s place in art for Millenia. It’s bulky form and thick fur can easily be over generalised into a blob on sticks. Here the skeleton secures the integrity of the structure. This sculpture is about his power and movement.

This piece will be completely cut away from it’s supports once it is firm to retain it’s shape, rested on foam and a hole made for a metal pin and base that will show off it’s galloping form once it’s fired.


The details of the face should be in balance with the rest of the sculpture’s texture and level of detail. At this small scale it is also a mistake to try and put on complicated detail. It will take a lot of time to find what can be left out. The skull will give you the clues: it is the structure of the face that matters.

Cats
Cats are extraordinarily flexible and their exterior hides their structure. Making pets can be very difficult because we have so much knowledge of them that can cloud the sculptural information. Use the skeleton to keep on track with proportions that our nutty perceptions may think are similar to humans!


Note the bend in the legs which is usually obscured by fur and the loose skin that allows cats to stretch so much.

It is too soon for superficial details like ears. Focus on the key structure. This is still at Armature stage and it’s all about applying the Craftsmanship of Portraiture at this stage. The Arty, creative bit goes on top of that excellent, species-specific structure.

The position of the bones and the length of the legs is very confusing and tricky to get right. Divide the problem into manageable steps:
Focus on the joint, they tell you where bends should be. Be sure the joint is in the right place.
Measure the bone’s length and swivel it from the joint.
Move to the next joint and bone. Etc.

This excellent, strong, central support allows you to place the legs where you want them on both sides to create the pose. Then the legs will stiffen and take on the extra work of holding up the weight of the body. The base should stay in place in the finished sculpture as it adds to the stability and strength of the legs. So, later that base can be made attractive.

Early stages with this one where it clearly wanted to be bigger! That was easy to change.

A beautiful, gentle way to address the eyes expressively, in keeping with the form.
Dogs
This student had gorgeous pictures of her adorable young dog, especially his loving face. But at this small scale she focussed on his movement and energy to portray him. She will paint his distinctive markings on in colour.


Keep re-checking those measurements at every stage.


The central support is removed gradually and with great care.

The armature is cut away (but continues to function usefully inside). Needle holes will be poked up into the form to vent all the air pockets made by building hollow. Then a hole will be placed for a wooden dowel set in a base to display this dog leaping as he runs.
Meercats
These little guys have tiny feet and very slender legs. You could build some grass or rocks around their lower legs to give stability. Or add a friend.


Like the giraffe parts of the support wall could remain and no-one would notice because the charm of these characters and their friendship is far more engaging.

Otter
This up-right stance gives similar problems to the meercats but the way otters stand gives plenty of attachment to the base.


An otter’s simple form can be very difficult to capture. His gesture and poses are well recognized so that helps. Starting with the skeleton puts the key points of his body in the right place under that silky fur. There is a lovely change in loose to very smooth modelling on the surface that recalls water running off the fur.
The Horse
Like many big herbivores, horses have surprises in their skeletons that are key to their shape. A ridge of spurs along the spine limits over-flexing but also keeps predator teeth away from the precious spinal column. It defines their characteristic silhouette. The skull seems bizarre but get that blocked in well and the head will look great, even in a small scale.


Follow the transition points of the legs very carefully.
Note how those big neck muscles cross and attach behind the shoulder blades.
At this stage it is almost as if the legs are just attached to the edge of the body but you now know those leg bones go right up near the spine and have a wide range of movement which can be gauged by measuring the length of a bone and pivoting it from it’s socket. It was suggested that you could cut up a spare skeleton in order to make a hinged ‘shadow puppet’ that could be helpful in designing the pose from a standing skeleton.

Taking full advantage of the central support.

Armadillo.
These guys go well out of their way not to look like animals all! They have extraordinary skeletons, well worth studying. But it has to be said that apart from getting proportions right, the hard shell-like outer skin means you see no clues of the bones showing on the armadillo’s surface. Their shell is a very subtle, beautiful shape with exquisite patterns.

This student did all the skeleton work as part of the workshop. But then he switched to working solid/hollowing (this link takes you to a post specifically about that technique) out as a technique far better suited to armadillos.

On solid clay use your skeleton to identify the right proportions.


Use a serrated kidney tool to shape the body. Then use a flat wide modelling tool to add clay and further refine that gently undulating form.
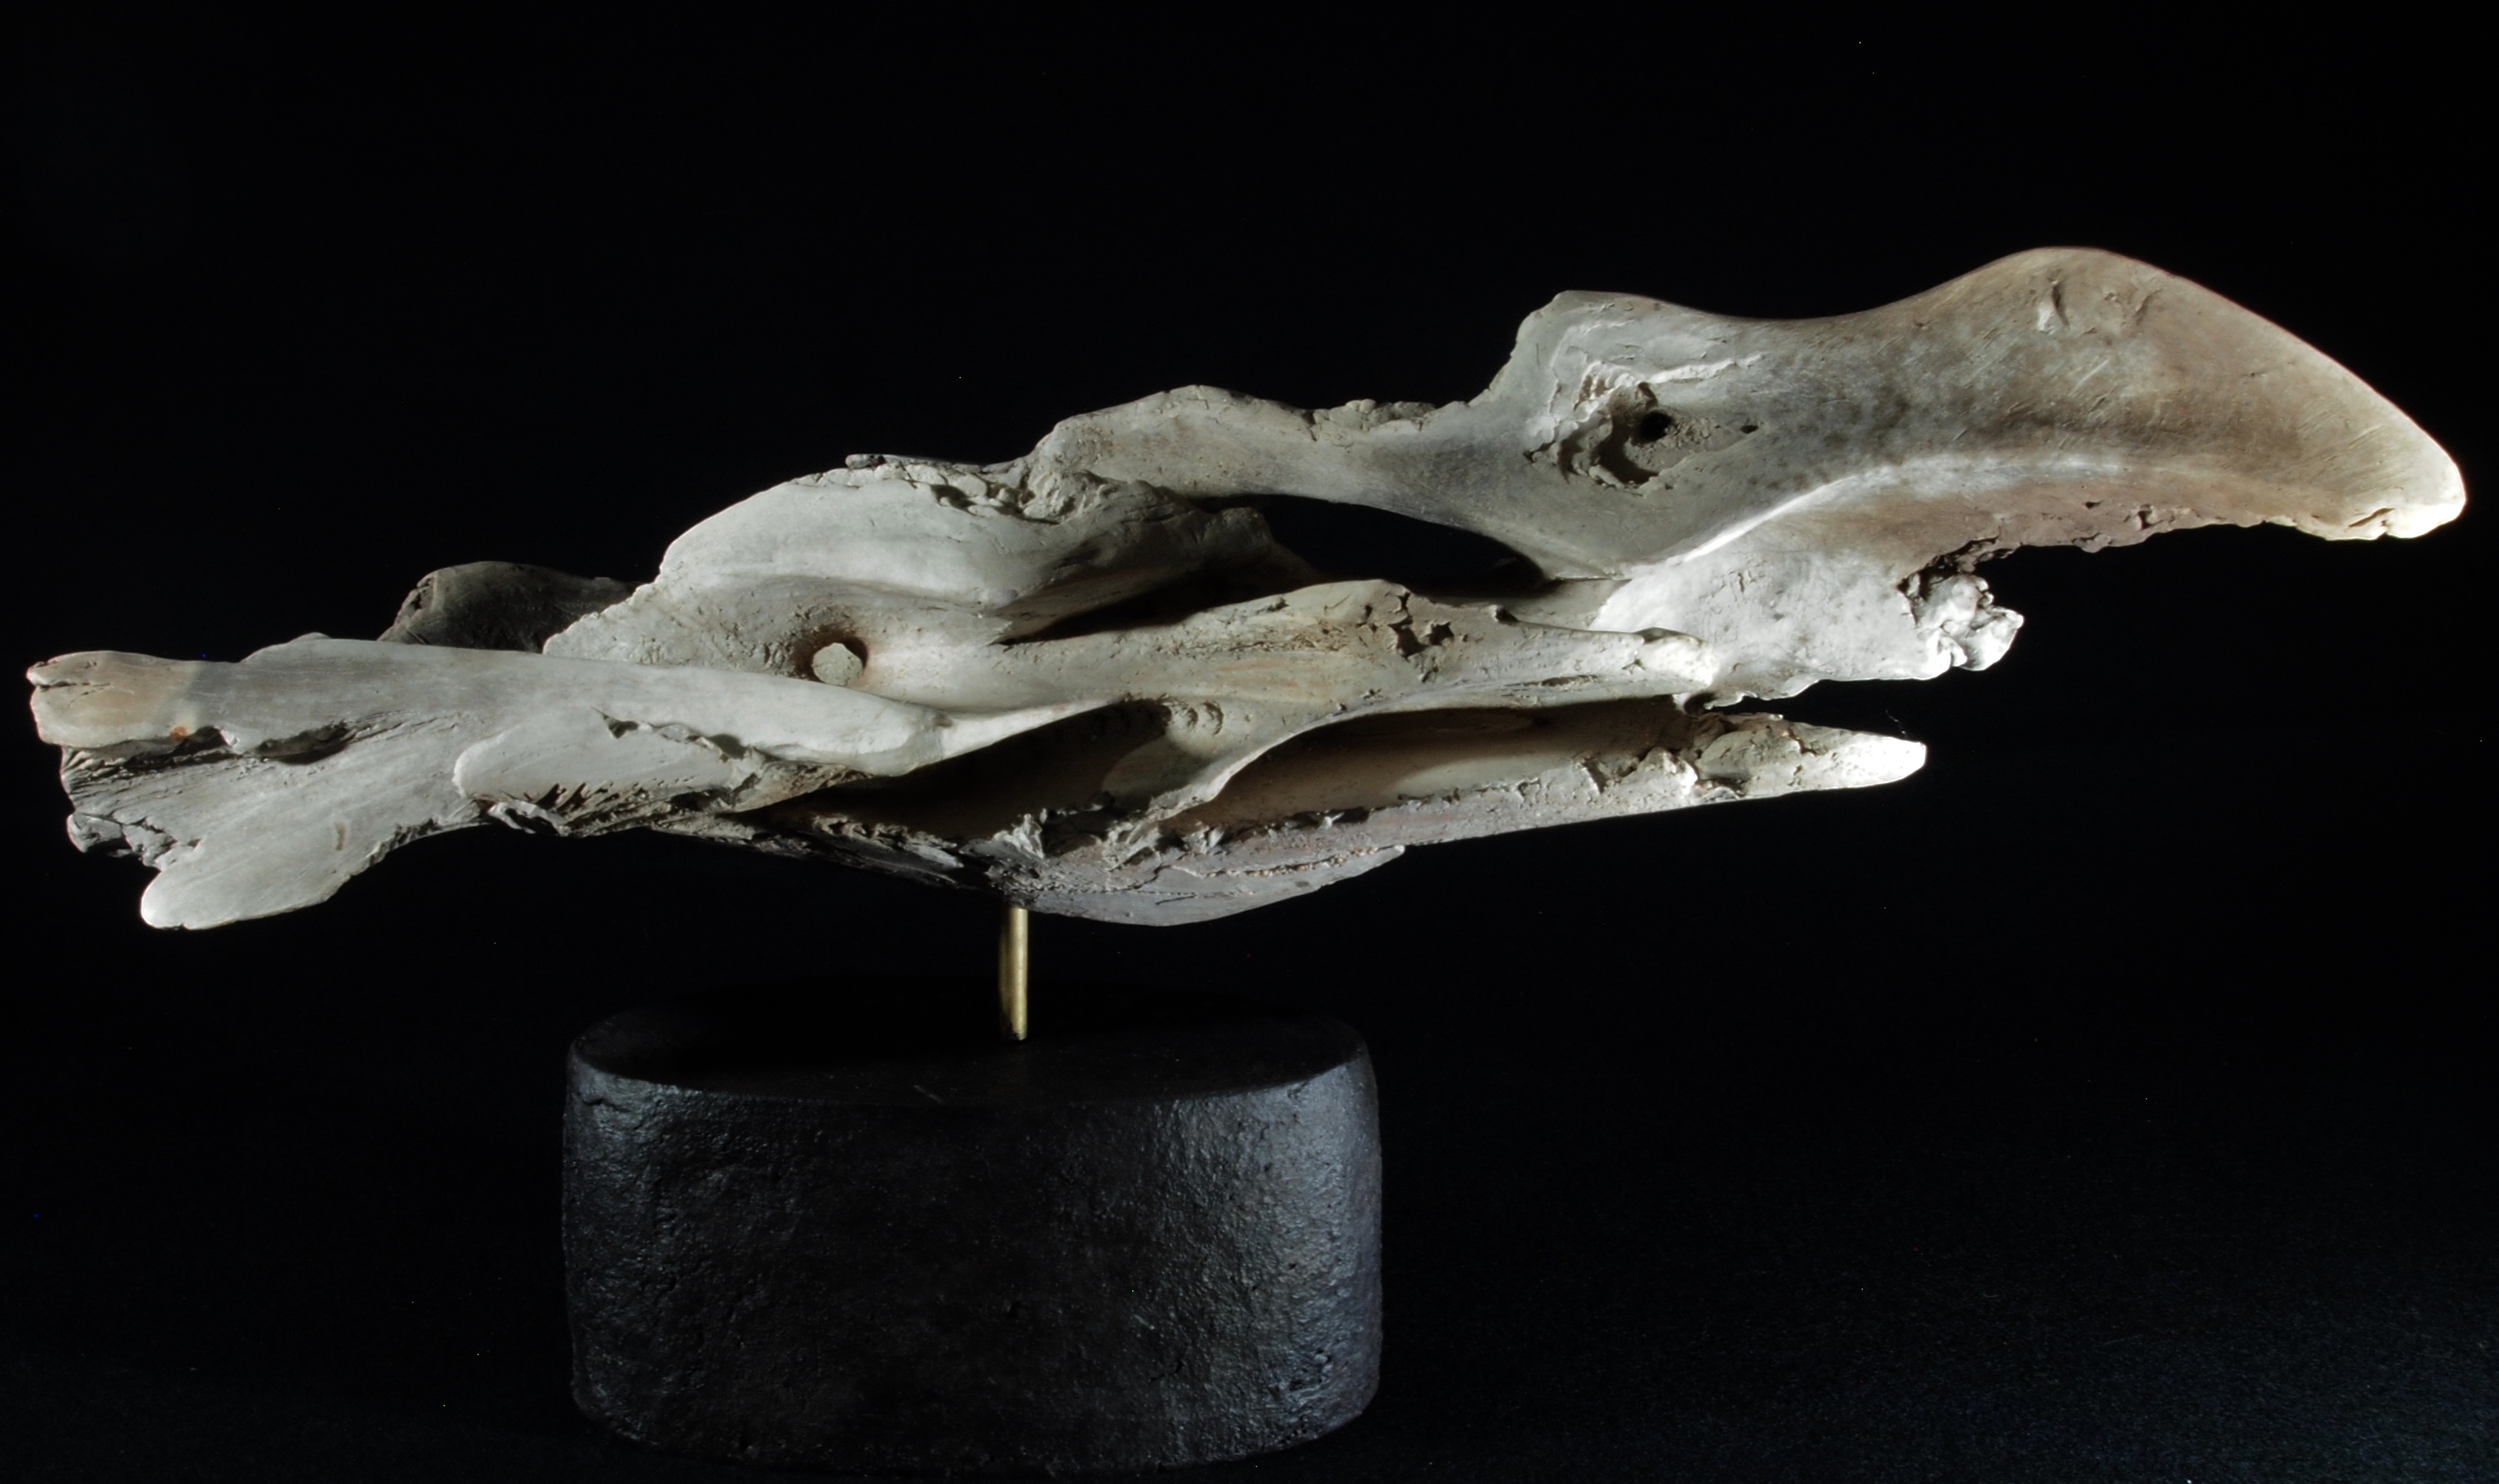
Your central, weight-bearing support does not need to be flat/straight: Both of these abstracts below were built outwards from a stiffened, curvy, up-right central shape of various thickness set on a metal rod. You can see parts of the original central support where it became part of the final form, much like the sculpture of the Giraffe above.
Quality Joints:
Genuine joins are formed when the chains of platelet-shaped particles from each section inter-lock. Picture a magnified image of hair.
Score marks do not give the surface ‘tooth’; they allow water into the clay-body. On vertical surfaces they hold the water in place to give it time to sink in and swell the clay so that the platelets are able to link with other platelets.
Slip is not ‘glue’, it is clay particles spread out in water and has little strength, especially when it has dried . It is ideal for holding a lot of water in place to give it time to be absorbed to soften the area of leather-hard clay.
Once both edges are softened put the pieces back together and move them back and forth until you feel the edges lock together.
Manipulate the softened clay at the join to encourage further integration of those particle-chains and to disturb the straight line of the join; cracks love to zing along a nice straight slip-weakened join during the firing when the pull of shrinking stresses the sculpture.
Thicknesses: cracking/breaking.
How thick the clay can be to fire well depends on the amount of grog (the gritty bits of pre-fired clay ground to specific sized grit/dust that gives improved structure and resilience to your clay), the denseness of your modelling style, drying time and the speed of your firing.
Air bubbles trapped in the clay will expand with the heat. Grog and/or a loose surface will allow the air to seep through the clay. The same is true with water but steam expands fast. If your piece breaks into big bits during the fire it was trapped air and you will be able to see where the bubbles were in the shards. If it blows up into a trillion smithereens it wasn’t properly dry!
Drying:
I dry thick sculptures slowly under plastic which I turn inside out ( to avoid condensation pooling) daily for 4 weeks minimum and then 1-2 weeks in a plastic tent with a dehumidifier. A card-board box makes a great, slow, draft-free drying chamber. A long dry allows the water to level out, as water loves to do, and that will enhance the structure of the clay within it’s new sculpture shape. You will get less cracks or distorting in the fire.
I fire very slowly with an 18 degree C rise until 600 degrees C. then onto full power up to the desired temperature.
Generally 3cm is a fair maximum thickness for a well grogged clay.
There is good essential advice about handling clay on the post about Coil Building.
How To Make a Head is essentially the same method and you will find it helpful. It talks about human heads but of course is relevant to all heads apart from the handy option of being able to measure with callipers from your own.

Pingback: How To Make Small Sculpture and Models | Rebecca Buck
Hello Rebecca
I am confused regarding the armature. I understand the slabs that hold up the weight of the animal but from the photos it seems only one side is being sculpted. How is the other side made? And how do I approach the final pieced so it’s not mounted on the slab and still can hold itself up?
Thank you.
Patti Euvino
LikeLike
Hi Patti, Read the post through and adapt the idea to suit your own needs. A really useful explanation of this technique is How To Make A Head; Clay Armatures and building Hollow.
All the best with your work.
LikeLike
Thanks this is the information I have been looking for
LikeLike
Hi Andrea, I’m pleased it’s been helpful. Thanks for letting me know, that’s very encouraging.
LikeLike
Pingback: Clay Sculpting Basics: A Beginner'S Guide - Clay
Pingback: Advanced Sculpting Strategies For Clay Artists - Clay
Are these sculptures being hollowed out at some point? I am curious about how that process looks.
LikeLike