The key reason making heads is so hard is that the perception (the way we take in our knowledge) that we have built up over our lifetime of what shape the head is, is based around communication and assessing each other. Making a head requires going against what ‘feels’ right and using information we are unlikely to have bothered with before. Portraiture has a system to organise the huge quantity of subtle details. Learning this system will broaden your knowledge, and your access to more knowledge, enormously. That’s why the study of Portraiture and Figurative Sculpture is traditionally the bed-rock of Art.
It is not rocket science and you can do it. The challenge is fascinating and very rewarding.
The Technique
Because clay shrinks as it dries and is floppy when very wet a Clay Armature that will support and shrink with the form through the drying and the firing is invaluable.
Most techniques for building hollow have a strong ‘voice’ of their own and will influence the final look of the piece. They can demand that you harden lower sections and are then unable to change them when you later realise they are wrong. This is a real disadvantage irregardless of your skill level. It is better to work solid over a clay armature especially if you are not using a scale-model and hollow out just before finishing touches. It’s not difficult. That technique is detailed here: Working solid and hollowing out.
Or you can use this technique of building outwards from a Clay Armature to make your sculpture hollow.
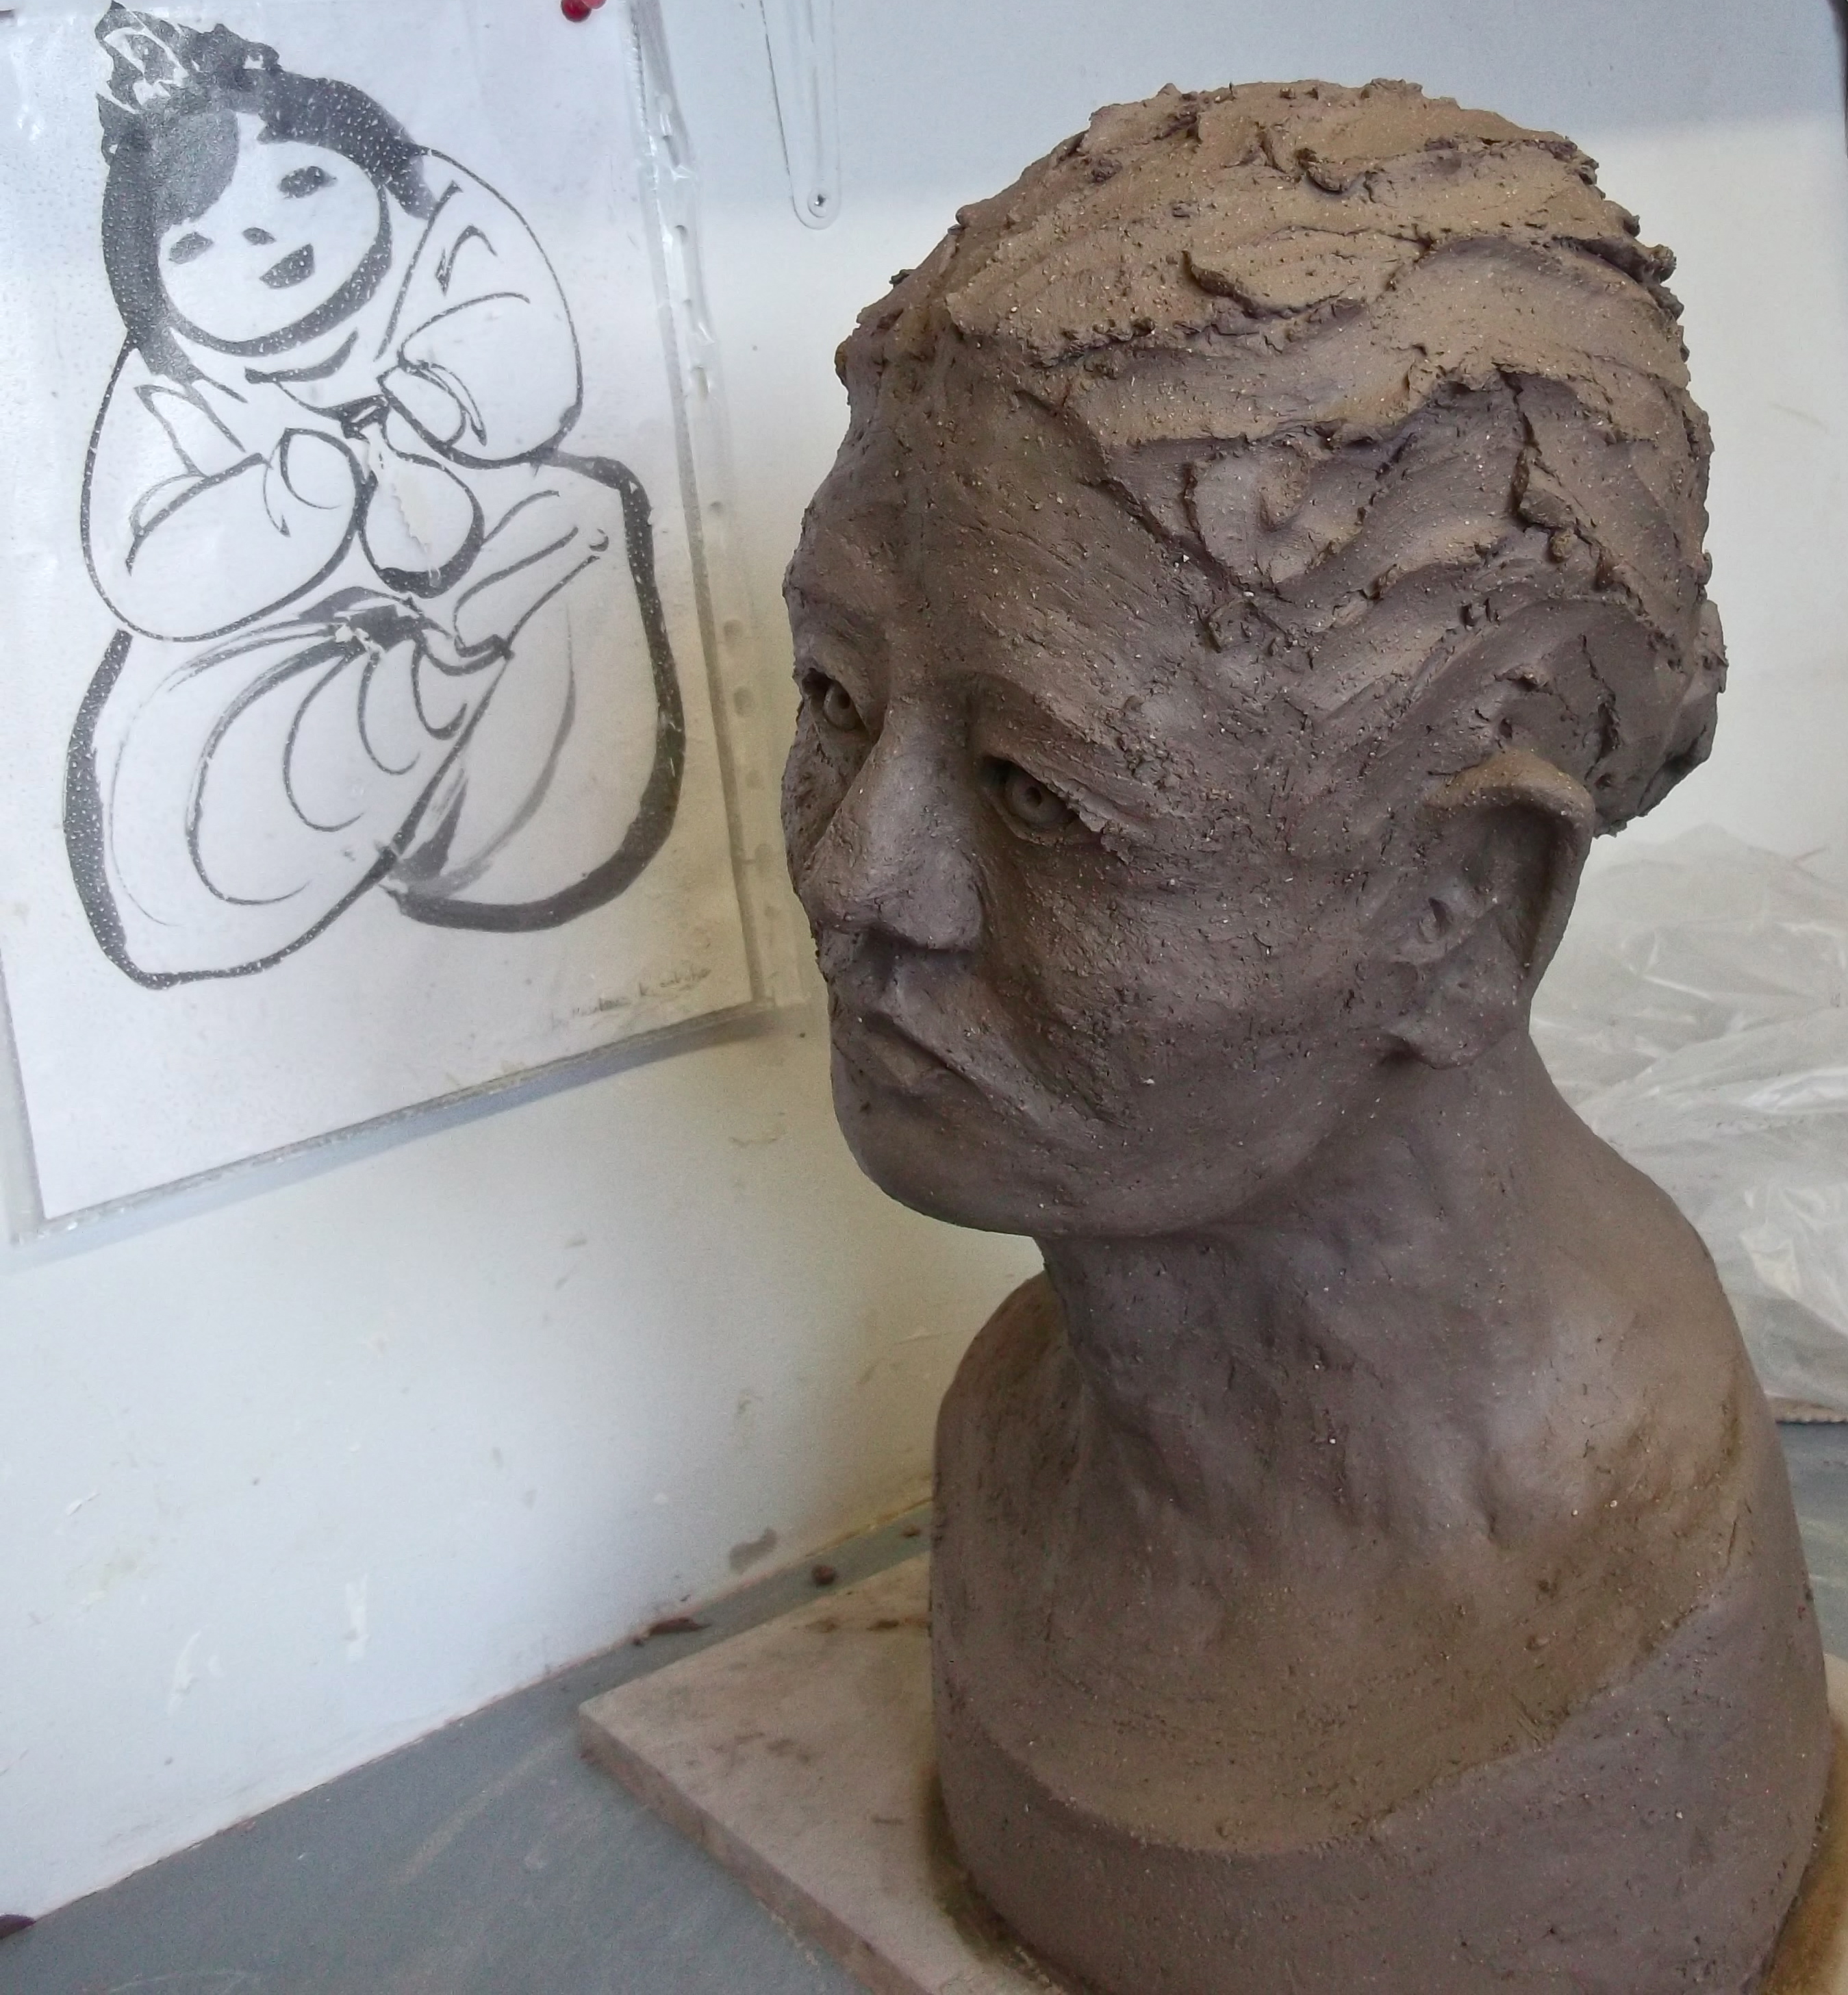
Clay armature for a bust, aug 20143rd Bust armature in progress, Aug 2014.in progress, Aug 2014.
Here I chose to leave gaps that show the Armature but of course you don’t have to. The step by step manner of this method and the fact that you work all over the head in layers from the start makes it ideally suited to help you organise the huge amount of information in your mind while learning to make Portraits and other Sculpture.
The Workshop
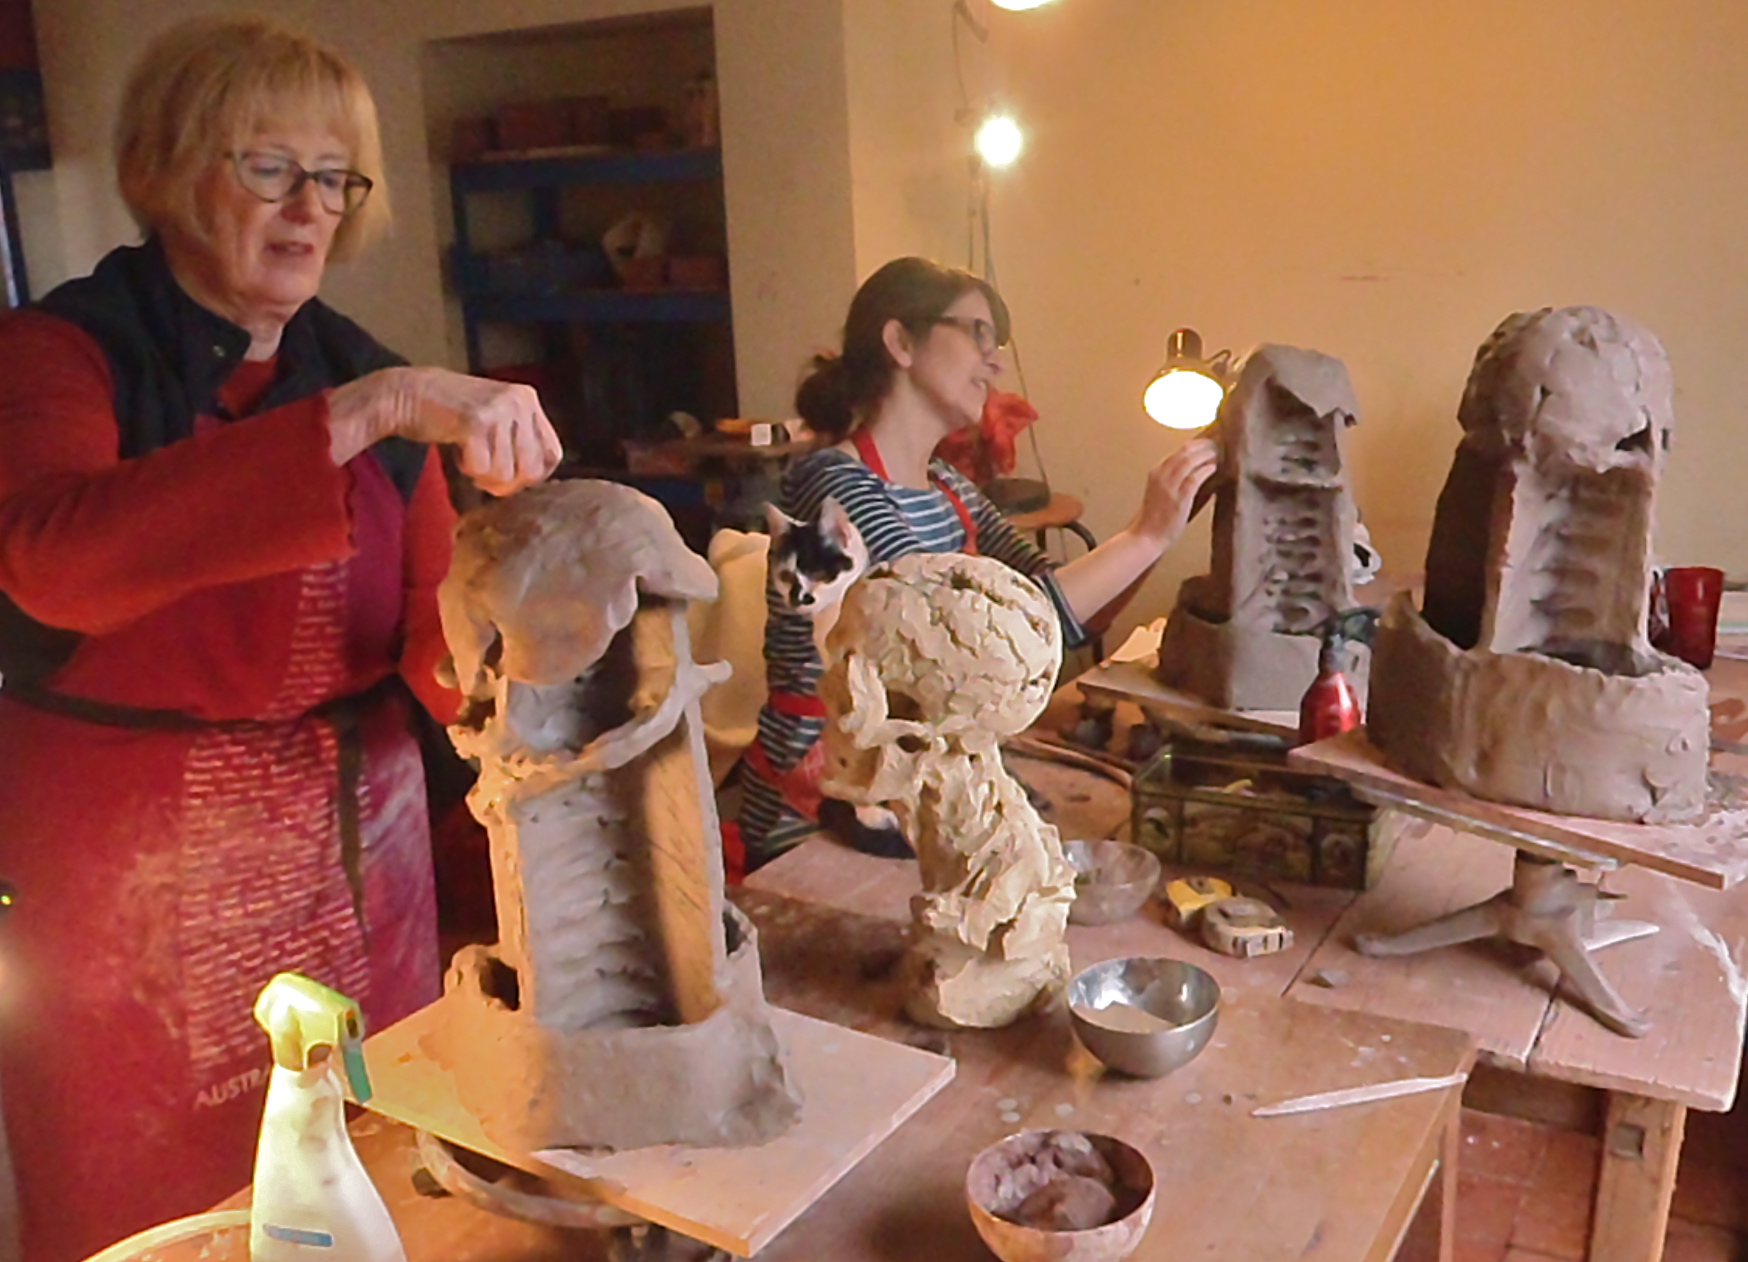
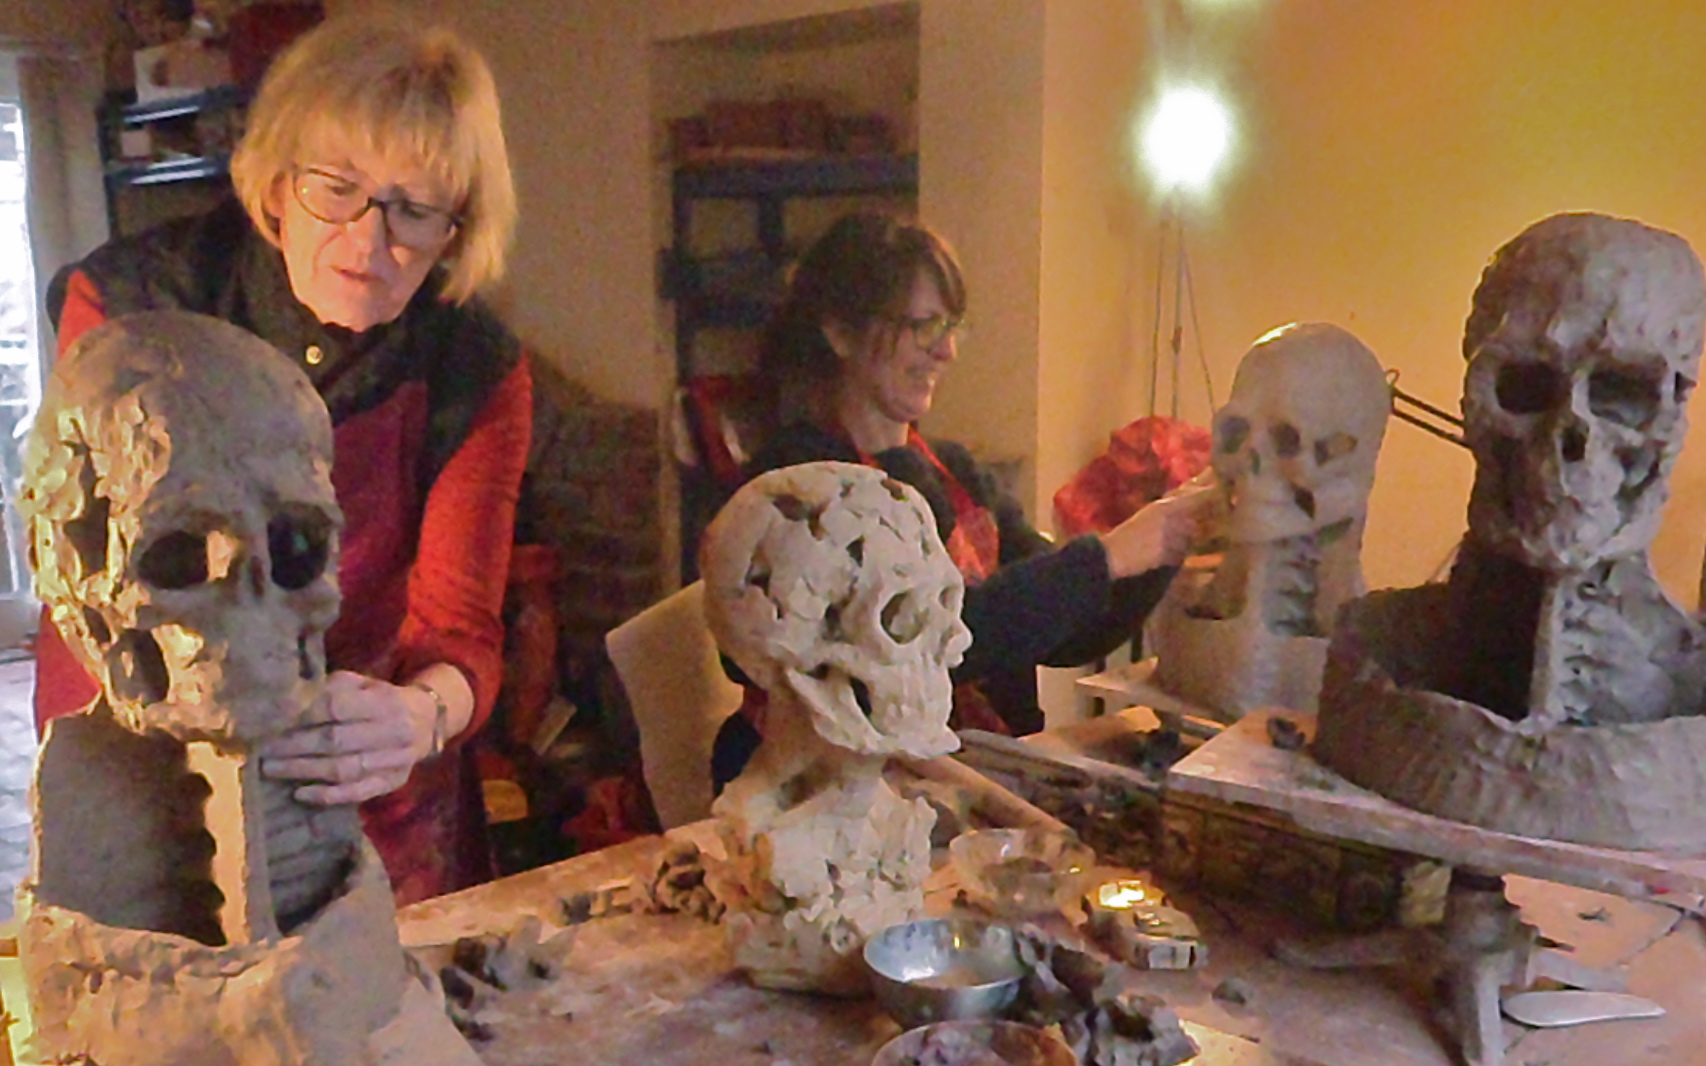
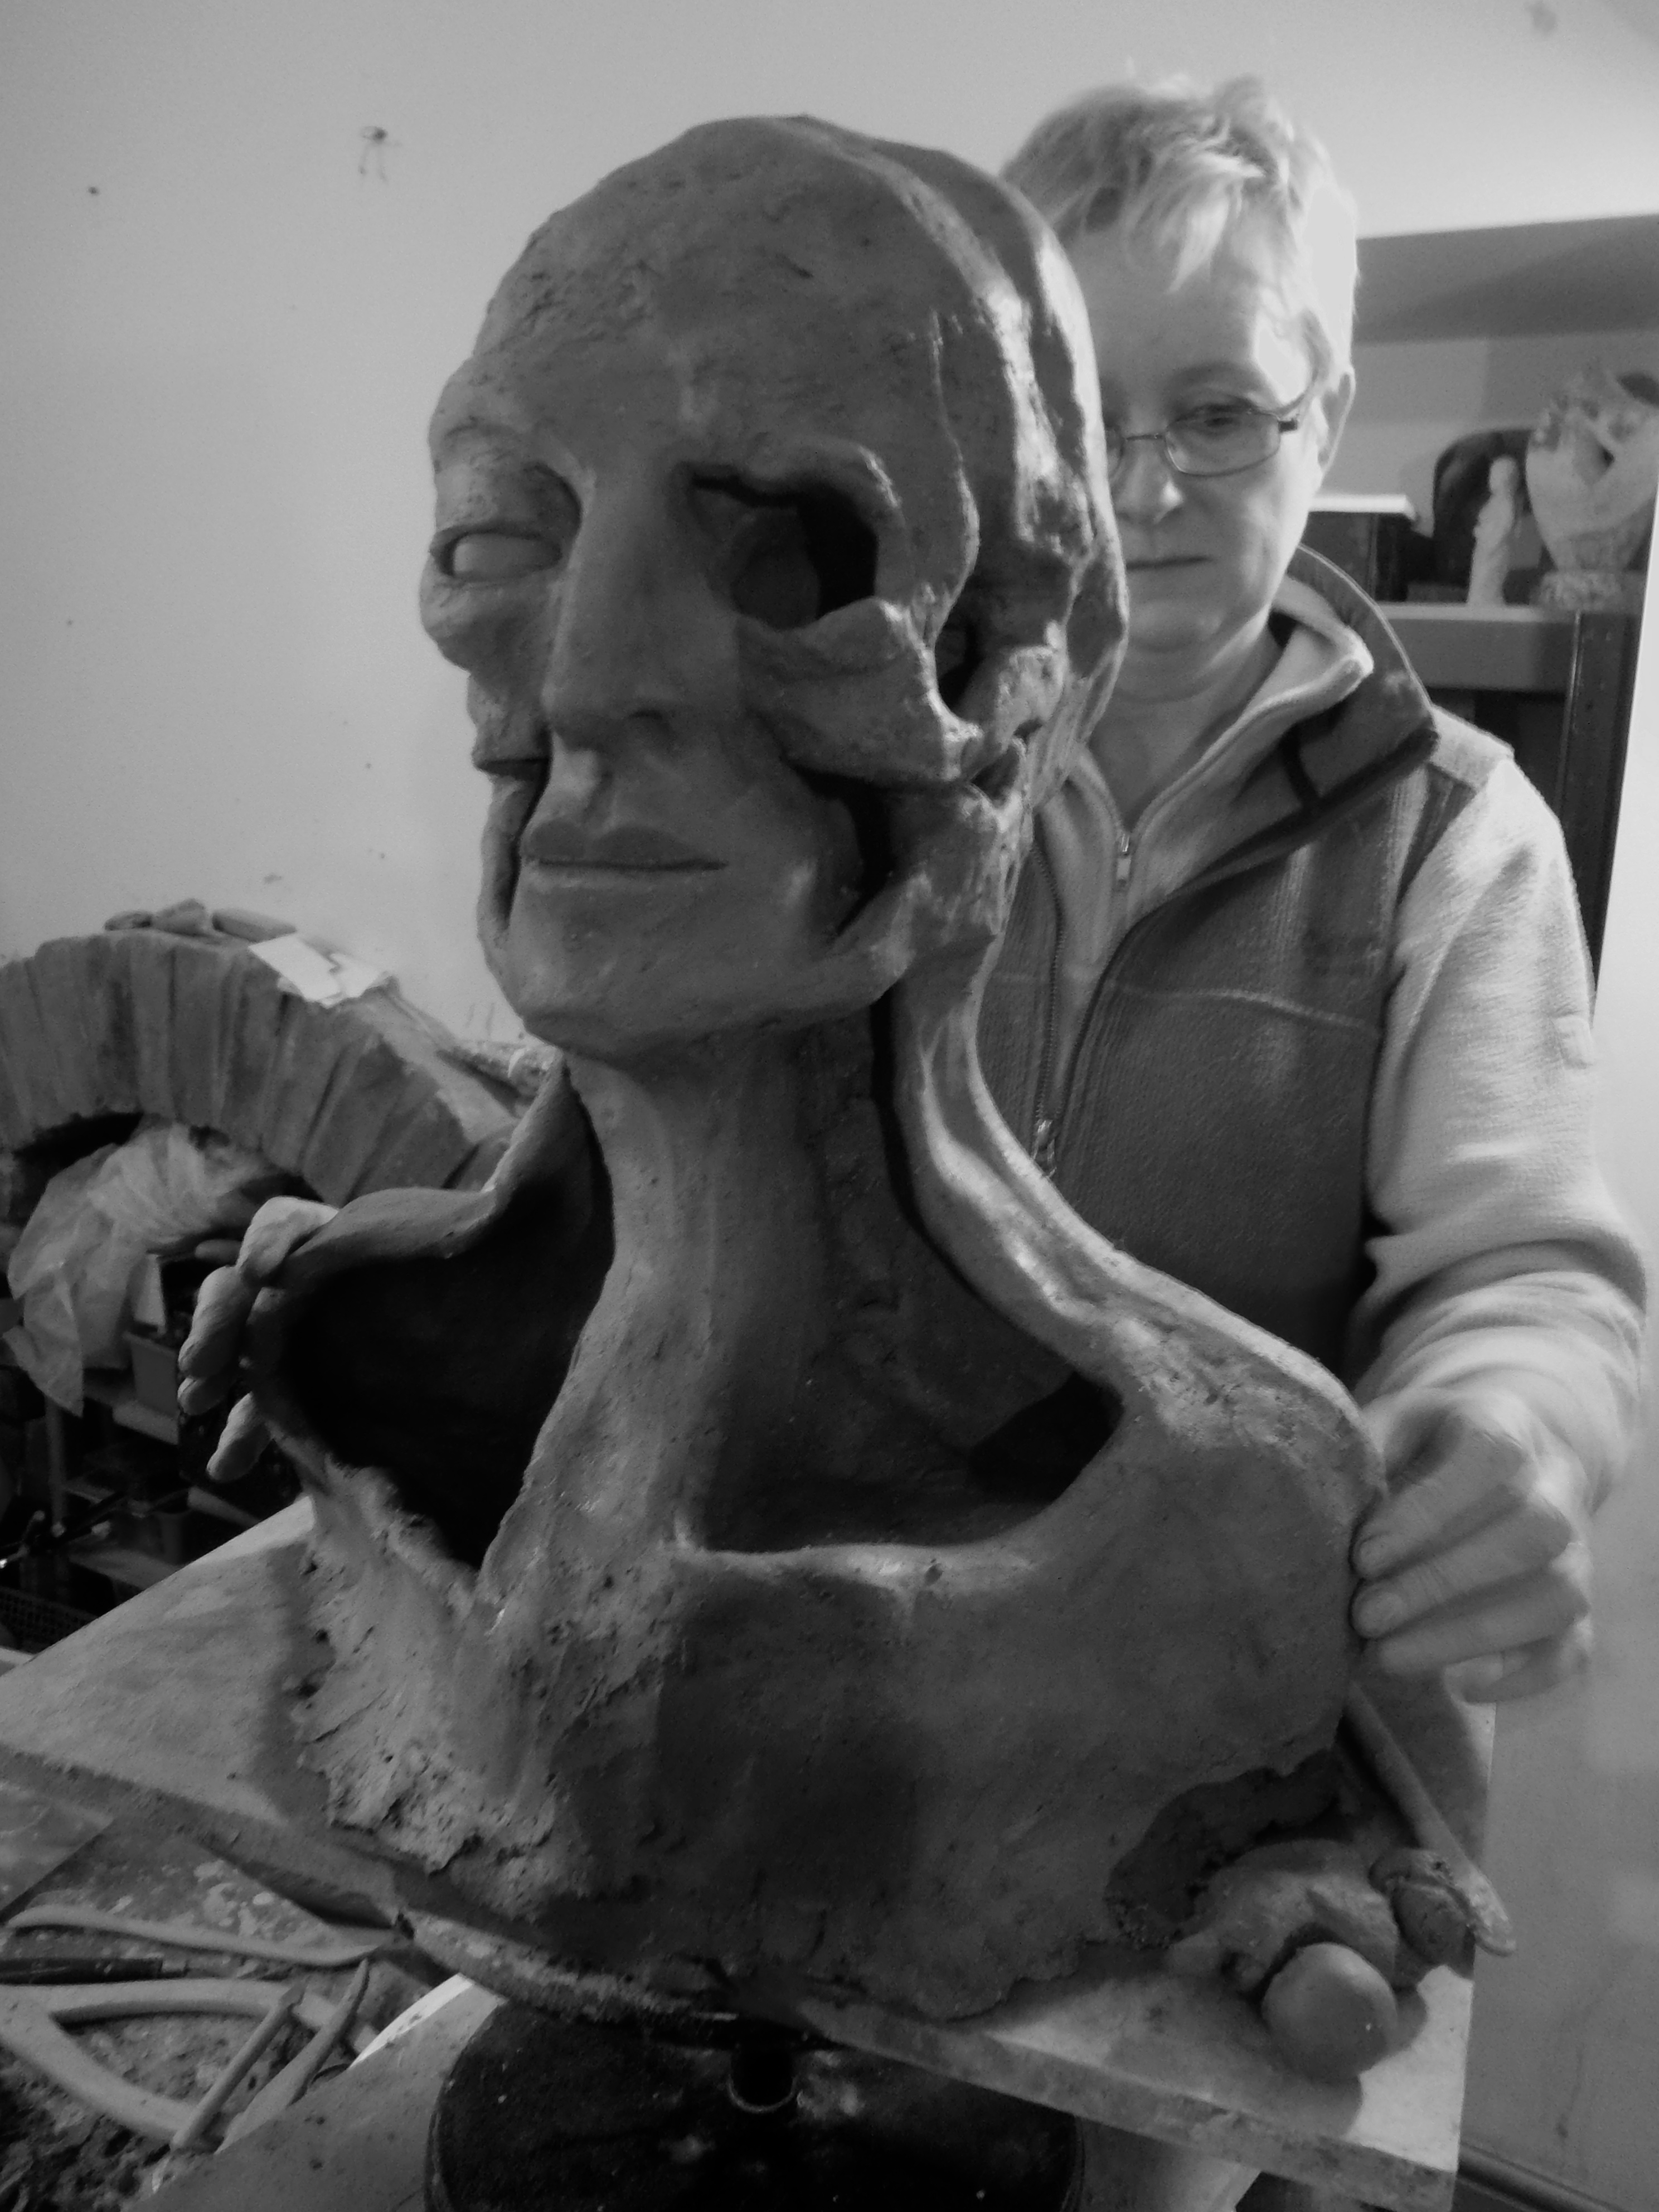
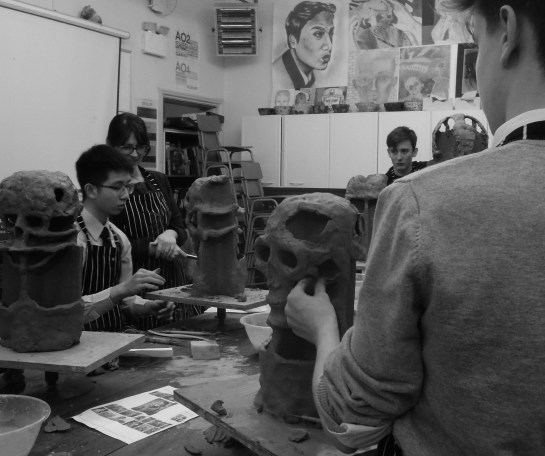
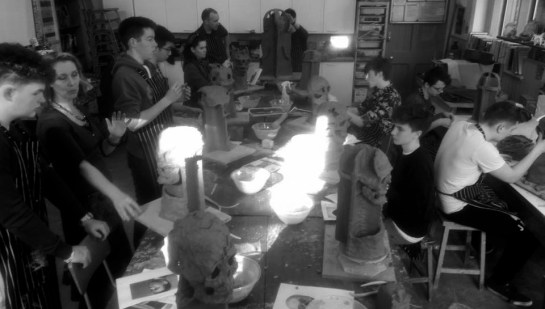
Two people with a creative back-ground but who had never done a head before came to Osprey Studios for a 2 day Workshop designed to give them the practical skills needed to make heads on their own and get 2/3 of the way through a head. Day 1 was The Skull built onto the central support (that I had prepared and allowed to harden 3 days earlier). Day 2 was The Head up to the point before finishing touches. The students both took their heads home to finish. We used the excellent Scarva Crank (ES50) clay.
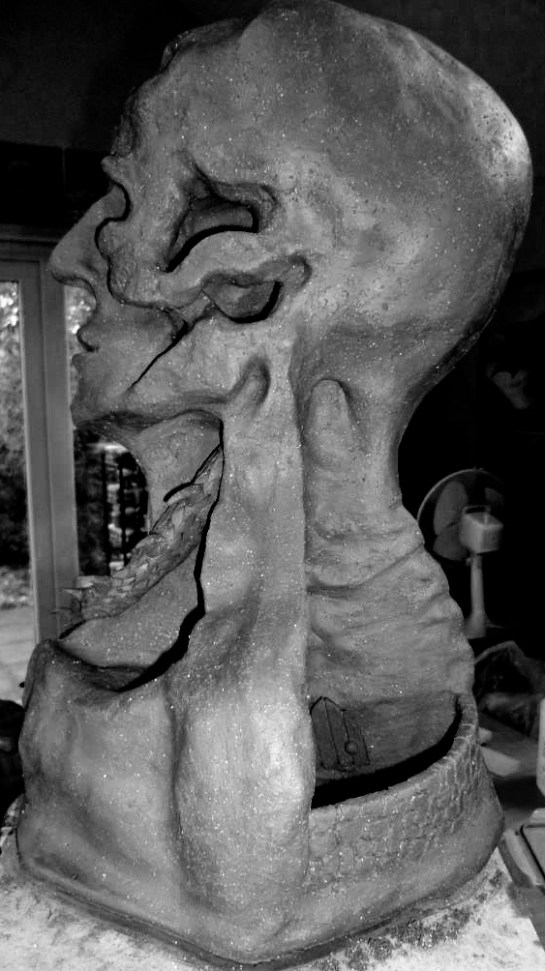
the leather-hard clay armature for the head. It will bear the weight and be a scaffold for your additions. Some of it will get cut away as the bust becomes leather hard and can support itself.Measure from your own head with callipers and add the information onto the armature. Some of these small, pinched slabs will also reinforce the armature. Start with where the neck emerges from the shoulders, then the chin, then the top of the head to ensure you will hit a height that will fit in your kiln. Leave some room for error; later you can trim away from the base or add clay there to adjust the height.I had made the Skull we used as a model previously using the same method. We also used photos from the internet and measured on our own and each other’s head. Having a model is expensive and sometimes distracting at this early stage of conquering the basics. This Workshop is designed to show you a method you can repeat at home.Block out the skull using thin slabs attached to the armature. Work your way around the form in ‘layers’; don’t focus on one part for to long. Each part informs the whole and they need to evolve together. Mark the place of the eye-sockets, nose, mouth, chin without getting distracted by their shape. Then these bars of clay will hold up the next layer, etc.It’s surprisingly hard work. Take regular breaks to allow the info to sink in.Spend plenty of time over the back of the head to ensure the size is correct.There will be times when it looks dreadful!And points when it looks guaranteed to be a masterpiece. Both of these phases pass!Measure everything repeatedly and keep moving forward methodicallyTake the Skull up to the stage before finishing touches and allow to go leather-hard. We chose to tilt the skulls a bit at this stage so that the Heads would be more expressive.
You can print these skull images to work from and there are 2 work-sheets for you at the end of this post.
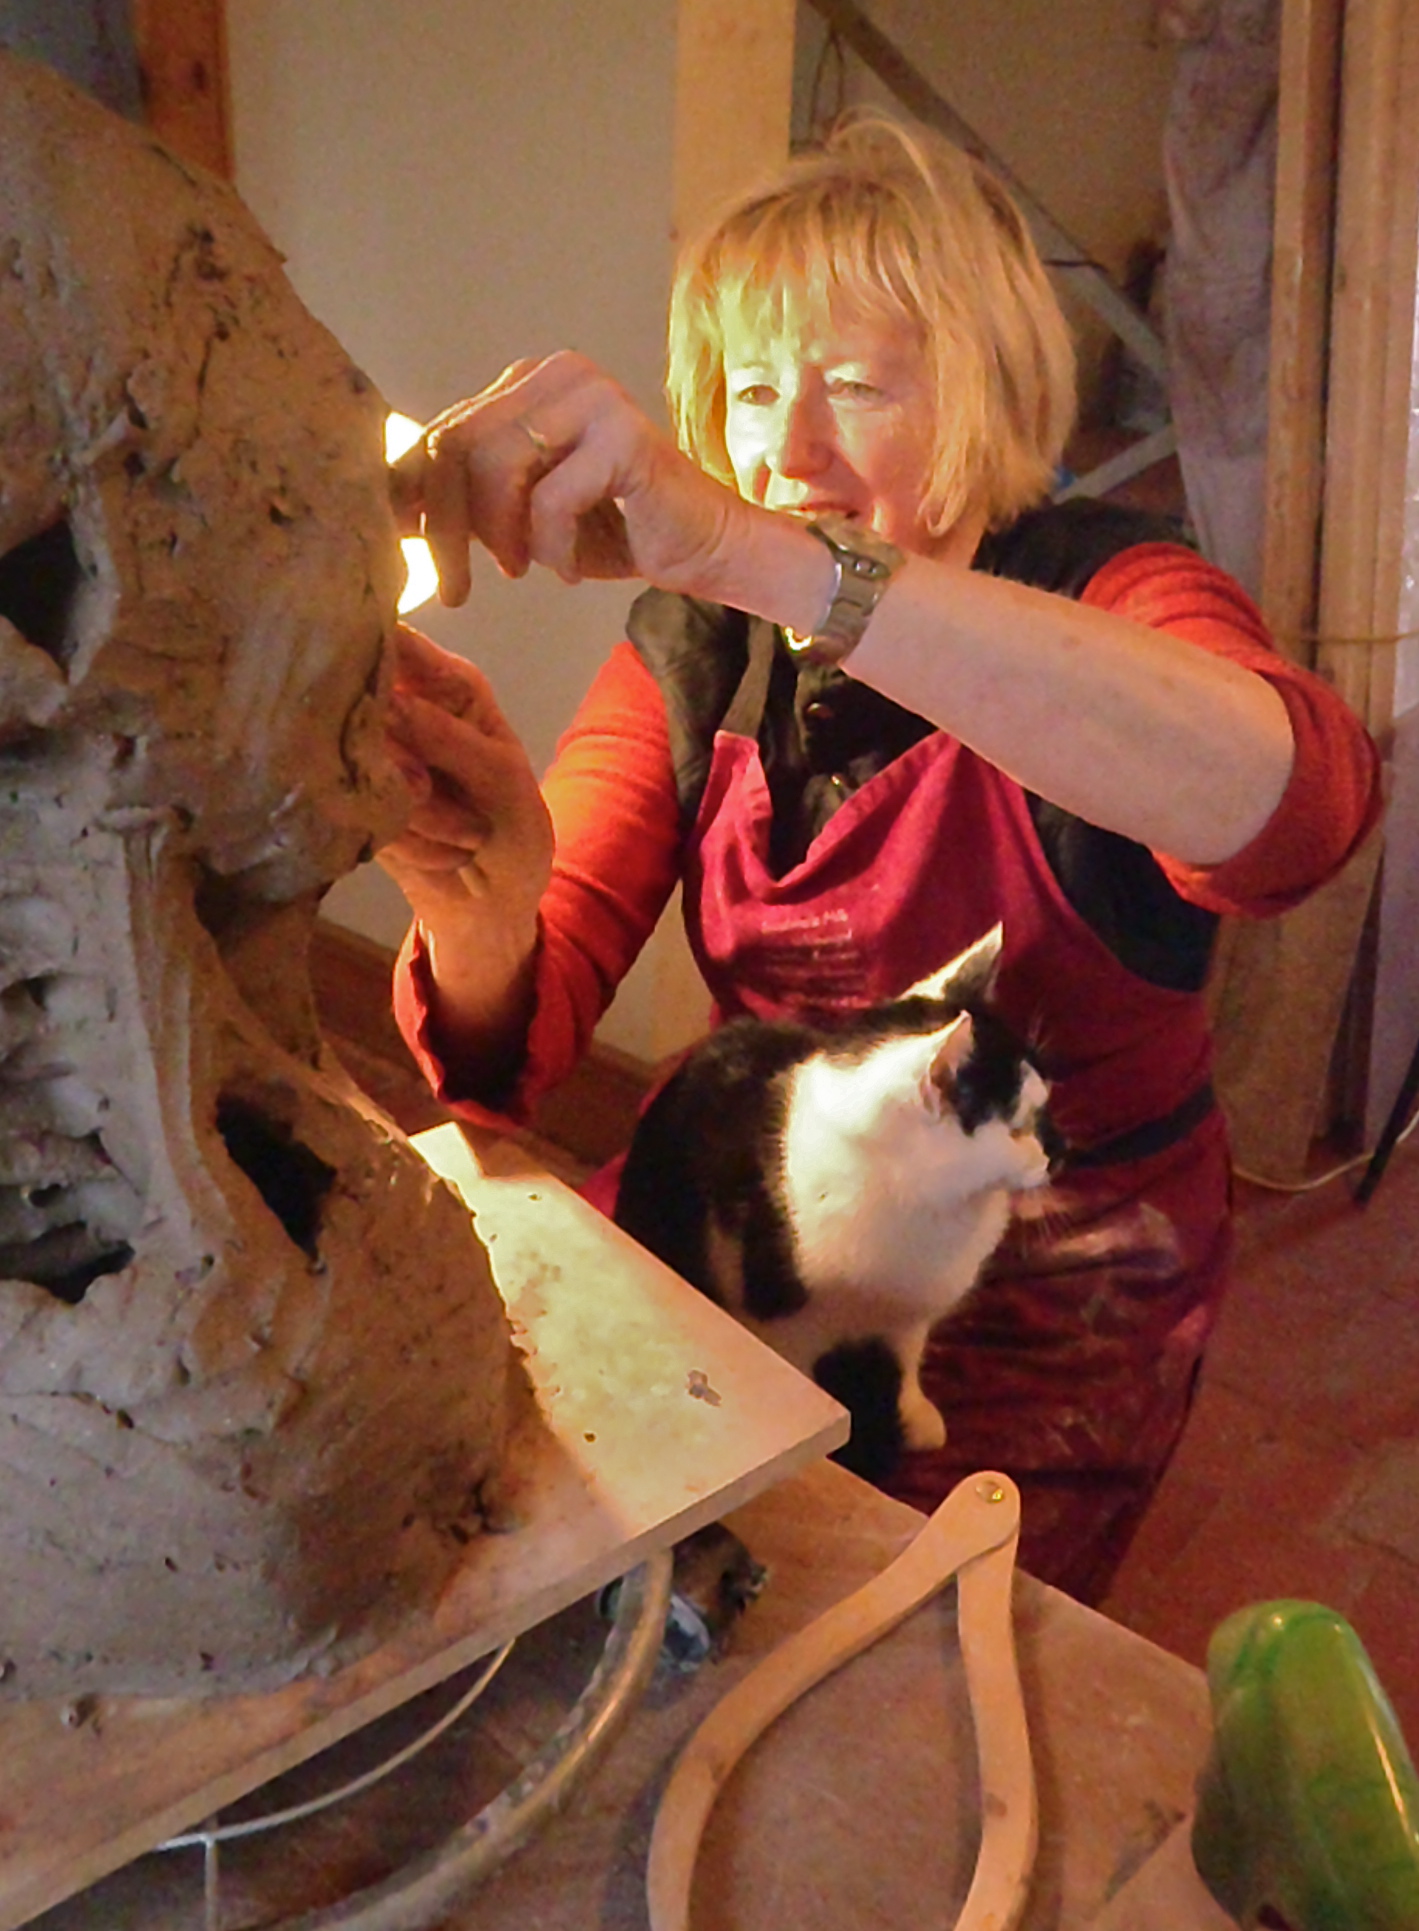
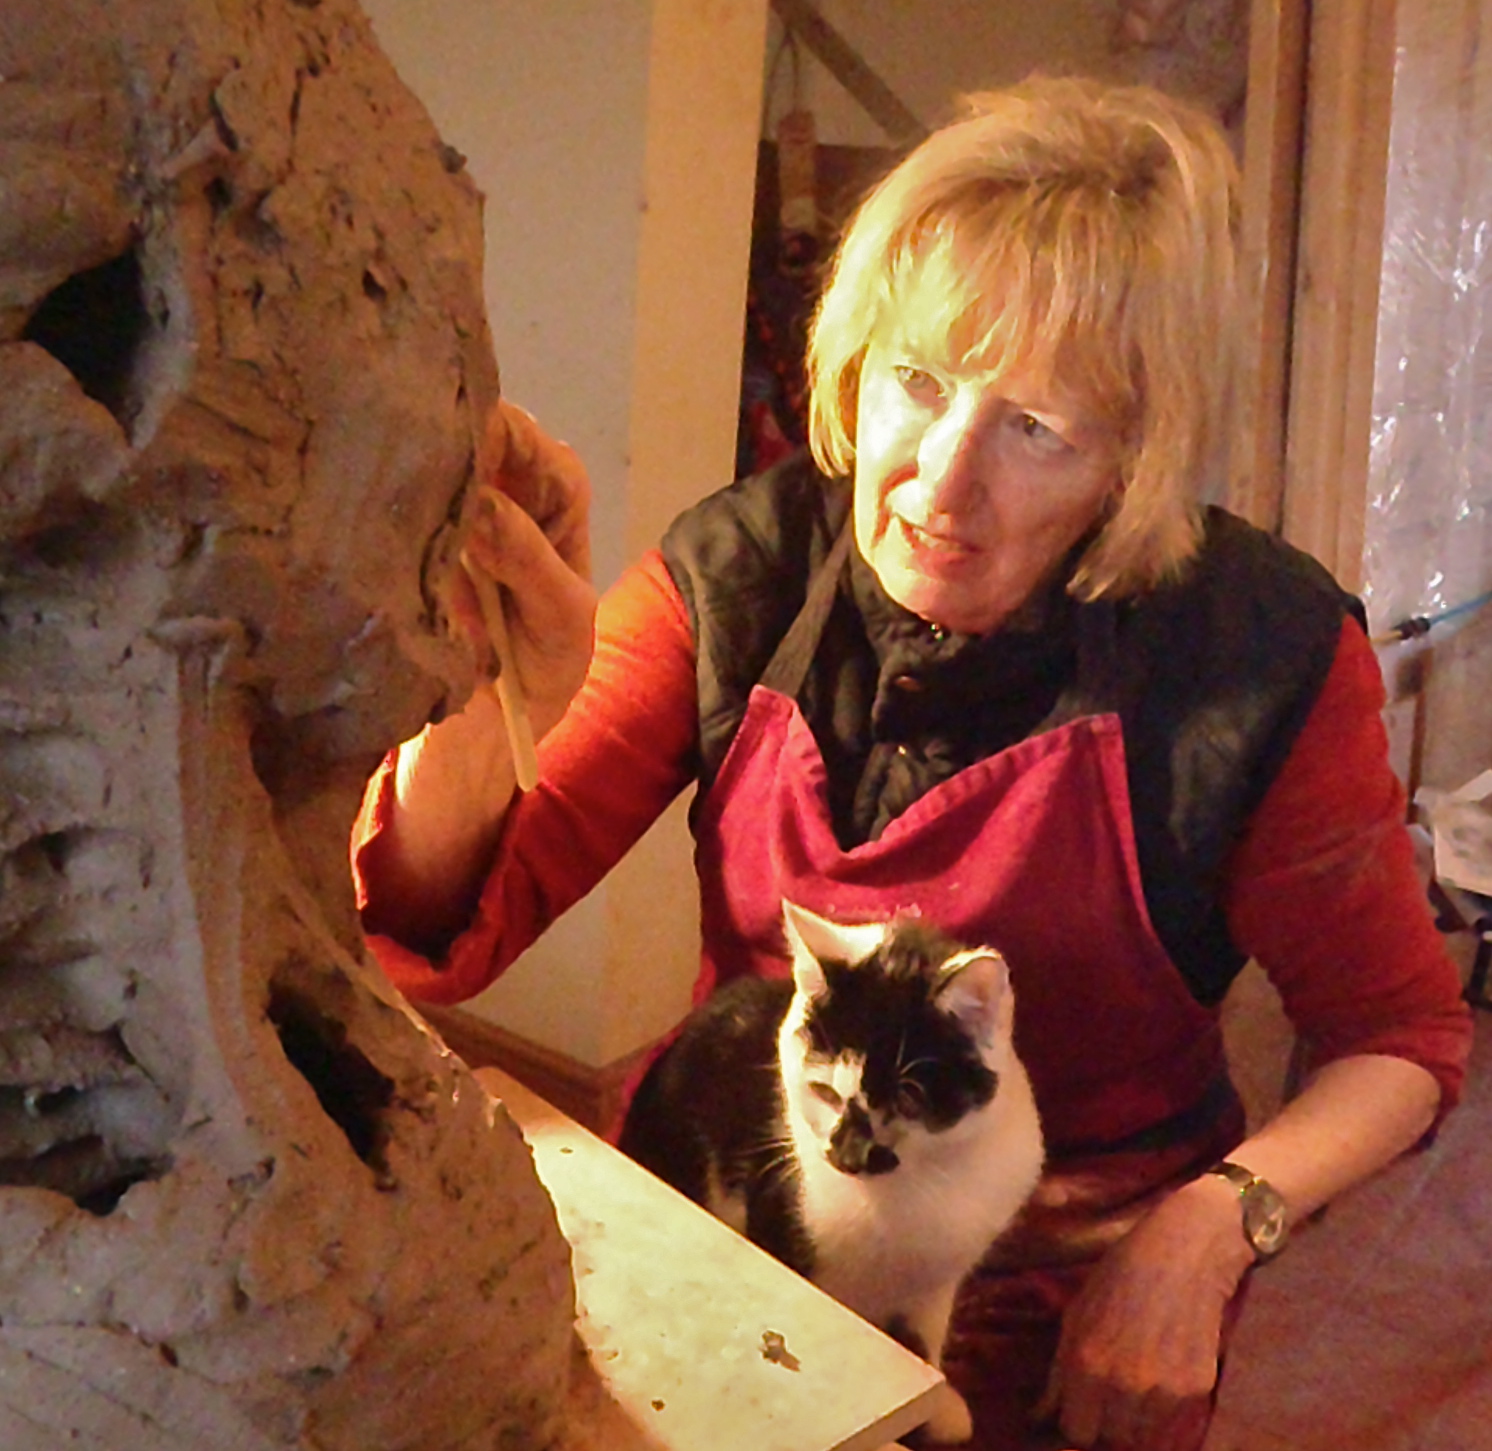
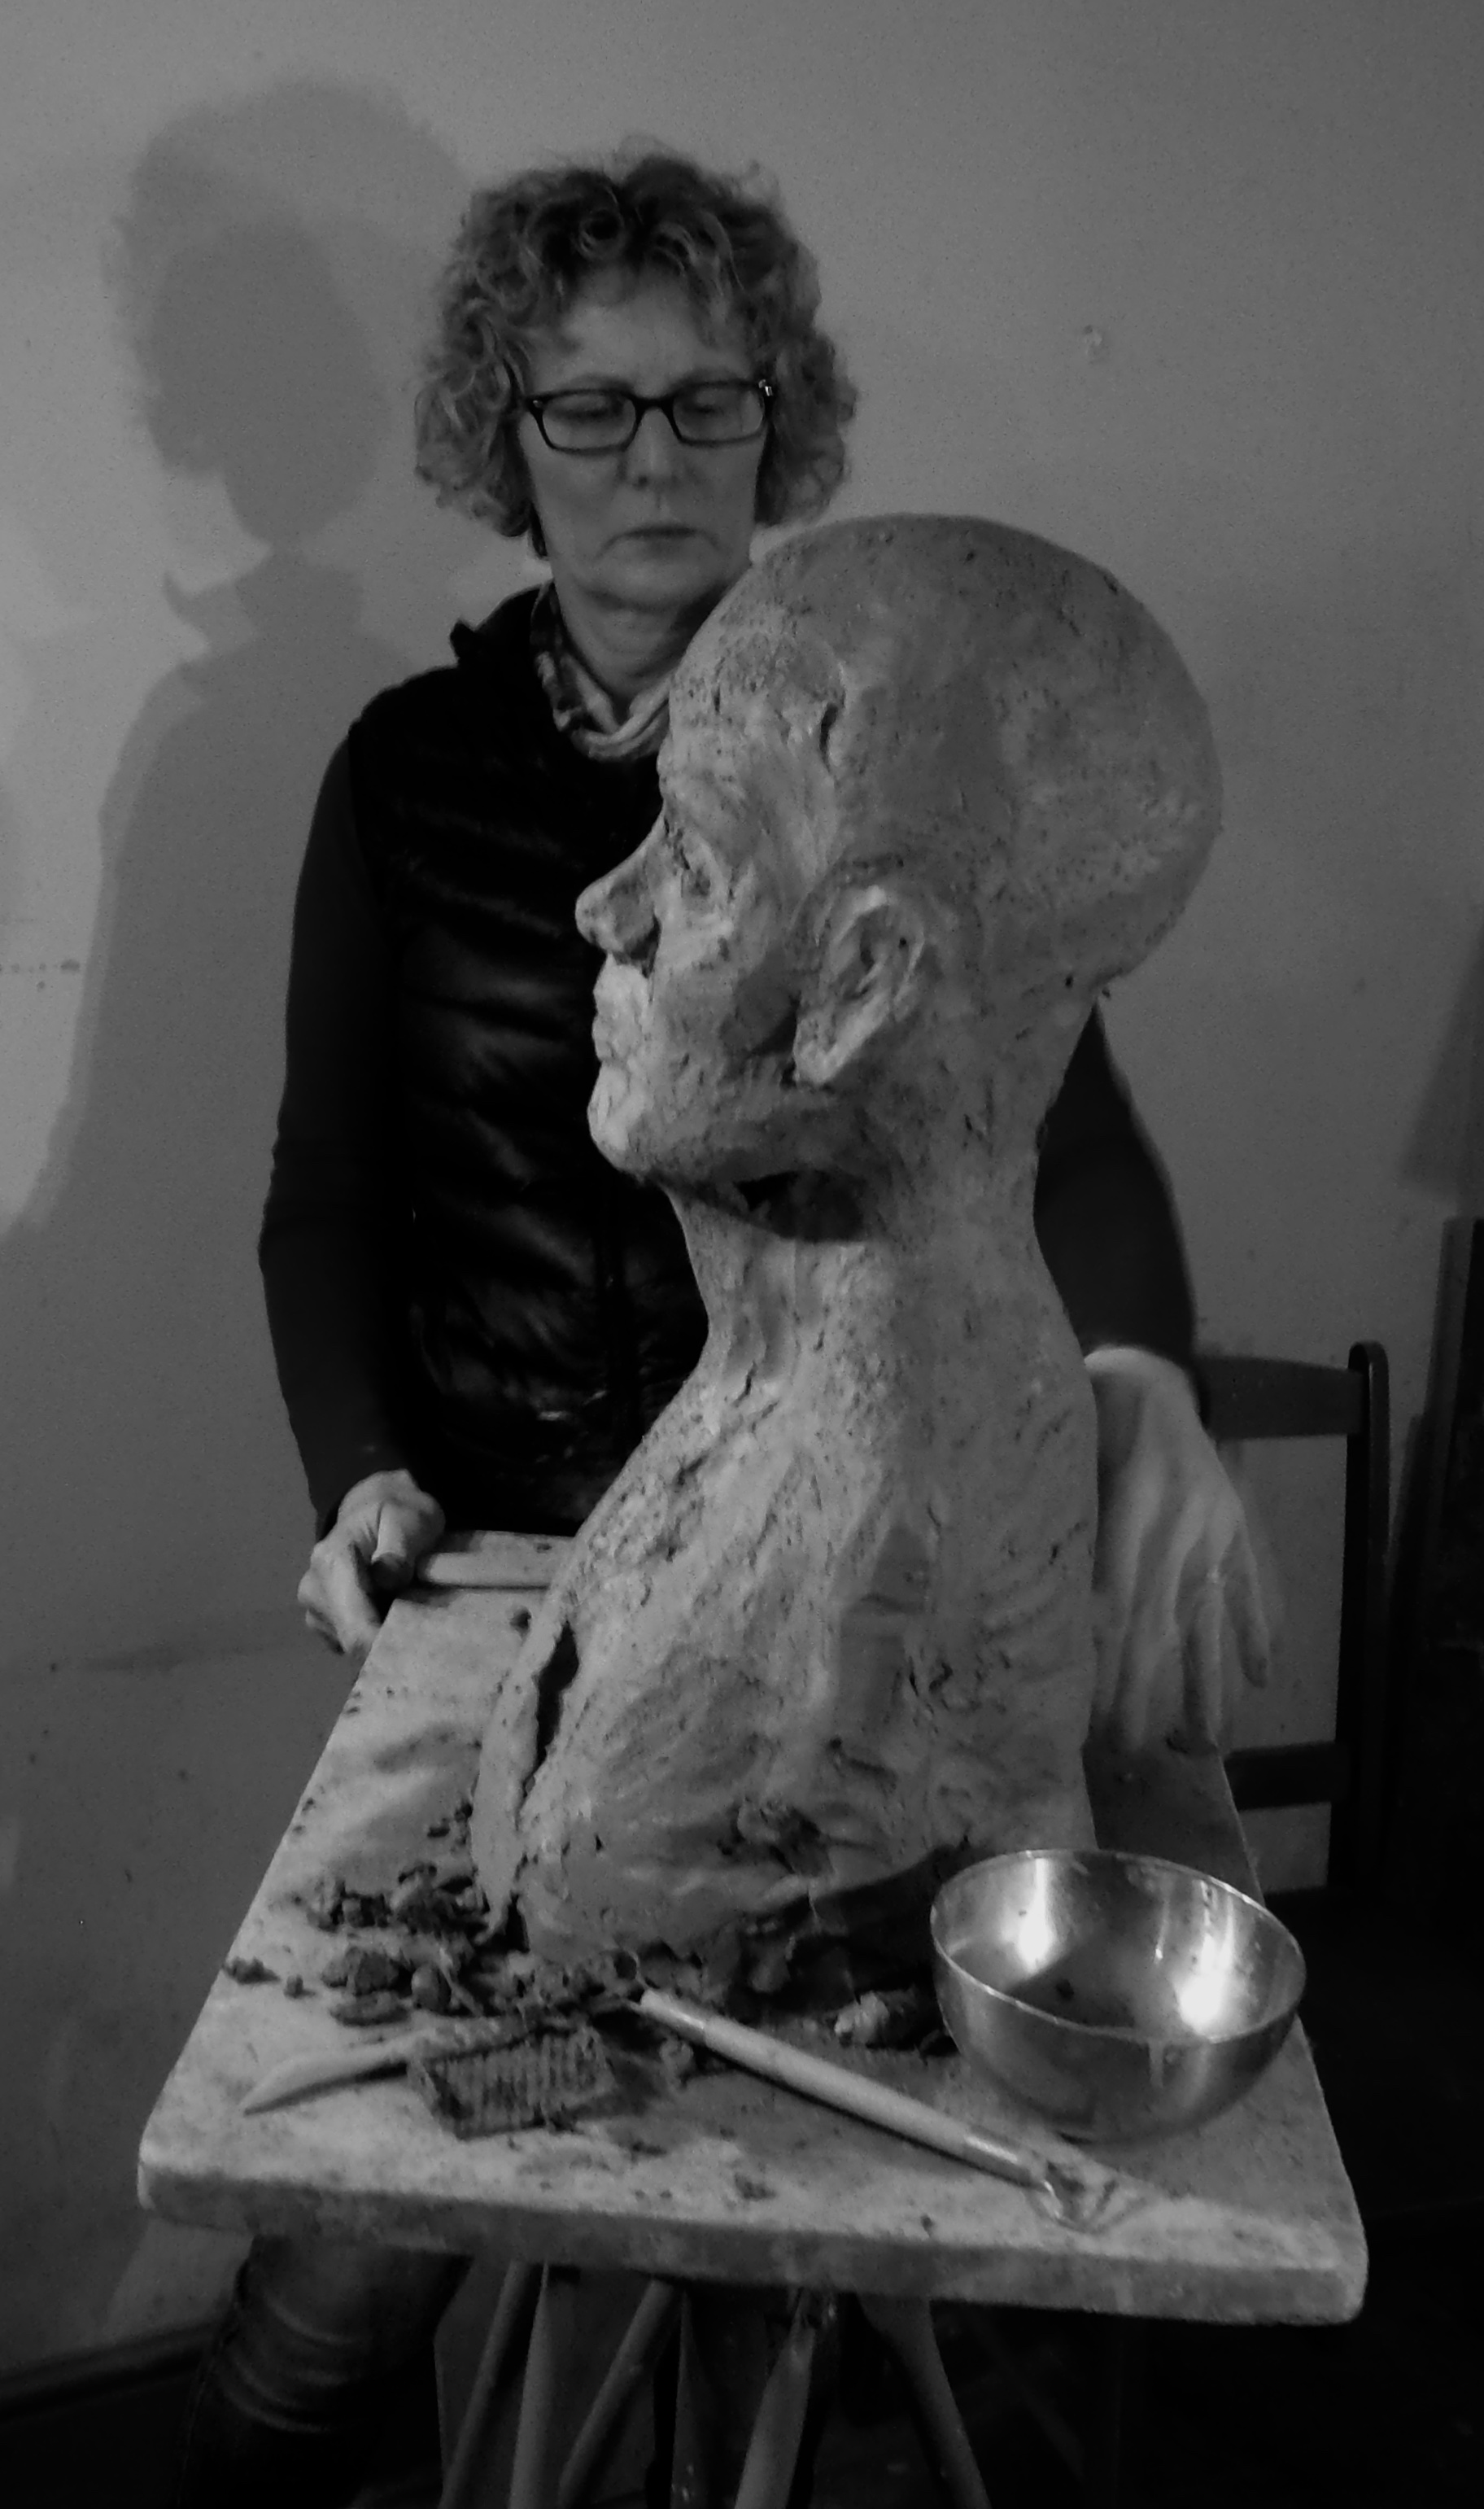
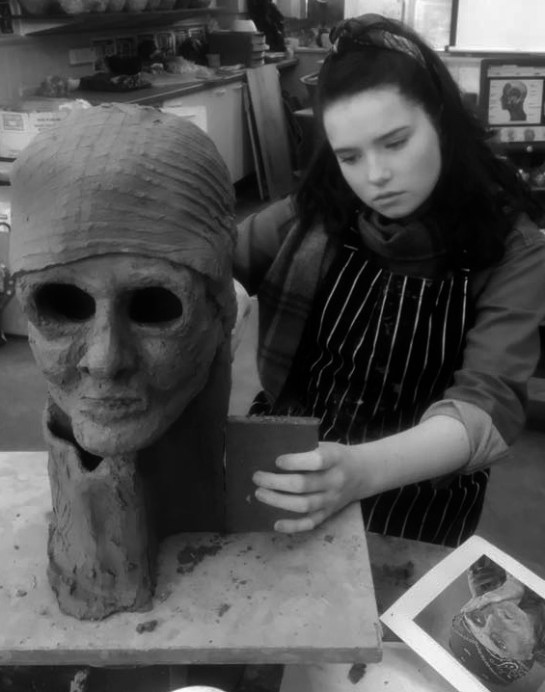
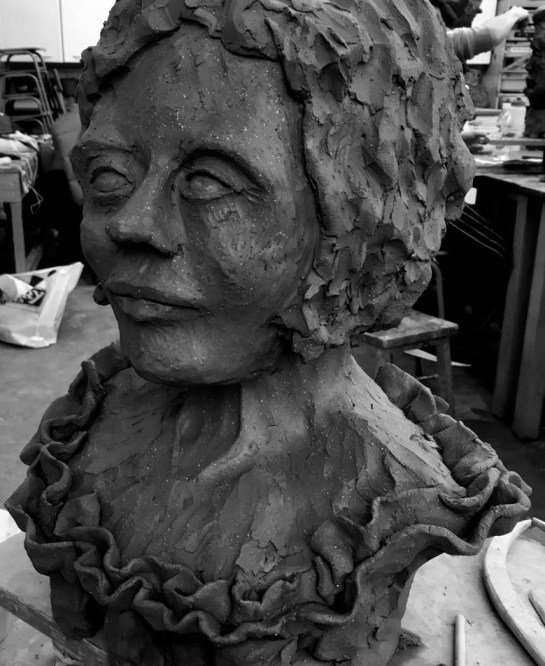
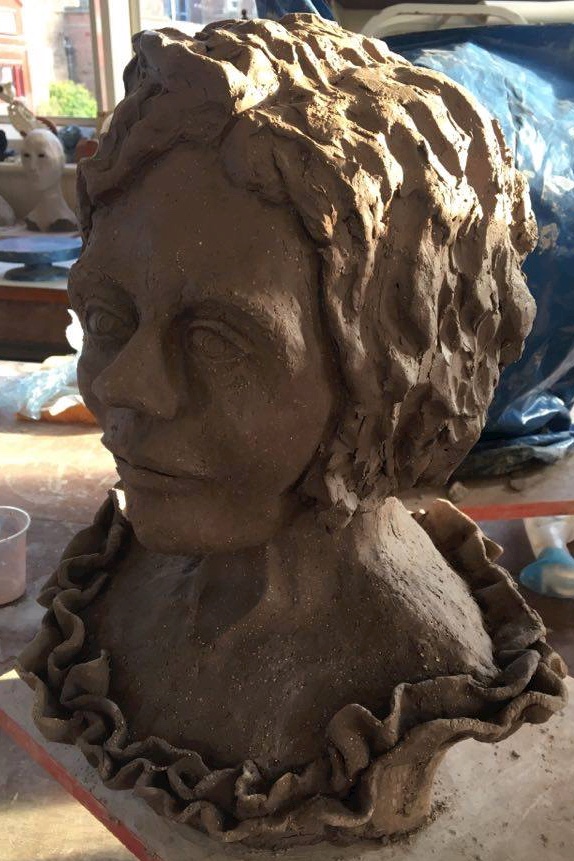
‘Block out’ the whole head over the foundation of the Skull; Work all around the head in rough, refining the whole form in layers rather than concentrating on one spot then moving to the next. It is crucial that you are willing to remove any part that is wrong, no matter how much time you feel you have spent on it. A beautifully worked eye slightly in the wrong place will ruin the whole. Every minute you spend on this work is building your skill so there is no time wasted.You will reap the benefits of all the careful measuring you did on the skull. Note that “The Eye” is the area all the way to the edge of that eye-socket not just the bit defined by the eye-lashes. ”The Mouth” starts up inside the nose and goes out toward the cheeks and the chin; it is not just the lips. Subtleties all across that area of muscle and skin over the teeth of the skull will express the mood of this person. Think a range of conflicting emotions and feel the small changes in your own mouth-area. Don’t look in a mirror, just feel them. Do it again in front of a mirror. “Act” the expression you want your Portrait to have while you are working and you will find it easier to capture it in clay.Continue measuring repeatedly using callipers and check your modelling by hold a horizontal or vertical stick to it and looking carefully at the shape of the negative space.Walk away from your work and look in detail at something out of the window; this will ‘clear your eye’. Turn and look at the head; what is the first thing you notice? It might be an error you couldn’t see when you were up close and immersed in the work. Or it might be that it looks way better than you expected.There are many tricks and techniques for making all the features and U Tube is a treasure trove. Try out different styles to find the one that you like.Use the modelling style you used on the rest of the sculpture for the hair to avoid that ‘Wig’ look. As you get nearer to being done the quality of your mark-making as you add clay becomes important. Look at lots of Portraits with Google-Images, choose the look you like best and try out using different tools until you find your own style.If you think you may have added a thickness over 3cms cut and hollow at the stage before finishing touches. If not you can fire the head with the armature in situ. Dry very slowly, preferably in a tent of news-paper that will keep off drafts and slow down the evaporation. While it is wrapped up the water from the added clay will migrate into the clay-armature and soften it; you might need to put a temporary support under the chin to stop the head tipping forward until the clay has stiffened up evenly.Double-check all your measurements and then move into Finishing Touches. During this stage you are reinforcing this new perception and understanding of the head that is not just about communication but is relevant to portraiture. This will allow you to see more too.This final stage, especially the eyes, will take a third of your total work time. A head usually takes 30 hours.Exactly like learning a musical instrument or a sport, practice will develop the fine-motor skills and perception specific to this difficult task. It is ALL about Practise, good technique, and the right tools and clay. If you add ‘enjoying doing it’ you will make beautiful Busts full of expression. ‘Talent’ is a mirage. I revisit figurative work regularly so that my skills don’t slip away.The measuring frees you up to be expressive with your modelling . Your ‘Creative Intuition’ is largely a collection of Skills that have become so ingrained you can take them for granted. They will be inter-woven across your mind, so the deep-set memories of the experience of dancing at a party, the exhilaration you feel out on the mountain, emotions that have shown on your face, will be part of your Skill. While you are making things music can help you access specific memories; I use particular Albums to re-set the mood each time I return to a sculpture.
A set of good portrait tools will make all the difference. Tiranti’s are famously lovely. Just holding one makes you want to work, they are beautiful. The M Series Hardwood Tools are designed for Portraiture and will fit perfectly to the important, tricky parts of the face. Scarva have a good range of quality tools and the set of fine modelling tools look like they will be nice and the price is very low. I am very pleased with my metal modelling tools from Amazon.
Choose a clay with plenty of mixed, medium to fine grog (gritty bits). Scarva ES 50 is out-standing.
Mary Cousins finished her head back in her own Studio. She has named her Butterfly.Butterfly by Mary CousinsButterfly by Mary CousinsMadam Butterfly by Mary Cousins. Mary makes absolutely lovely, fluid, sensuous porcelain pottery.
Once you have got the hang of this excellent method you can use it to open out the space of a form.
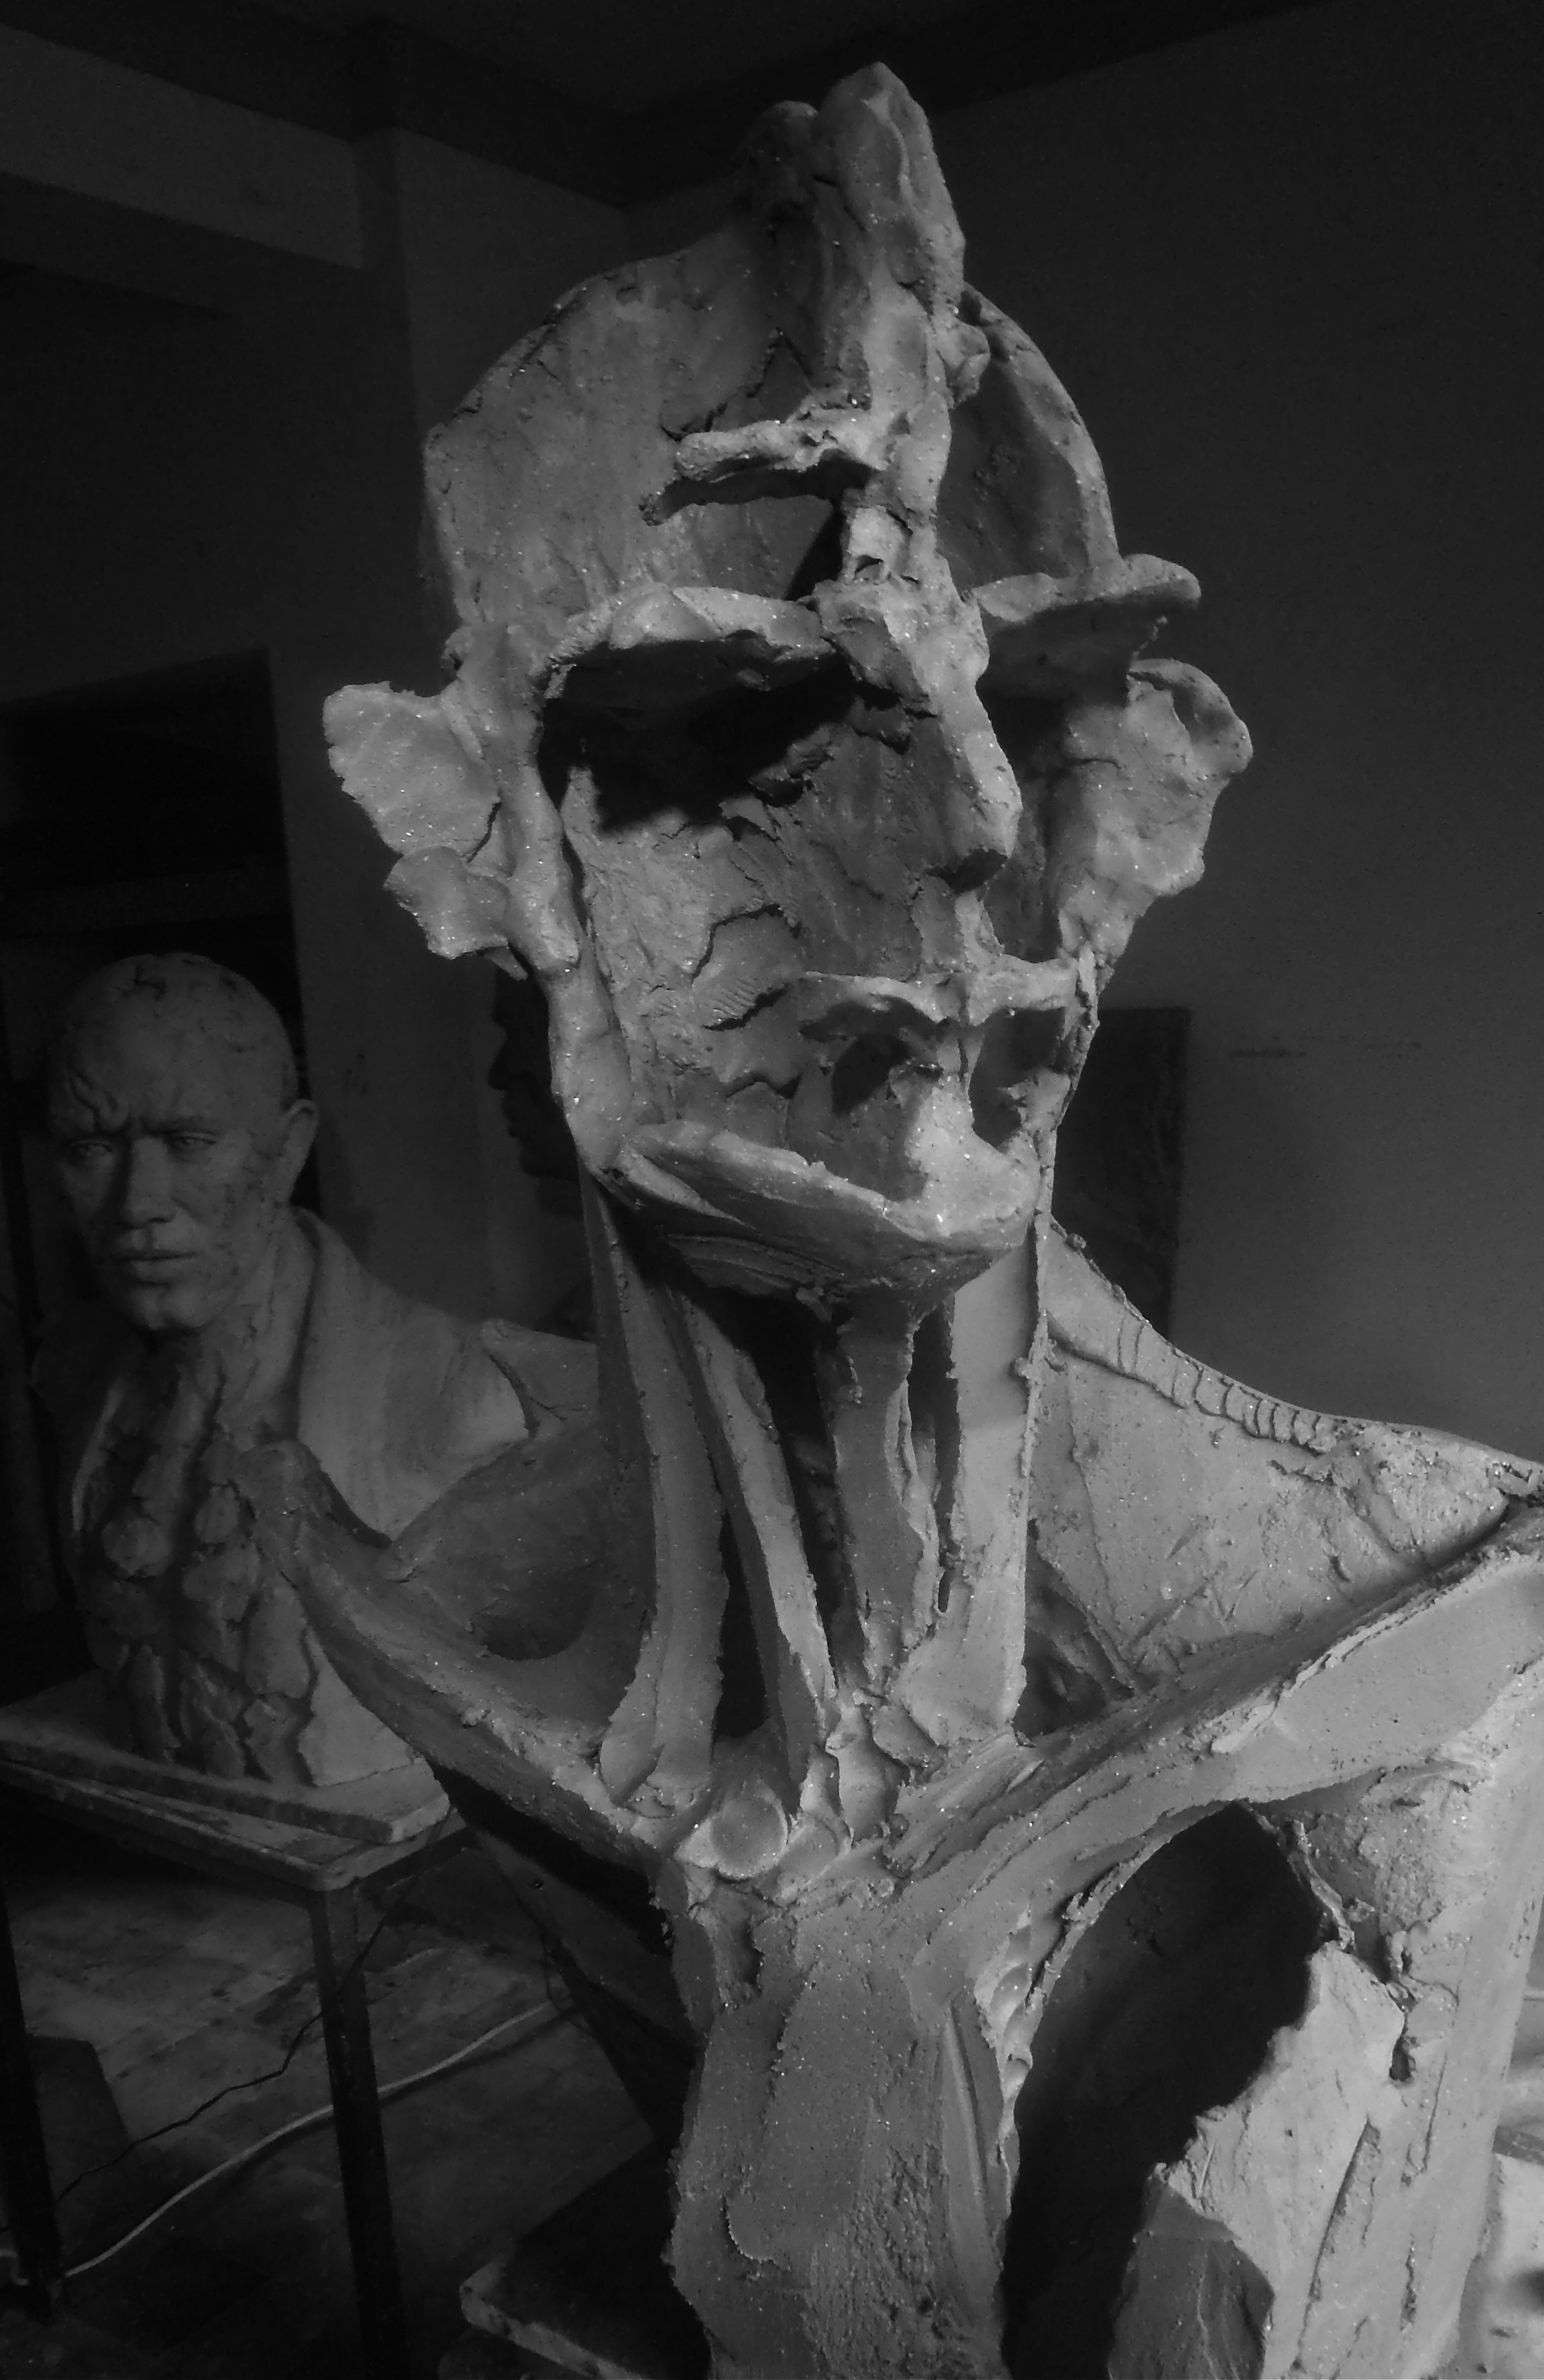
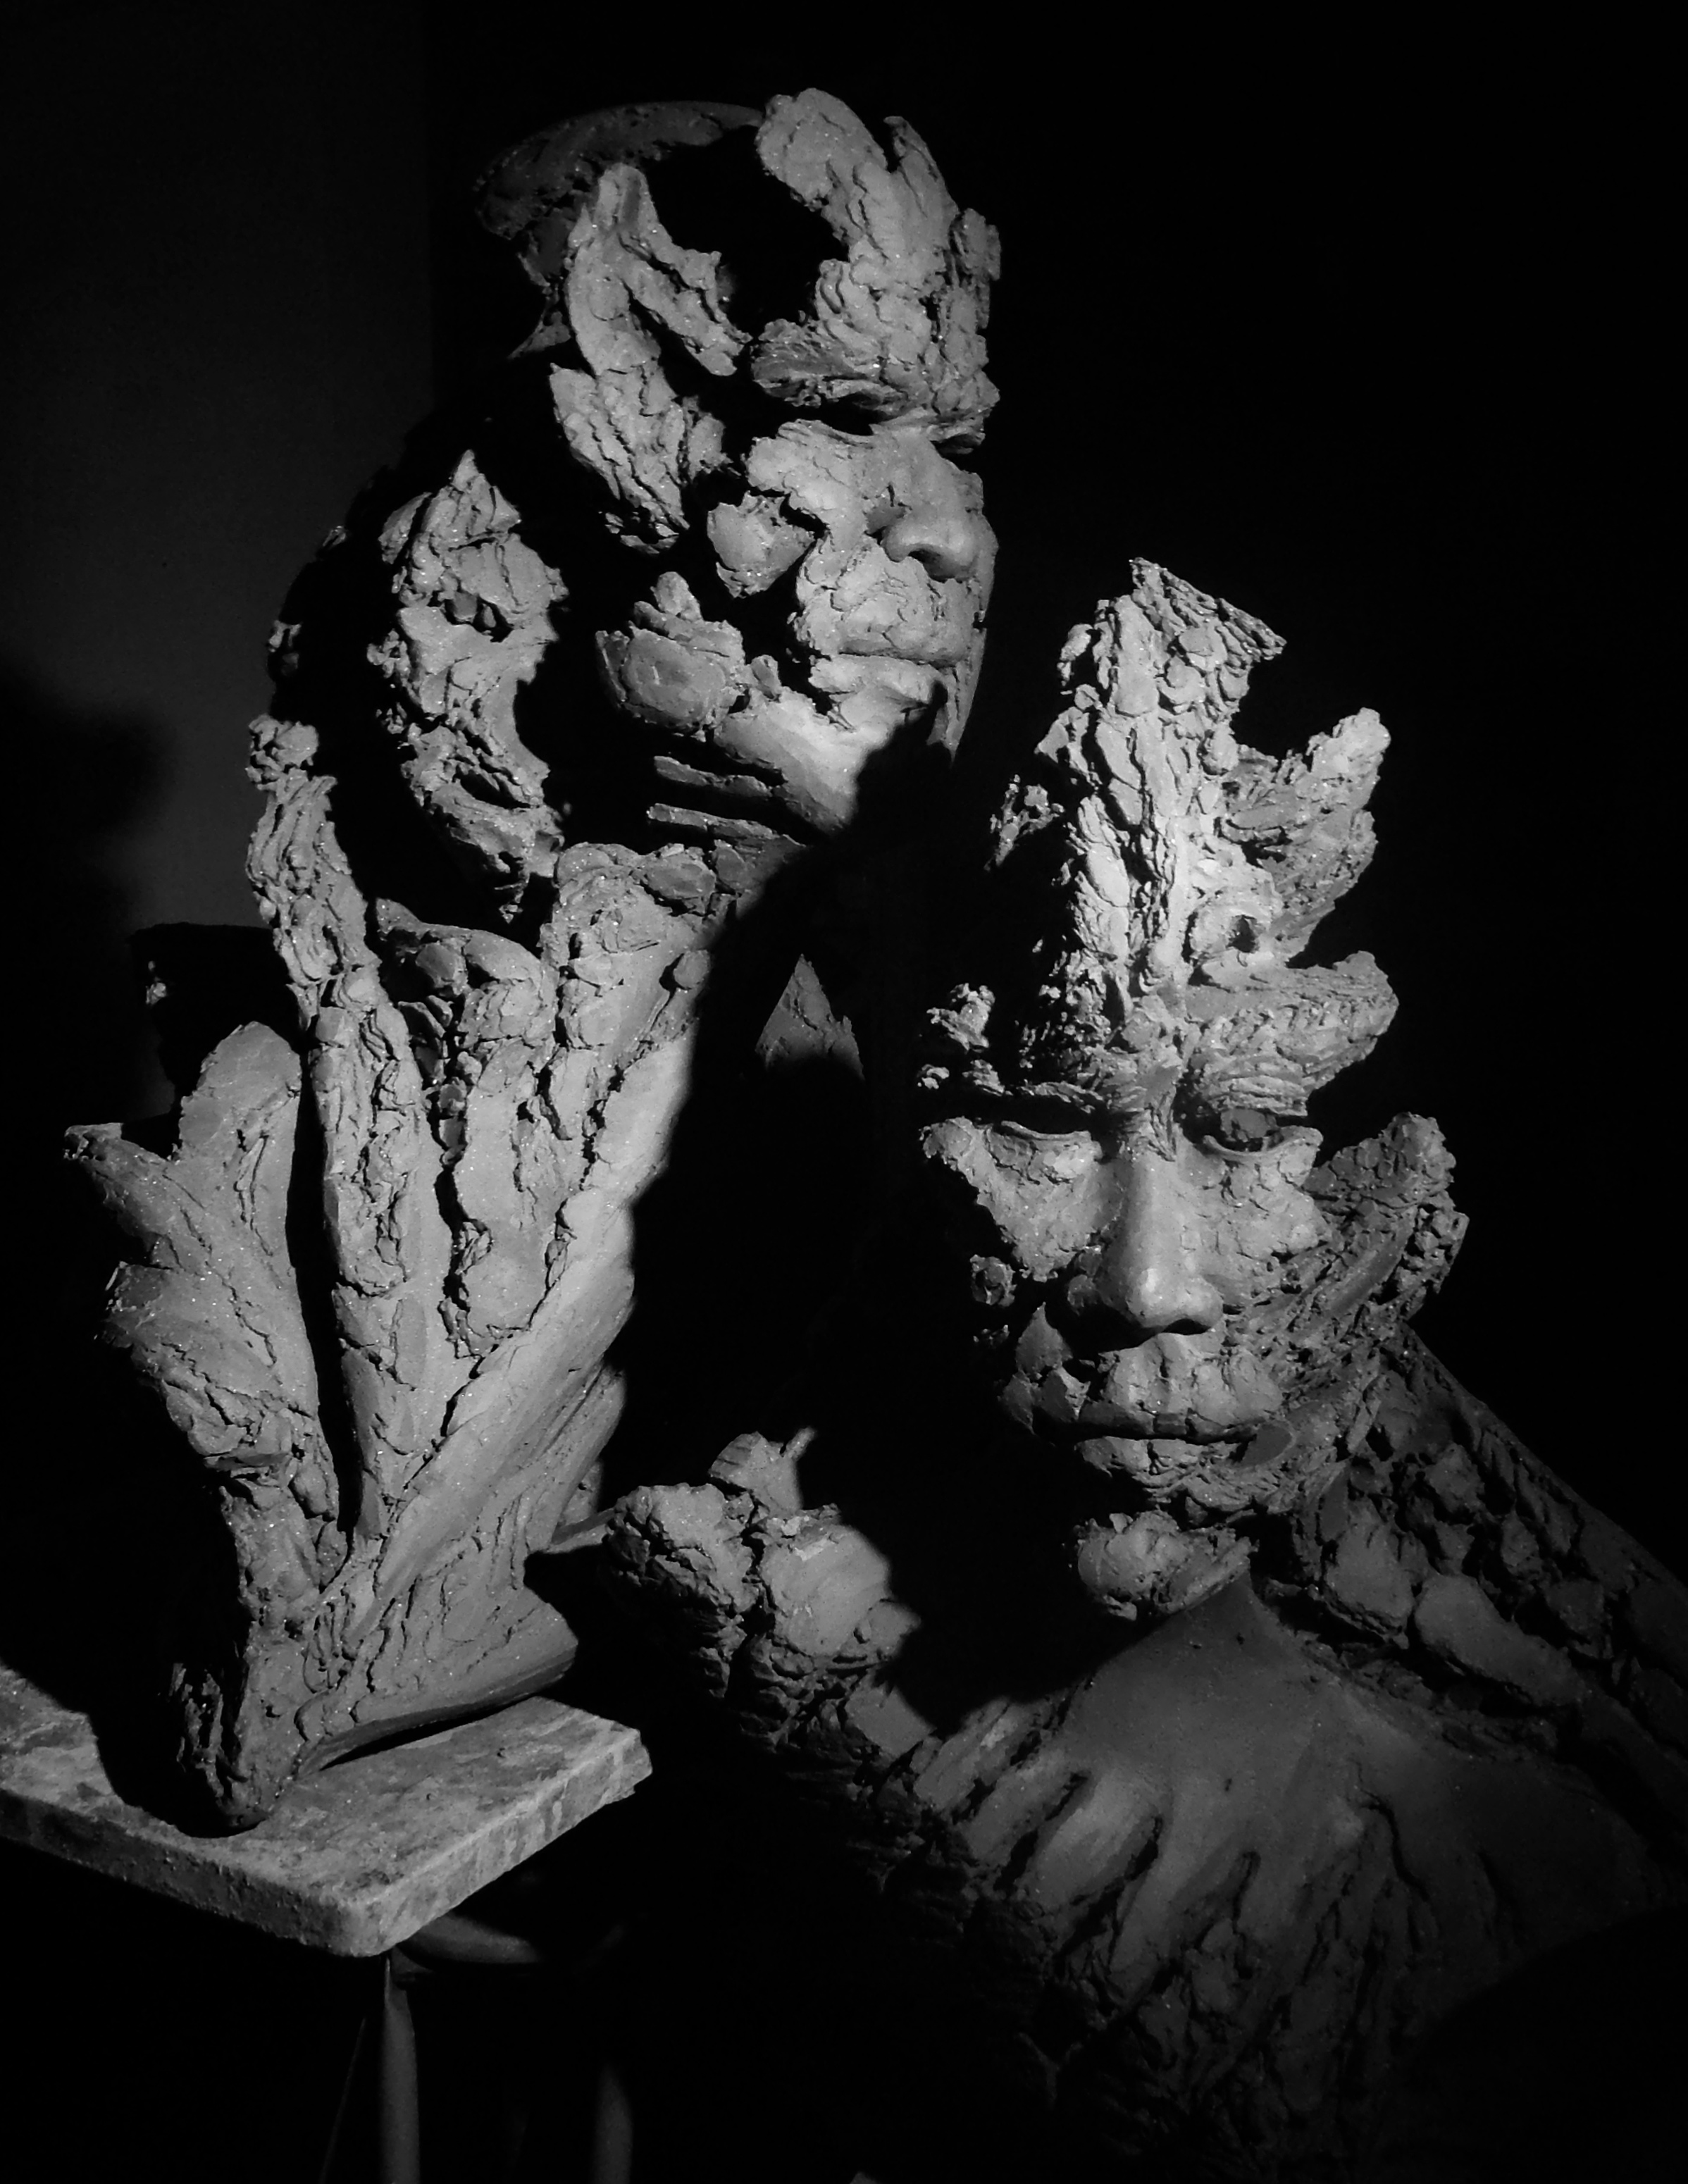
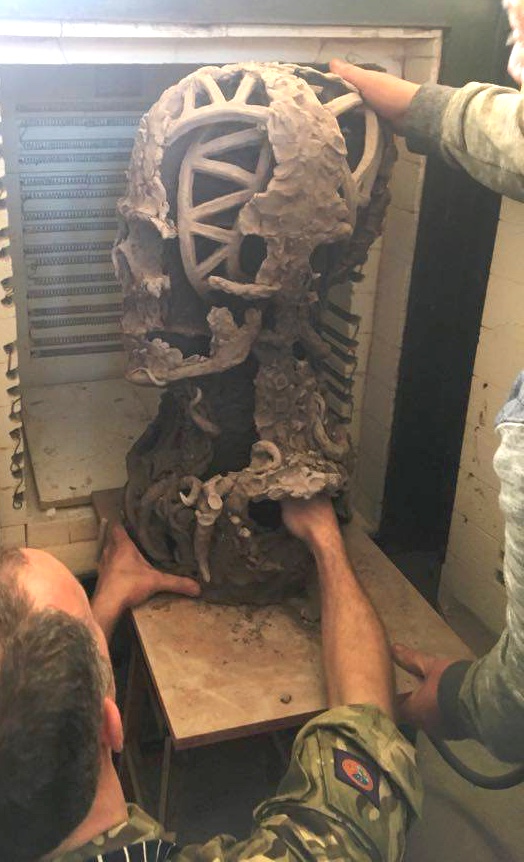
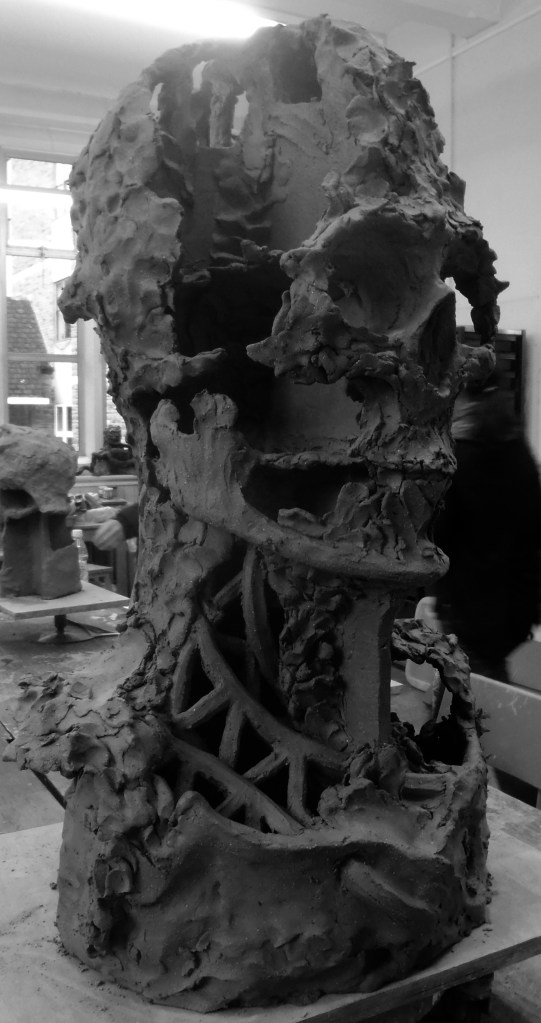
Frame-works for The Wyvern IV and, in the back ground, The Leviathan.
These Armatures or ‘frameworks’ were planned to be very much part of the fractured image. But the ‘corrugation’ and circular holes you can see are strengthening the Armature and would be very suitable to an armature that would ultimately be hidden. Playing around with these Armatures lead the Sculptures in un-anticipated directions.
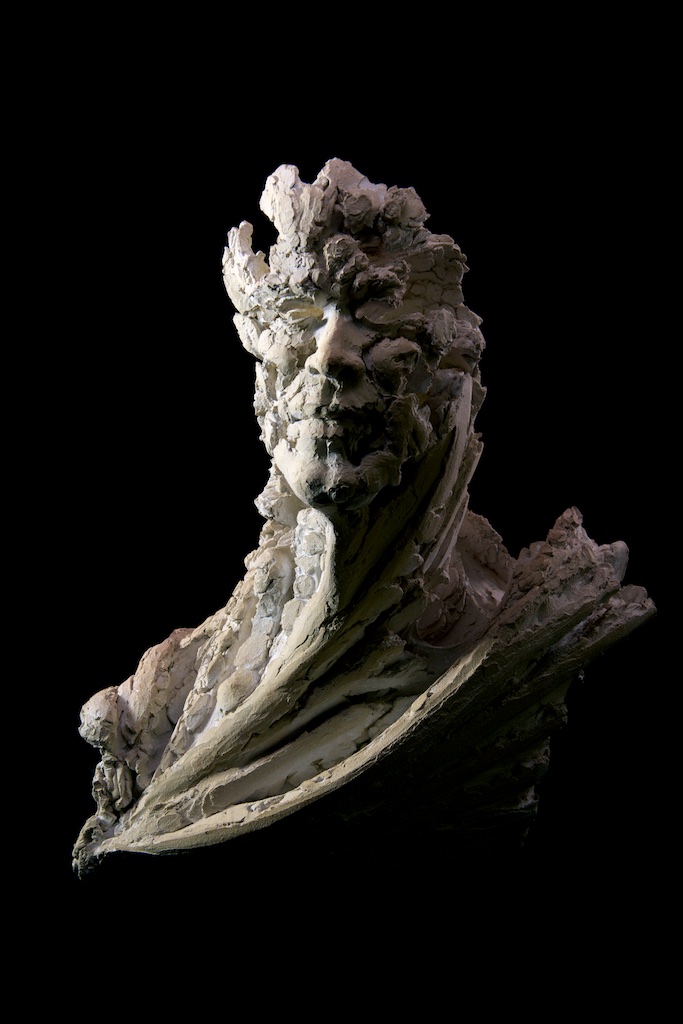
The Wyvern and The Leviathan. in progress, Sept 2014.
Here are some work-sheets you can print off and use.
In February 2016 we ran this Workshop again but on Day 2 we played more freely. We still covered the essentials. I’ll add Workshop photos over time because you will find looking at how other people have handled it helpful and the variety inspiring.
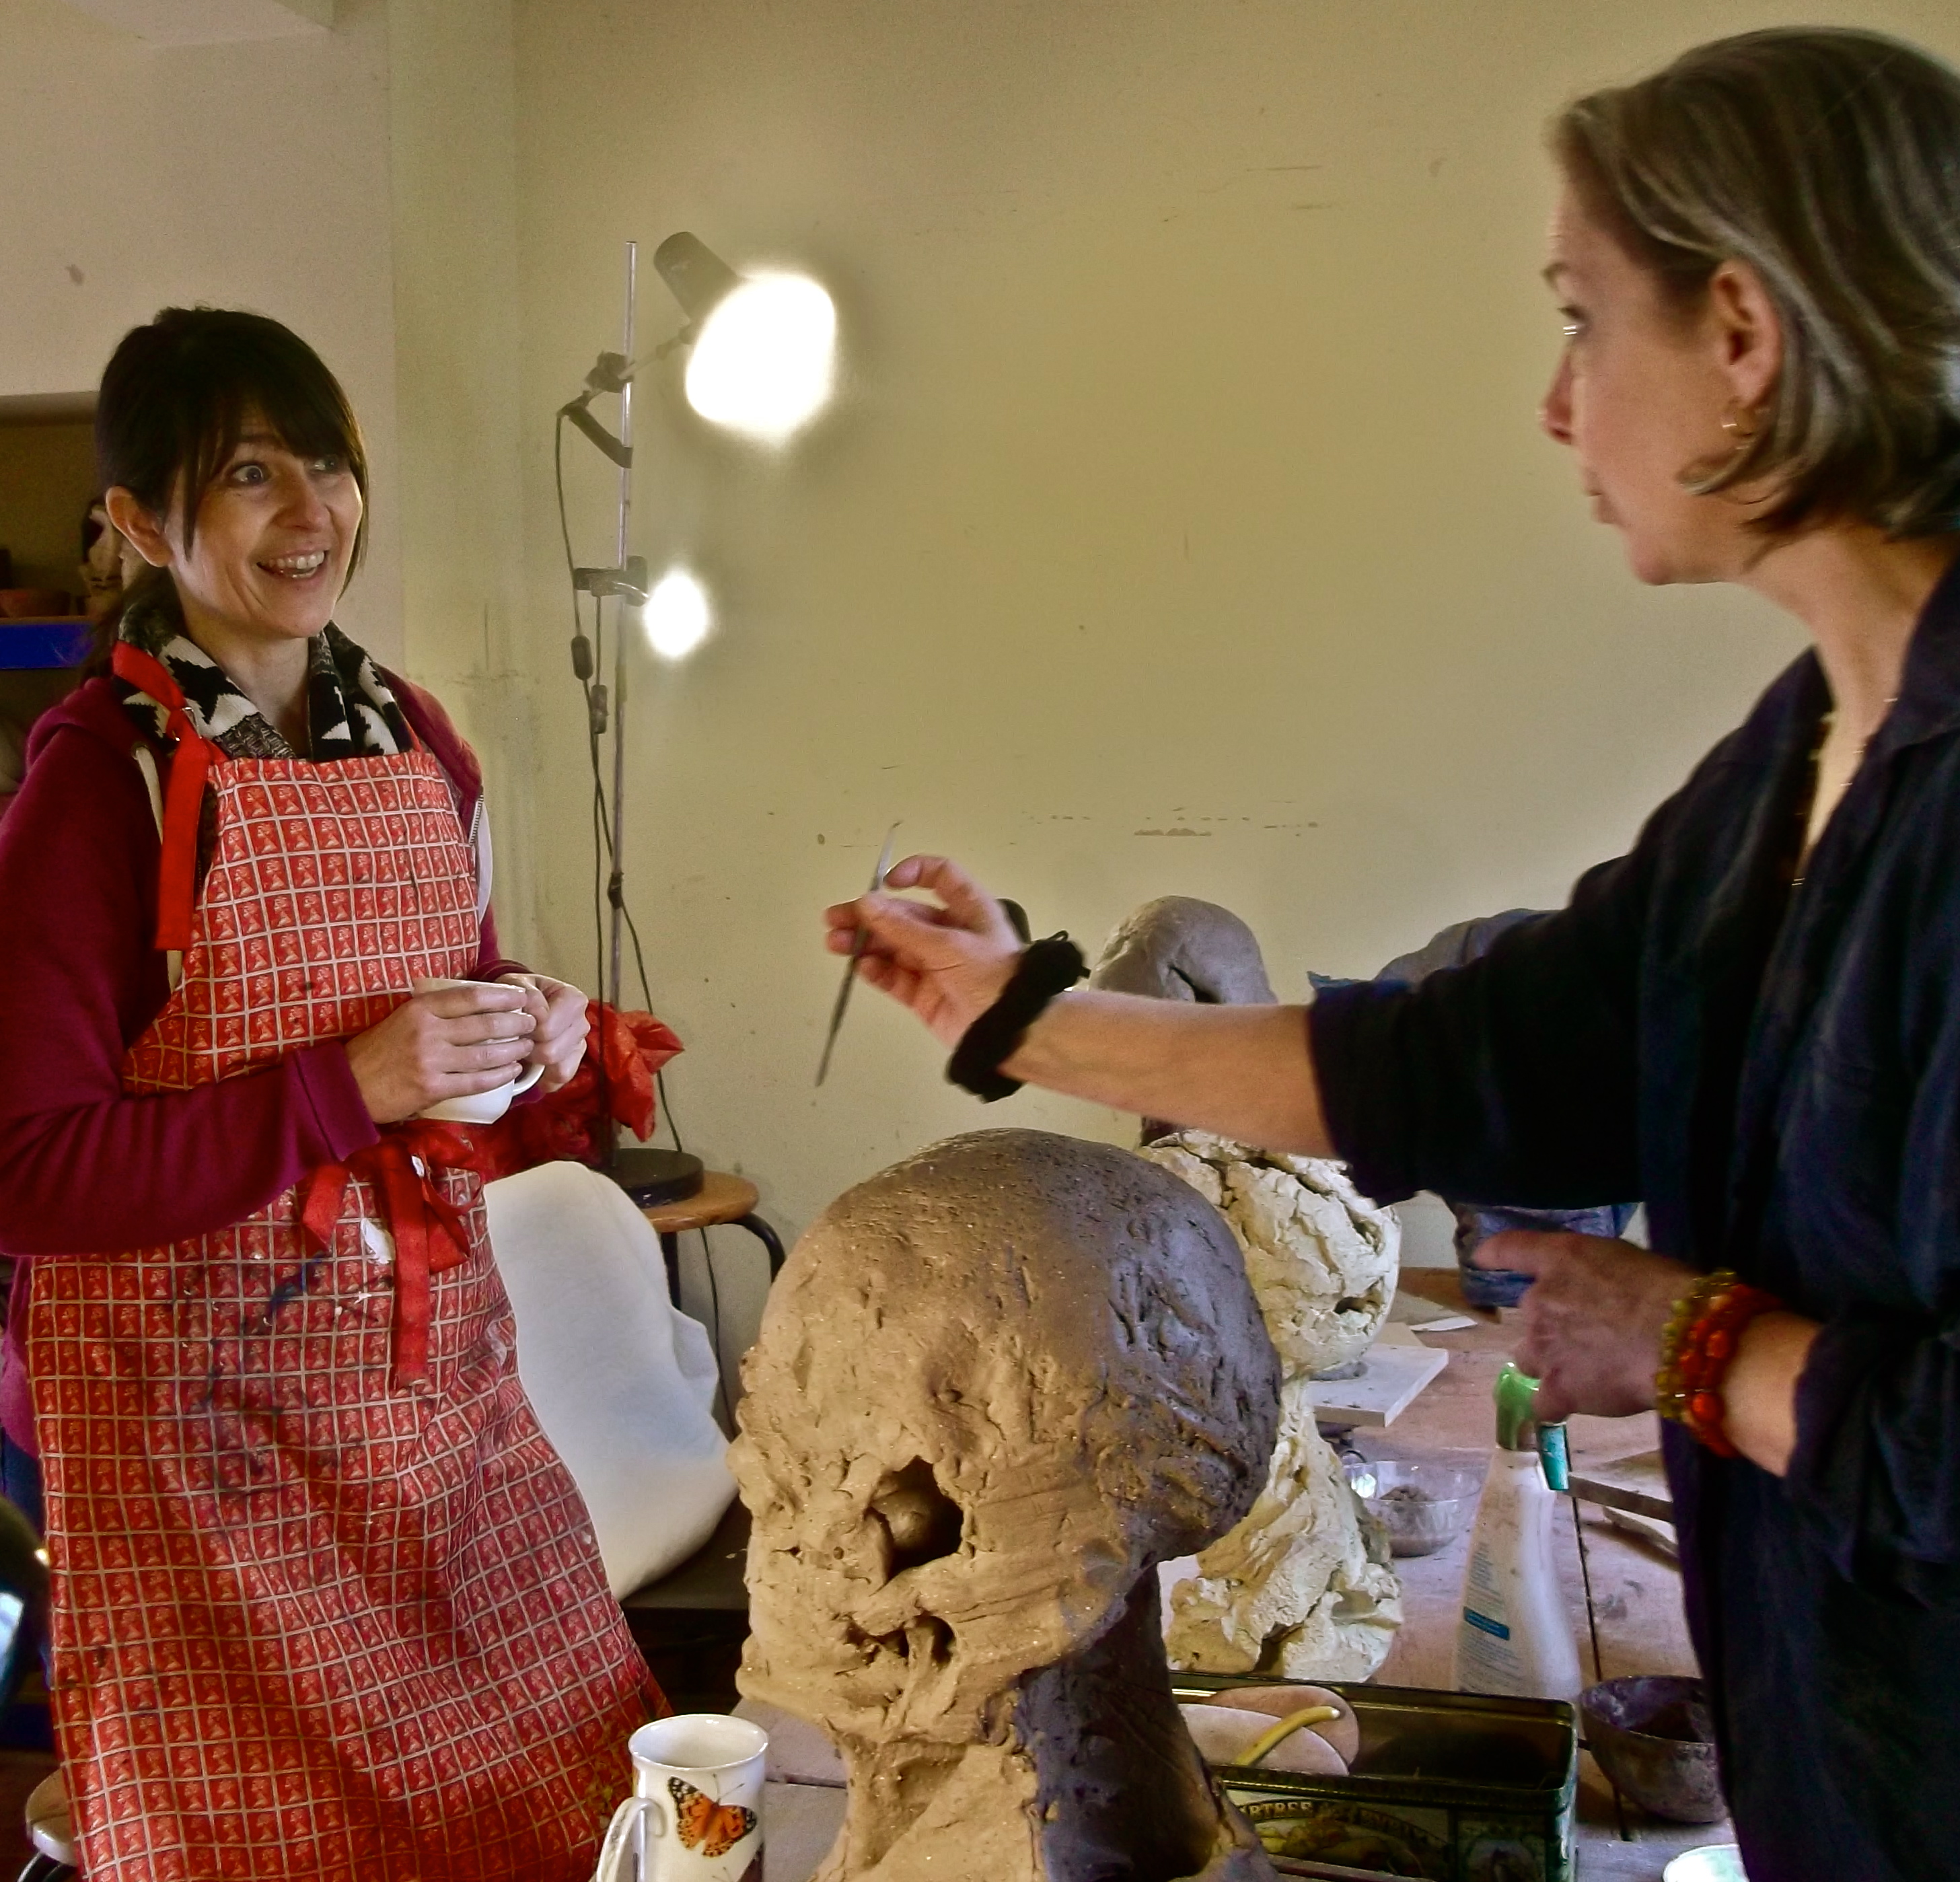
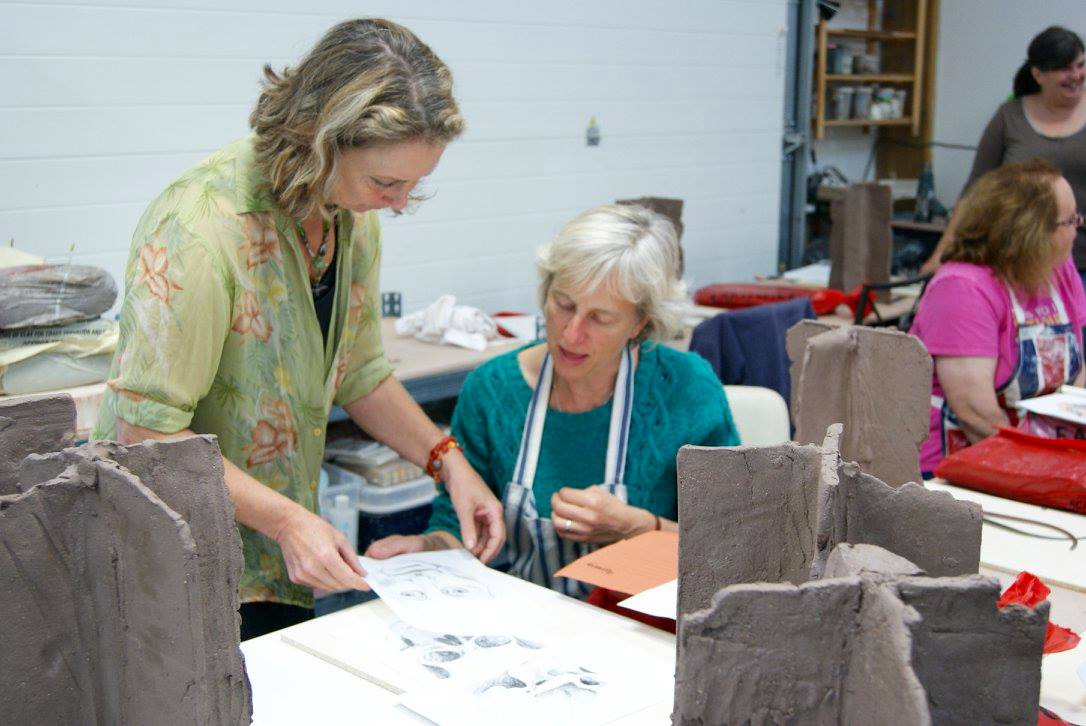
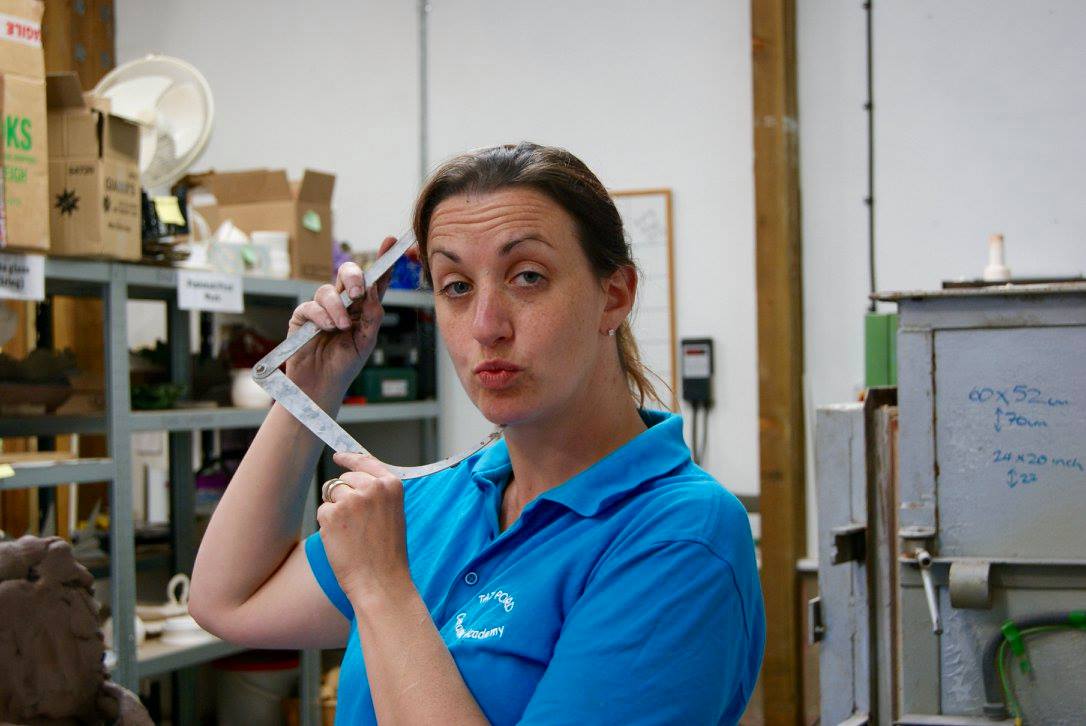
September 2016, I ran a Masterclass with the wonderful North Devon Ceramics Academy & Studio. Taz Pollard and Nicola Crocker run an excellent Studio making their own work and giving very popular classes in pottery and hand-building. They have created a lovely, business- like space with an open, welcoming atmosphere that leads everyone into making their best work. They will be running Masterclasses, workshops and classes regularly, in all aspects of ceramics and it was a pleasure to work with them. We packed a massive amount of work into one day and group worked their butts off. Taz and Nicola kept everyone afloat with delicious, home-made food, drinks and humour.
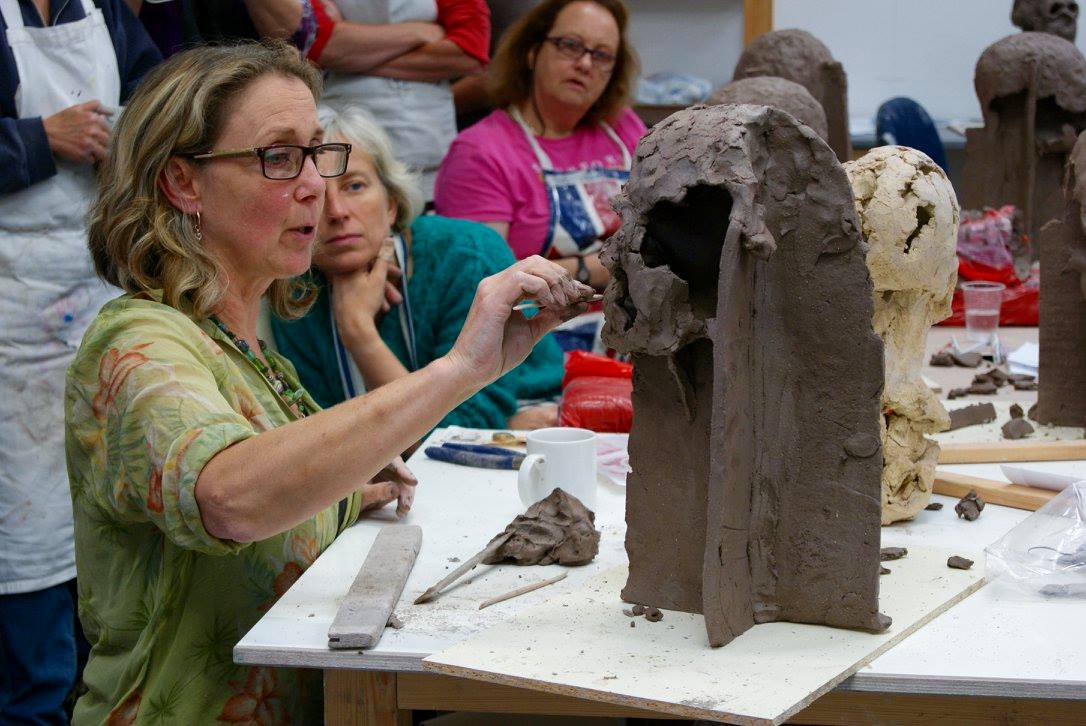
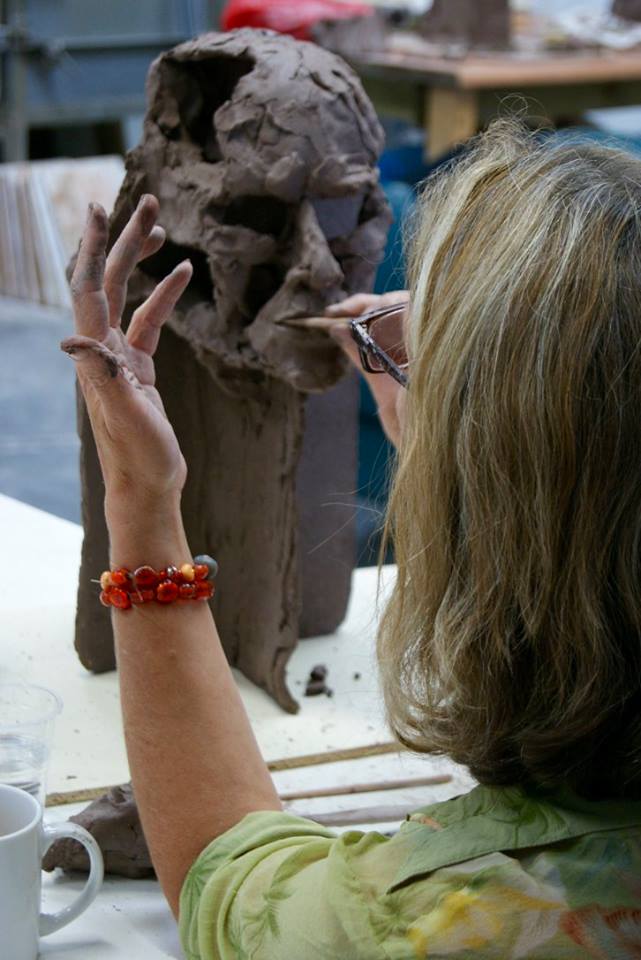
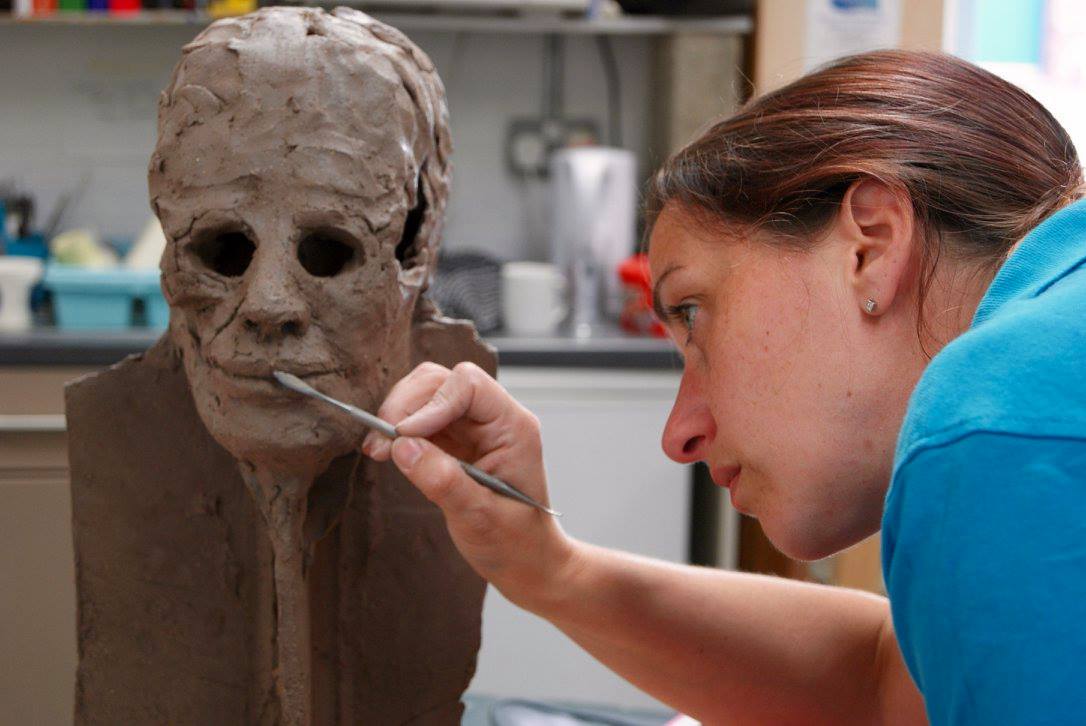
Masterclass with Rebecca Buck, North Devon Ceramics Academy & StudioMasterclass with Rebecca Buck, North Devon Ceramics Academy & StudioMasterclass with Rebecca Buck, North Devon Ceramics Academy & StudioMasterclass with Rebecca Buck, North Devon Ceramics Academy & StudioMasterclass with Rebecca Buck, North Devon Ceramics Academy & StudioMasterclass with Rebecca Buck, North Devon Ceramics Academy & StudioMasterclass with Rebecca Buck, North Devon Ceramics Academy & StudioNorth Devon Ceramics Academy & StudioNorth Devon Ceramics Academy & StudioNorth Devon Ceramics Academy & StudioNorth Devon Ceramics Academy & Studio
Art teacher Sheila Mone and her lovely, forward looking department head Matt Peake, invited me to Monmouth School to work with their A Level students. The school has a set of very handsome studios and the quality student work reveals that this Art Department understands the important contribution and highly transferable skill set that art brings to a pupil.
We had 12 hours over 2 days and the work would be completed over the rest of the following weeks. The frameworks were beautifully made a few days in advance and left to stiffen. Day 1 was the skull with full measuring and day 2 was open with the only condition being that the eyes/mouth/nose placements were maintained. Some had photos to work from and I was pleased at the care and thought these students had put into their interpretation, bringing in themes and messages. Most of them had done very little clay work before! So it was a leap into the deep-end and they achieved a fantastic amount through intensive hard work. Wonderful! I went home on cloud nine!
Monmouth School A level students 2 day Workshop with Rebecca Buck. Sheila Mone talking through ideas with this student while the others listen in and collect information. These guys have great study skills.
Monmouth School A level students 2 day Workshop with Rebecca Buck. Tony blocking out the skull in preparation for a portrait of Donald Trump.
With both of these heads the pupils used photos, aimed for a likeness. Setting boundaries like this will really help you to progress. The head in the back then went on to be beautifully stylised. The excellent head in front is based on Mohammed Ali. You can feel the strength and dignity of the man.
Robert moving forward from blocking out the skull to setting the key high points on the bones on the right plain.
Monmouth School A level students 2 day Workshop with Rebecca Buck. Wilfred tidying the frame in preparation for developing the face. Because time was tight we left out the back of the head. This makes developing the head more difficult and I don’t recommend it. But handled stylishly it can look great.
Monmouth School A level students 2 day Workshop with Rebecca Buck. An excellent level of concentration.
Monmouth School A level students 2 day Workshop with Rebecca Buck. After giving general instruction I go one-to-one as much as possible. I aim to guide each student towards their own ‘voice’ in building, theme, and modelling style.
Monmouth School A level students 2 day Workshop with Rebecca Buck. Wilfred has a good selection of views of his model . A selection of images from different angles is invaluable.
Monmouth School A level students 2 day Workshop with Rebecca Buck. Really difficult to pull off but a great challenge is 1/2 skull 1/2 face. This brave student had a steady, methodical approach that is ideal in portraiture.
Monmouth School A level students 2 day Workshop with Rebecca Buck. Harry had already done a very good head after looking through this post. And he has used clay on large pieces. So this time he chose to work double the size. Take your measurements and use a ruler to double them. Do not attempt to do it by eye. Larger than life heads carry an immediate power. It’s a great scale if you have a message to convey.
Harry’s piece just fits in the kiln!Harry’s next head. Fantastic work on the very difficult area of the shoulders/base.
Monmouth School A level students 2 day Workshop with Rebecca Buck. The dark, haunting eyes in the photo were done by this very skilled student, Robert, by cutting through and harnessing the dark interior of the head. Really effective and evocative.
Monmouth School A level students 2 day Workshop with Rebecca Buck. Rhianna had a powerful image of an elderly homeless man and wanted to portray his story. She left the eyes empty but cut smaller holes through the back of the head behind the eye-level telling an inner, nearly hidden narrative.
Monmouth School A level students 2 day Workshop with Rebecca Buck.
Monmouth School A level students 2 day Workshop with Rebecca Buck. The art department assistant, Kate Owens, beautiful use of clay.
Monmouth School A level students 2 day Workshop with Rebecca Buck. Kate Owens.
Monmouth School A level students 2 day Workshop with Rebecca Buck. Harry’s theme here is a simple “contrast hard geometric form with organic form.” The size, the forward unyielding gaze, the beautiful, enchanting modelling style, the flow of the geometric inner form and the places where it mimics the natural structure of a head evoke a mysterious presence.
Monmouth School A level students 2 day Workshop with Rebecca Buck.
Monmouth School A level students 2 day Workshop with Rebecca Buck.
Monmouth School A level students 2 day Workshop with Rebecca Buck. Sheila Mone helped her students and worked on her own fascinating bust.
Monmouth School A level students 2 day Workshop with Rebecca Buck. Excellent modelling skills and empathetic sensitivity are giving this moving image sculptural form.
Monmouth School A level students 2 day Workshop with Rebecca Buck. This a stylish, contemporary design for the base. It is very difficult to handle the truncated aspects of the bust. There are various ‘classic’ motifs that work really well but it’s very refreshing to see a new approach. This piece was then taken further to become this beautifully
The piece above was then taken further to become this beautifully defined character.
Monmouth School A level students 2 day Workshop with Rebecca Buck. A few of the guys had to leave early including the student doing a superb job of Mohamed Ali using a beautiful, sophisticated modelling technique. The head of Donald Trump is being handled with great skill and thoughtfulness by another student. In each case they are aiming to capture the inner life of the man not just his shell. Of course this is very difficult but the challenge is engrossing and very satisfying and having a particular direction will get you through the many intimidating intersections on the road to a portrait. Art department Head Matt Peake worked alongside his students on the wonderful, humorous self portrait you can see front, right of this photo. The wide variety of approaches were a credit to the Art Department and the wider school.
Monmouth School A level students 2 day Workshop with Rebecca Buck.


Thank you! Can’t wait to spend some time with this!
LikeLike