Building Brick Sculptures on a Monumental Scale.

Whole buildings are built from clay-mud all over the world. They last for centuries and can be huge. They are all built  basically like coil-pots.

I build the structure of the big sculptures in much the same way, add on  the artwork and  then cut them up (hollowing where necessary) for firing. These days I use this method for most of my sculpture but with smaller pieces (under 2 metres)I work quite intuitively. The big ones you need to plan like a military campaign because supports will need to be built in from the outset in order to be rigid enough to work and to cut the piece up. Budgets must be stuck to and Volunteer’s time is very precious.

Parc Calon Lan, Blaengarw , South Wales

Calon Lan, Parc Calon Lan, Blaengarw, South Wales.

Ocean Colliery Pit Marker,5m long x 2 m high, Blaengarw ,South Wales

Ocean Colliery Pit Marker, 5m long x 2 m high, Blaengarw, South Wales.

This is a very different method from building with un-fired Bricks, which is mostly a subtractive, carved process. Using the raw clay allows for a lot of adding and modelling. They are both great techniques and Gwen Heeney’s excellent book ”Brickworks” is well worth reading. It is full of good advice.

Llanharran's hourse and Cefn Pennar's Dragon,in Groundwork's Polytunnel,Aberdare.

Llanharran’s horse and Cefn Pennar’s Dragon,in Groundwork’s poly-tunnel, Aberdare.

After talks/workshops with the local community, research, writing a plan-of-work, time-table  and making a  Scale Model, draw the out-line of the sculptures foot-print onto the floor.

Using very soft  Brick-clay  lay down first layer at around 5 cm thick. Allow to stiffen. Soften top edge w/ water, rub to a slip, add next layer (approx 10kg clay ‘coil’ 40cm long), ensure good join, draw the clay upwards. You can get about 30 cm in height. You can lay a strip of plastic along the top to keep that edge soft for the next join. Joints must be perfect so that the final sections are strong enough to handle.

Calon Lan ;1/2 way up, basement of the Sculpture Studio,Katie St,Blaengarw.

Calon Lan; 1/2 way up, basement of the Sculpture Studio, Katie St, Blaengarw.

Note the finger marks; leave these: use them as strengthening for the walls in the manner of corrugation.

Calon Lan,Blaengarw

Calon Lan,Blaengarw

Inner ‘Support Walls’ are built thinner, inside the form. Clay supports shrink with the Sculpture. They will be discarded and re-cycled when the Sculpture is cut up.

Memorial to Gito Neath Bran ,Llanwonno,built w/ Groundwork Aberdare

Memorial to Guto Nyth Bran, Llanwonno, built w/ Groundwork Aberdare.

Like all coil-pots, lower sections are wrapped in plastic to prevent over-drying; you will need to be able to cut through all layers so they must not get too hard and over-drying/shrinking will cause nightmare cracks. The thickness of the walls can be reduced as you go up to reduce weight.

Memorial to Gito Nith Bran,Llanwonno,

Memorial to Guto Nyth Bran, Llanwonno.

Chunks of memory-foam can be put inside to support horizontal walls; the foam will shrink w/ the clay.

Memorial for Maerdy Workingman's Hall built in the Polytunnel w/ Groundwork,Aberdare

Memorial for Maerdy Workingman’s Hall built in the polytunnel w/ Groundwork Aberdare. On the bottom-left of this sculpture you can see a clay support holding up that leaning wall, built in from the first layer. This will be removed once the huge weight (2 tons) of the upper parts of the sculpture are cut away during the dismantling .


Balarat Pit Marker built in Pontycymmer w/ The Creation Development Trust , Blaengarw

Balarat Pit Marker built in Pontycymmer w/ The Creation Development Trust , Blaengarw

Wooden supports can’t shrink w/ the form so may cause bad cracks but they have their place.

Balarat Pit Marker

Balarat Pit Marker

We made 7 adjustable metal/plank brackets to support a wall that leaned outwards by nearly 40 degrees. They had to stay in place until upper sections were removed. There are whole sofa cushions inside supporting the roof!

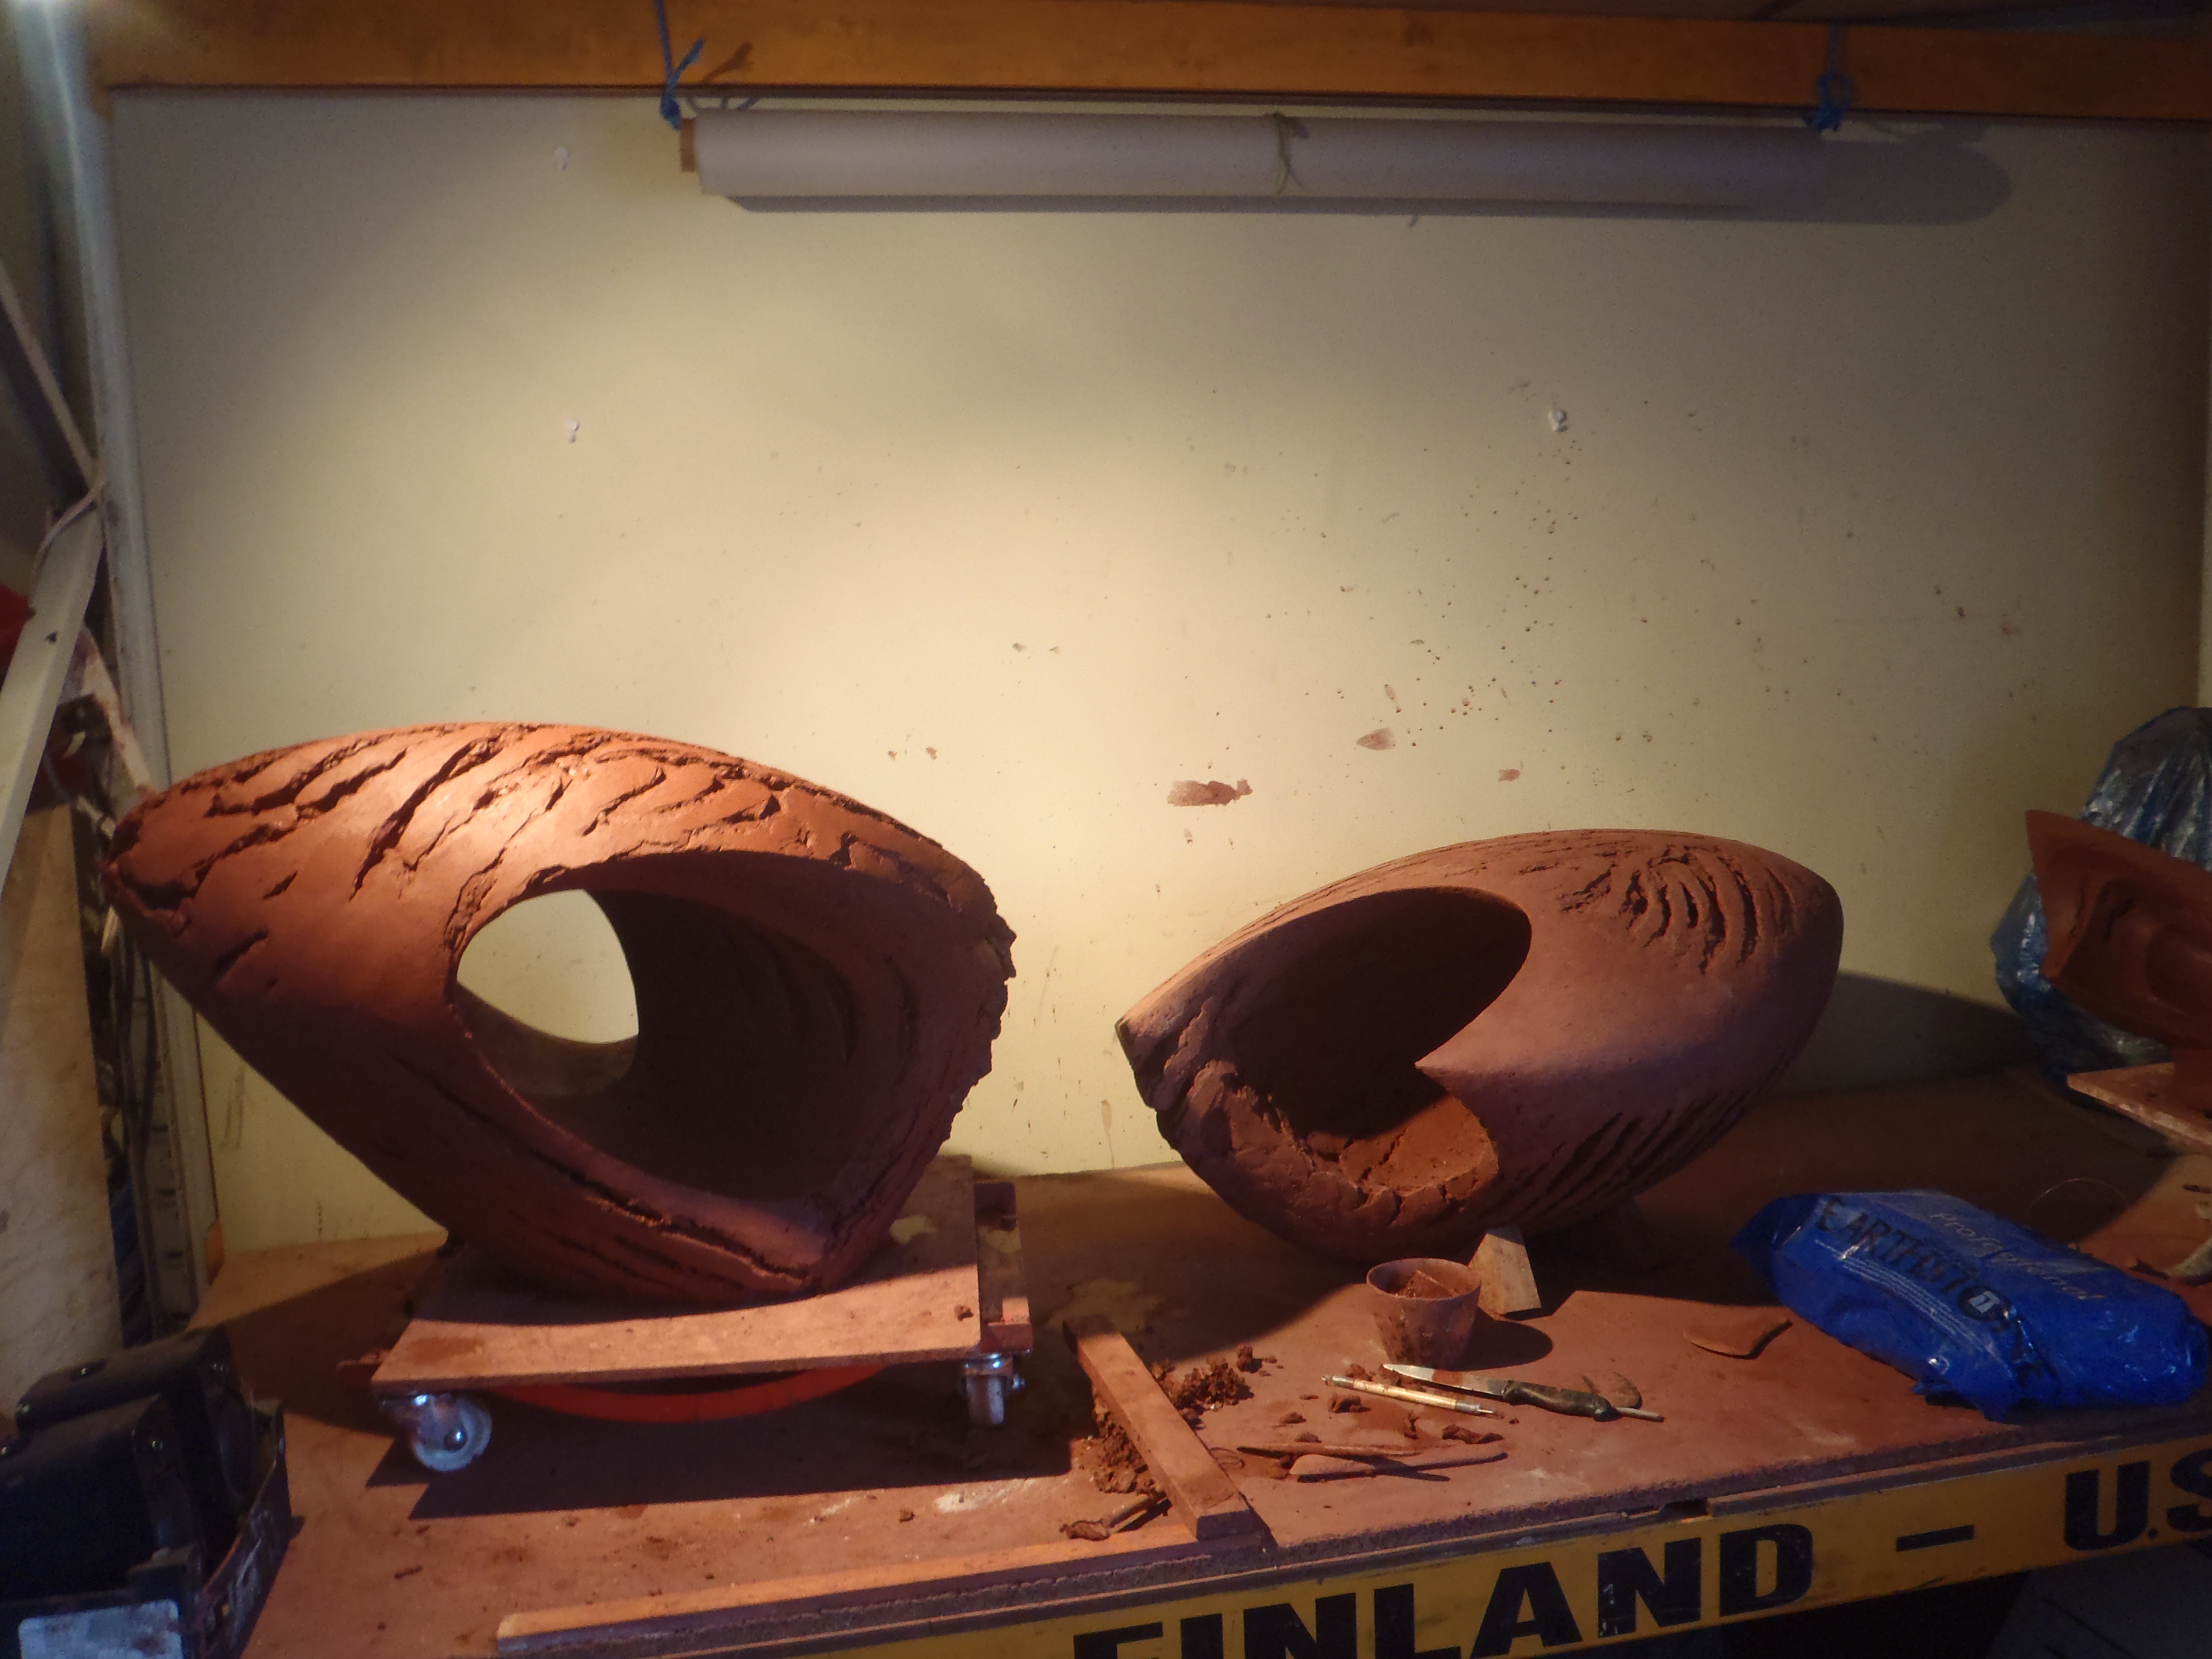
Balarat is 6 metres long x 2 m high and took 7 tons of clay. We built it at the same time as Ocean Colliery Pit Marker (5m long, 5 tons of clay), seen in the background. There is a lot of drying (timing is everything) so having 2 on the go really maximises the use of your budget; we were able to build and install these both for £40,000. Countless wonderful people were involved and it all took over a year.

The Sirhowy Wyvern built w/ Time Banking Wales,Tredegar.

The Sirhowy Wyvern built w/ Time Banking Wales, Tredegar.

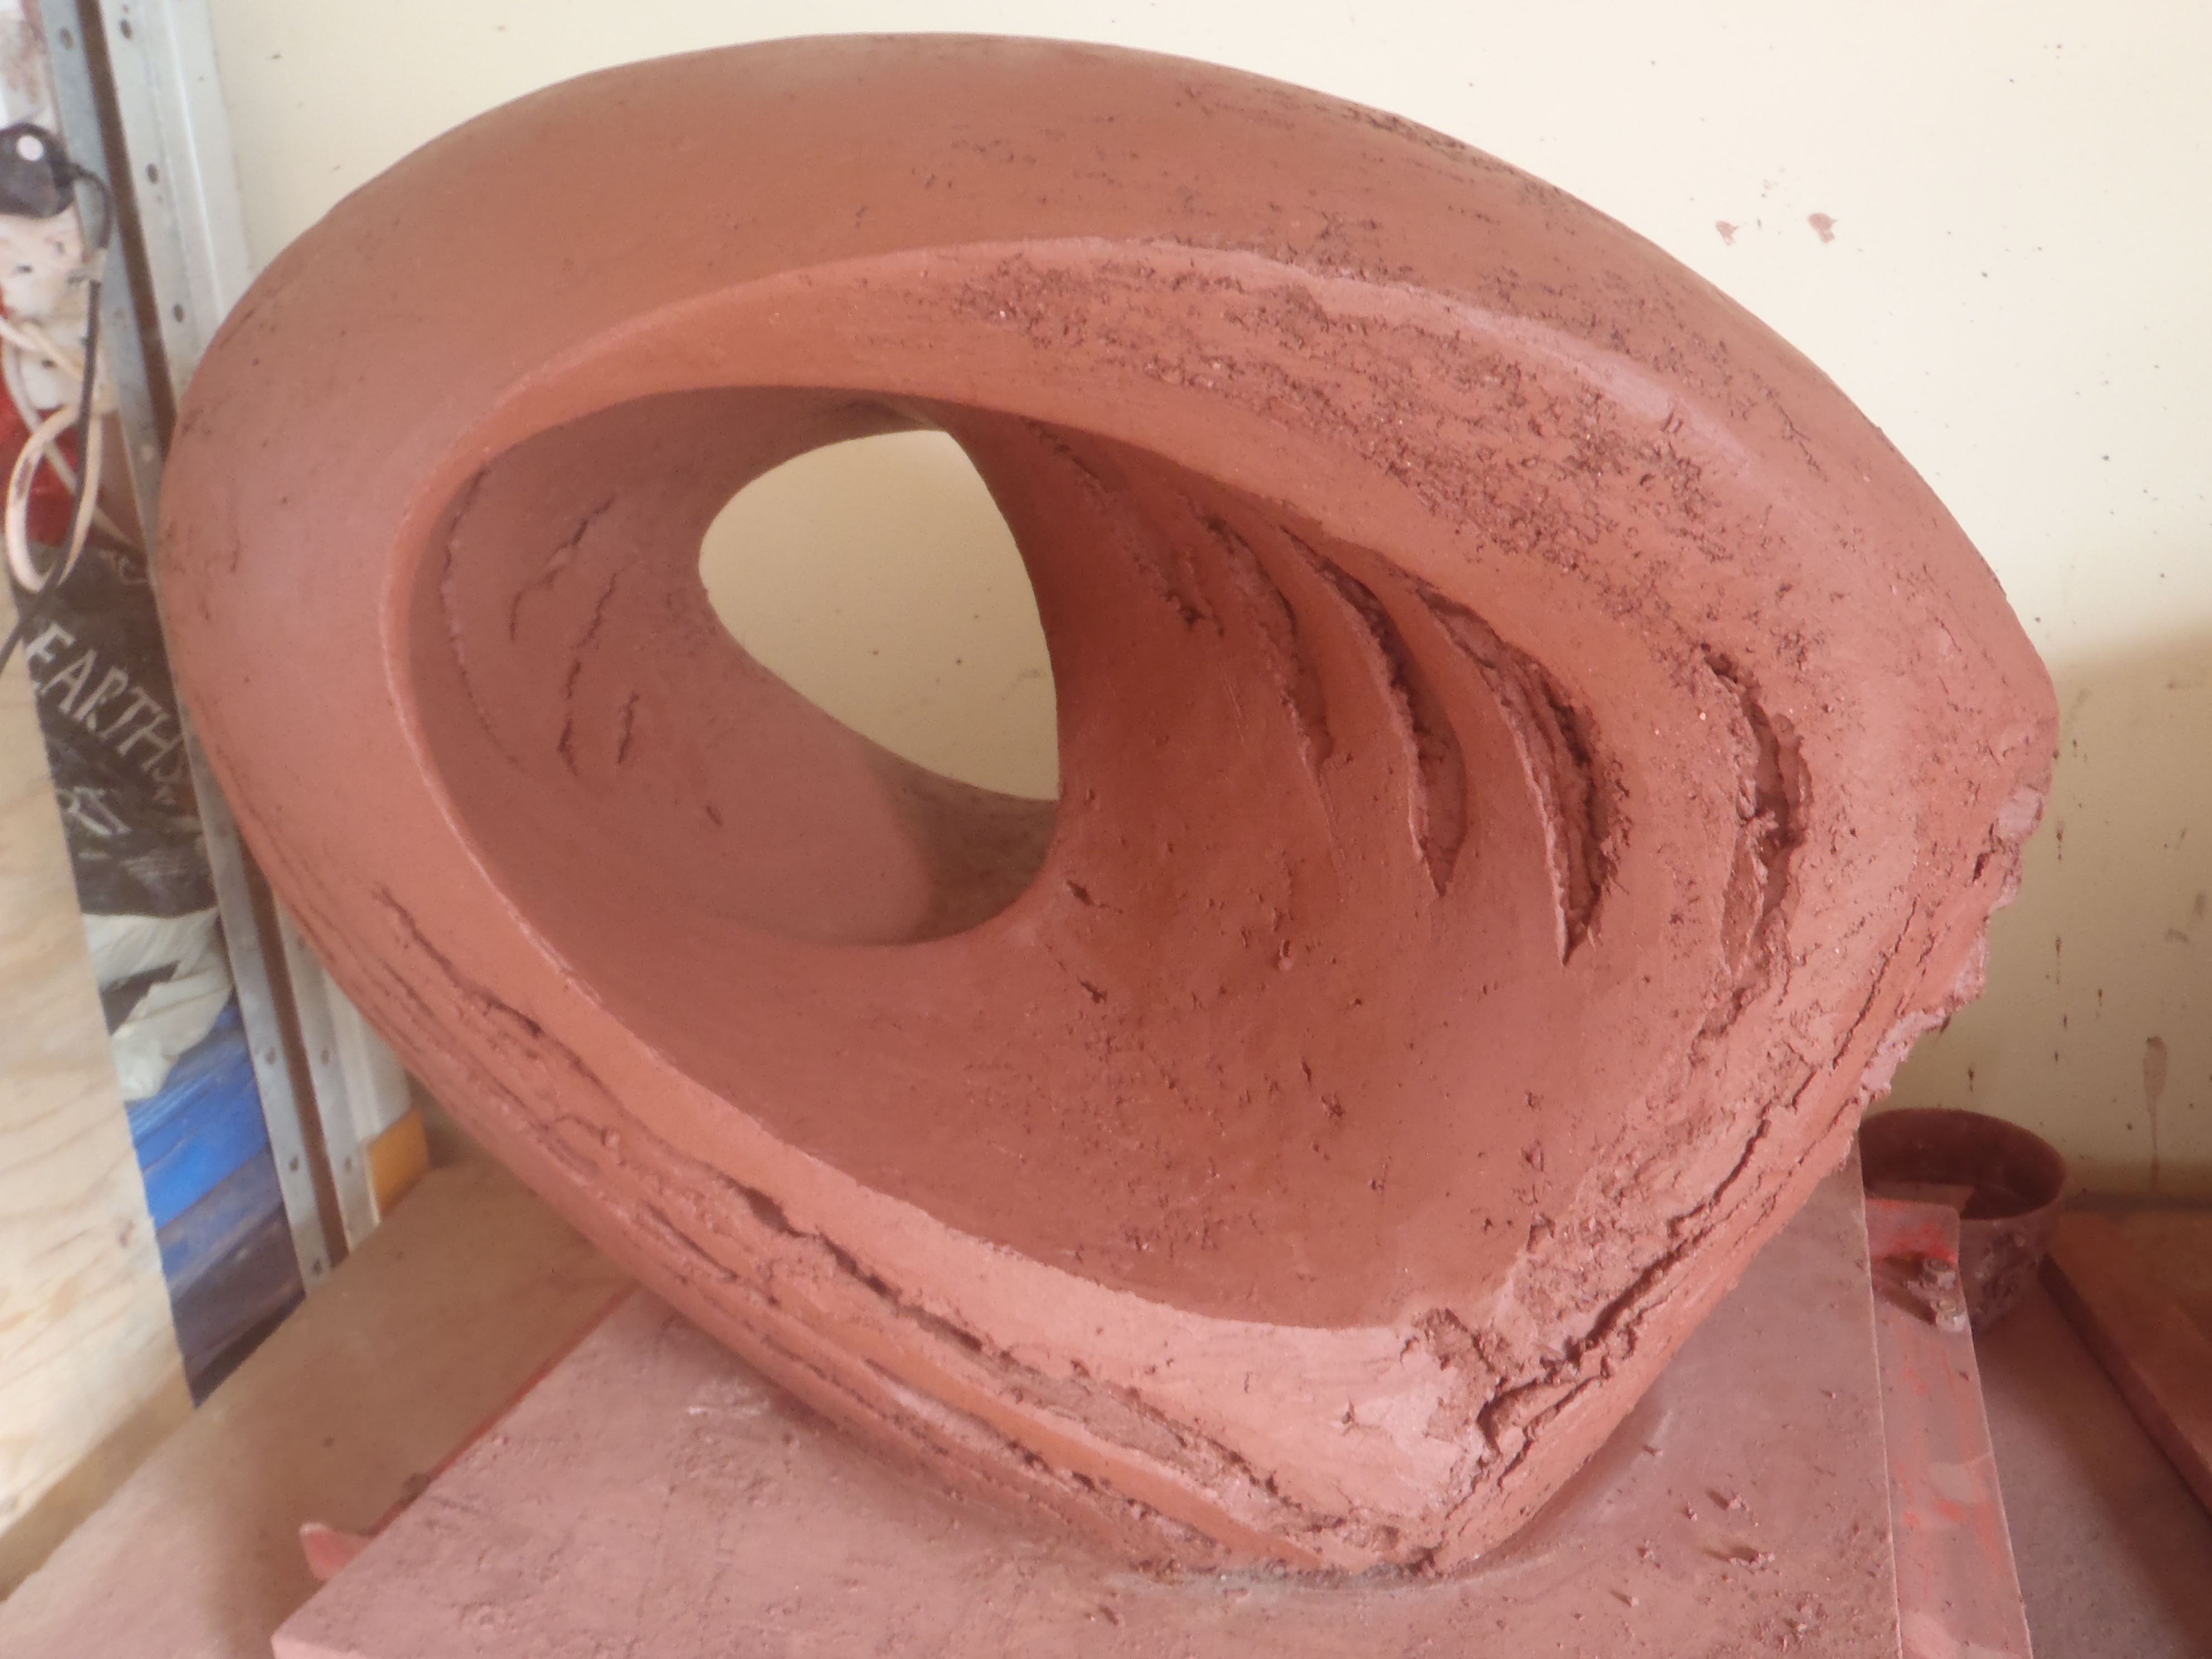
The Sirhowy Wyvern has a tunnel running through it (with art-work inside of children working in coal mines, some done by kids like these awesome girls from the Youth Club). We had one clay support-wall half way along to support the roof and this allowed us to get inside from either end to work.

Gito Nith Bran Memorial detail; the Salmon,oldest and wisest of all the creatures in Celtic Mythology.

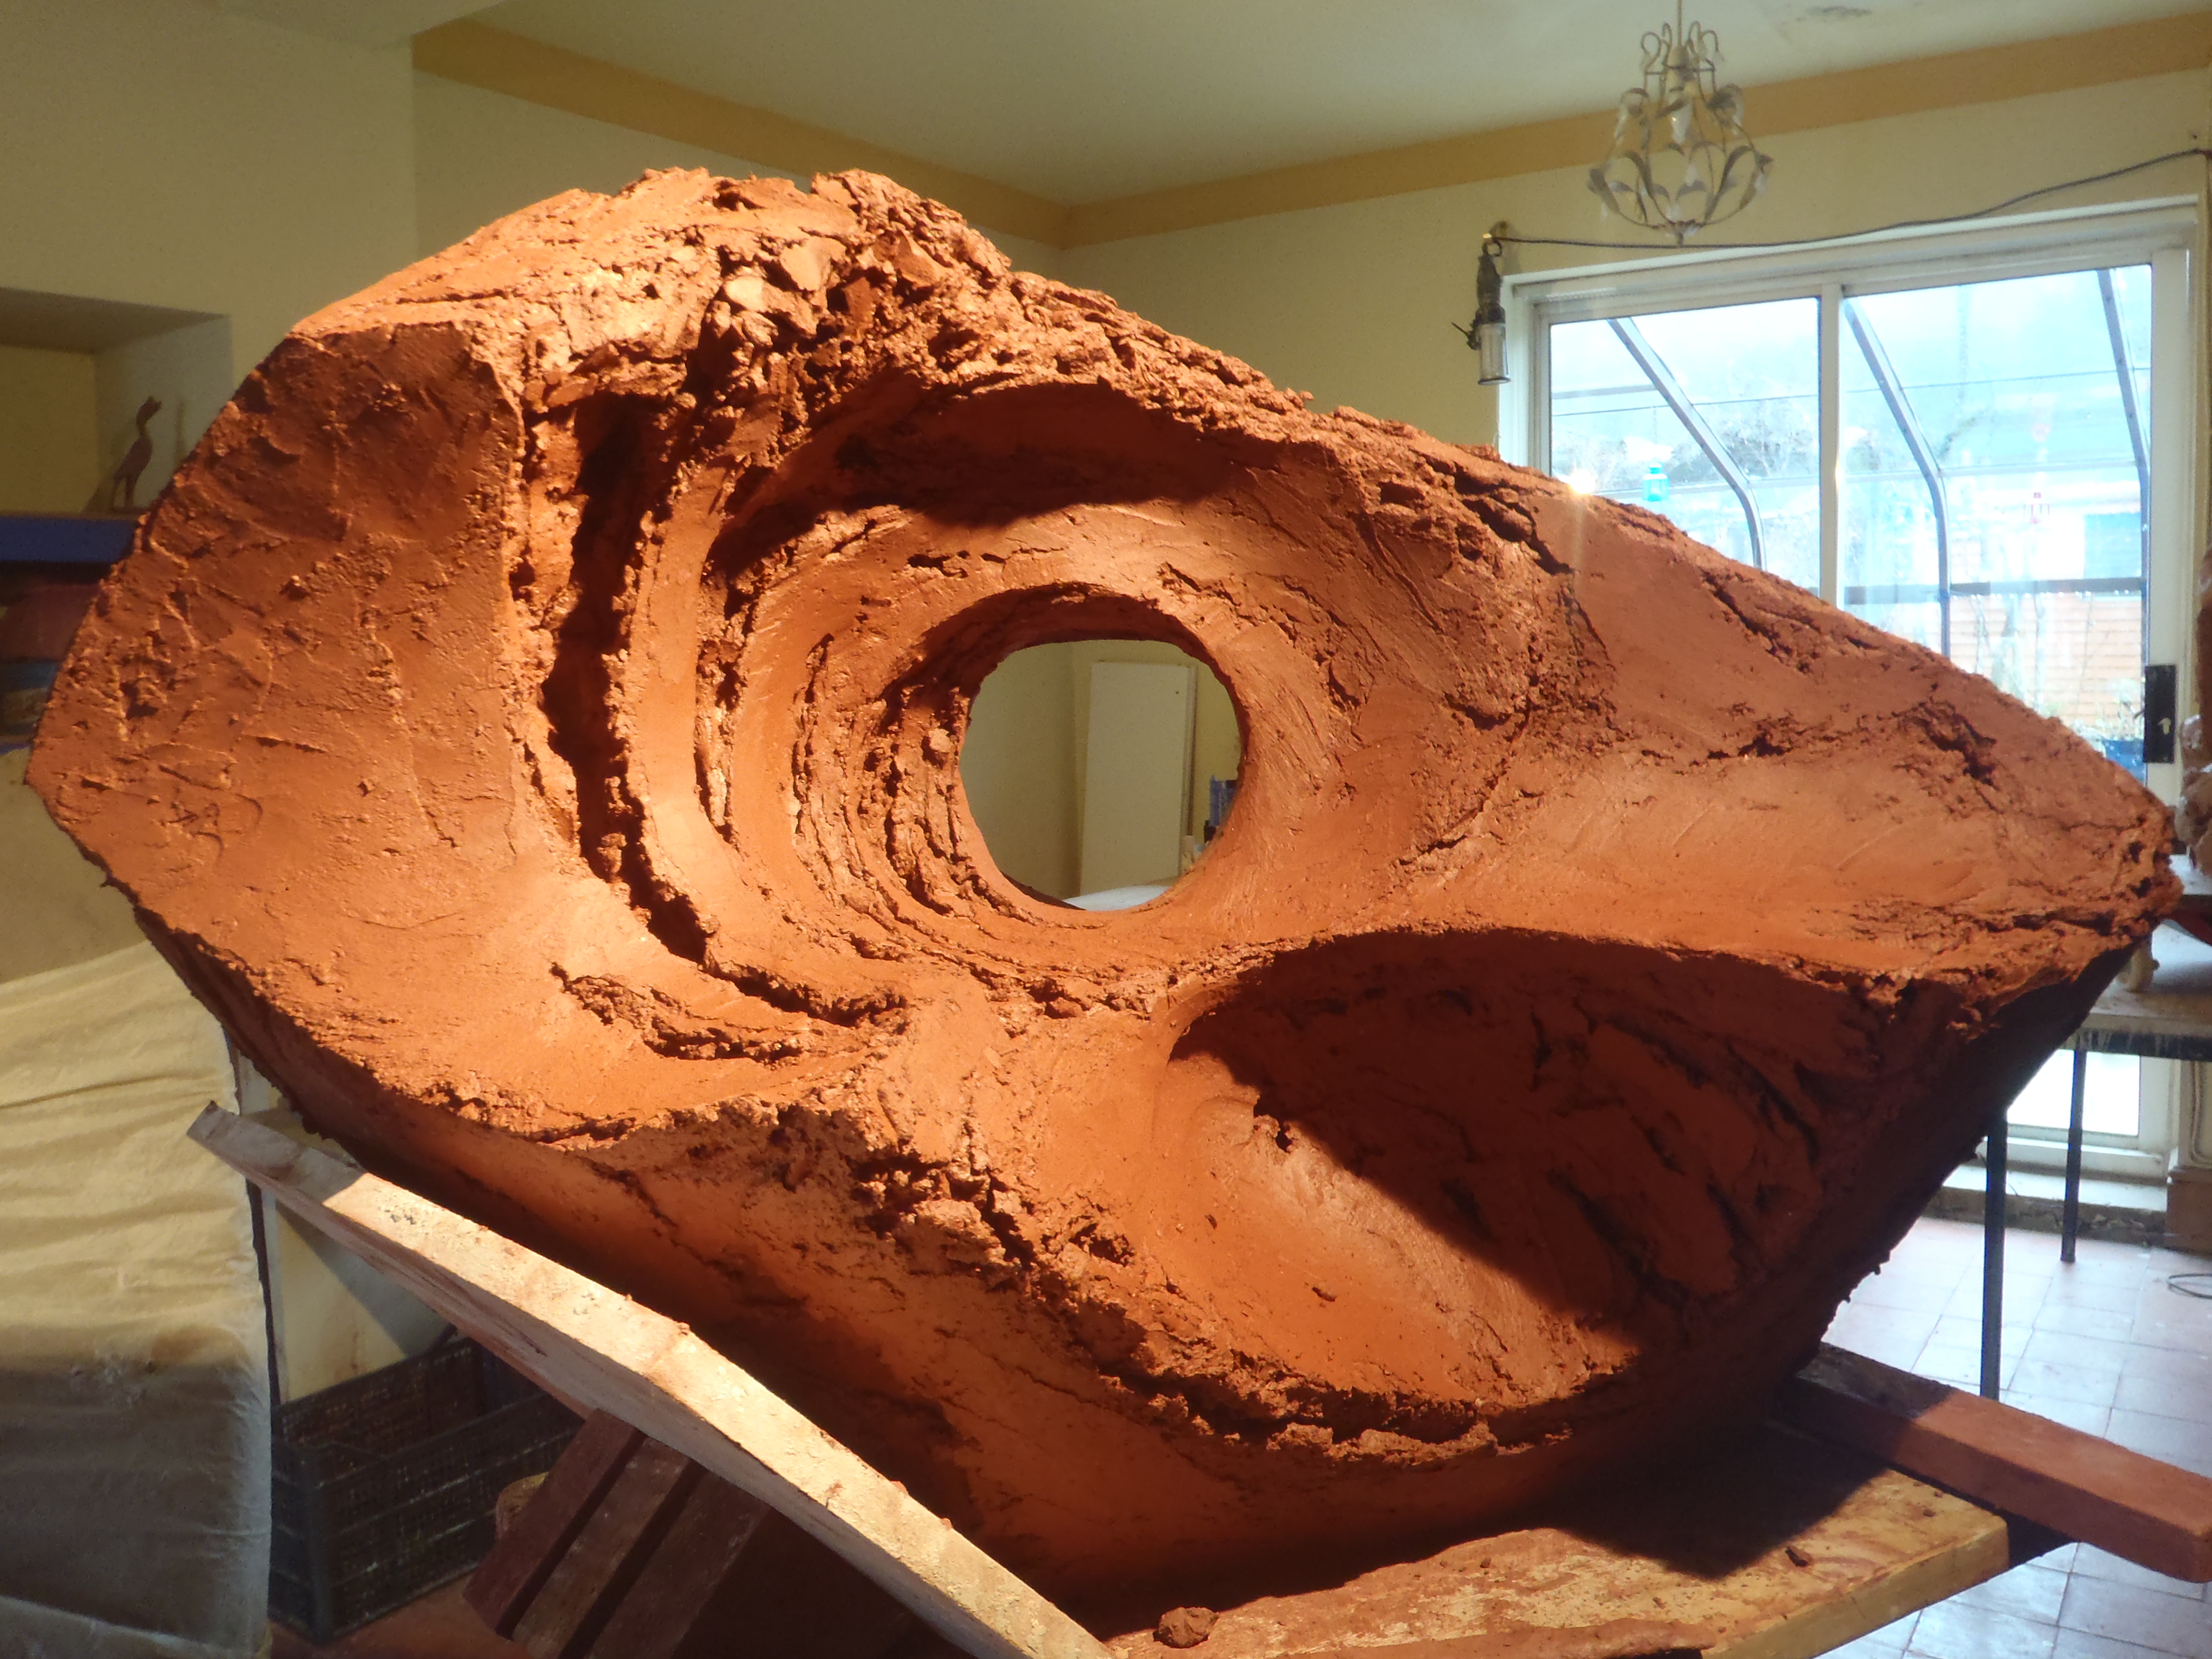
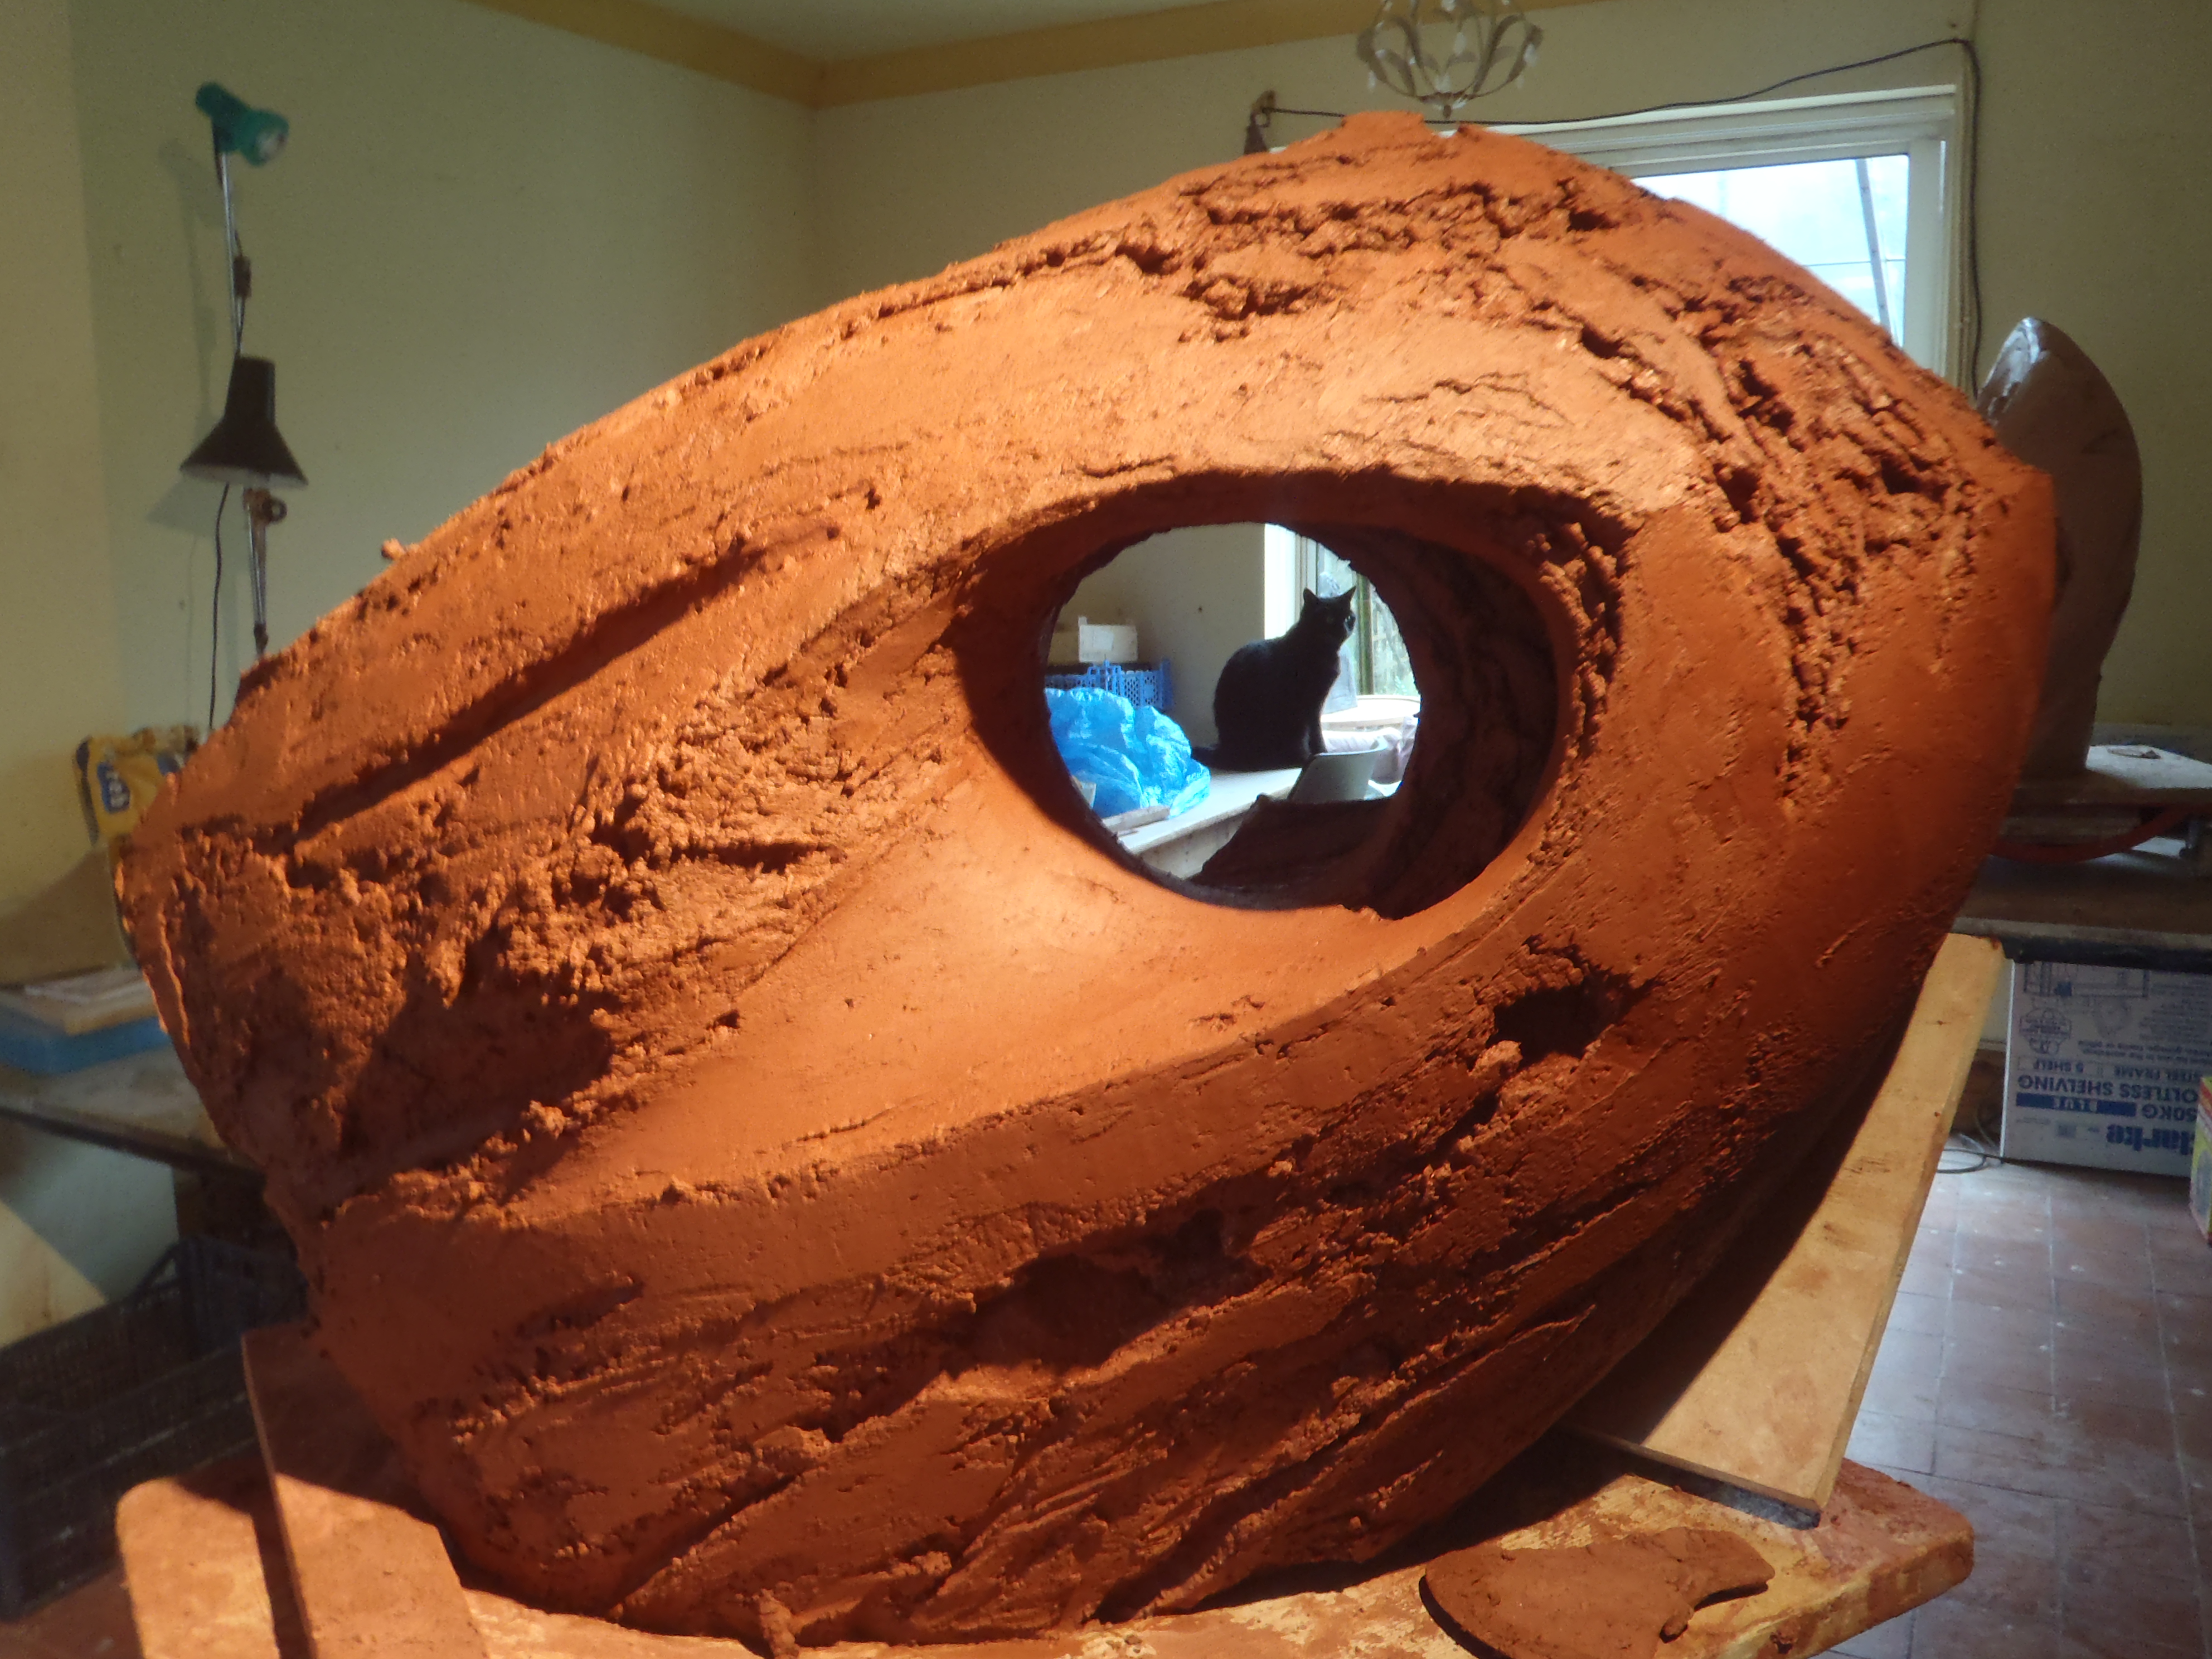
Guto Nyth Bran Memorial detail; the Salmon, oldest and wisest of all the creatures in Celtic Mythology.

To add on art-work: spend a lot of time softening the surface, add clay, ensure a good join, add clay to block-out art work, wrap in plastic to allow the water to travel from the soft clay into your hardened wall. Un-wrap when the clay has all reached a similar hardness + complete the art-work.

Calon Lan , Blaengarw

Calon Lan, Blaengarw.

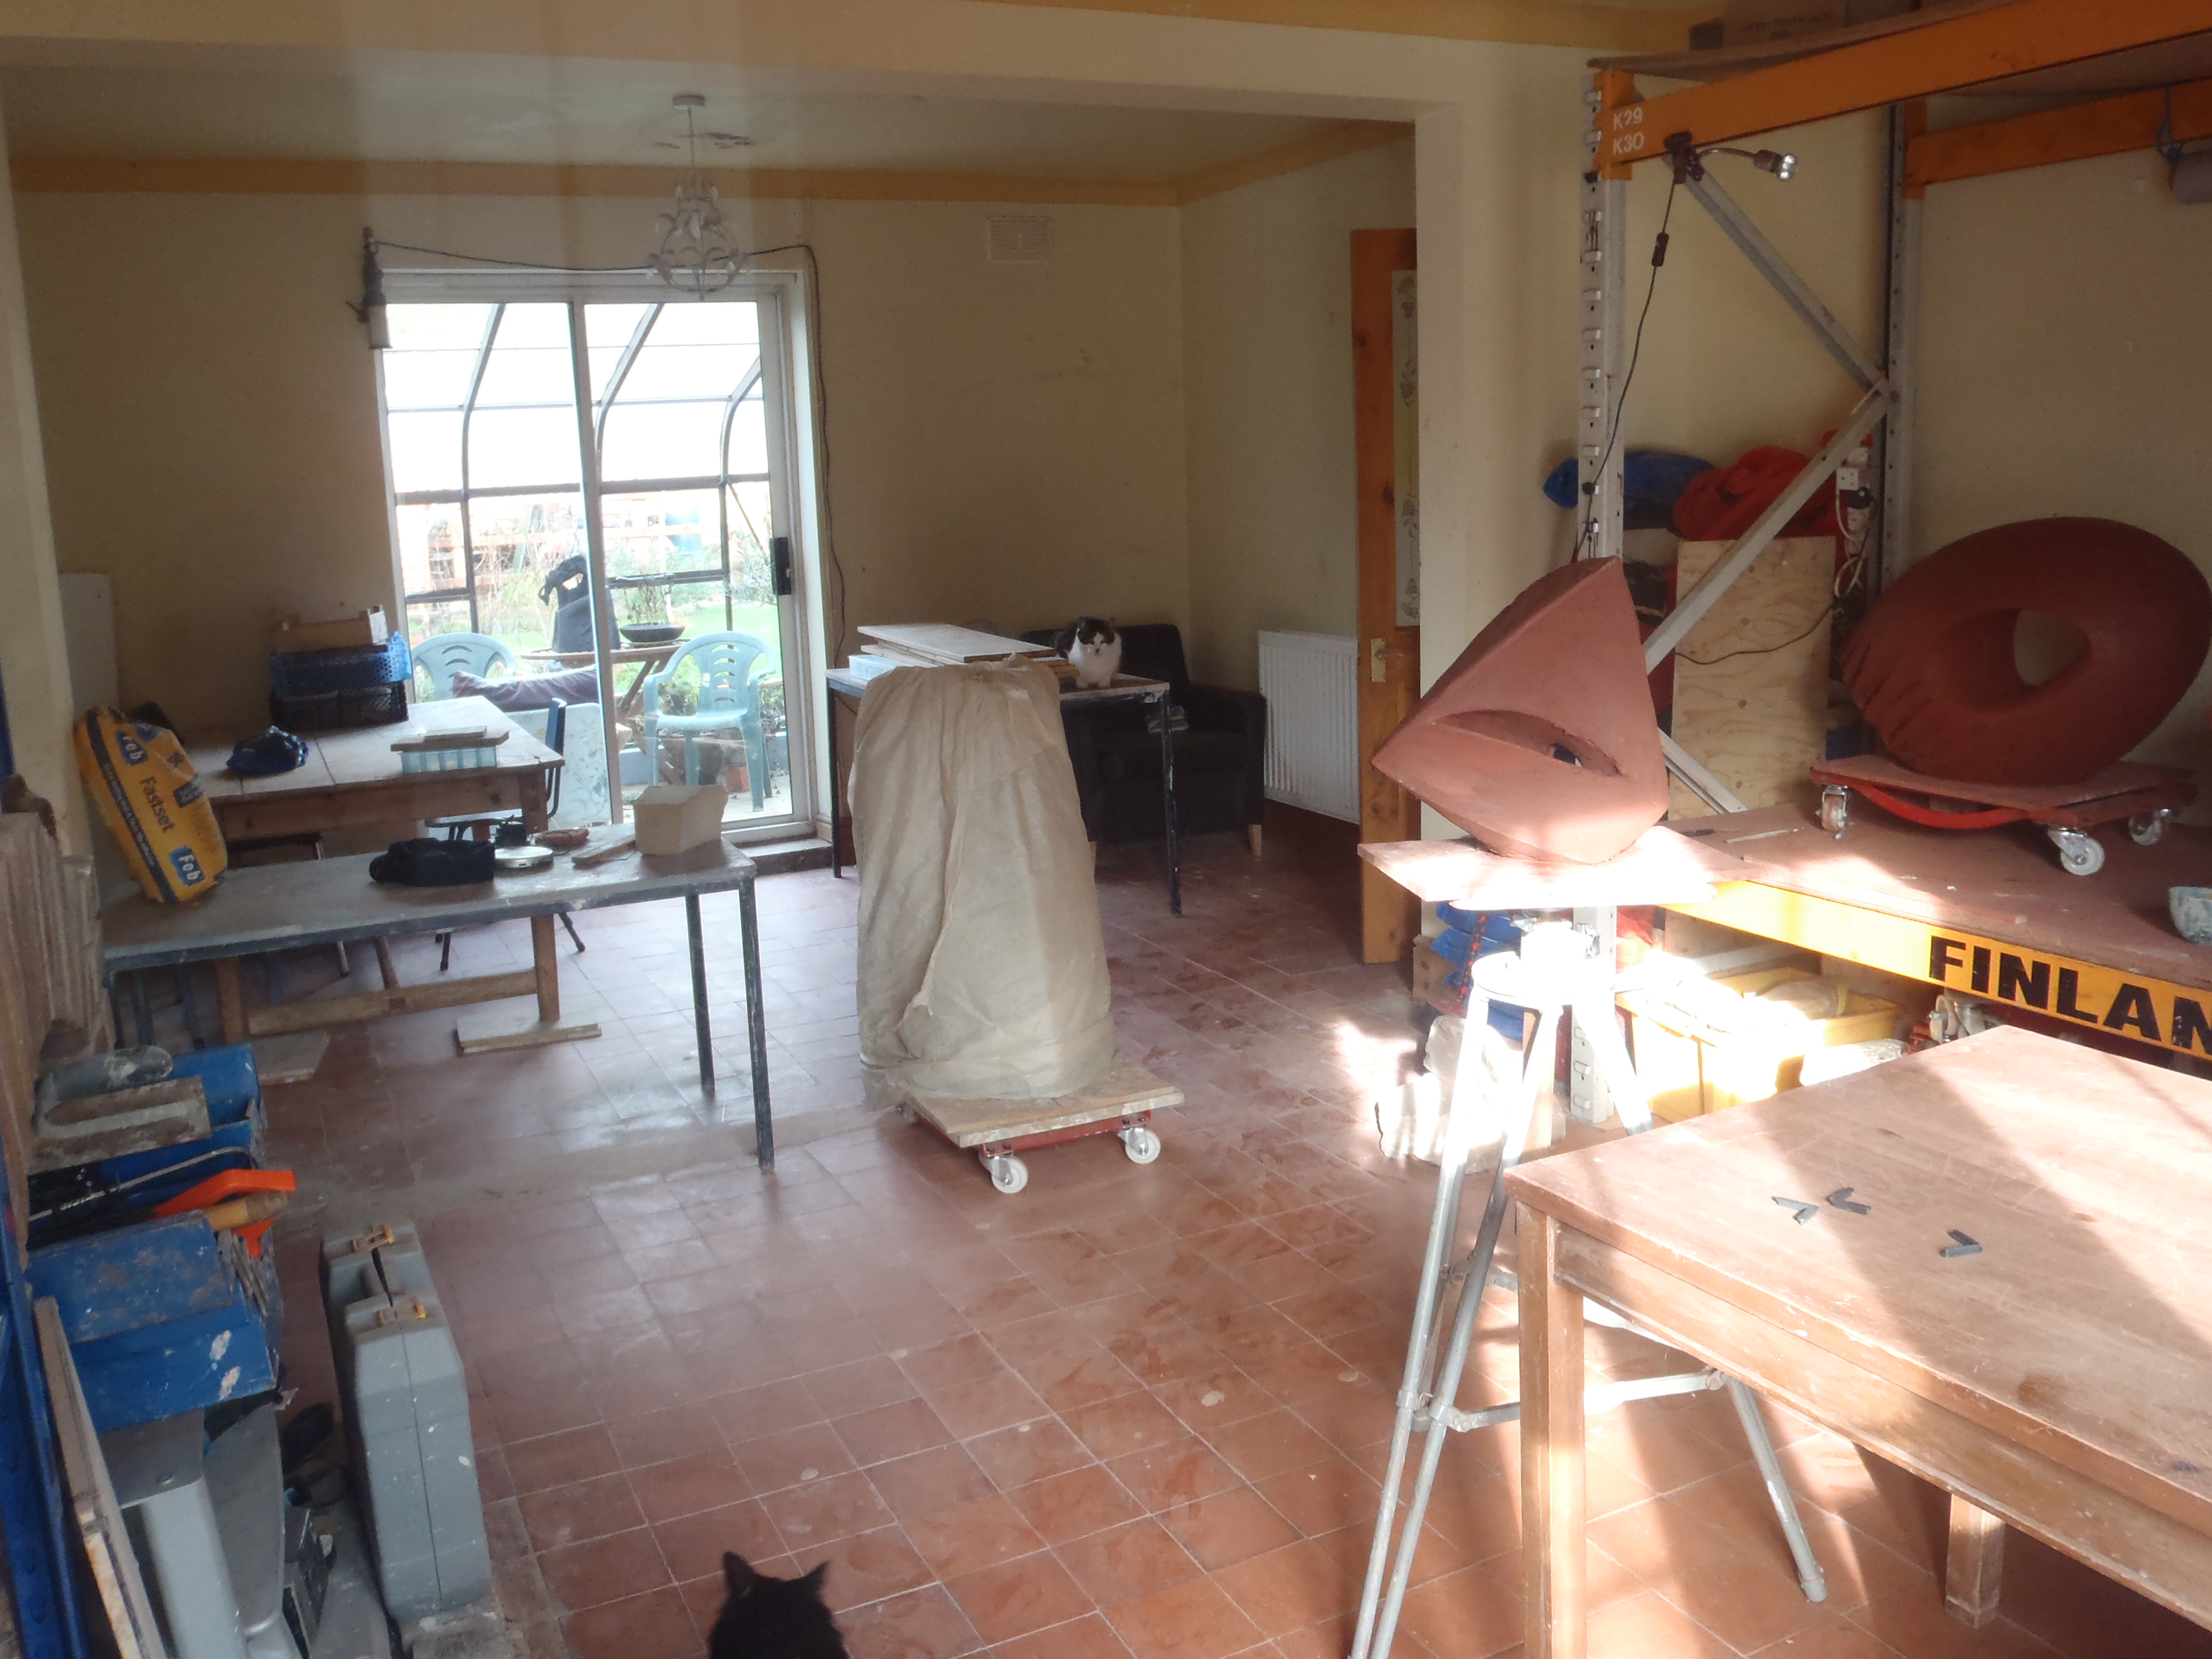
As walls are complete they can be smoothed, carved and art-work added and refined. All the tools are normal sized pottery tools and bits of wood. Plastic wrapping and containers of water placed inside can slow the drying, fans (pointed towards walls, not at the clay) and dehumidifiers can speed it up.

Calon Lan was the first really large build I did with a group and only the 3rd one I had done. Many people worked on this piece, using all sorts of techniques and styles. We had lively discussions about the building methods and art-work and worked it out between us. Especially with these early pieces it was terrifying! With each sculpture I have changed the technique a bit. You will do the same, adapting it to your style and clay.

Wendy Sage's panel on Balarat

Wendy Sage’s panel on Balarat Pit Marker, Blaengarw.

This wall on Balarat was built extra thick in preparation for the remarkable volunteer, Wendy Sage, to carve on this fantastic view of the village taken from archive photographs. Wendy worked on this panel for 6 weeks and did a lot of the other art work on the Blaengarw Sculptures.

Ex-Miner , Jim.

Jim, an ex-miner and excellent painter, gave countless hours to all the Blaengarw Sculptures.

wonderful Volunteer , Sharon.

Sharon started out reluctantly helping with the foliage on Calon Lan and quickly became invaluable, working on all aspects of the Sculpture. Here she’s building the dram on Ocean Colliery Pit Marker.

Sculpture1 001

We all worked on this difficult panel, taking turns to model or advise. Jim knew the ‘feel’ we were after from his time under-ground.

Ocean Colliery Pit Marker - detail

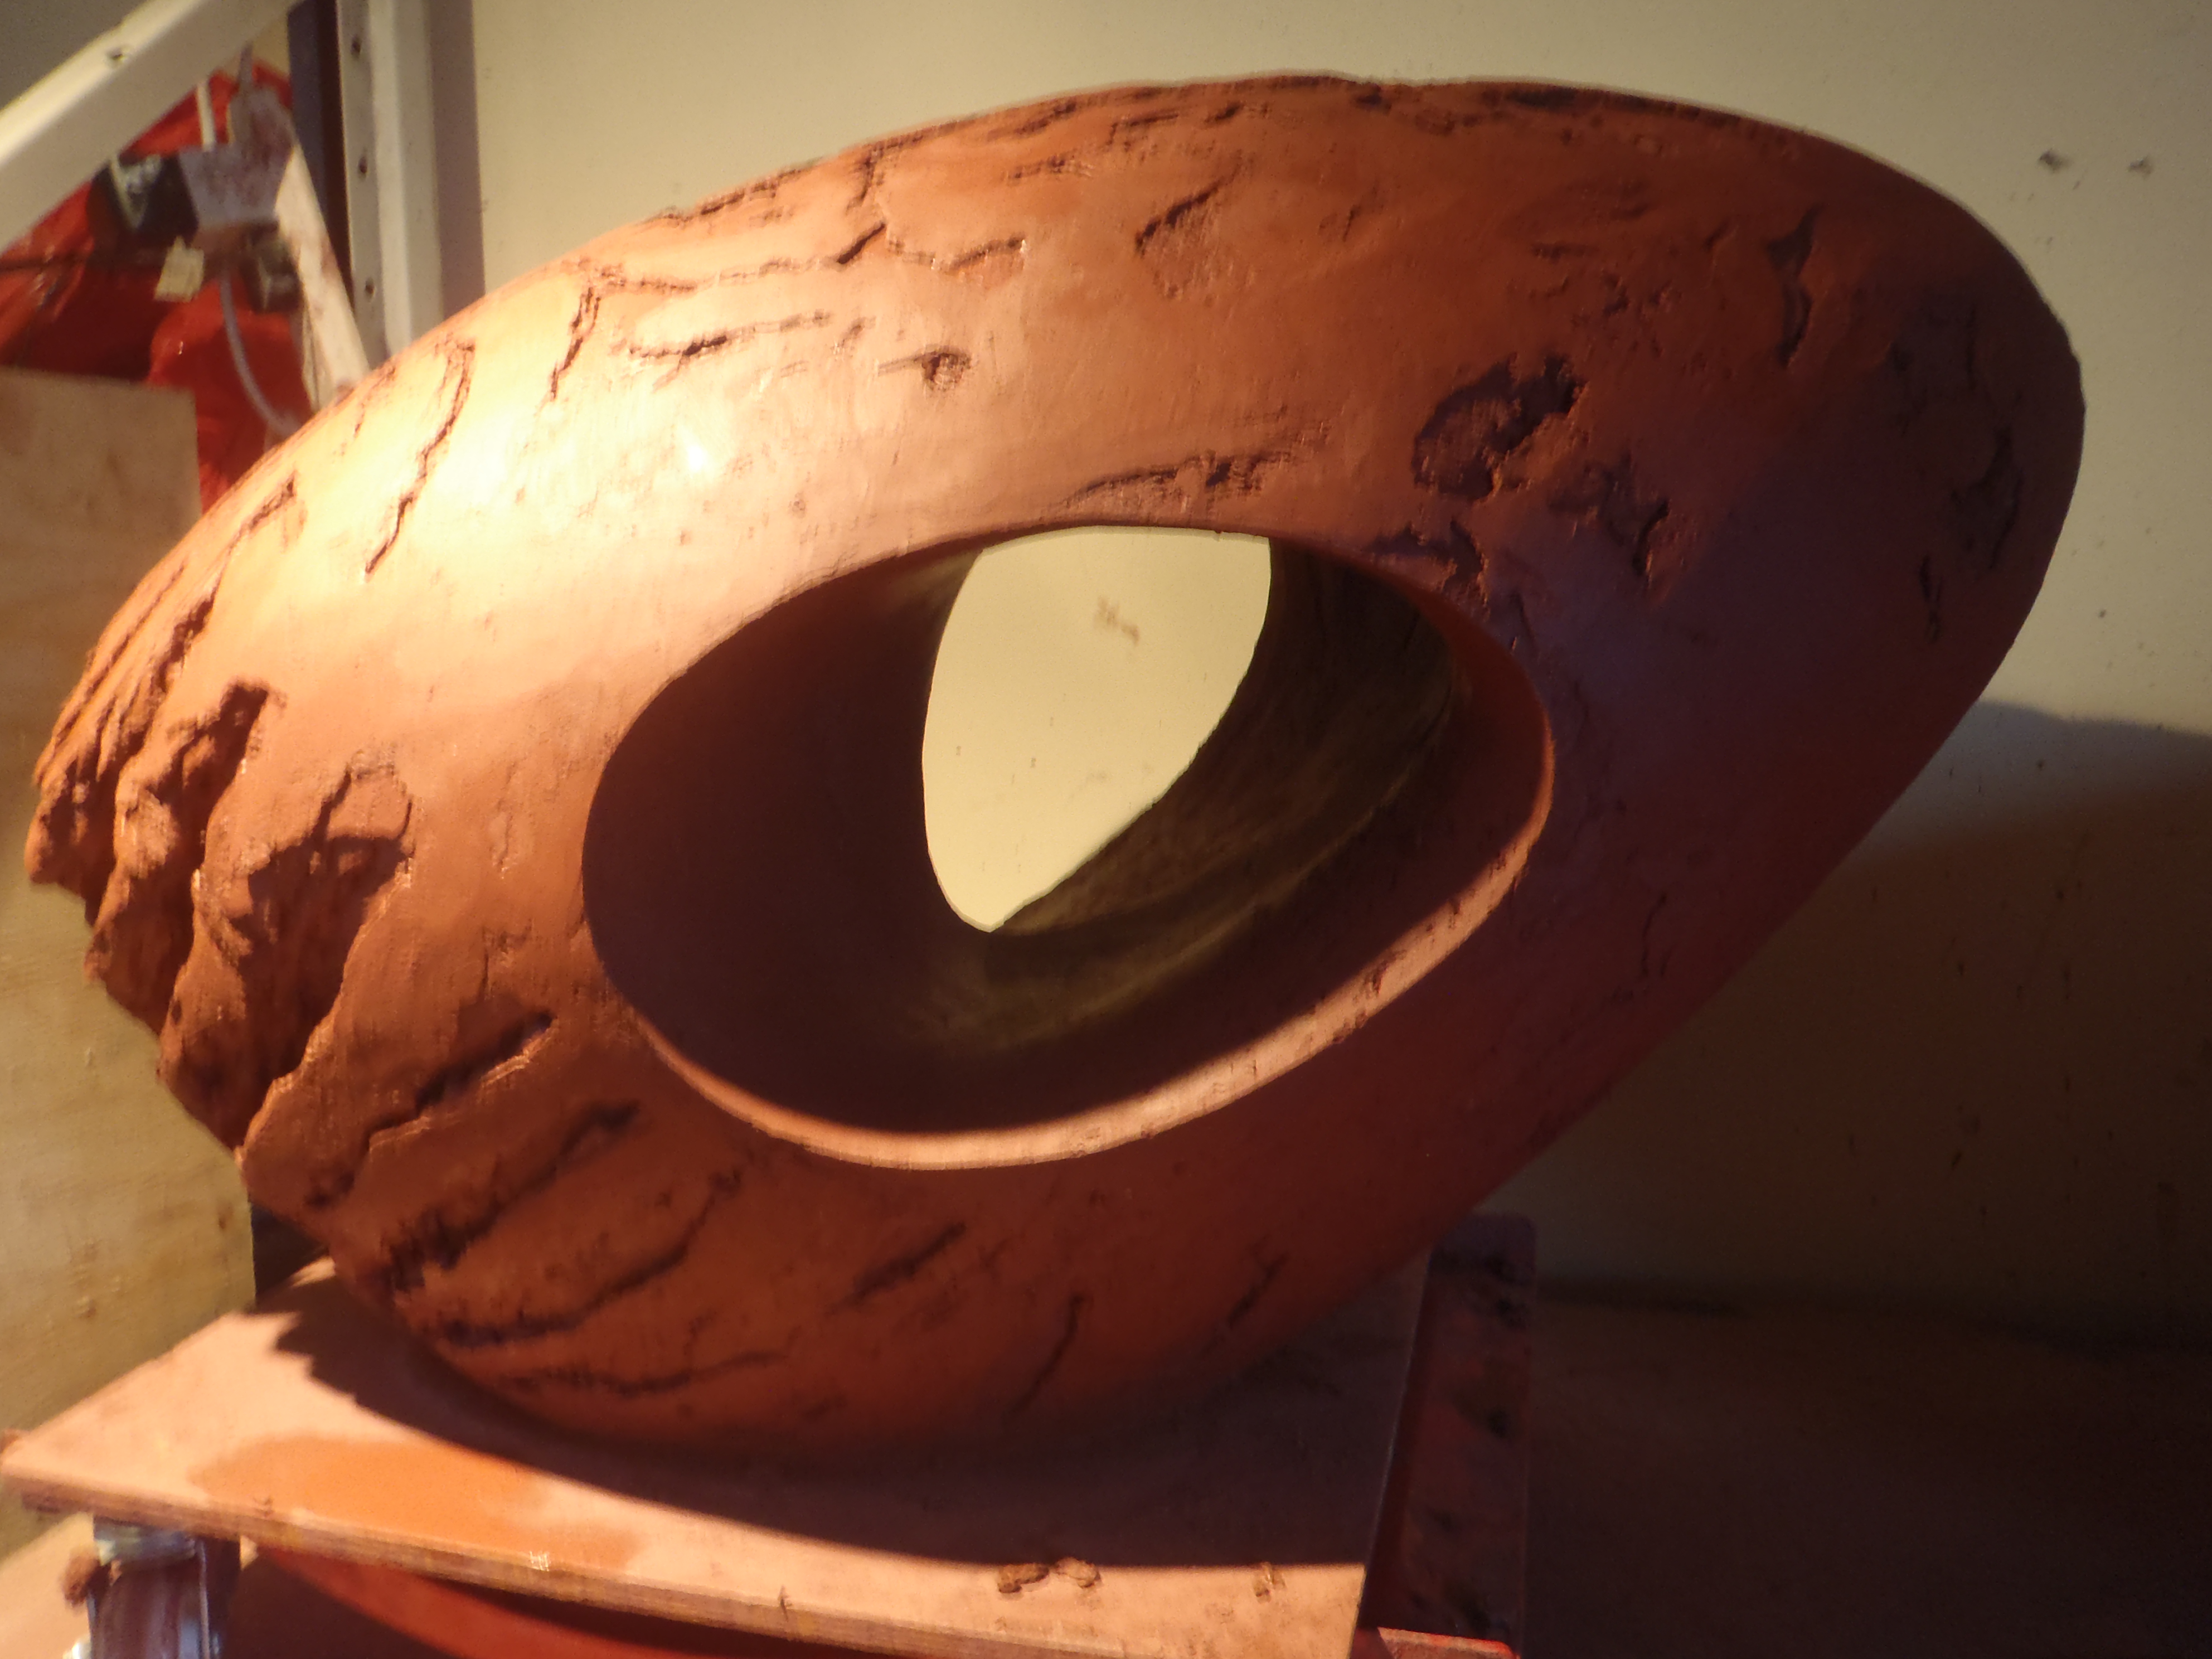
Ocean Colliery Pit Marker – detail

As soon as the top area is firm enough to handle you need to start dismantling the Sculpture. Cracks will be showing up as the whole thing tries to shrink.

Take photos all around the Sculpture. Enlarge + photocopy.

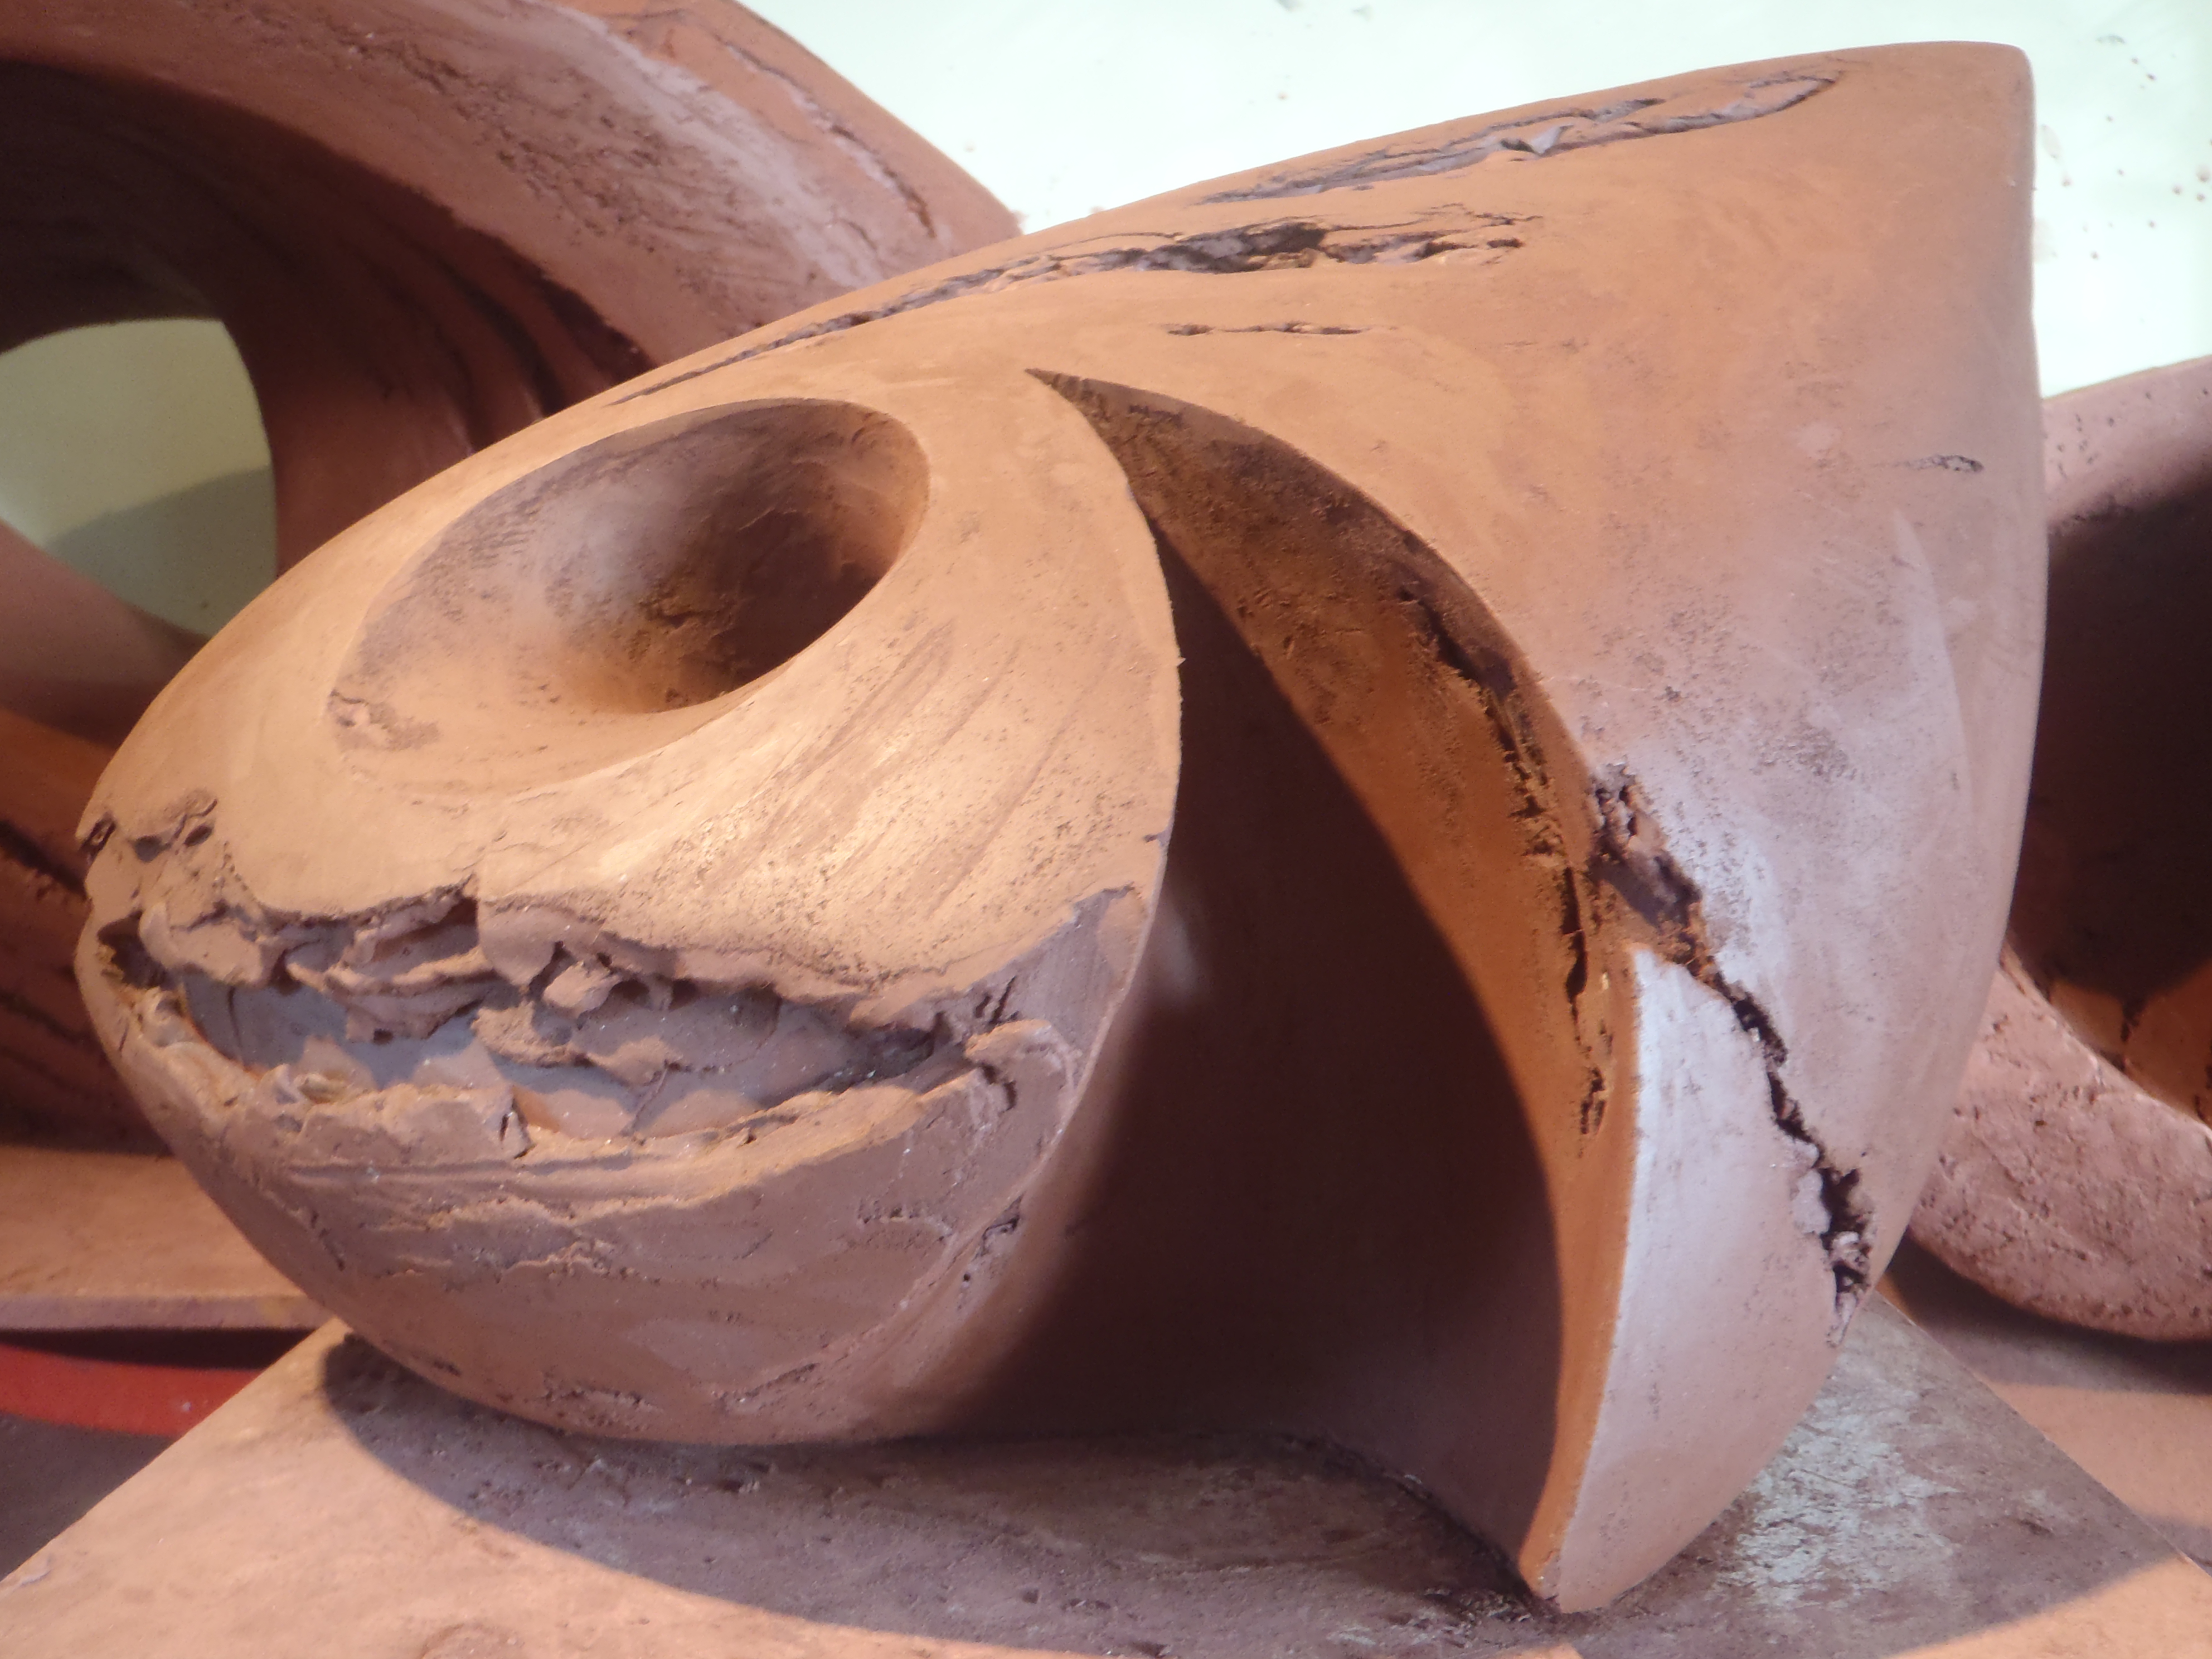
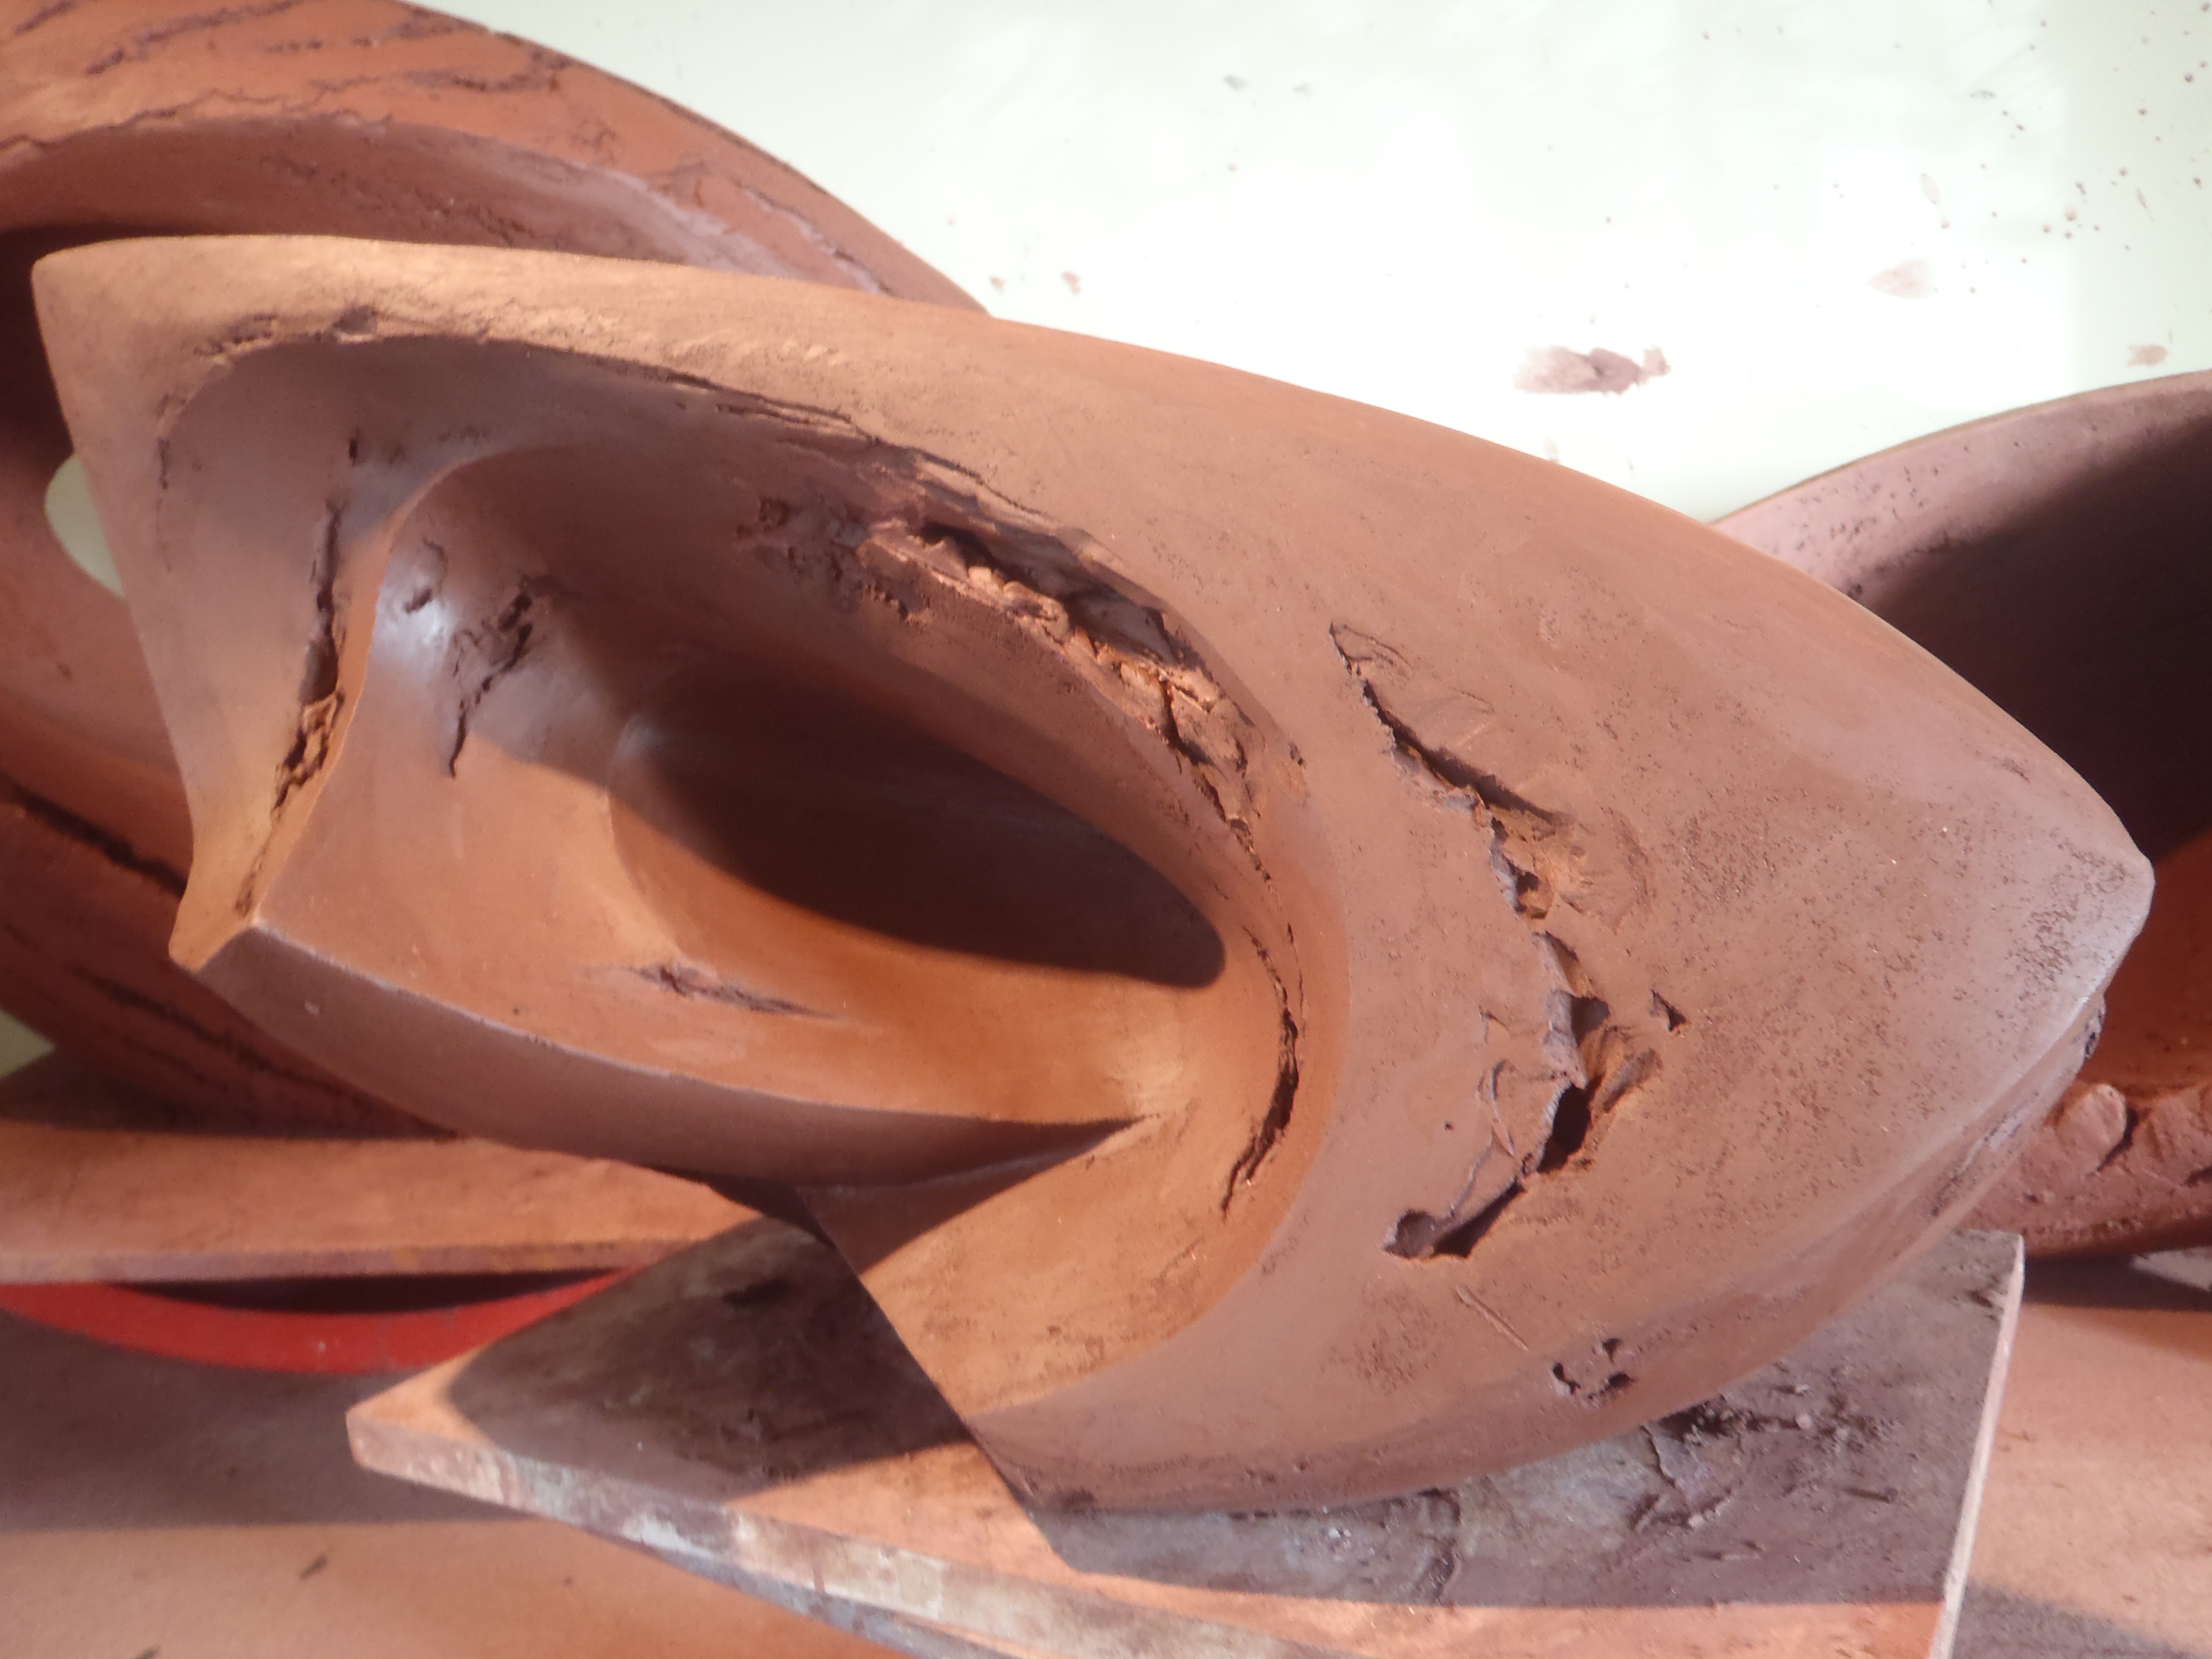
Start cutting from the top with a normal ‘cheese-wire’. Aim for around 30 cm square; sections that are too large will be hideously heavy, crack and worst, warp in the firing. Try and keep the edges of the sections at 90 degrees to the front surface for yourInstaller’s sake. Lay the sections onto memory foam so they don’t distort/get damaged. Draw on your photocopy  Photo-Map the cut’s shape and record the number. Mark the number on each side of the edges of the section (incase one number gets smudged). These Maps, numbers, a tracing, on plastic, of the outline left on the floor of the foot-print of the sculpture and the Scale model are now your most treasured possessions until the sculpture is installed and loosing them will haunt the many nightmares you will have about the whole process.

Once sections are stiff enough to handle without distorting trim away the excess thickness leaving a good 5 cm minimum. ‘Gouge’ out, using loop-tools (or an electric drill on leather-hard sections) a random pattern of channels in the back of the sections that will reduce the thickness to 2cm at any point, act as a grid of braces to deter warping and give excellent grip to the cement that will hold them all together. It’s got to be said: this is not the fun bit….

Dry slowly using a dehumidifier/memory foam support/regular turning for at least 5 weeks. Fire SLOWLY!!! Bear in mind that many brick-clays contain stones; these must be fired extremely slowly passed 500 degrees C to allow vaporised minerals to escape or your sections will ‘bloat’. Luckily I’ve never had this happen thanks to the kind guidance from the  guys at Coleford Brick and Tile who don’t find bloating a laughing matter even though a bloated brick looks like a rugby ball! Be wary, too, of the low melting point of some brick-clays.

I fired all the sections packed in the kiln on their edges (flat seems to invite cracks/distortion) in my Cromartie 16 cu ft Workhorse Electric Kiln in batches of up to 40 sections. 1 ton of sculpture seems to yield about 50 sections.

Installation needs an imaginative Builder with the patients of a saint who will, non-the-less, come to hate your guts. Lay a strong foundation w/ reinforced concrete, build an internal structure of breeze-blocks/infill/steel bars,’clad’ with the sections of sculpture and point up joints. Installation will generally use half your budget.

You can copy/print this next bit for your installer:


OLYMPUS DIGITAL CAMERAOLYMPUS DIGITAL CAMERAOLYMPUS DIGITAL CAMERAOLYMPUS DIGITAL CAMERAOLYMPUS DIGITAL CAMERAOLYMPUS DIGITAL CAMERAOLYMPUS DIGITAL CAMERAOLYMPUS DIGITAL CAMERAOLYMPUS DIGITAL CAMERAOLYMPUS DIGITAL CAMERAOLYMPUS DIGITAL CAMERAOLYMPUS DIGITAL CAMERAOLYMPUS DIGITAL CAMERAOLYMPUS DIGITAL CAMERAOLYMPUS DIGITAL CAMERAOLYMPUS DIGITAL CAMERAOLYMPUS DIGITAL CAMERAOLYMPUS DIGITAL CAMERAOLYMPUS DIGITAL CAMERAOLYMPUS DIGITAL CAMERA

        Installing a ceramic sculpture with sections.

Sculptures made in brick, using any of the various techniques, is incredibly laborious. But they are more durable than any other material. They are the archaeology of the future. More people can be involved in making them and they can be much more affordable than other  materials. The process of the installation will be more like dry-stone walling than brick laying.

Using the Scale Model:

The scale model was used to build the form in wet clay. Changes will have been made to enhance the form in it’s full scale.

There is an 18% shrinkage from wet to fired with Coleford Brick clay so the scale model will be 18% too small.

Spacing and pointing will also affect the installed size.

So the scale model is only a useful guide during installation.

The Sections:

The sculpture is built as one in soft clay and then cut up.

Once the form is built it under-goes a controlled drying period to the point where it can be cut. Obviously the lower layers are very hard by that time, and the upper layers less so.

Cutting has to be done in such a way that the fragile form does not collapse. That is why the numbers follow the sequence they do and why the cuts are where they are.

Cutting up is very difficult and hard work. At each cut the Map is marked, numbered and the section numbered. Mistakes are easily made. 

The sections are heavy and can be awkward to lift. They are set down on memory foam and then trimmed back as much as possible. A grid of gouges in the back helps to hold the shape during drying/firing. Happily they also provide excellent grip during installation. Every care is taken but inevitably some get damaged. Once the clay has passed a certain point in drying it is best to repair this damage after the firing.

 Each section section is carefully handled/supported/turned during a long, very slow drying period of 6 weeks.

The sections will have been divided over a number of firings. No firing is the same and where the section was in the kiln also creates unique conditions. Because the shrinkage is so high ( 18%) and the Coleford Brick clay is being fired to a temperature close to it’s melting point to gain the near vitrification and strength, this may make significant differences to the fired section’s size.

So sections may well have warped, shrunk un-evenly and cracked. They can be trimmed or cut with power tools. Badly warped ones can be cut into several pieces so that they can set well in the form.

Priorities:

The parts that will be focal points and define the sculpture.

                                                      Edges.  Carvings.  Holes.

The hole is focal- people will usually go up close to the holes if they can. But they can be ground with power tools.

Edges can also be ground into line to a certain extent but it is very difficult to re-produce the right texture.

All three are very important but the carvings are the part that needs to be set most carefully.

The Foundation:

The installed sculpture may be solid with infill and very heavy. The foundations need to be adequate. Steel re-bars should be set to re-enforce /anchor the sculpture.

The Layers:

The installation can only progress one layer at a time, starting at the base. If the base layer is angled wrongly that error will magnify with each subsequent layer making it very difficult to look after your 3 priorities ( above).

Careful planning of each layer will make a big difference.

Sections can be trimmed and spacing can be varied. Have a box of spare mosaic tiles/pebbles to decorate very wide gaps. Leave enough gap to point: This sculpture will stand for centuries and all precautions should be taken against water/ice.

         – Using the maps sort the sections into groups.

  • Using a washable paint write the numbers on the out-side of the section.
  • Using a marker-pen write the number of the adjacent section shown on the map, on the inner-edge. Also mark ‘top’, ‘base’ or a this way up arrow.
  • With smaller sculptures or parts like figures:

          Place paper or plastic on ground.

          Starting with the top layer, place the sections using stones/bricks/breeze blocks to support them. Make wedges/spacers and hold in place             w/ duct tape.

          where necessary fix sections together with quick drying cement ( this can be knocked off later.)

          Photograph/measure/make notes.

          Trace the ‘foot-print’ onto the paper. Cut it out and use to guide the next layer down.

         -With large/wide sculptures:

          Set the base layer. Support/space well as above. Hold the next layer sections to each join to check the consequent angles. Lay that next                 layer on the ground around the installed layer and check as much as is necessary that the fit is good.

  • Once you are sure they are correctly placed, fix them in with cement. When that is set put in your next layer of re-bars and infill.

Pointing:

Coleford brick clay is very dense and has extremely low porosity. Ensure your pointing material is suitable to the ceramic.

Red sand gives a good, long lasting match to terracotta colours.

Coloured mortar from Tarmac (http://www.tarmac.com/mortar/mortar/coloured-mortar/  ) are good.

Colour dyes do not last well in sun-light.


The Sirhowy Wyvern, Sirhowy Green, Tredegar, South Wales

The Sirhowy Wyvern, Sirhowy Green, Tredegar, South Wales

1048761_452135444882806_362683050_o

The whole process is spectacularly laborious!! And exquisitely low-tech. There is a job there for every Volunteer of every ability, from teen-age lads building the structure to Grans, kids and every-one in between doing art-work, people who like to stay clean doing research and collecting reference material, the local Cafe feeding you all the vast amounts of cooked dinners it will take to fuel the gruelling lifting and shifting required, people stepping in off the street to give you an invaluable ‘fresh eye’ on how it looks. The finished Sculptures will last for many generations, become landmarks and the pride of the area and finally the archaeology of the future.

The River Series

River Harbinger, 125cm H.

River Harbinger, 125cm H, at Wyndcliffe Court Sculpture Garden.

The River Series is an off shoot of the Wind Water Fire series merged with the Harbingers. It coalesced here in the Beacons in 2012 after 12 years in the stunning Upper Rhondda surrounded by waterfalls.

The view from my door step;One of many waterfalls in beautiful Blaencwm,Rhondda

Blaenrhondda, Rhondda Valley

The rivers in the Rhondda ran black for decades.Now you can drink the sparkling icy water.

The rivers in the Rhondda ran black with coal dust for decades. Now you can drink the sparkling, icy water.

Wind,Water,Fire III

Wind Water Fire III. 1m H.

When I first tried the Scarva black clays about 3 years ago I made a number of reclining figures and harbingers many of which were so awful they got recycled! But this one with a water theme I have hung onto knowing I wasn’t done with it. A lot of the work from it is now showing up in The Edge landscapes. Moss and lichens are the perfect finishing touch.

Reclining Harbinger,80cm L

Reclining River Harbinger, 80cm L.

I’ve been off down various roads with it, some of them dreadful!! I’m definatly not done with it .

Like the Harbingers it is an environmental theme about the land and our relationship with it. Knowing you have drinking water running clear near your home is a treasure that means more to us all than we dare to think.

After the move to the Brecon Beacons I found we had this stunning river just below our new home. It is the river of the Henrhydd Falls, south Wales’s tallest Falls made famous by the last Batman movie.

OLYMPUS DIGITAL CAMERA OLYMPUS DIGITAL CAMERA OLYMPUS DIGITAL CAMERA OLYMPUS DIGITAL CAMERA OLYMPUS DIGITAL CAMERA I go there several times a week for the peace and beauty.

Rebecca, Buck, Osprey, Studios, Ceramics, Clay, Clays, Pots, Bowls, Art, Sculpture, Architectural, Knick-knacks, Knick, Knacks, for, the, Mantles, Rich, Public, Monuments, Brick, Wales, Brecon, Beacons, American, Wonderful, Tired, Coilbuilding, Cement, monumental, Rivers, Join-in, volunteers, wrokshops, Classes, Community, star centre, Blaengarw,

The River, 1.5m, commission, 2012.

OLYMPUS DIGITAL CAMERA OLYMPUS DIGITAL CAMERA       OLYMPUS DIGITAL CAMERA OLYMPUS DIGITAL CAMERA

River Harbinger, 125cm H.

River Harbinger, 125cm H.


Tuition, Workshops, Play Events and Parties.


The measuring frees you up to be expressive with your modelling .

The measuring frees you up to be expressive with your modelling. Concrete skills set your creativity free.

Osprey Studios has a major commitment to sharing skills and encouraging creativity. I have a great deal of experience in guiding people of all ages and abilities towards their own style. My sculptural techniques have been tested to destruction and make sound foundations for your own exploration of clay and form. You can find my set of ‘How To’ posts here. I update and add to them regularly and get a big kick out of the fact that they are now used all over the world.

From time to time I’ll run a Master class here on a particular thing; Posts about Workshops. If there is something you want to work on let me know and I’ll collect together a group of like-minded people and we’ll set a date that works for everyone. The price is usually around £90 p/day each for a 7 hour day, with a max group size of 8, including home-made lunch and refreshments. Only materials or tools kept are extra.

A Masterclass at your venue can have more students than that depending on your resources.


Groups or individuals are welcome to come to Osprey Studios (SA9 1YT).  Being in the Studio environment with work-in-progress and the sculpture garden outside is part of the event. I usually provide homemade refreshments and lunches (included in the fee) and we have relaxing breaks on the sofa or in the garden to swap ideas and chat. There is accommodation available here or lots of other gorgeous places to stay and eat in this lovely area.

Or I can bring everything we need to you in my van. Sculpture in clay makes surprisingly little mess and is easy to clean up.

The Workshop will be custom made to suit your needs and objectives.

For example;

  • A 1 day workshop guiding you towards your own ‘voice’ in 3D artwork. A very enjoyable, fascinating day with lots of laughs and new experiences in clay work whatever your starting point.
  • Making figures: a 1 day workshop incorporating a great deal of very useful information relavent to all sorts of artwork.
  • I particularly encourage Teacher’s to do a fun, very straightforward 2 hour Workshop on using clay modelling in school. We’ll cover firing/self-hardening clays, recycling clay, decorating and controlling costs, everything to help you keep clay in the class room because it matters!
  • A Portfolio Review will clarify the way you see your work in preparation for college applications or a change of direction.
  • ‘How To’ classes with technical solutions for challenging projects, including working on a large scale, hand-building pottery, drawing from life, portraits/figures, all suitable for all levels of experience including total beginners. 
  • Join-In Sculptures are great fun and full of learning opportunities. They are the ultimate embodiment of unstructured, experiential, messy play! I have done these with adults and children at Events and Parties in all kinds of settings and they bring out the best in everyone. The fabulous, ever changing sculpture is photographed along the way and then we re-cycle the clay. It is a wonderful, flexible, cost effective way to engage and inspire even very large groups ( 80 year 2’s over 1 day is my best yet) and great for working through themes, building concepts and stories and engendering co-operation. No matter how small the contribution it is part of something greater.


    OLYMPUS DIGITAL CAMERA OLYMPUS DIGITAL CAMERA

    Occasionally I’ll go for other materials and processes like drawing or murals. This fantastic 3 metre x 2.5 metre painting was done with many wonderful young people at the Penrhos Youth Centre in short sessions over 6 weeks.

This magical book to go in the Library was part of a sculpture project with year 5 at Pennard Primary School on the Gower.

Fees start at £30 per hour + 44p per mile travel + materials. On average individuals will use around £2.00 worth of clay. On many projects, like the Join In Sculptures, all the material is recycled so there is no charge for it.

Feel welcome to contact me to chat through your idea: phone 01639 731271 / 07913743457 or email at osprey.studios@btinternet.com

Studio Diary; work in Progress,Feb 2013.

in progress , 4/2/13

all of these pieces are made with Scarva Black chunky clay – they will turn black in the Fire at 1250c.It is THE most fantastic , versatile clay.The smaller ones are a similar clay with a finer grade which is remarkably flexible. in progress , 4/2/13

This was built solid and hollowed out - it is the best technique for getting an unexpected , complex form because you can work so freely.

This was built solid and hollowed out – it is the best technique for getting an unexpected , complex form because you can work so freely.

OLYMPUS DIGITAL CAMERA

same form , other view

.

OLYMPUS DIGITAL CAMERA I often work with one spot light so I can see the horizon of the form clearly.

I’m mostly using the music of  Avishai Cohen on this part of the Edge Series but of course Steve Vai plays a part along with some amazing Gaming music my son collects for me.It’s all instrumental.

Photos can give you a new perspective on your work.Getting ongoing  feed-back online is marvellous – for years I worked almost in secret! Now I have the benefit of advice , opinions and inspiration from all over the world ,particularly on Facebook which many Sculptors and Ceramisists use to exchange ideas. Like many others I have posted Step-by-Step photo Albums explaining my building  methods on my Osprey Studios page .

4/2/13

4/2/13

Three muses.

Three muses.

Initial version .4/2/13

Built hollow with slabs cut straight from the block. This is the initial version .I added a new section , caught the shape then cut it open and hollowed away the previous unwanted wall. Black Chunky is extremely course and  will allow you do such things , no problem.4/2/13

Re-arranged ,Spring cleaned , far more spacious!

Re-arranged ,Spring cleaned , far more spacious!My classes are taught right in here so students can follow my work’s ups and downs.

Feb 10th. note the board w/ wedges supporting the side.This will soon be removed.

Feb 10th.The Edge Series ; note the board w/ wedges supporting the side.This will soon be removed.Once it’s firm enough it will be hollowed out and finished.

OLYMPUS DIGITAL CAMERA

Feb 24th;  .OLYMPUS DIGITAL CAMERA Completed and drying,the newest addition to The Edge Series .It was made to Steve Vai’s latest Album ‘The Sound of Light’.It’s definatly my favourite so farOLYMPUS DIGITAL CAMERA  It will fire black.

March 11

The 4 smaller pieces are complete. They have taken a tremendous amount of time and a steady hand making me glad yet again that my Studio is part of the house and warm!!

The Half a Century Series;     OLYMPUS DIGITAL CAMERA OLYMPUS DIGITAL CAMERA OLYMPUS DIGITAL CAMERA OLYMPUS DIGITAL CAMERA OLYMPUS DIGITAL CAMERA OLYMPUS DIGITAL CAMERA OLYMPUS DIGITAL CAMERA

The Edge;     OLYMPUS DIGITAL CAMERA

March 30th;New pieces for The Edge.

The new set up in the Studio where each sculpture can stay in the same spot from start to finish is working really well. They are heavy and fragile until they are fired.I now have 2 good kiln loads dry,time to call in my Assistants to start moving them!

OLYMPUS DIGITAL CAMERA OLYMPUS DIGITAL CAMERA OLYMPUS DIGITAL CAMERA OLYMPUS DIGITAL CAMERA OLYMPUS DIGITAL CAMERA OLYMPUS DIGITAL CAMERAThese larger , rougher  Sculptures from The Edge are showing the strong influence of living in the Brecon Beacons winter landscape and Cribarth Mountain behind the Studio.

4th Nov.2013

While the connection is clear, especially in this brand new piece, I have moved to a new series. I haven’t settled on a name but the philosophy is about how we don’t actually possess   clear boarders; the cloud of particles and especially  bacteria that make up us dissipates and interacts with our surroundings and fellows , interchanging constantly. When you leave the Forrest some of it comes with you , some of you is left behind.We are constructed from atoms that have been used to form countless other things since the big bang. After death those atoms will move on to build other parts of the World. As my son put it beautifully when he was 5 ; ”So we become part of the mountain? Good.”OLYMPUS DIGITAL CAMERA OLYMPUS DIGITAL CAMERA Meanwhile this hydraulic motor-bike lift is  a life -changer.

OLYMPUS DIGITAL CAMERA

http://www.sciencemusings.com/2008/01/key-to-riddle.html

by Chet Raymo

Behind the apparent decay and new growth the atoms endure, those mysterious and eternal particles that contain within themselves tendencies to combine and recombine in endlessly creative ways.

The church, the village, the rank tropical growth, the creatures that creep and fly and crawl are composed of recycled star dust, atoms forged billions of years ago in hot, massive stars, here woven by the hands of energy and entropy into a fabric of gorgeous complexity.

I went there for the same reason the naturalist/scientist Rachel Carson went to the edge of the sea. She wrote: “Underlying the beauty of the spectacle there is meaning and significance. It is the elusiveness of that meaning that haunts us, that sends us again and again into the natural world where the key to the riddle is hidden.”

OLYMPUS DIGITAL CAMERA OLYMPUS DIGITAL CAMERA OLYMPUS DIGITAL CAMERA

Extracts from J.P. Hodin, Barbara Hepworth, London, 1961, Two Conversations with Barbara Hepworth: ‘Art and Life’ and ‘The Ethos of Sculpture’, pp. 23–24

Art and Life (in conversation with J.P. Hodin, 18 August 1959)

“Art at the moment is thrilling. The work of the artist today springs from innate impulses towards life, towards growth – impulses whose rhythms and structures have to do with the power and insistence of life. […] In the past, when sculpture was based on the human figure, we knew this structure well. But today we are concerned with structures in an infinitely wider sense, in a universal sense. Our thoughts can either lead us to life and continuity or […] the way to annihilation. That is why it is so important that we find our complete sense of continuity backwards and forwards in this new world of forms and values. I see the present development in art as something opposed to any materialistic, anti-human or mechanistic direction of mind.”

I would really appreciate any feed-back you might have on these ideas including a Title.

Ysgol Maesydderwen Sculpture;step by step

   Groups from Year 10 made models on the Theme of the School Badge and Motto; ”Knowledge is the best weapon” . I took those away and drew together all of the strongest ideas and images to get this Scale Model.All the images have symbolic meaning and came from pupils.    We built the Sculpture together in the Art-room during pupils regular Art classes.Years 7-10 were involved.                                                                       Once it was built the Sculpture was cut into 3 sections and dried slowly.      Tiles for the plinth were hand-made and carved showing scenes from school life and local history                        Wilmot Dixon took on the Installation as part of their finishing touches to the new extension .               OLYMPUS DIGITAL CAMERAOLYMPUS DIGITAL CAMERAOLYMPUS DIGITAL CAMERA

Ysgol Maesydderwen, Ystradgynlais, S.Wales.

Ysgol Maesydderwen, Ystradgynlais, S.Wales.

Ysgol Maesydderwen, Ystradgynlais, S.Wales.

Ysgol Maesydderwen, Ystradgynlais, S.Wales.