The Albany Gallery is one of the UK’s most established and respected galleries. Collectors keep an eye on them because they have a great track-record for showing new treasures.
South Wales Potters is one of the largest groups of professional and hobby potters, ceramicists and collectors in the UK. Members are based all over southern Wales, England and some abroad. They are involved in putting together Europe’s premier ceramics event, the International Ceramics Festival held every 2 years at Aberystwyth University.
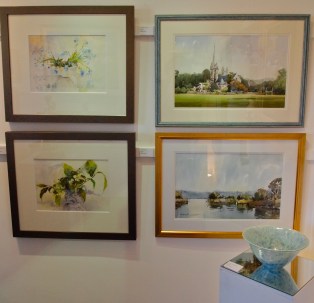
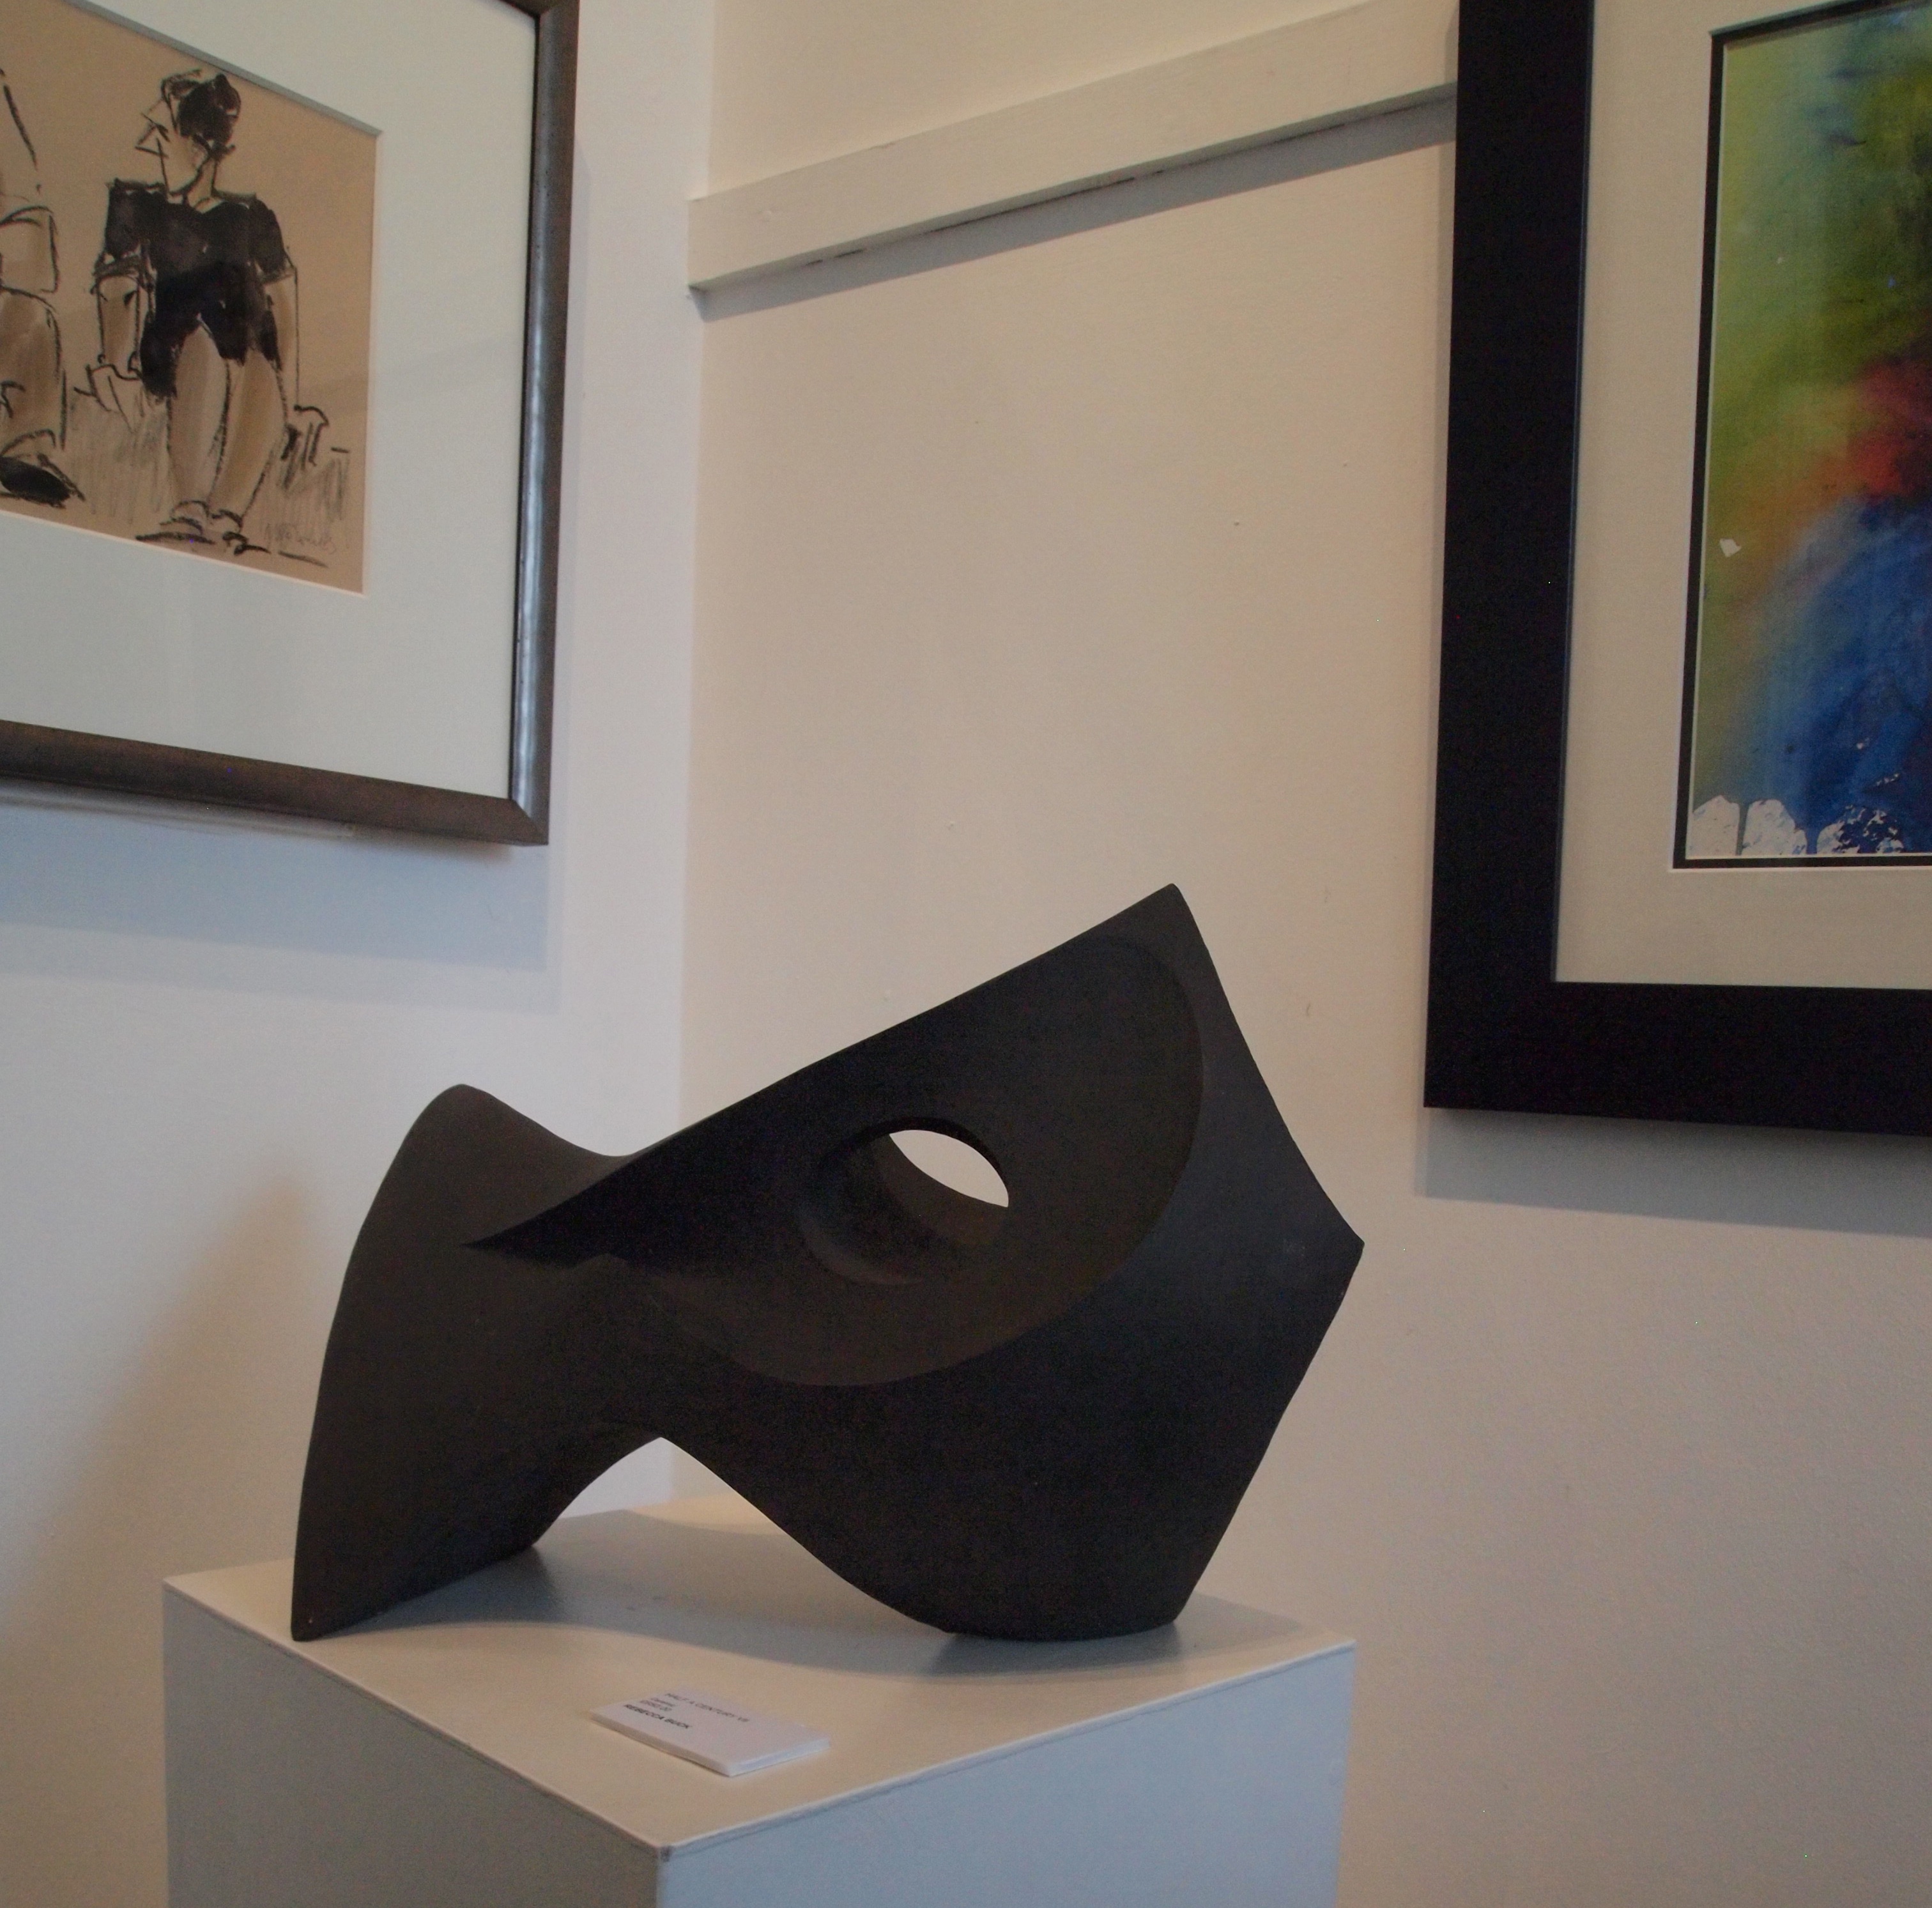
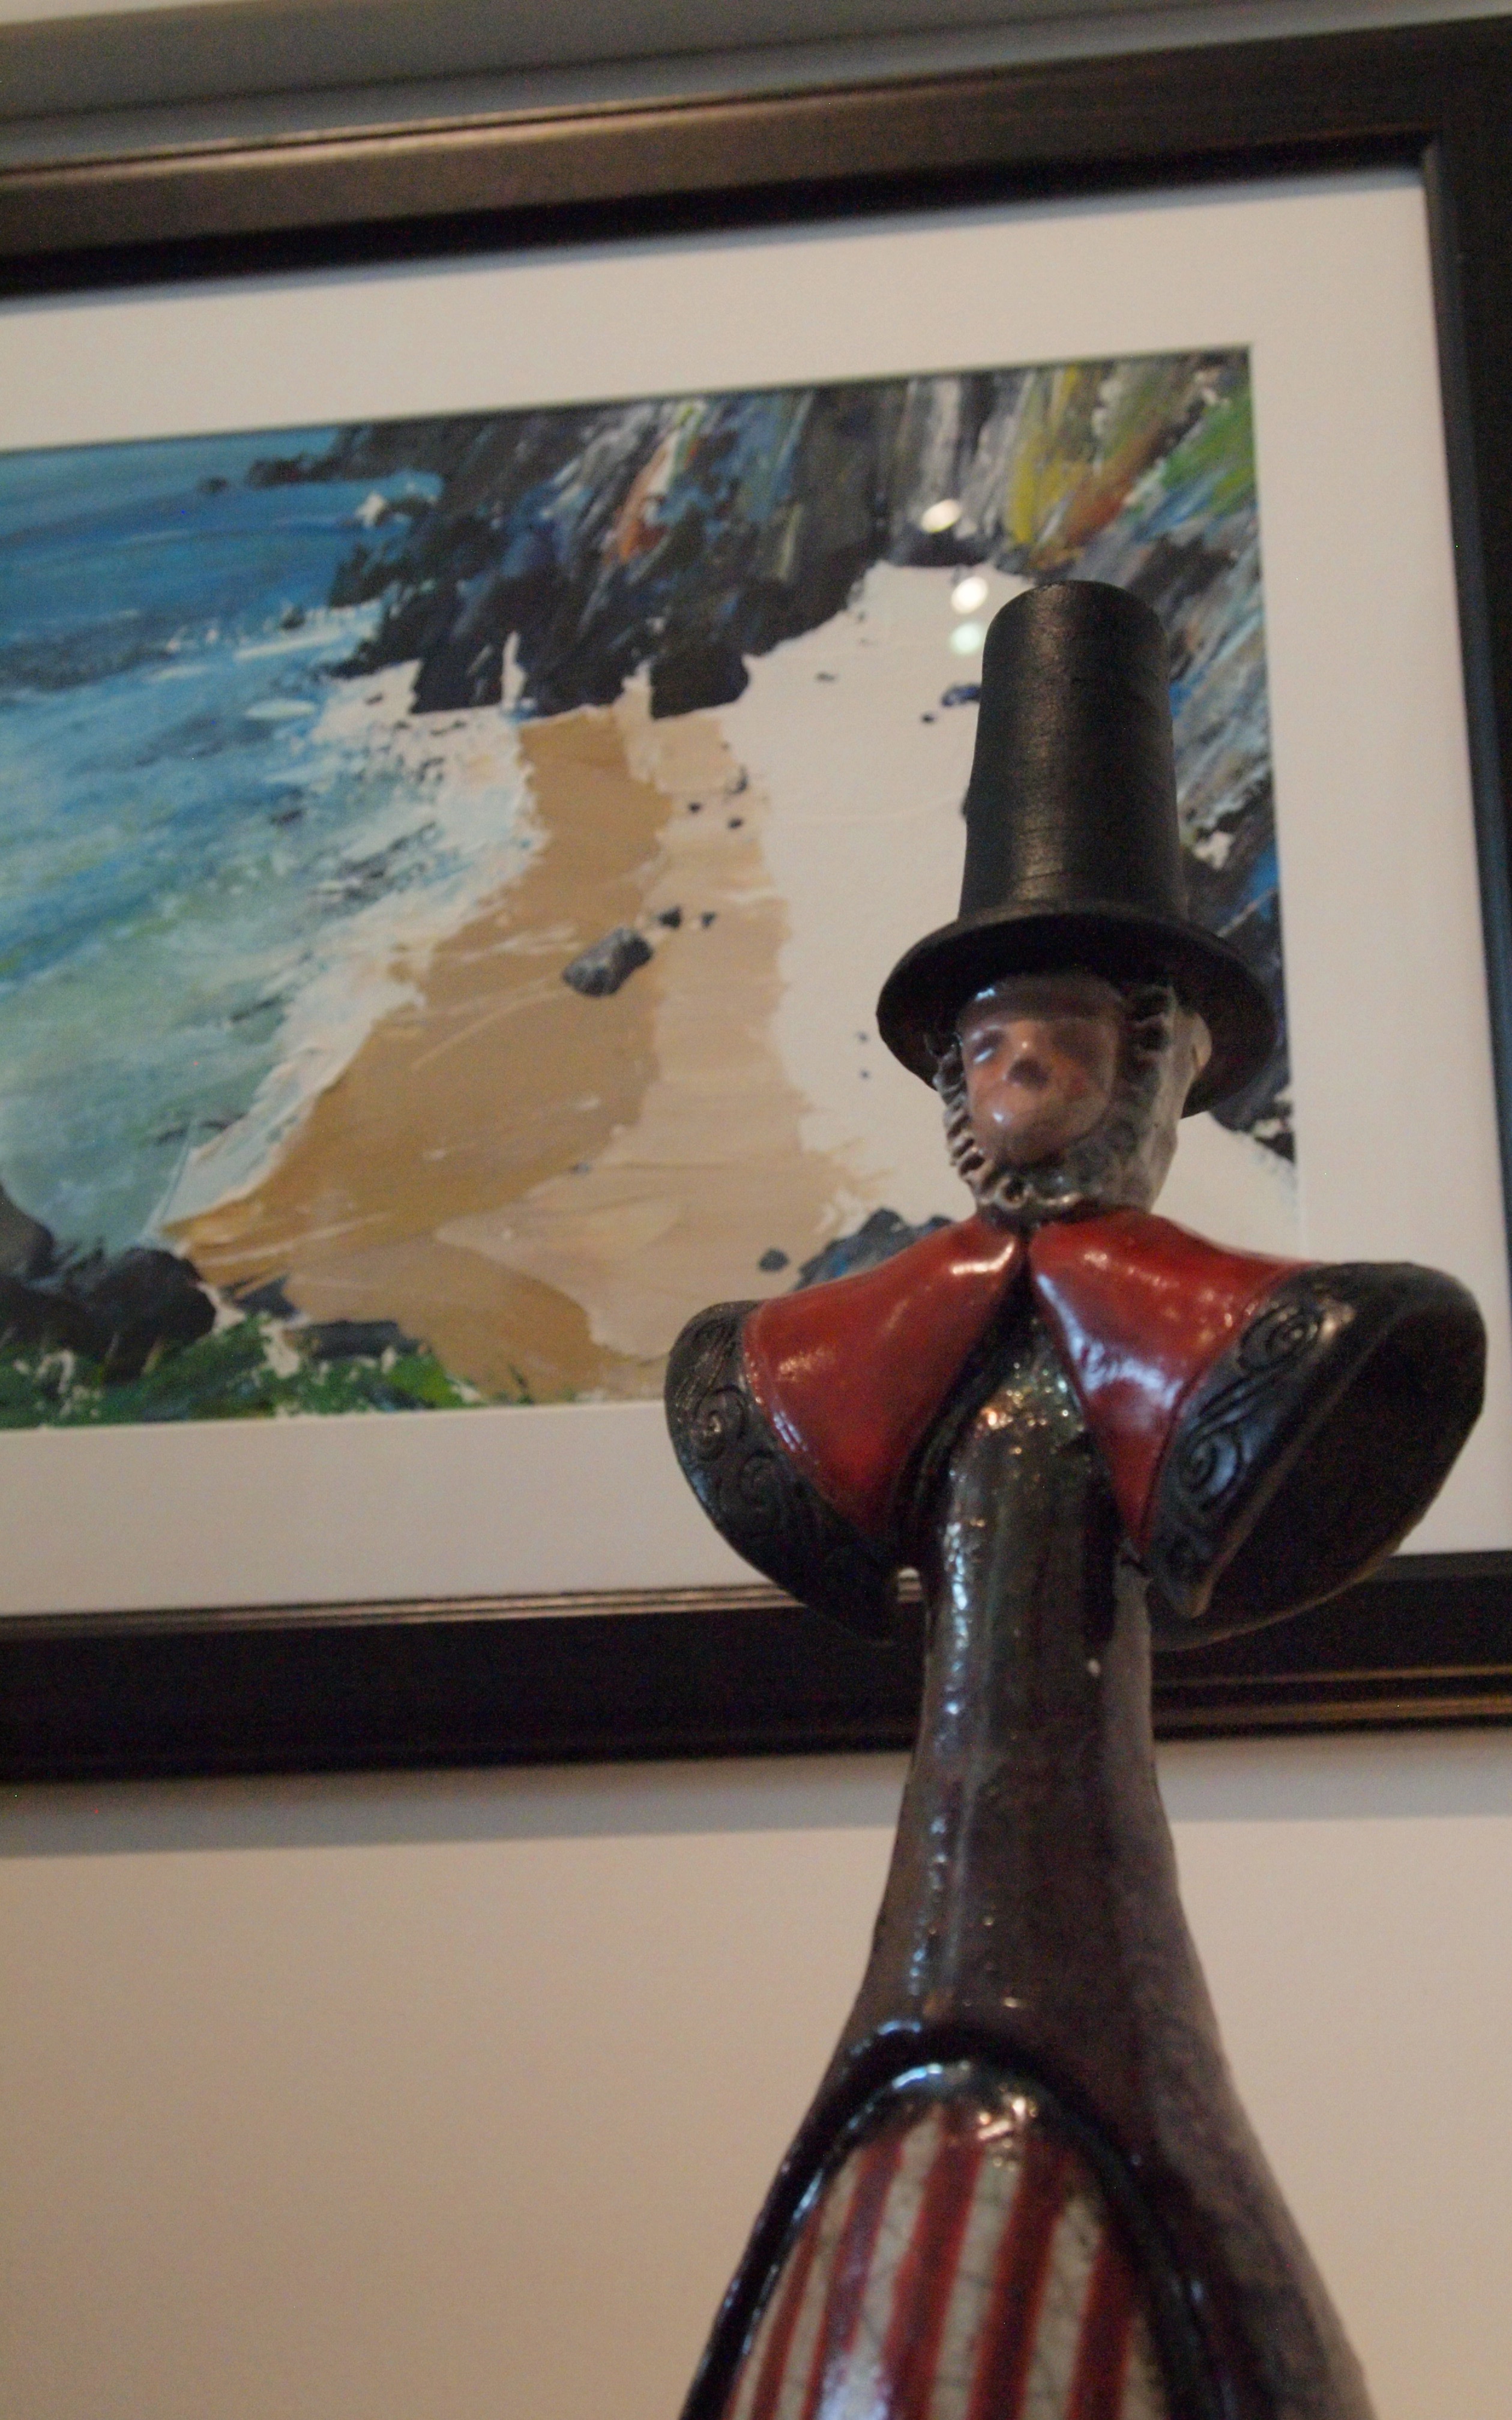
The Albany’s Summer Show is always fresh and wonderful. They have an excellent variety of 2D Art set off beautifully by ceramics they have selected from South Wales Potters. The staff at the Albany Gallery are lovely- very knowledgeable about the work they show, friendly and very approachable.
The Private View was very full and bustling but there are still some gorgeous pieces to buy.
Albany Gallery have set the ceramics to compliment the paintings and it looks marvellous. The Gallery is an intimate and home-like space making it very easy to imagine the Art-work in the rooms of your own home.
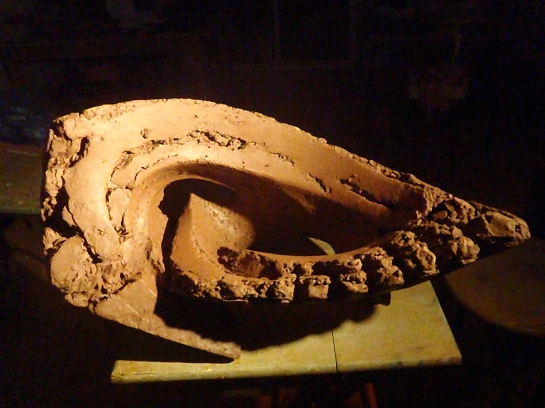
Wyvern VIII, 2015, 39cm H x 71cm L x 34cm D, ceramic.
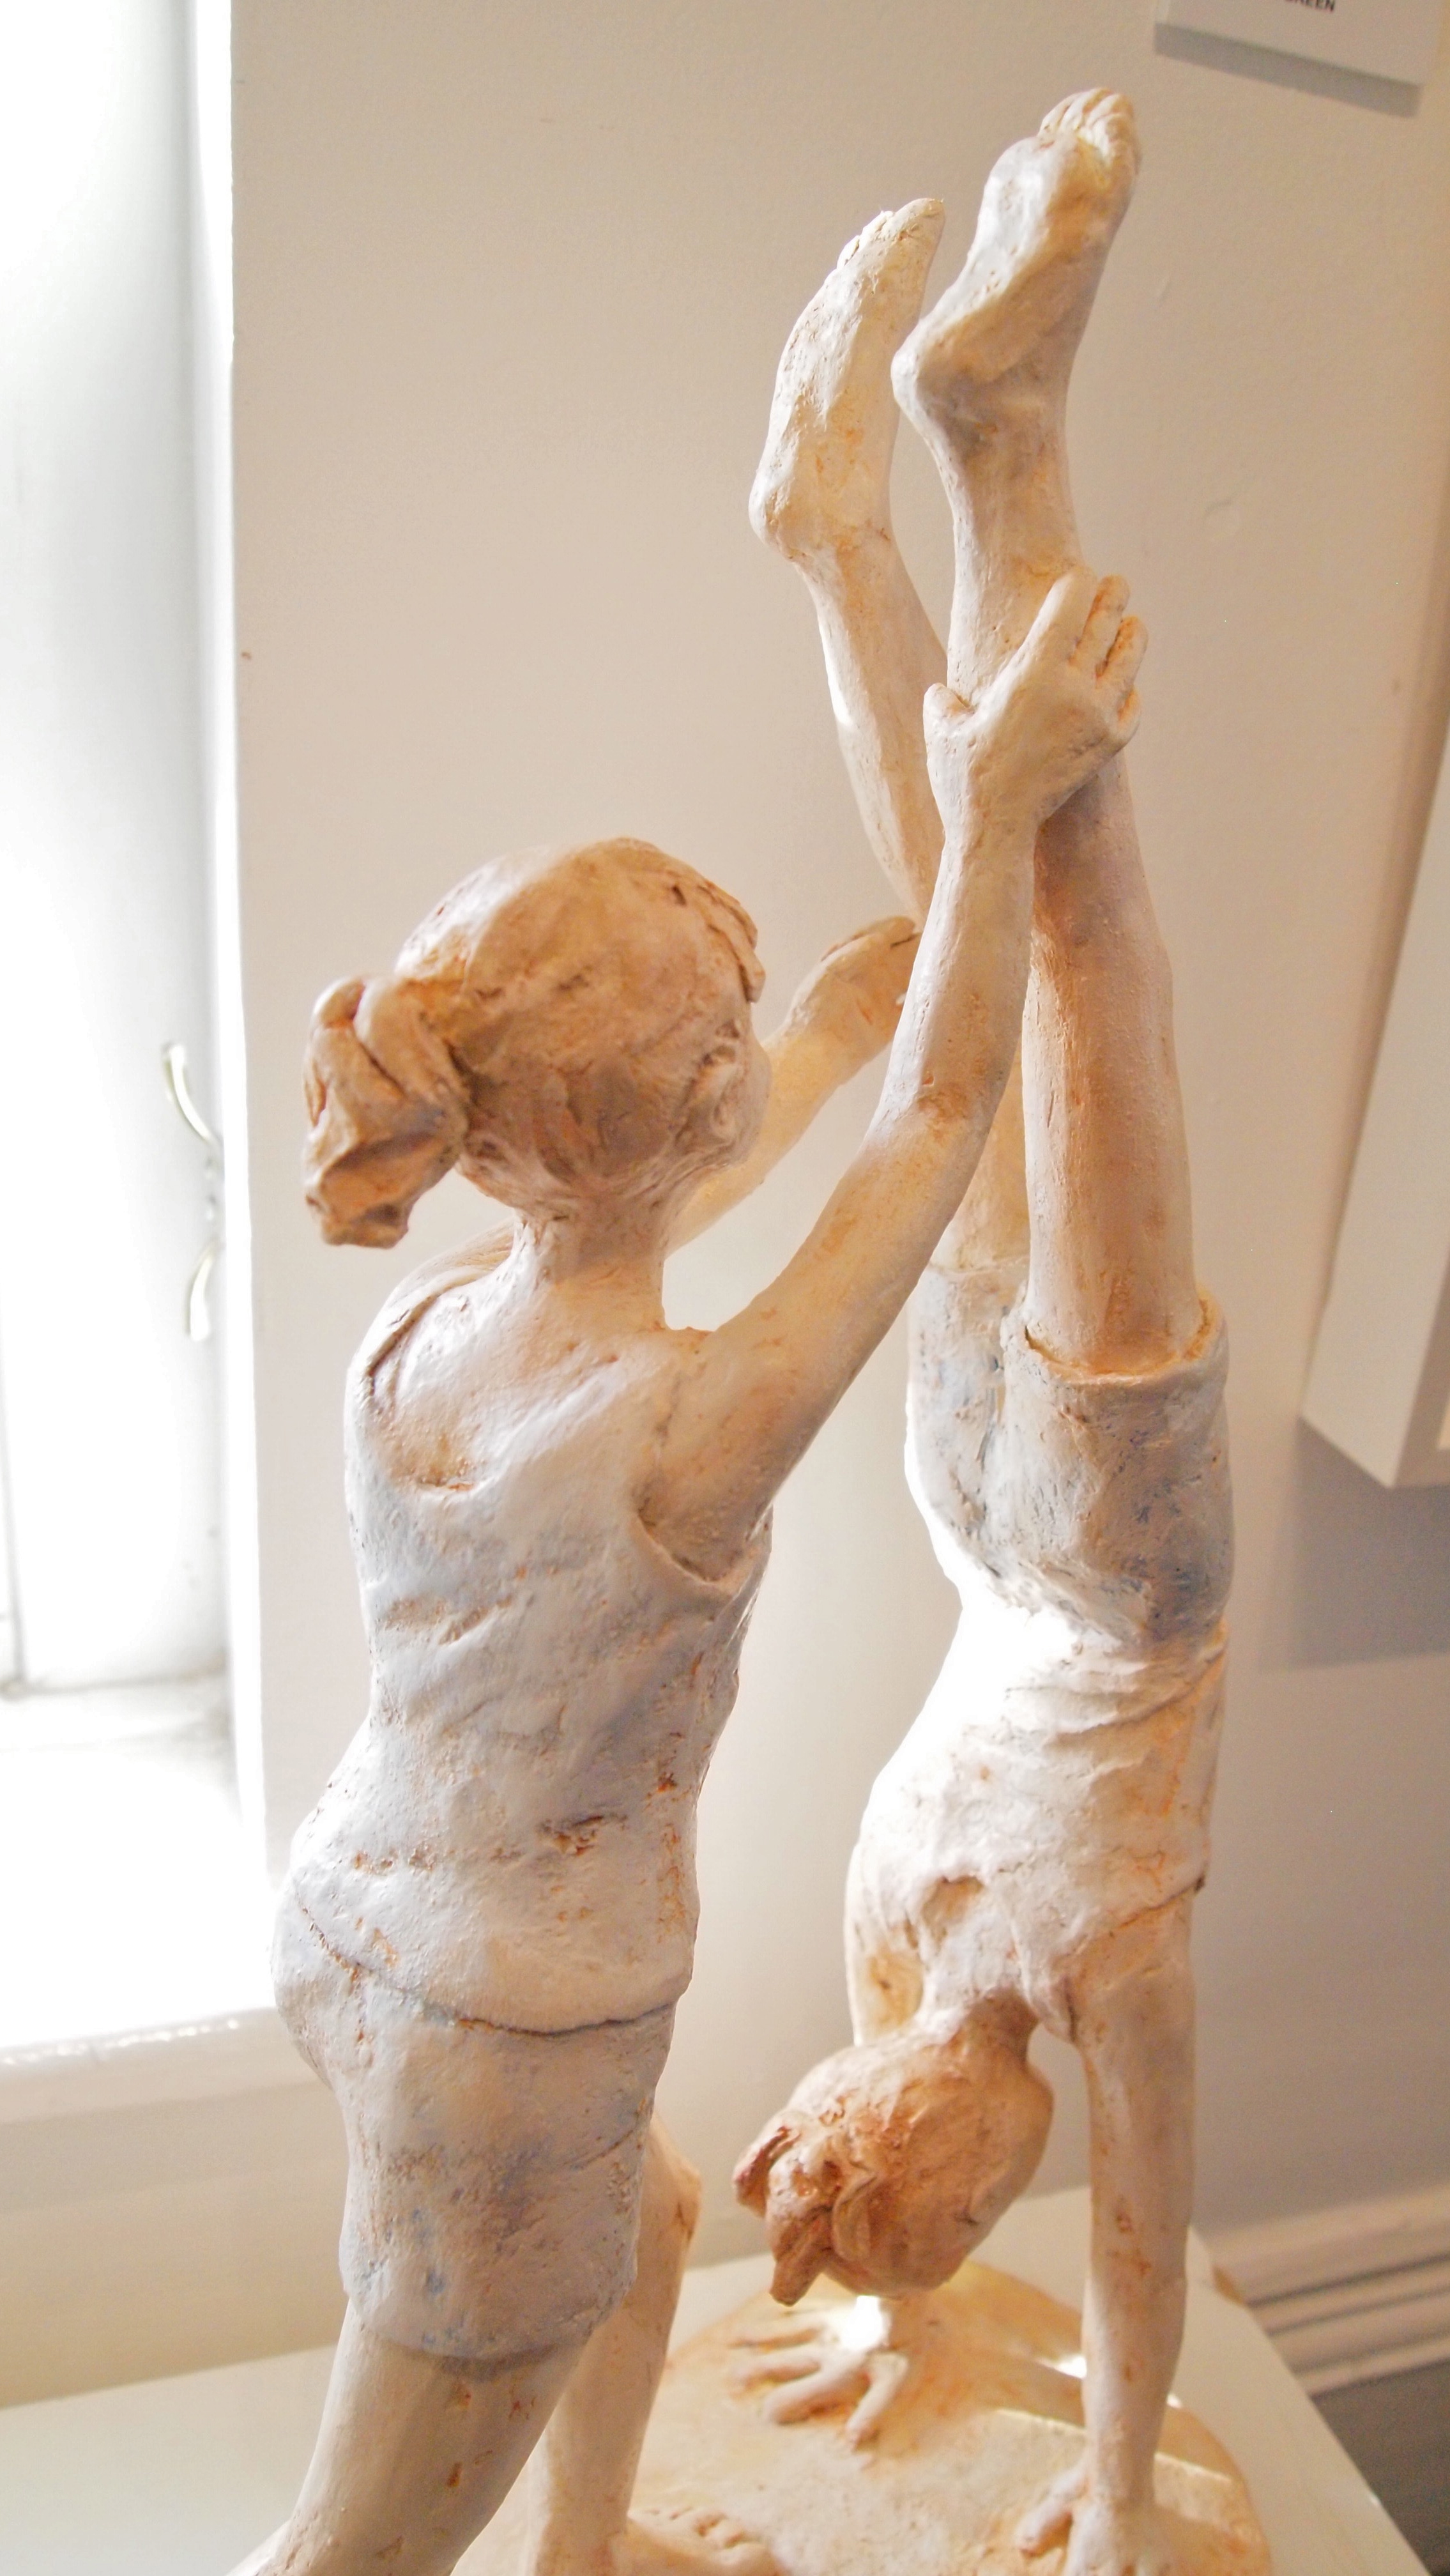
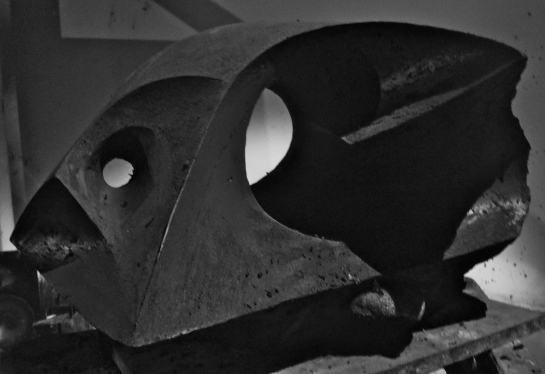
Up is Down VII, back view
Up is Down V, 44cm H x 58cm L x 50cm D,
Up is Down VI, second view.
Up is Down V, back view
Making Abstract Sculpture can feel very elusive; where to start, when to stop? This post aims to de-mystify the process and give you an ideal technique that will allow you to go with your flow to make beautiful Abstract forms that express those things that are not easily put into words or naturalistic art.
Because there is no right or wrong with Abstracts you are better off with a technique that allows you to feel your way around the form and to change your mind any time you want to. Building the piece in solid clay allows you to separate the ceramic-technical needs from the flow of creativity for the most part. You do need to make good joins as you go along but with the right clay that is not a distraction. It’s a great method for pieces up to 1 metre. For larger Sculptures I often use it over a hollow clay-armature to reduce the over-all weight. Use a clay designed for sculpture and hand-building with plenty of grog (gritty bits like sand). Scarva’s ES 50 is fab and excellent value for money.
I work to music and usually have a theme I am following. When you start out with Abstracts you need to put some boundaries in place; have a theme (an emotion, geometry, etc) or abstract a known form like a figure or an animal. All the pieces above were made using this technique. All but one are made in combinations of Scarva’s black clays.
Gill Tennant-Eyles, Emma Bevan and Tez Roberts came to Osprey Studios for a Workshop. We had an excellent day going over this technique and sharing each other’s ideas.
Make a block of clay that has the approximate hight/width/depth you feel you need at this point. Rough out the beginnings of a form.
Work all around the form in stages, giving each area equal attention, refining with each rotation.
Add or subtract clay. A paddle will be very useful.
When the piece starts sagging leave it to harden up a bit. Use plastic to keep the drying even.
For larger pieces the process is the same. Use props or leave temporary supports of clay to hold up the form until it hardens. These might stay there until you have hollowed out the sculpture and reduced the weight.
Once the piece is leather-hard carve/scrape the surface. You can still add clay but pay attention to the joins.
At the point where the form is complete apart from finishing the surface, stop building and get ready to hollow-out. The piece should be firm enough to resist a thumb-print. On very large pieces you might start hollowing the top while the lower parts are still too damp; the hollowed clay walls will need to be able to support themselves with-out distorting. Don’t let the form get too hard or you wont be able to cut it open.
How thick the clay can be to fire well depends on the amount of grog, the denseness of your modelling style, drying time and the speed of your firing.
Air bubbles trapped in the clay will expand with the heat. Grog and/or a loose surface will allow the air to seep through the clay. The same is true with water but steam expands fast. If your piece breaks into big bits during the fire it was trapped air and you will be able to see where the bubbles were in the shards. If it blows up into a trillion smithereens it wasn’t properly dry!
I dry thick sculptures slowly under plastic which I turn daily for 4 weeks minimum and then 1-2 weeks in a plastic tent with a dehumidifier. A long dry allows the water to level out as water loves to do and that will enhance the structure of the clay within it’s new sculpture shape. You will get less cracks or distorting in the fire.
I fire very slowly with an 18 degree C rise until 600 degrees C.
Generally 3cm is a fair maximum thickness for a well grogged clay.
Choosing where to cut is easy: Starting at the top make the first cut at the point where you can reach all the parts that need hollowing to leave 1-3cm walls. That may mean cutting off a very small piece and hollowing barely a few scoops, for example the head of a figure: drill a tool down the neck and then your next cut would be low on the chest, etc. Always ensure there is an air outlet for each hollowed area. Hard to reach areas can be skewerd from the inside or outside to make channels for the air/water to escape.
Horizontal cuts are best because gravity is on your side while the piece is drying. Lay the cut section on foam.
Hollow the cut section first, leaving a wall approx 1.5-2cm thick. Do not smooth this inner surface: it will make it difficult for any trapped air to pass through the clay during firing. You can leave ‘buttress’ type support walls. Score the edges with a serrated kidney (NEVER make deep scores with a pointy tool. Tiny bubbles of air will get trapped there all along your join and possibly cause a crack.) Moisten w/ water/slip so that the edge can soften while the section is upside-down. Then hollow into the rest of the form going as far as you can reach. Mark how far you reached on the surface to help you decide where to make the next cut.
Quality Joints: Once both edges are softened put the pieces back together and move back and forth until you feel the edges lock together. Genuine joins are formed when the chains of platelet-shaped particles from each section inter-lock. Picture a magnified image of hair. Score marks do not give the surface ‘tooth’; they allow water into the clay-body. On vertical surfaces they hold the water in place to give it time to sink in. Slip is not ‘glue’, it is clay particles spread out in water and has little strength, especially when it has dried. It is ideal for holding a lot of water in place to give it time to be absorbed to soften the area of leather-hard clay. Once both edges are softened put the pieces back together and move back and forth until you feel the edges lock together. Manipulate the softened clay at the join to encourage further integration of those particle-chains and to disturb the straight line of the join; cracks love to zing along a nice straight slip-weakened join during the firing when the pull of shrinking stresses the sculpture.
Smooth the now recessed join with water + rub until a slip is lifted from the join’s surface. Make a coil 1.5cm thick by squeezing. Do not roll your coils; it packs the finer particles on the coils’s surface making them resistant to joining. Attach one end and inch the coil into the join; press in then squeeze the coil to force it to inch forward along the join; this friction creates the bond between the surfaces. Coiling explained here.
Blend the coil in, leaving it raised. The excess clay will slowly release it’s water into the join, slowing drying. Wrap the piece in plastic and leave for week or so until the coil has the same hardness as the rest of the form. Then you can scrape it away, compressing the clay as you go to leave a strong join that wont recess during the firing.
Make your next cut and repeat.
Once those coils have hardened under plastic you can complete the Sculpture’s surface and edges. Then set to dry very slowly (min 4 weeks) under a 5-sheets-thick-newspaper or cardboard box. For very large forms you can use a double layer of bed-sheets. If you use plastic turn it regularly so that condensation doesn’t drip onto the clay and spoil it. Or stick plastic over your selves to make a micro drying-room.
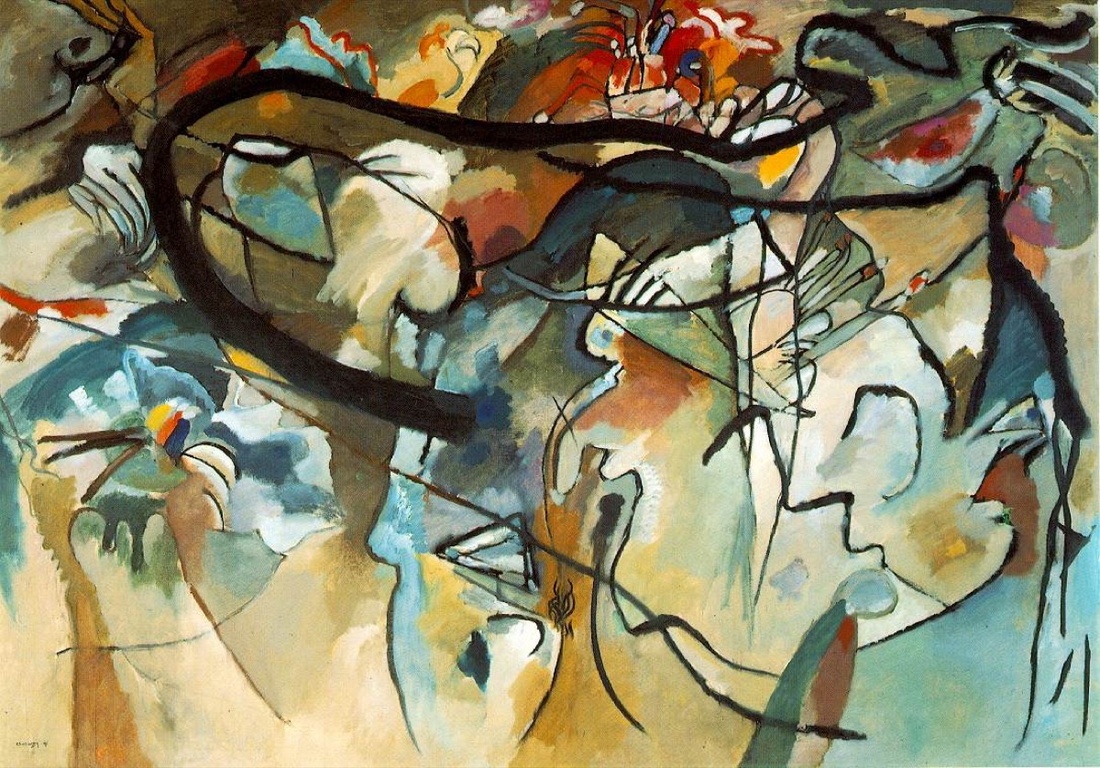
Wassily Kandinsky, Composition V, 1911. Image via Wikimedia Commons.
Who made the first Western abstract painting? That was the question that Wassily Kandinsky’s widow, accompanied by a team of researchers, set out to answer in 1946. Her late husband, a Russian painter who was among the pioneers of abstraction in the early 1910s, had himself been personally invested in the answer.
In 1935, Kandinsky had penned a letter to his gallerist in New York to insist on his preeminence. “Indeed,” he wrote of a 1911 work, “it’s the world’s first ever abstract picture, because back then not one single painter was painting in an abstract style. A ‘historic painting’, in other words.”
Kandinsky wasn’t the only artist interested in preserving his legacy. He and several early abstract painters—including Robert Delaunay, Mikhail Larionov, Natalia Goncharova, and Kazimir Malevich—backdated their works, in some cases several years before they were actually completed.
This artistic jostling reflects a focus on invention as an individual act, notes curator Leah Dickerman in an essay for MoMA’s 2012 show “Inventing Abstraction, 1910-1025: How a Radical Idea Changed Modern Art.” But, as she goes on to say, that approach is in some ways misguided. Rather than the work of a solitary genius, abstraction “was an invention with multiple first steps, multiple creators, multiple heralds, and multiple rationales.”
RELATED ARTICLE
What Makes an Abstract Expressionist Painting Good?
At the turn of the 20th century, the world was becoming increasingly connected. Steamships, cars, and trains facilitated international travel, while telephones, telegraphs, and radios allowed for conversations between people on opposite ends of the globe.
Within the art world specifically, journals sprang up in droves; in Paris alone, some 200 reviews of art and culture appeared in the decade leading up to World War I. Subscribers were scattered across Europe and America, allowing a wide swath of creatives to stay abreast of the latest developments in art. And this period also saw the beginning of a traveling exhibition culture, led by the Italian Futurists.
“Historians talk about ‘conditions of possibility,’” Masha Chlenova, a curator who worked with Dickerman on “Inventing Abstraction,” told Artsy. “For example, photography was also invented by three people at the same time. Daguerre just happened to be the best at marketing and patenting.”
Similarly, while Kandinsky is today hailed as the father of abstract painting, he was by no means the only player in the development of non-representational painting. His work Komposition V did, admittedly, jumpstart public interest in abstract painting. Exhibited in Munich in December 1911, this monumental work was just barely representational.
It was the first such work to be put on display, and “for some artists and intellectuals, abstraction not only began to seem plausible, but also took on the character of an imperative,” Dickerman writes.
Kandinsky had been thinking about abstract art for years beforehand. His manifesto On the Spiritual in Art, which appeared as a draft in 1909 and was published the same month as Komposition V went on display, laid out the tenets of abstraction. But it would still be several years before Kandinsky would finally break free from recognizable forms in his art. As Chlenova put it, “he theorized abstraction before he made painting.”
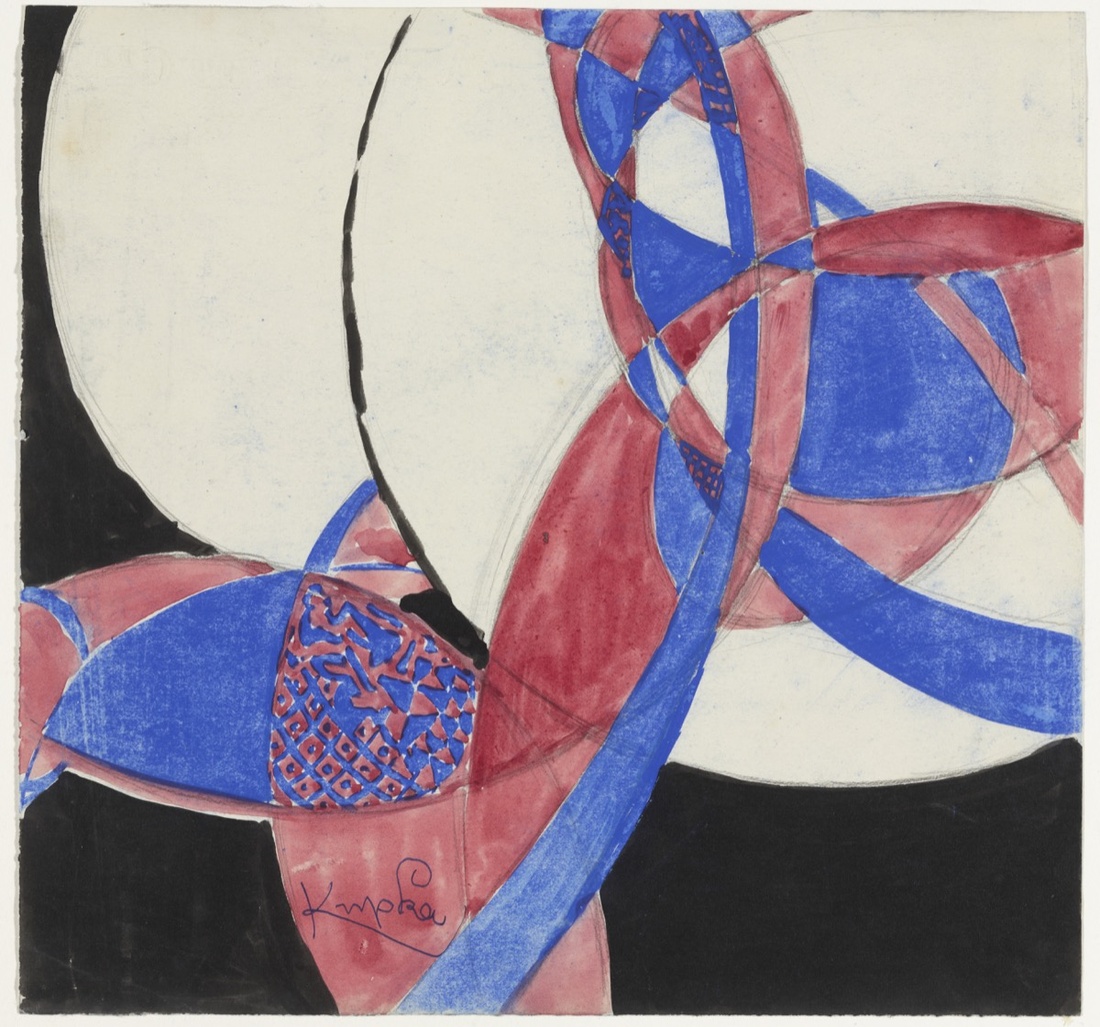
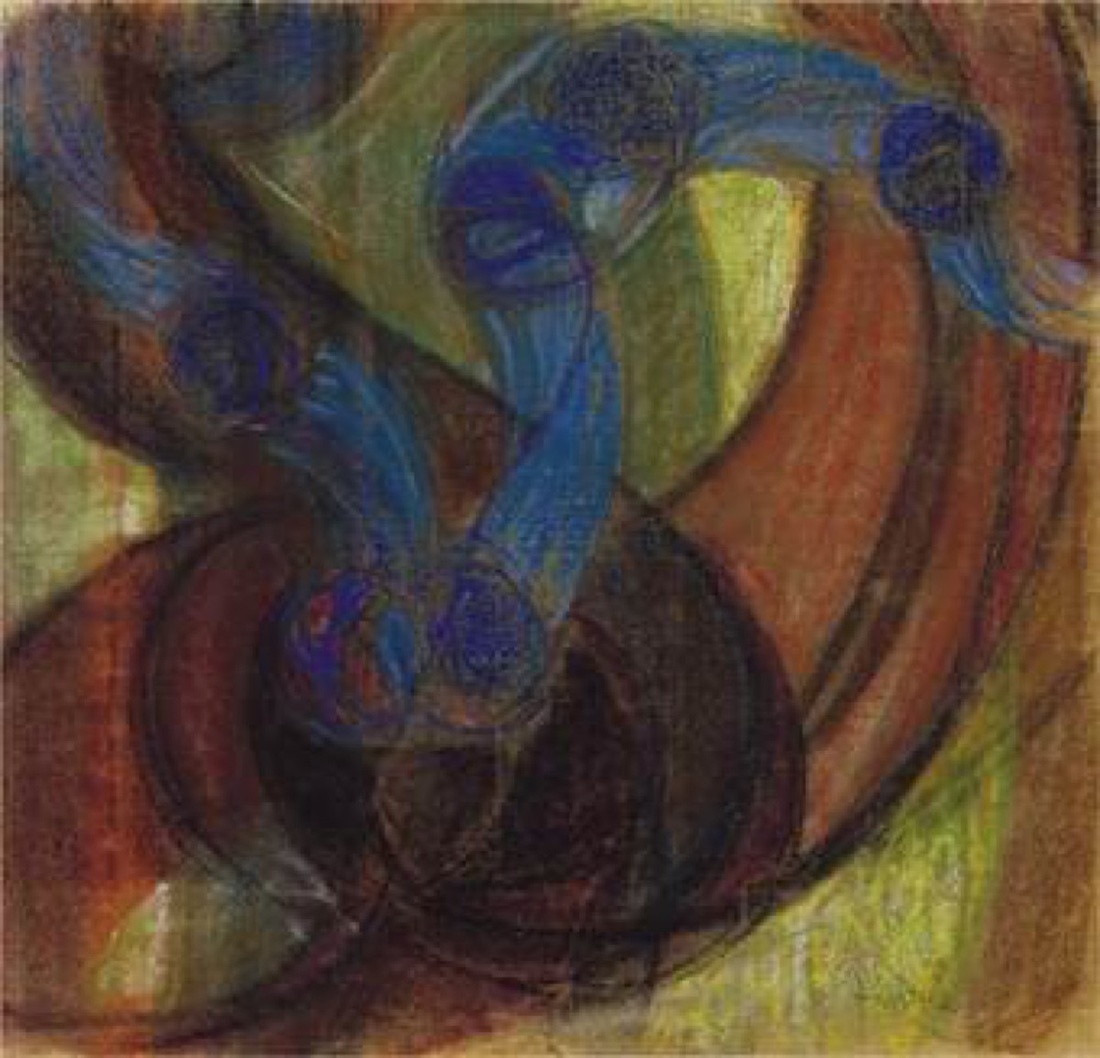
Dickerman references Czech-born artist František Kupka as the first to display works that were a complete break from representational painting. His compositions Amorpha, Chromatique chaude and Amorpha, Fugue à deux couleurs were shown at the Salon d’Automne in Paris in October 1912, filmed for the newsreels, and then broadcast across Europe and America.
Dickerman believes that Kupka’s willingness to publicly defy convention was related to his personal history. Although he grew up in Prague and Vienna and started out as a Symbolist, he later moved to Paris and developed close ties with the city’s avant-garde—which, as Dickerman notes, granted “him an insider/outsider status that seems particularly fertile for paradigm-shifting thought.”
But further complicating the question of “first” is that it can be difficult to determine the threshold of abstraction. When, precisely, does a work go from “abstracted” to “abstraction”?
French avant-garde artist Francis Picabia, for example, is sometimes credited with the first abstract painting. His watercolor Caoutchouc (Rubber) was completed in 1909, which would predate even Kandinsky’s theories on abstraction. But other academics have pushed back, noting that the work still retains some semblance of form, reminiscent of a bouquet of flowers.
For “Inventing Abstraction,” Chlenova said she and Dickerman began by establishing clear criteria for what they considered abstract work. “Our main criterion was the artist’s own position and their statements that they’re doing something abstract,” she said. “The terminology is a slightly different question because the word ‘abstract’ would not necessarily be used. But there was a very clear awareness from the artists that were sensitive to what was happening.”
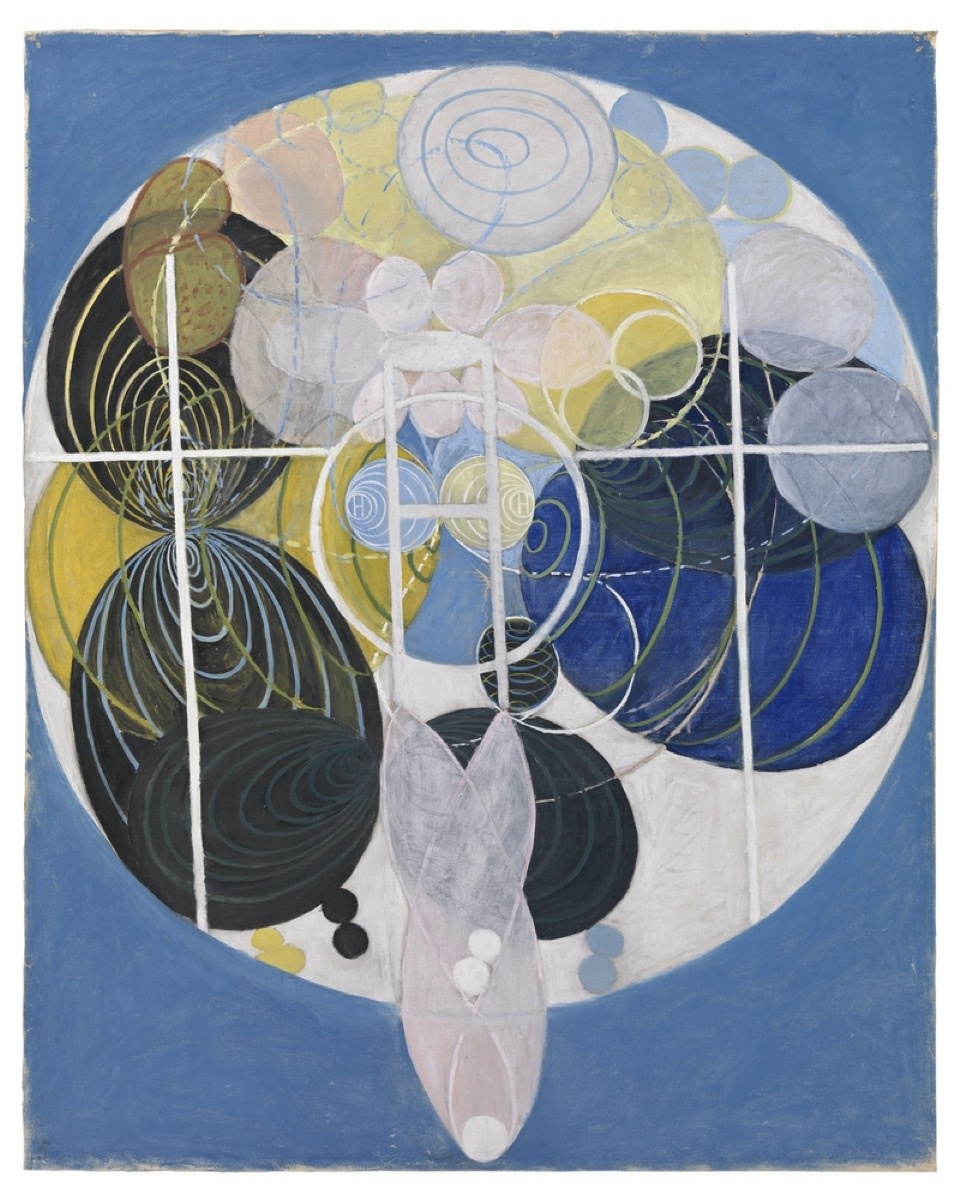
Hilma af Klint, The Large Figure Paintings, No. 5, Group III, 1907. Image via Wikimedia Commons.
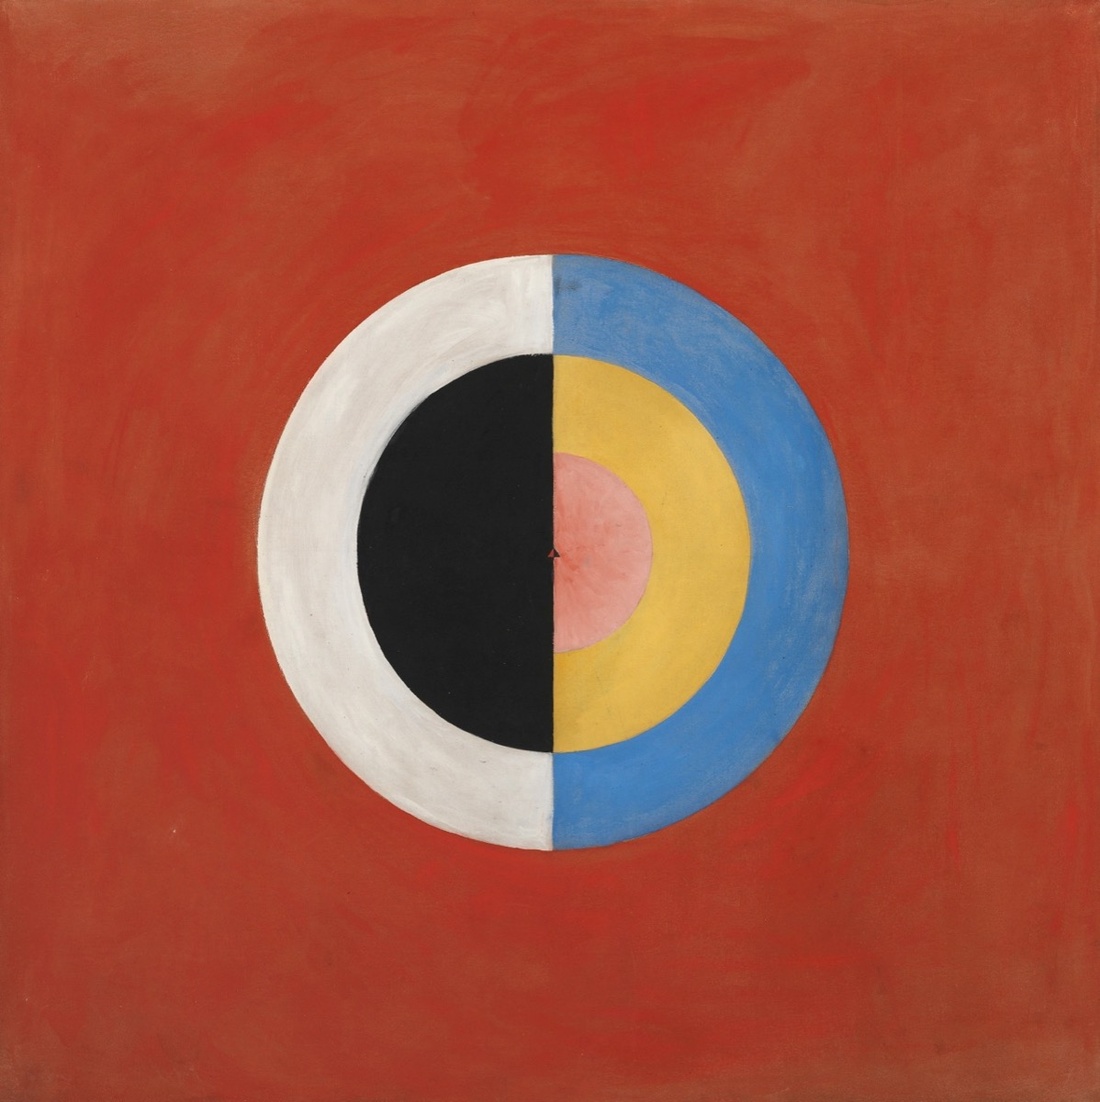
Hilma af Klint, Svanen (The Swan) No. 17, Group IX/SUW, The SUW/UW Series, 1914-1915. Image via Wikimedia Commons.
This is why, she explained, Swedish artist Hilma af Klint was not represented in the MoMA exhibition. Since 2013, when Moderna Museetheld the first-ever retrospective of her work, af Klint’s oeuvre has received renewed attention from the public. Known in her lifetime as a landscape painter and portraitist, it was revealed decades after her death that she had also been experimenting with abstraction. As early as 1906, af Klint had been painting colorful works full of organic shapes, spirals, and curlicues.
This date places her several years before Kandinsky even theorized abstraction, let alone acted on his ideas. But af Klint’s works sprang from her interest in the occult—during the 1890s, she started organizing seances with four artist friends where they practiced automatic drawing and writing.
Later, when she began her largest body of non-representational paintings, she claimed that spiritual forces were directing her hand. And for an artist to be included in “Inventing Abstraction,” Chlenova explained, they had to “formulate their practice as a conscious rejection of any reference to the outside world.”
Others disagreed with this reading, arguing that a mystical approach should not negate her contribution to developing abstraction. “‘Spiritual’ is still a very dirty word in the art world,” curator Maurice Tuchman toldthe New York Times in 2013. “When the prejudice against the idea of the spiritual life in af Klint’s work is overcome, which will require scholarship, then perhaps she will really take hold in the broader conversation.”
But there’s no disagreement that the invention of Western abstraction revolutionized art production in the 20th century, nor that it was predated by centuries of abstracted forms and patterns in non-Western traditions.
“One can treat abstraction a little bit more abstractly, if you will,” Chlenova laughed, “without ultimately being too concerned about who was first.”
It’s the end of the 1st year and time to take stock. You can see the earlier parts of the story via the Contents page. Click on any picture to see it full size.
Stephen Foote and I met up after 30 years. We were good friends as teenagers, both rather disengaged with school, both making art in our own time. 30 years on we both still use art work as a major part of our interaction with this nutty world. Sharing our images was a key way we got to know each other again and harnessing that process in a joint project was simply a way of capturing a what was occurring naturally. We set a straightforward ” Artist Responds to Landscape ” brief and kept a very open mind while we walked, talked, Steve took pictures and I just took it all in. We met every few months and sent each other pictures of the ensuing work in-between times.
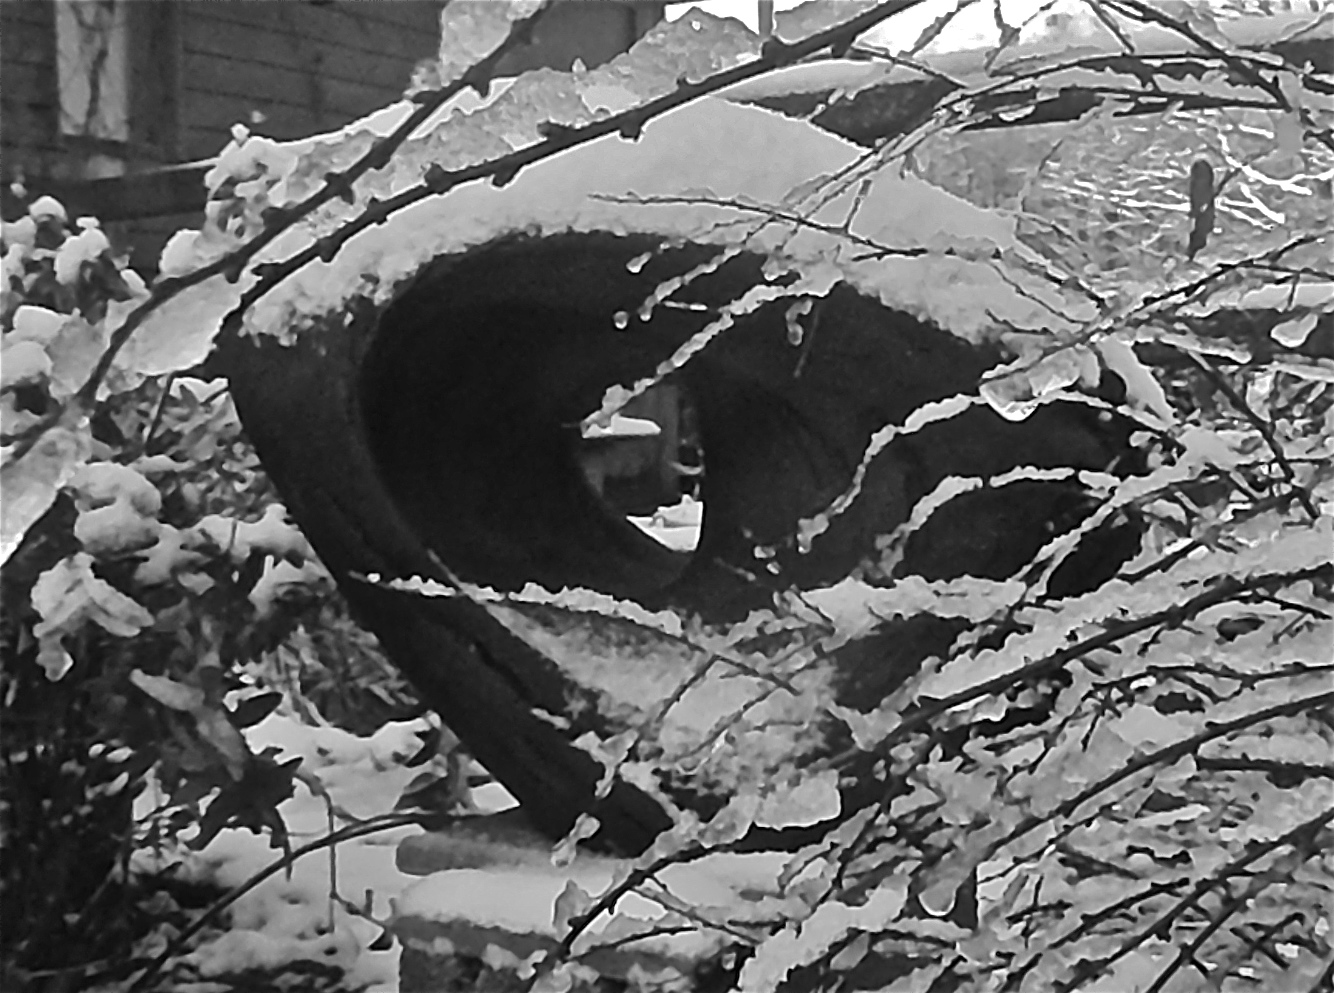
Steve is also a Cameraman and was involved in filming for Panorama during the early, very heated phase in Kiev and the Crimea. I was coming to the end of the Up Is Down Series . Our first visit was Bracelet Bay, Mumbles, Swansea. Then we went into Porth Yr Ogof caves and had a mind-blowing day for me; we spent hours in the dark, natural cave while Steve took a fab series of photographs. I stood in the river in the darkness, held the lights and listened to the flow of water, felt the under-ground breezes. From there the project clarified for us as the travels of the water from the sky above the Brecon Beacons to the river, especially the Tawe, down to the wide bay at Swansea, and out into the Ocean where much of it will return to the clouds and begin the circle again.
These pictures are roughly in sequence for the progression of work over the last year with Steve’s Photos next to the related Sculptures.
Bracelet Bay , Stephen Foote.
Up Is Down- in progress
Up Is Down- in progress
Up is Down IX, 57cm W,
Stephen Foote; Dunes
Bracelet Bay, Mumbles, Swansea by Steve Foote
in progress, July 2014
Bracelet Bay, Mumbles, Swansea by Steve Foote
in progress August 2014
Bracelet Bay, Mumbles, Swansea by Steve Foote.
It was this fabulous picture that shifted me abruptly into figures, much to my own surprise.
Busts in progress, Aug 2014.
Bracelet Bay, Mumbles, Swansea by Steve Foote
A narrative developed that was also influenced by the awesome storms of the previous winter. A trio of figures, the Guardians of the Aquasphere, the Lithosphere and the Atmosphere, arose and they and their Harbingers took on characteristics that the many life-forms of the Biosphere could relate to so that all would understand what was happening; The Triumvirate were going to let loose their forces. This was not to threaten or punish. They simply knew it was time.
Brecon Beacons, by Steve Foote.
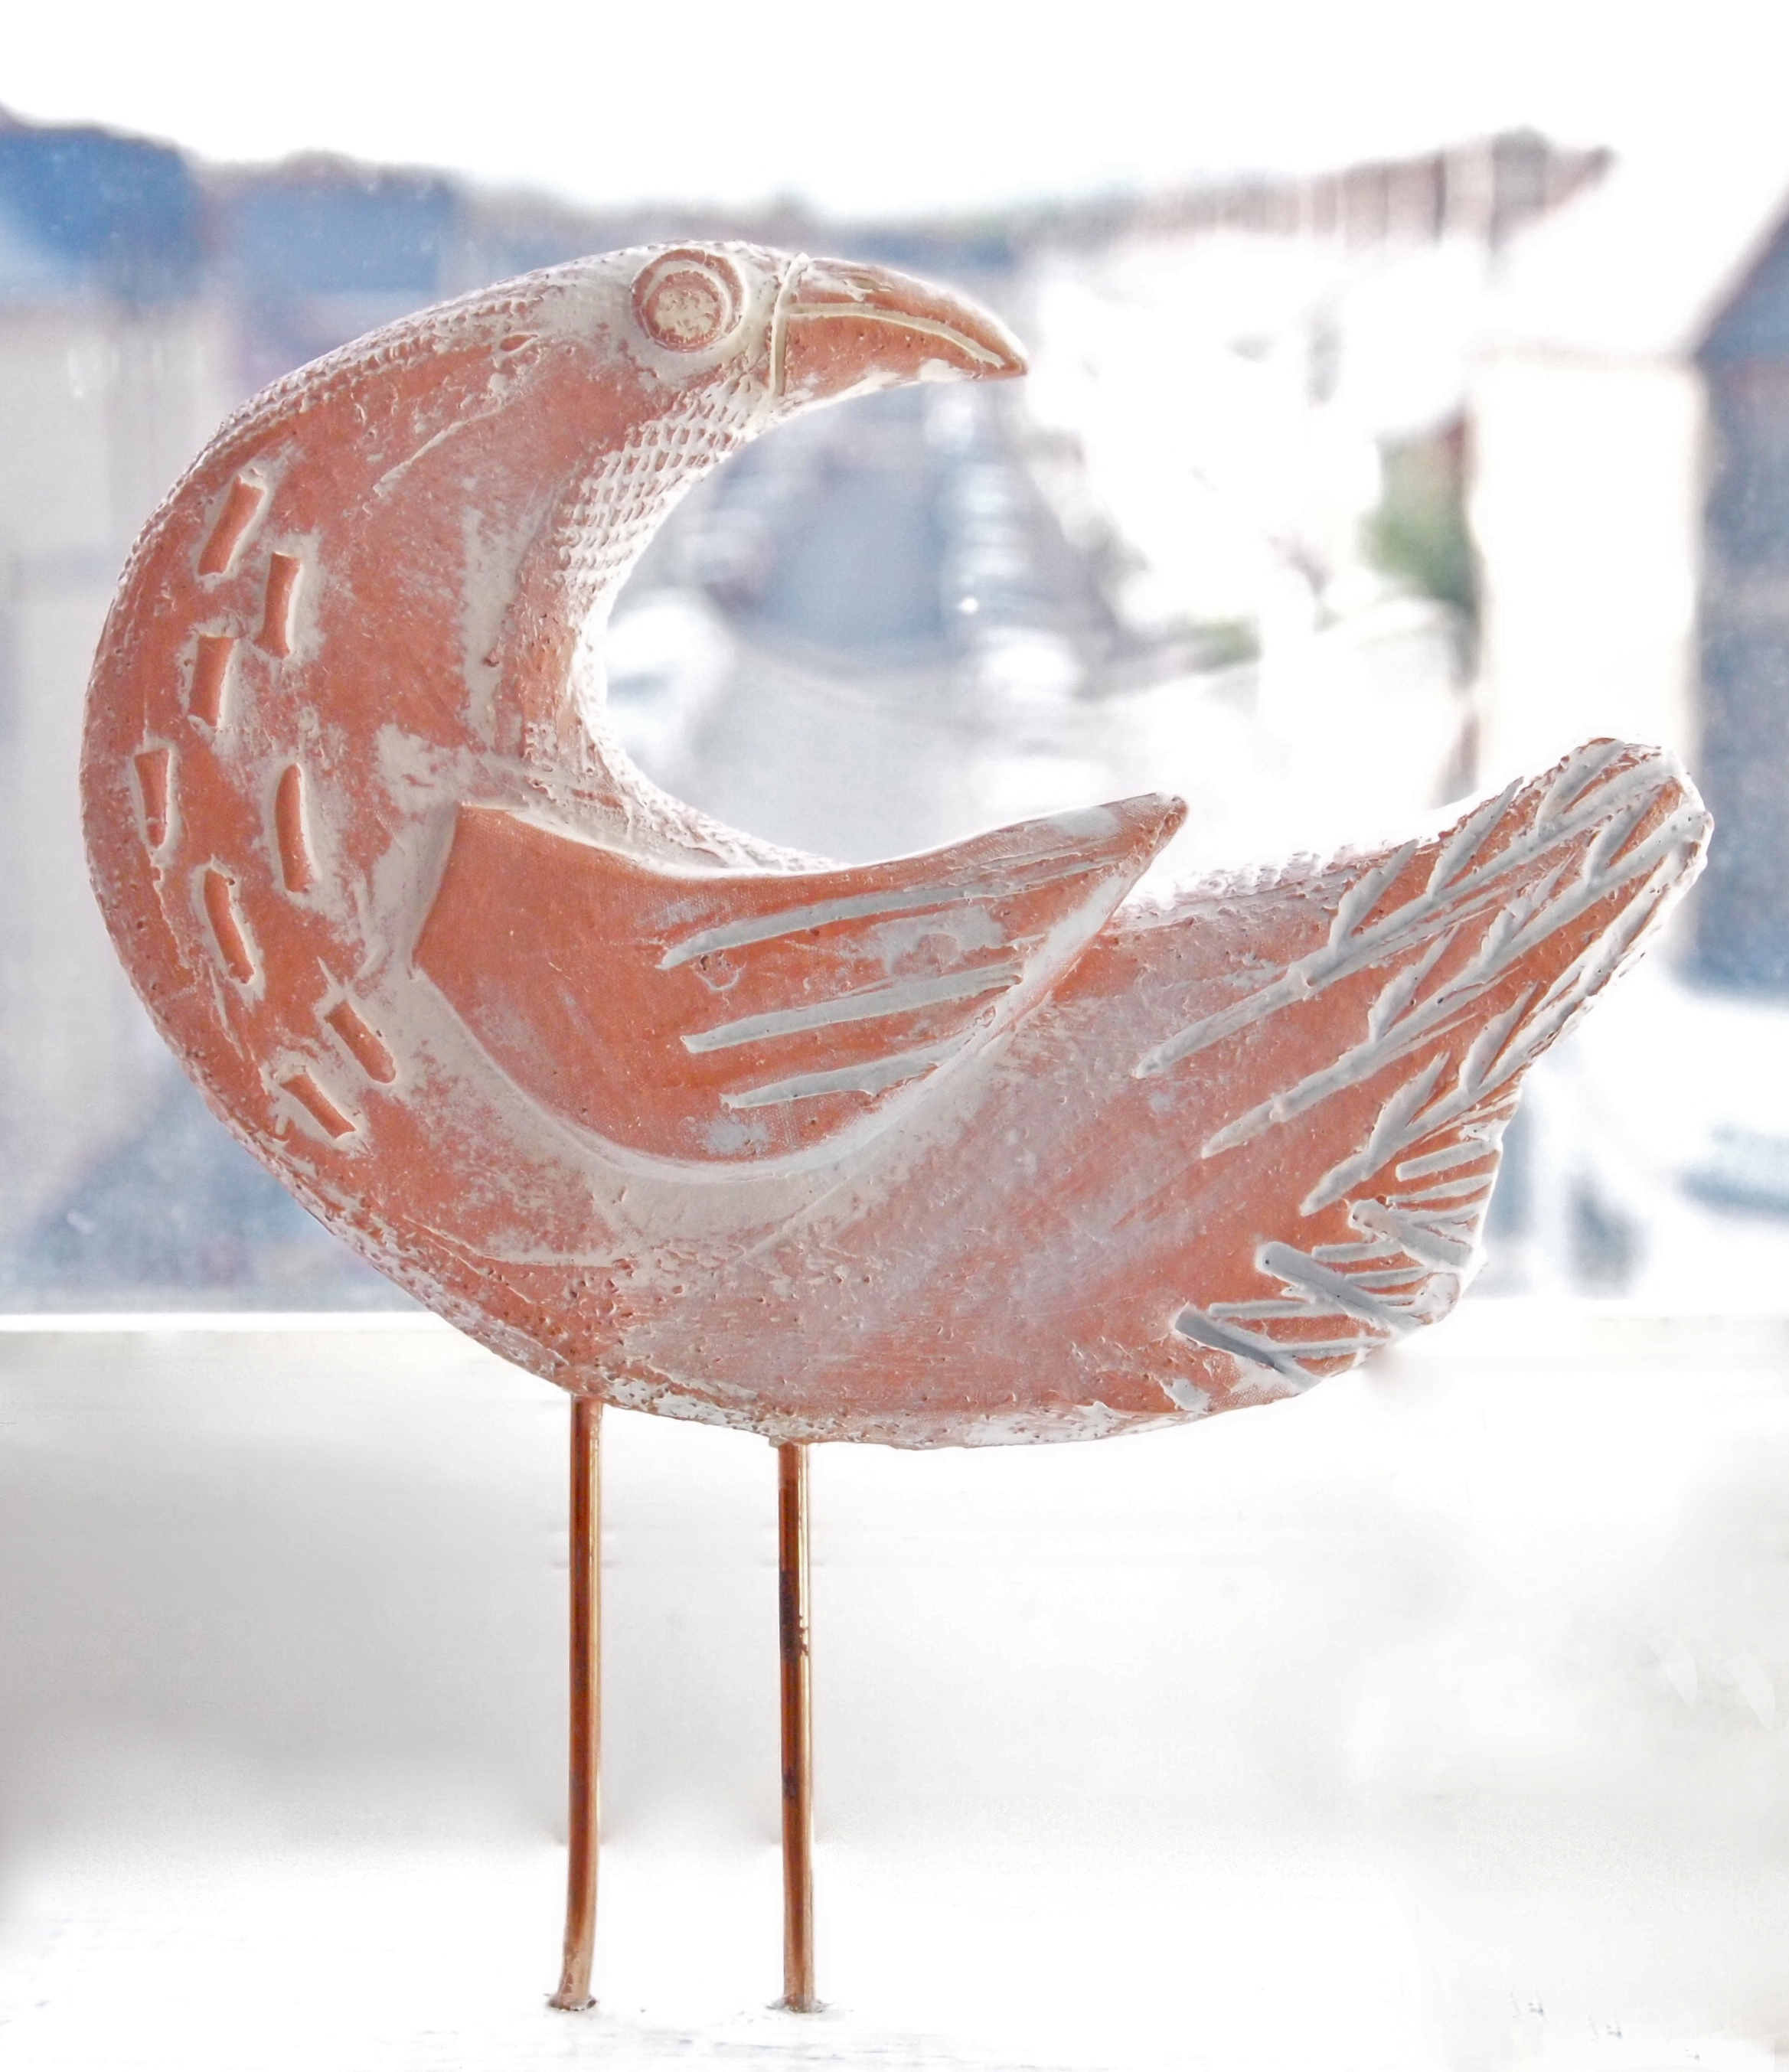
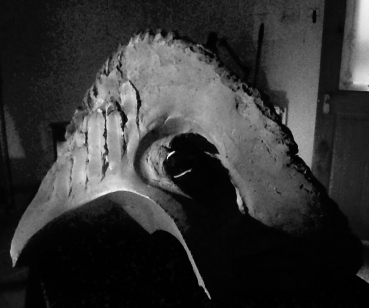
The Atmosphere in the form of an Osprey.
Porth Yr Ogof Cave, Brecon Beacons, by Stephen Foote.2014
Guardian of the Atmosphere, The Osprey
The Wyvern and the Osprey, 2014.
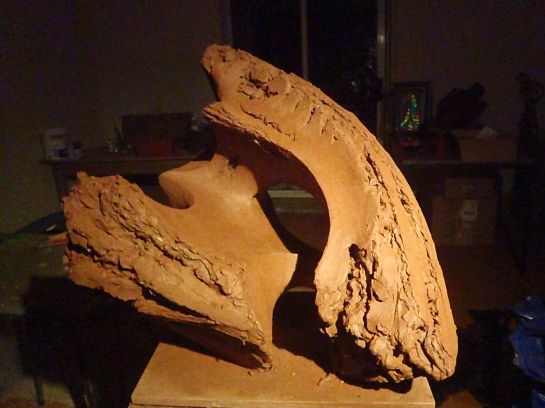
The Wyvern, Guardian of the Lithosphere.
Frame-works for The Wyvern IV and, in the back ground, The Leviathan.
The Lithosphere has The Wyvern, a dragon that has taken a number of forms so far.
The Leviathan in progress, Sept 2014.
The Wyvern and The Leviathan. in progress, Sept 2014.
The Wyvern.
Bracelet Bay, Stephen Foote.
The Wyvern.
Bracelet Bay, Stephen Foote.
The Wyvern.
Osprey.
Wyvern
Leviathon
Osprey.
Leviathon
Wyvern.
Wyvern
Wyvern
The Guardian of the Aquasphere took on the form of the Mountain Ponies that run free in the Beacons.
It has been a fantastic year in the Studio; I am harnessing the narrative and collective sides of the monumental Community Sculptures of the last 13 years. But I’m free to use any scale. The architectural clays I use have given me the freedom to go anywhere in space. My amazing collection of Sculptor and Ceramist friends, from all over the world, on Facebook have encouraged and inspired me enormously. I’m settled into my lovely big Studio ( and gotten over the shock of having it at last!). Stephen and I communicate very well and we egg each other on.
Many thanks to everyone who has visited the work over this last 6 weeks and given invaluable advice and feed-back.I will continue with this series of sculptures until it is done.
We will start a new project focussing specifically on the passage of water from the mountains to the ocean along the Tawe Valley. We are partnering with some Public art venues and setting up some Community participation to widen our perspective. We will visit a small Coal-mine and the Open-cast mine. Only a few years ago, on the 15th of September 2011, 4 men were killed in a dreadful accident at Gleision Colliery when their mine was inundated with water. Making the Pit Markers in Blaengarw, I heard about these type of accidents but, like everyone else, I never thought such a thing could happen here, in this century. From just below the Studio down-wards the River has an extra-ordinary history in the Industrial Revolution.
Neither of us have any idea where this will lead. We feel confident that we have something with substance and a great deal of potential and we have found a work-method that is productive and sustainable. I know from past projects that the community will come up with all sorts of treasures that will lead us into work that is far richer and more interesting than we would make alone. We will trade Workshops in photography and ceramics for input from community groups and individuals. It will be a fun process. We need images, stories, myths, legends, history-including the ancient history and favourite, special spots on the river or tributaries.
The key reason making heads is so hard is that the perception (the way we use our knowledge) that we have built up over our lifetime of what shape the head is, is based around communication and assessing each other. Making a head requires going against what ‘feels’ right and using information we are unlikely to have bothered with before. Portraiture has a system to organise the huge quantity of subtle details. Learning this system will broaden your knowledge, and your access to more knowledge, enormously. That’s why the study of Portraiture and Figurative Sculpture is traditionally the bed-rock of Art.
It is not rocket science and you can do it. The challenge will be fascinating and very rewarding.
The Technique
Because clay shrinks as it dries and is floppy when very wet a Clay Armature is invaluable.
Most techniques for building hollow have a strong ‘voice’ of their own and will influence the final look of the piece. They can demand that you harden lower sections and are then unable to change them when you later realise they are wrong. This is a real disadvantage irregardless of your skill level. It is better to work solid over a clay armature especially if you are not using a scale-model and hollow out just before finishing touches. It’s not difficult.
Or you can use this technique of building out from a Clay Armature to make your sculpture hollow.
Clay armature for a bust, aug 2014
3rd Bust armature in progress, Aug 2014.
in progress, Aug 2014.
Here I chose to leave gaps that show the Armature but of course you don’t have to. The step by step manner of this method and the fact that you work all over the head in layers from the start makes it ideally suited to learning to make Portraits and other Sculpture.
Frame-works for The Wyvern IV and, in the back ground, The Leviathan.
These Armatures or ‘frameworks’ were planned to be very much part of the fractured image. But the ‘corrugation’ and circular holes you can see are strengthening the Armature and would be very suitable to an armature that would ultimately be hidden. Playing around with these Armatures lead the Sculptures in un-anticipated directions (I frequently have no idea what I’m doing, just why!)
The Wyvern and The Leviathan. in progress, Sept 2014.
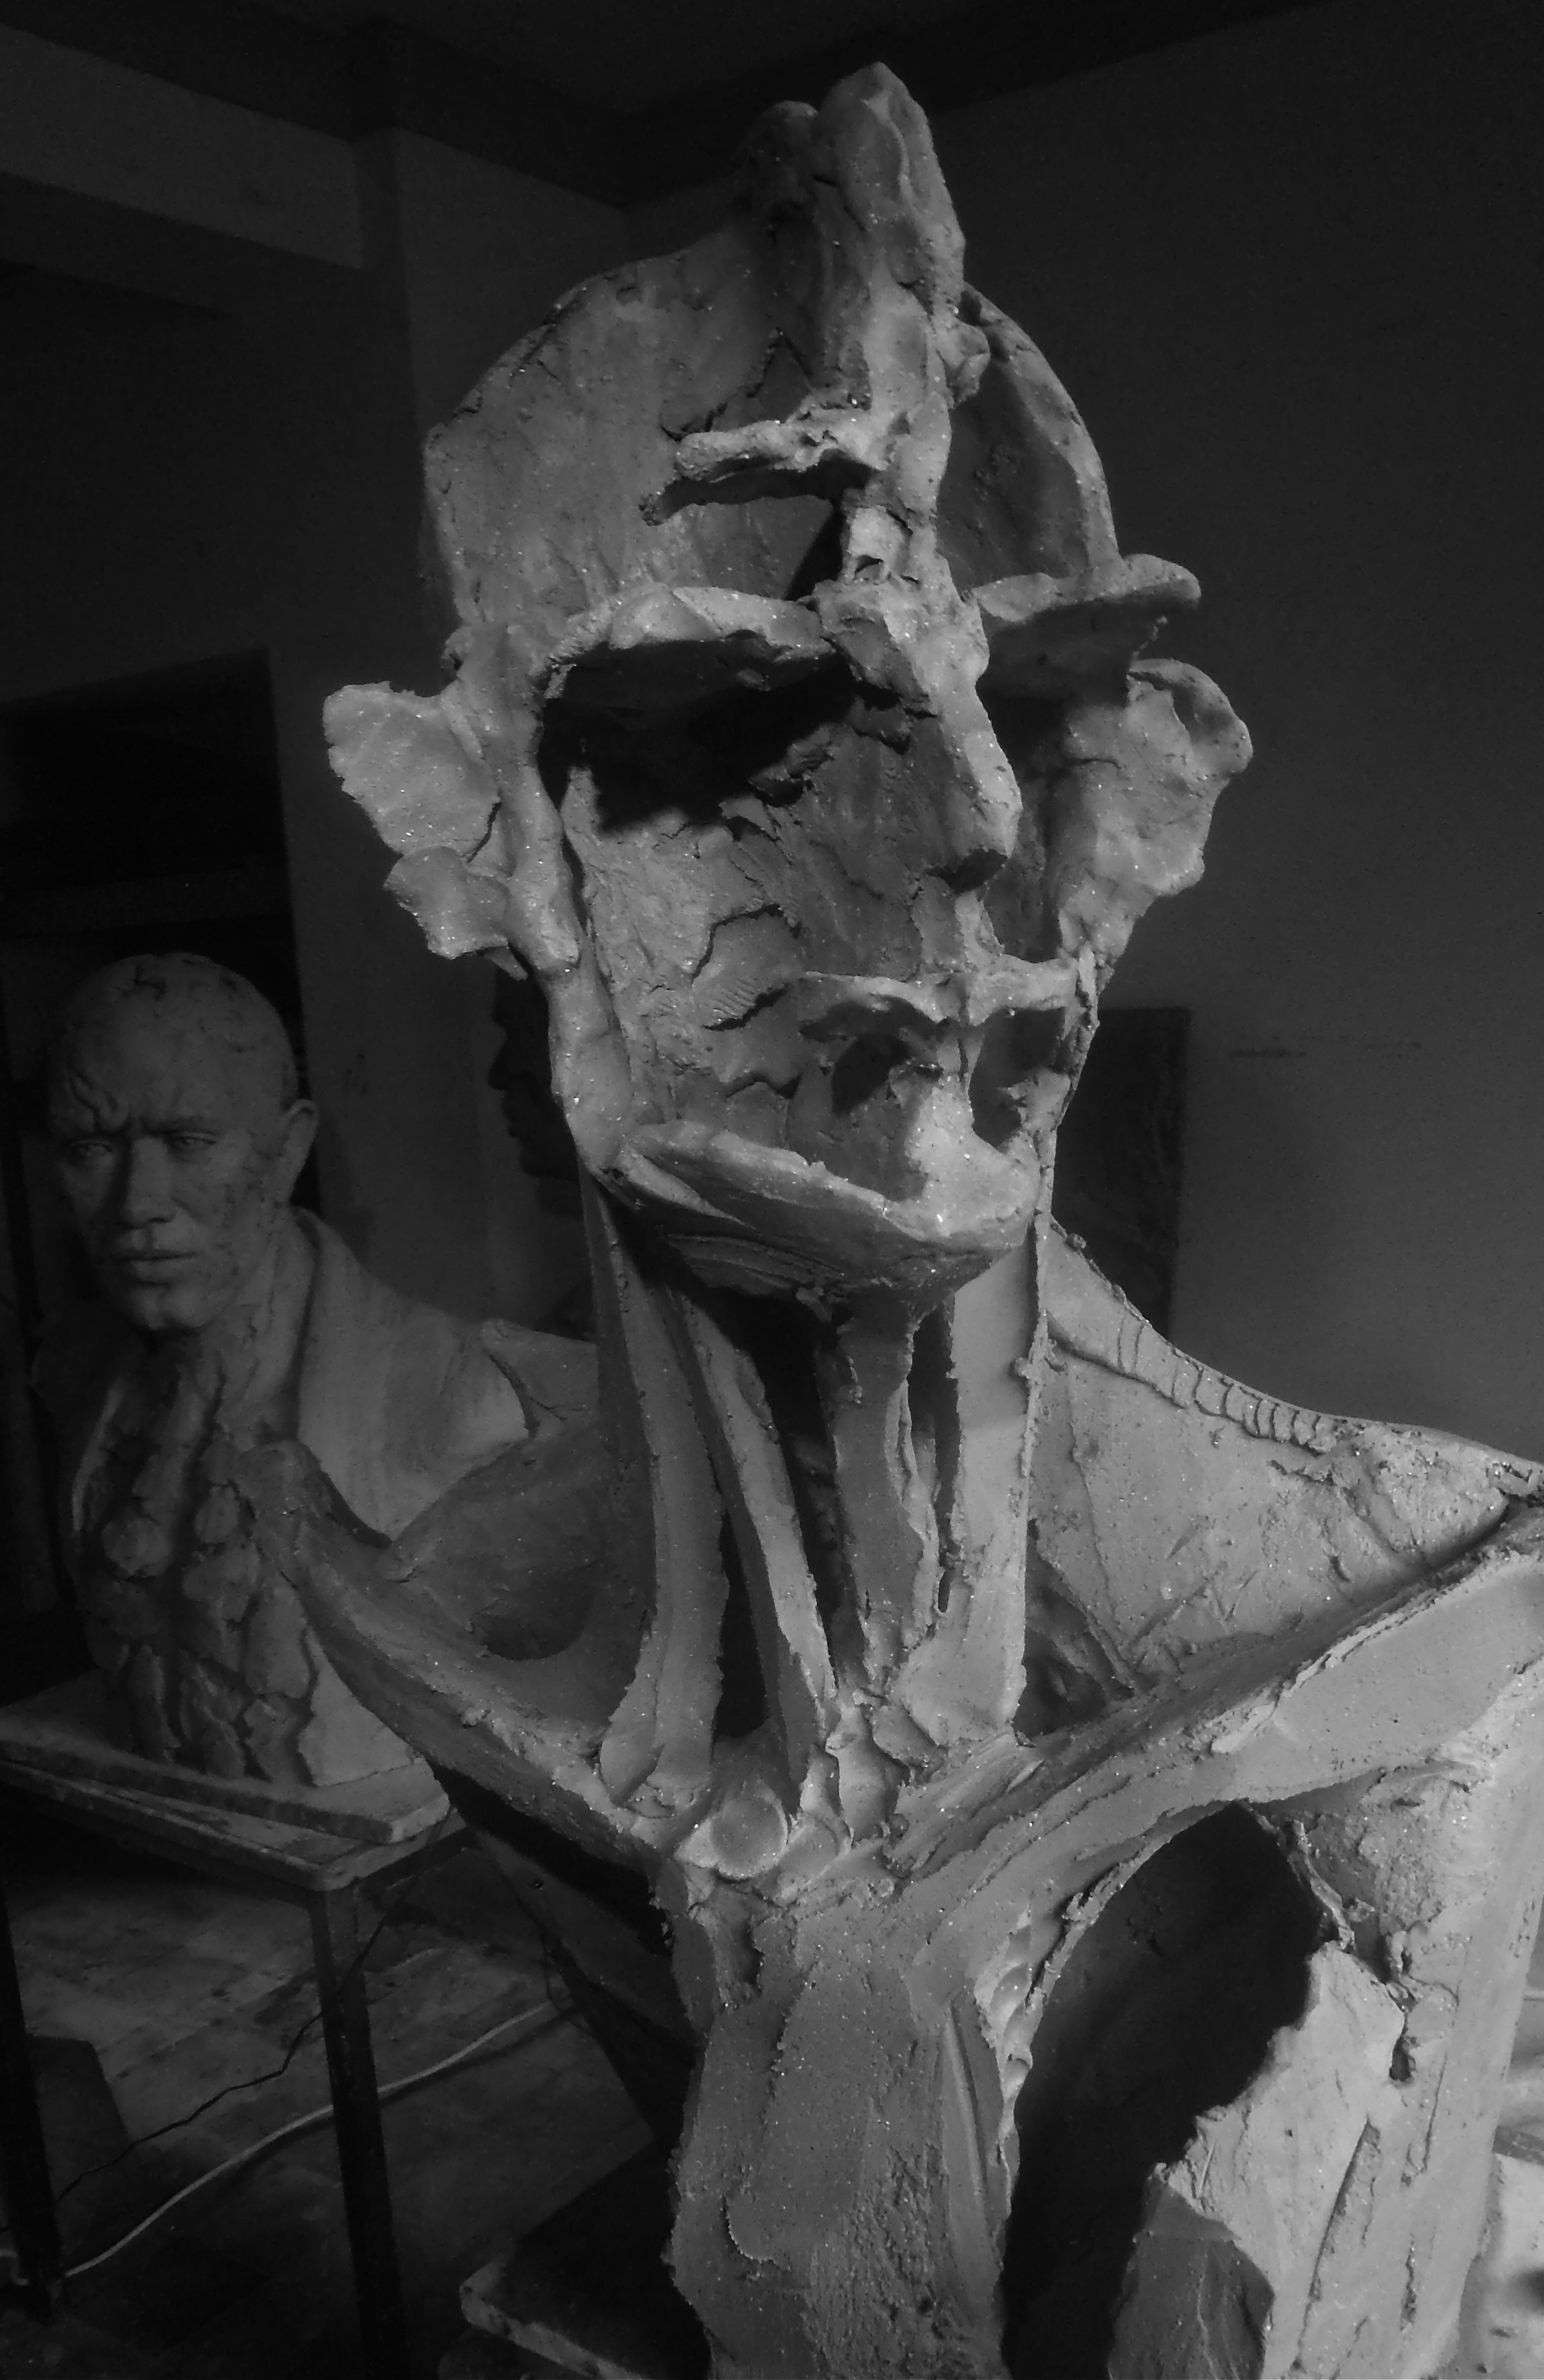
In this Workshop we will build a strong Armature, work on the Skull loosely for the benefit of looking at that and then build on the external features of the head; the face, ears, hair etc.
The Skull. 2014
The Weekend
We’ll cover Hollowing out too. You will get my invaluable tirade on joins. We’ll look at some different clays and talk about choosing clays. And we’ll sit down to a relaxing bring and share lunch in true South Wales Potter’s Tradition and talk shop. There will be drinks available all day.
Everyone, from any level of experience, is welcome and will get a lot out of this challenging week-end.
The Fee is £130 which includes 25kg of Scarva Crank (an out-standing sculpture clay), a set of sculpture’s callipers and set of Skull and Skeleton images. The Workshop is to give you the Techniques so that you can develop your own way of using them. Just like learning to play an instrument, practice and adding your own style will give you the results. You are unlikely to complete your head on the week-end and I will encourage you to take it home to work on or break it down and have the clay to use on your next head where you can work more slowly. I can fire your sculpture if you like and we’ll sort that out separately.
It is easy to get here and there is plenty of Parking and the Studio is not bad for accessibility.
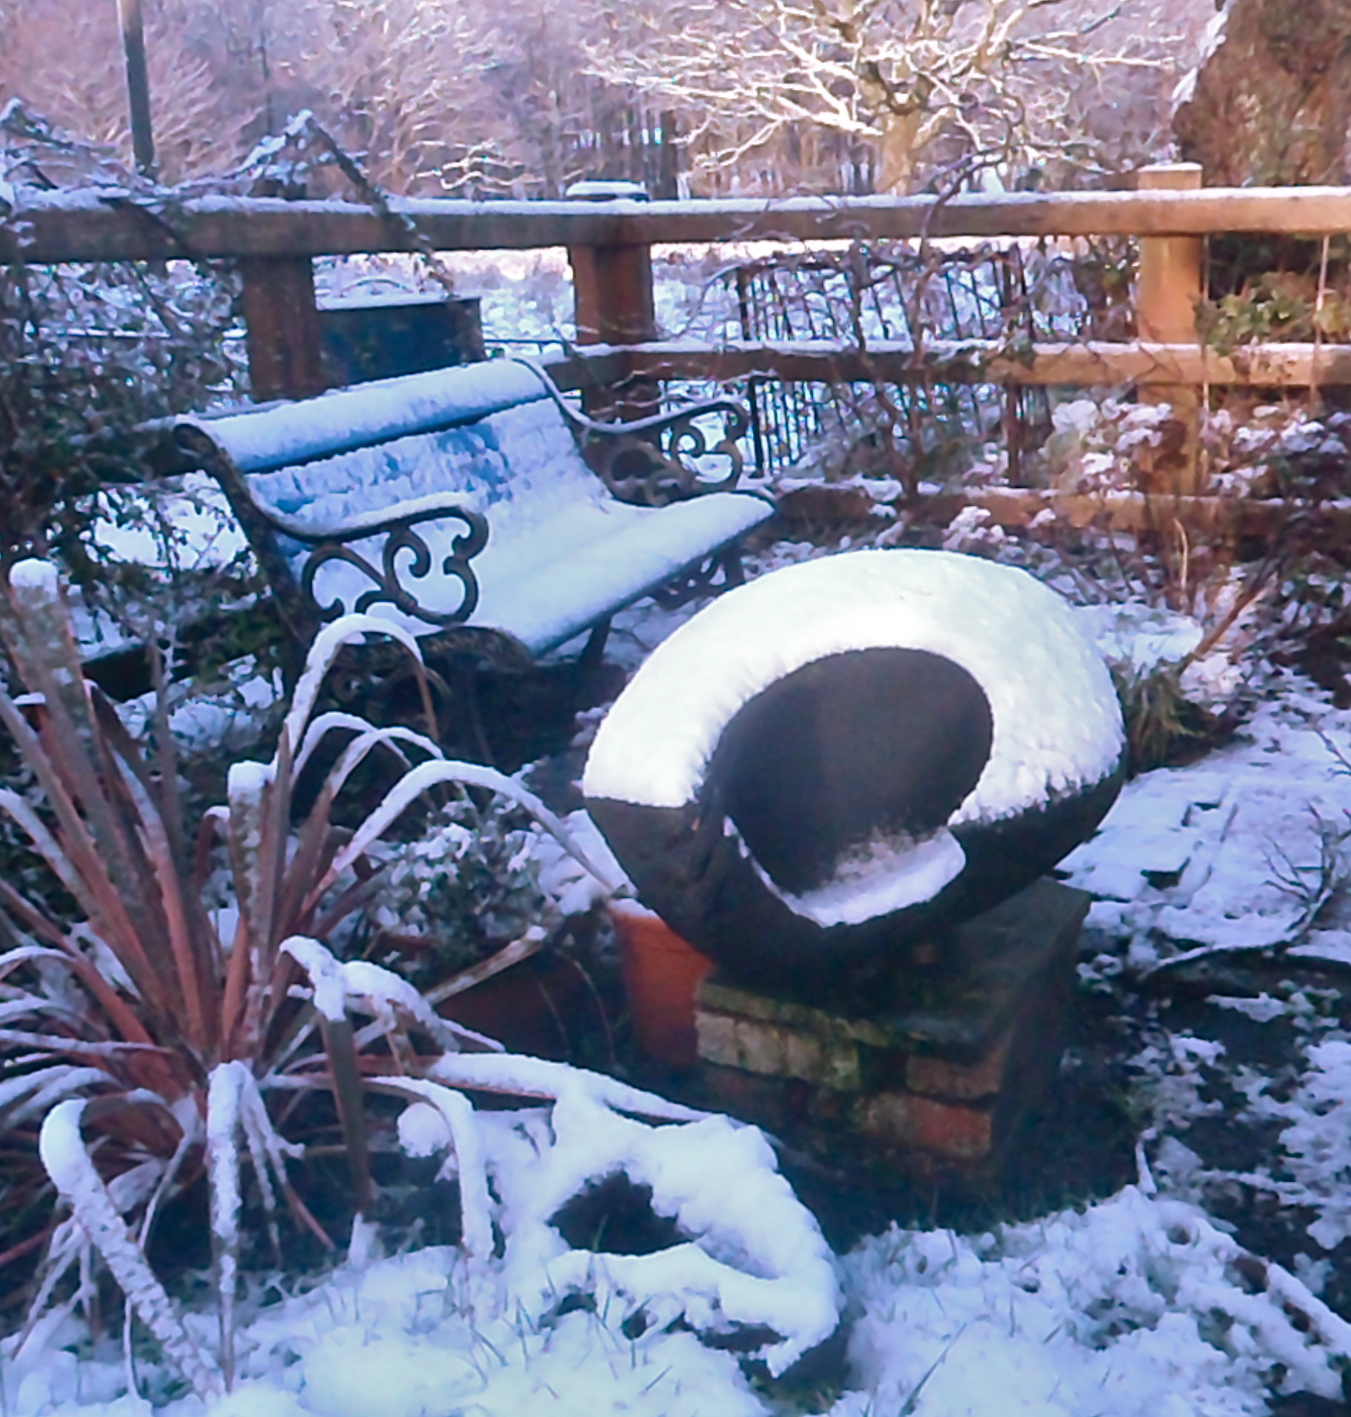
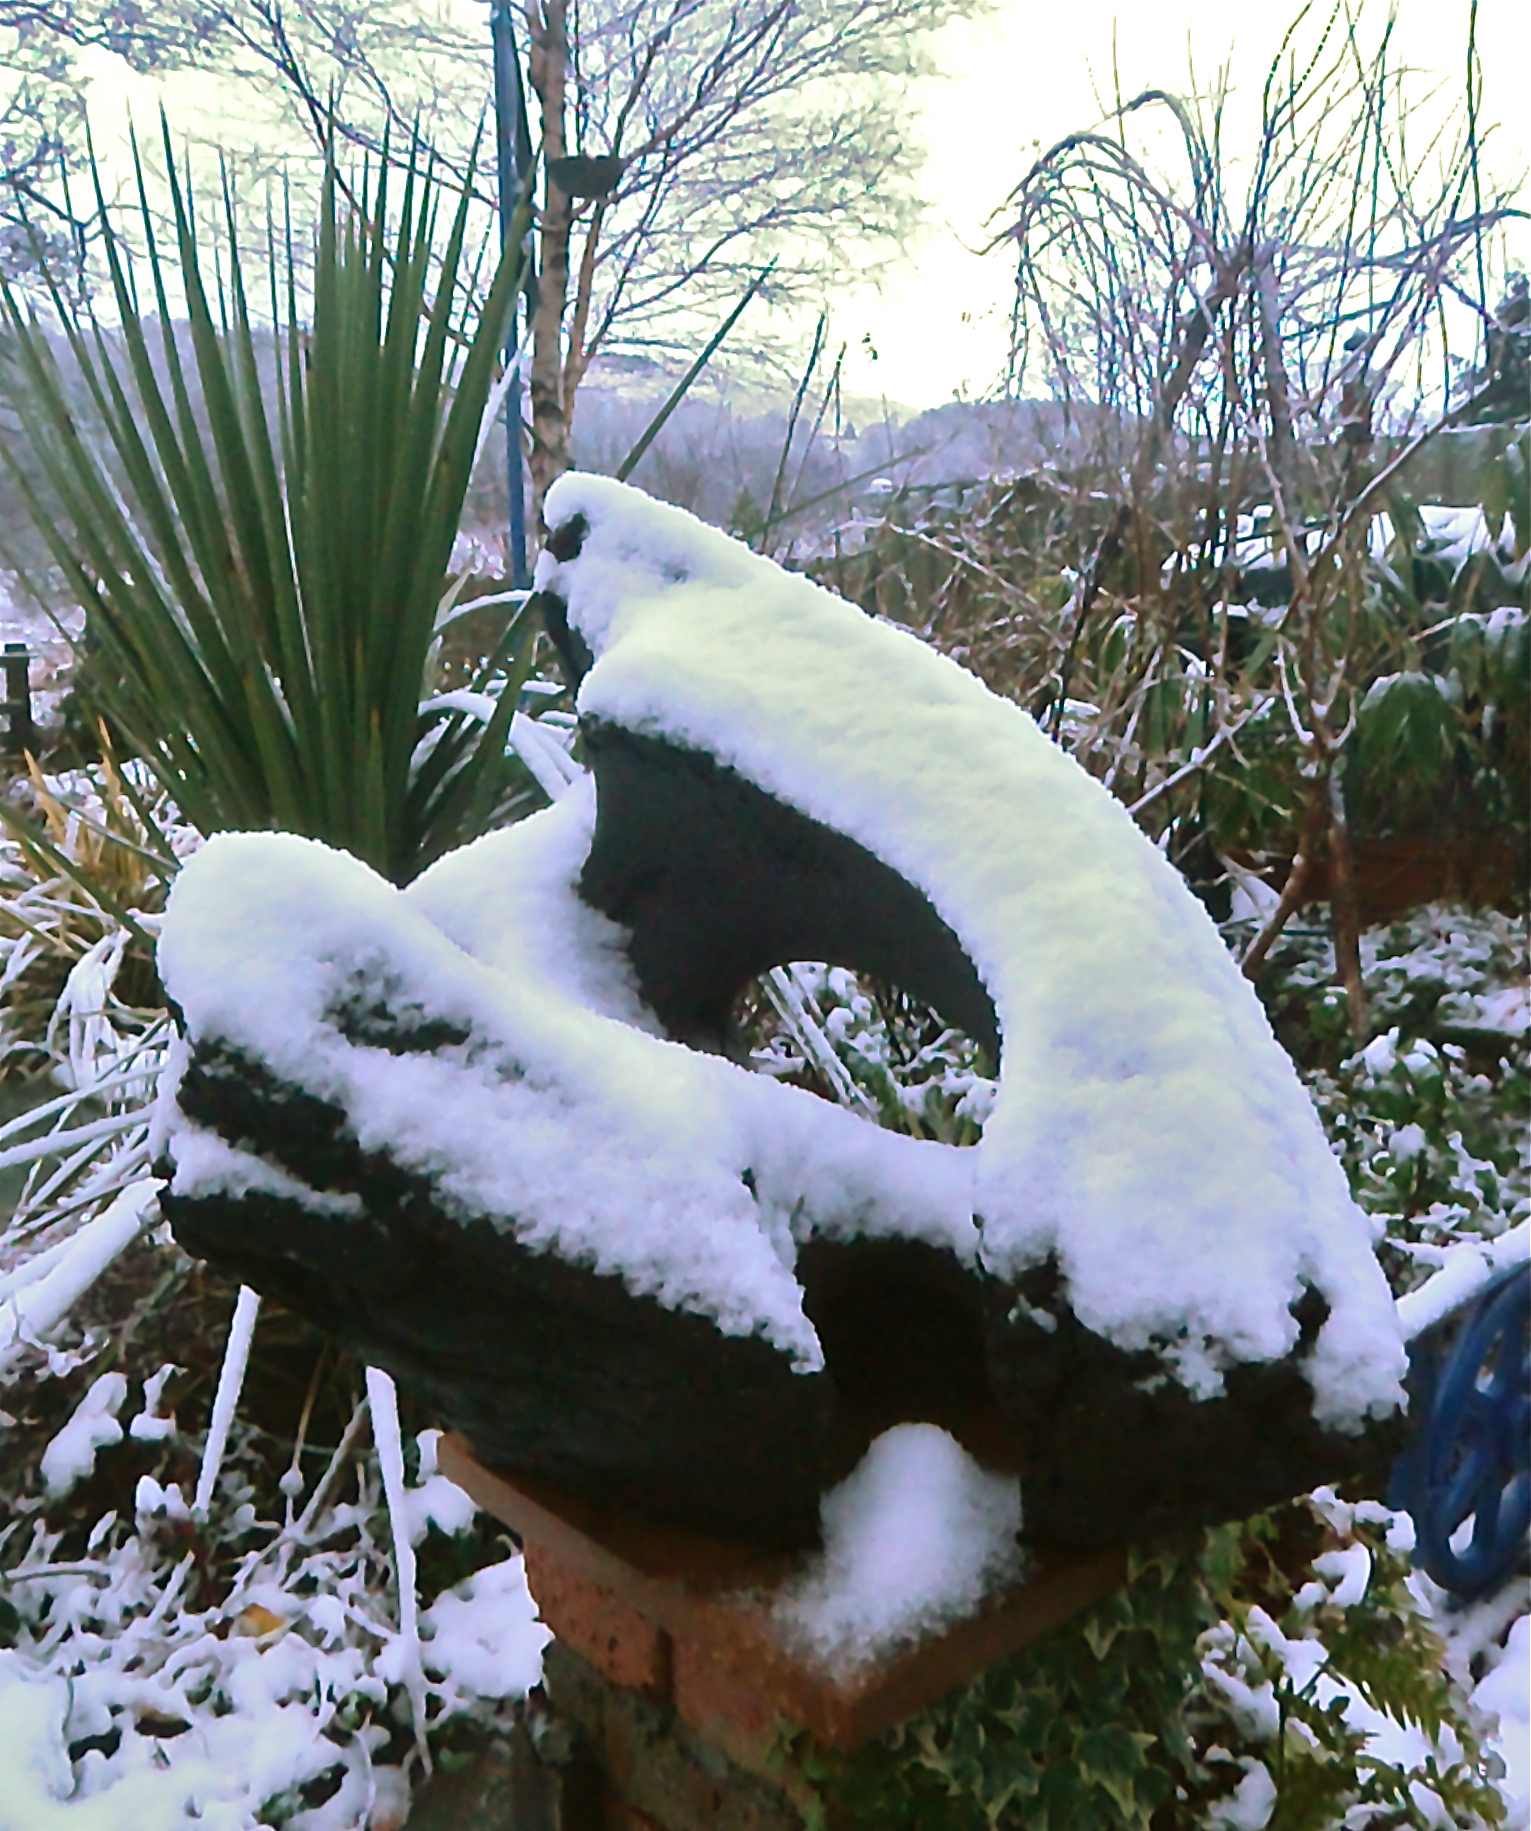
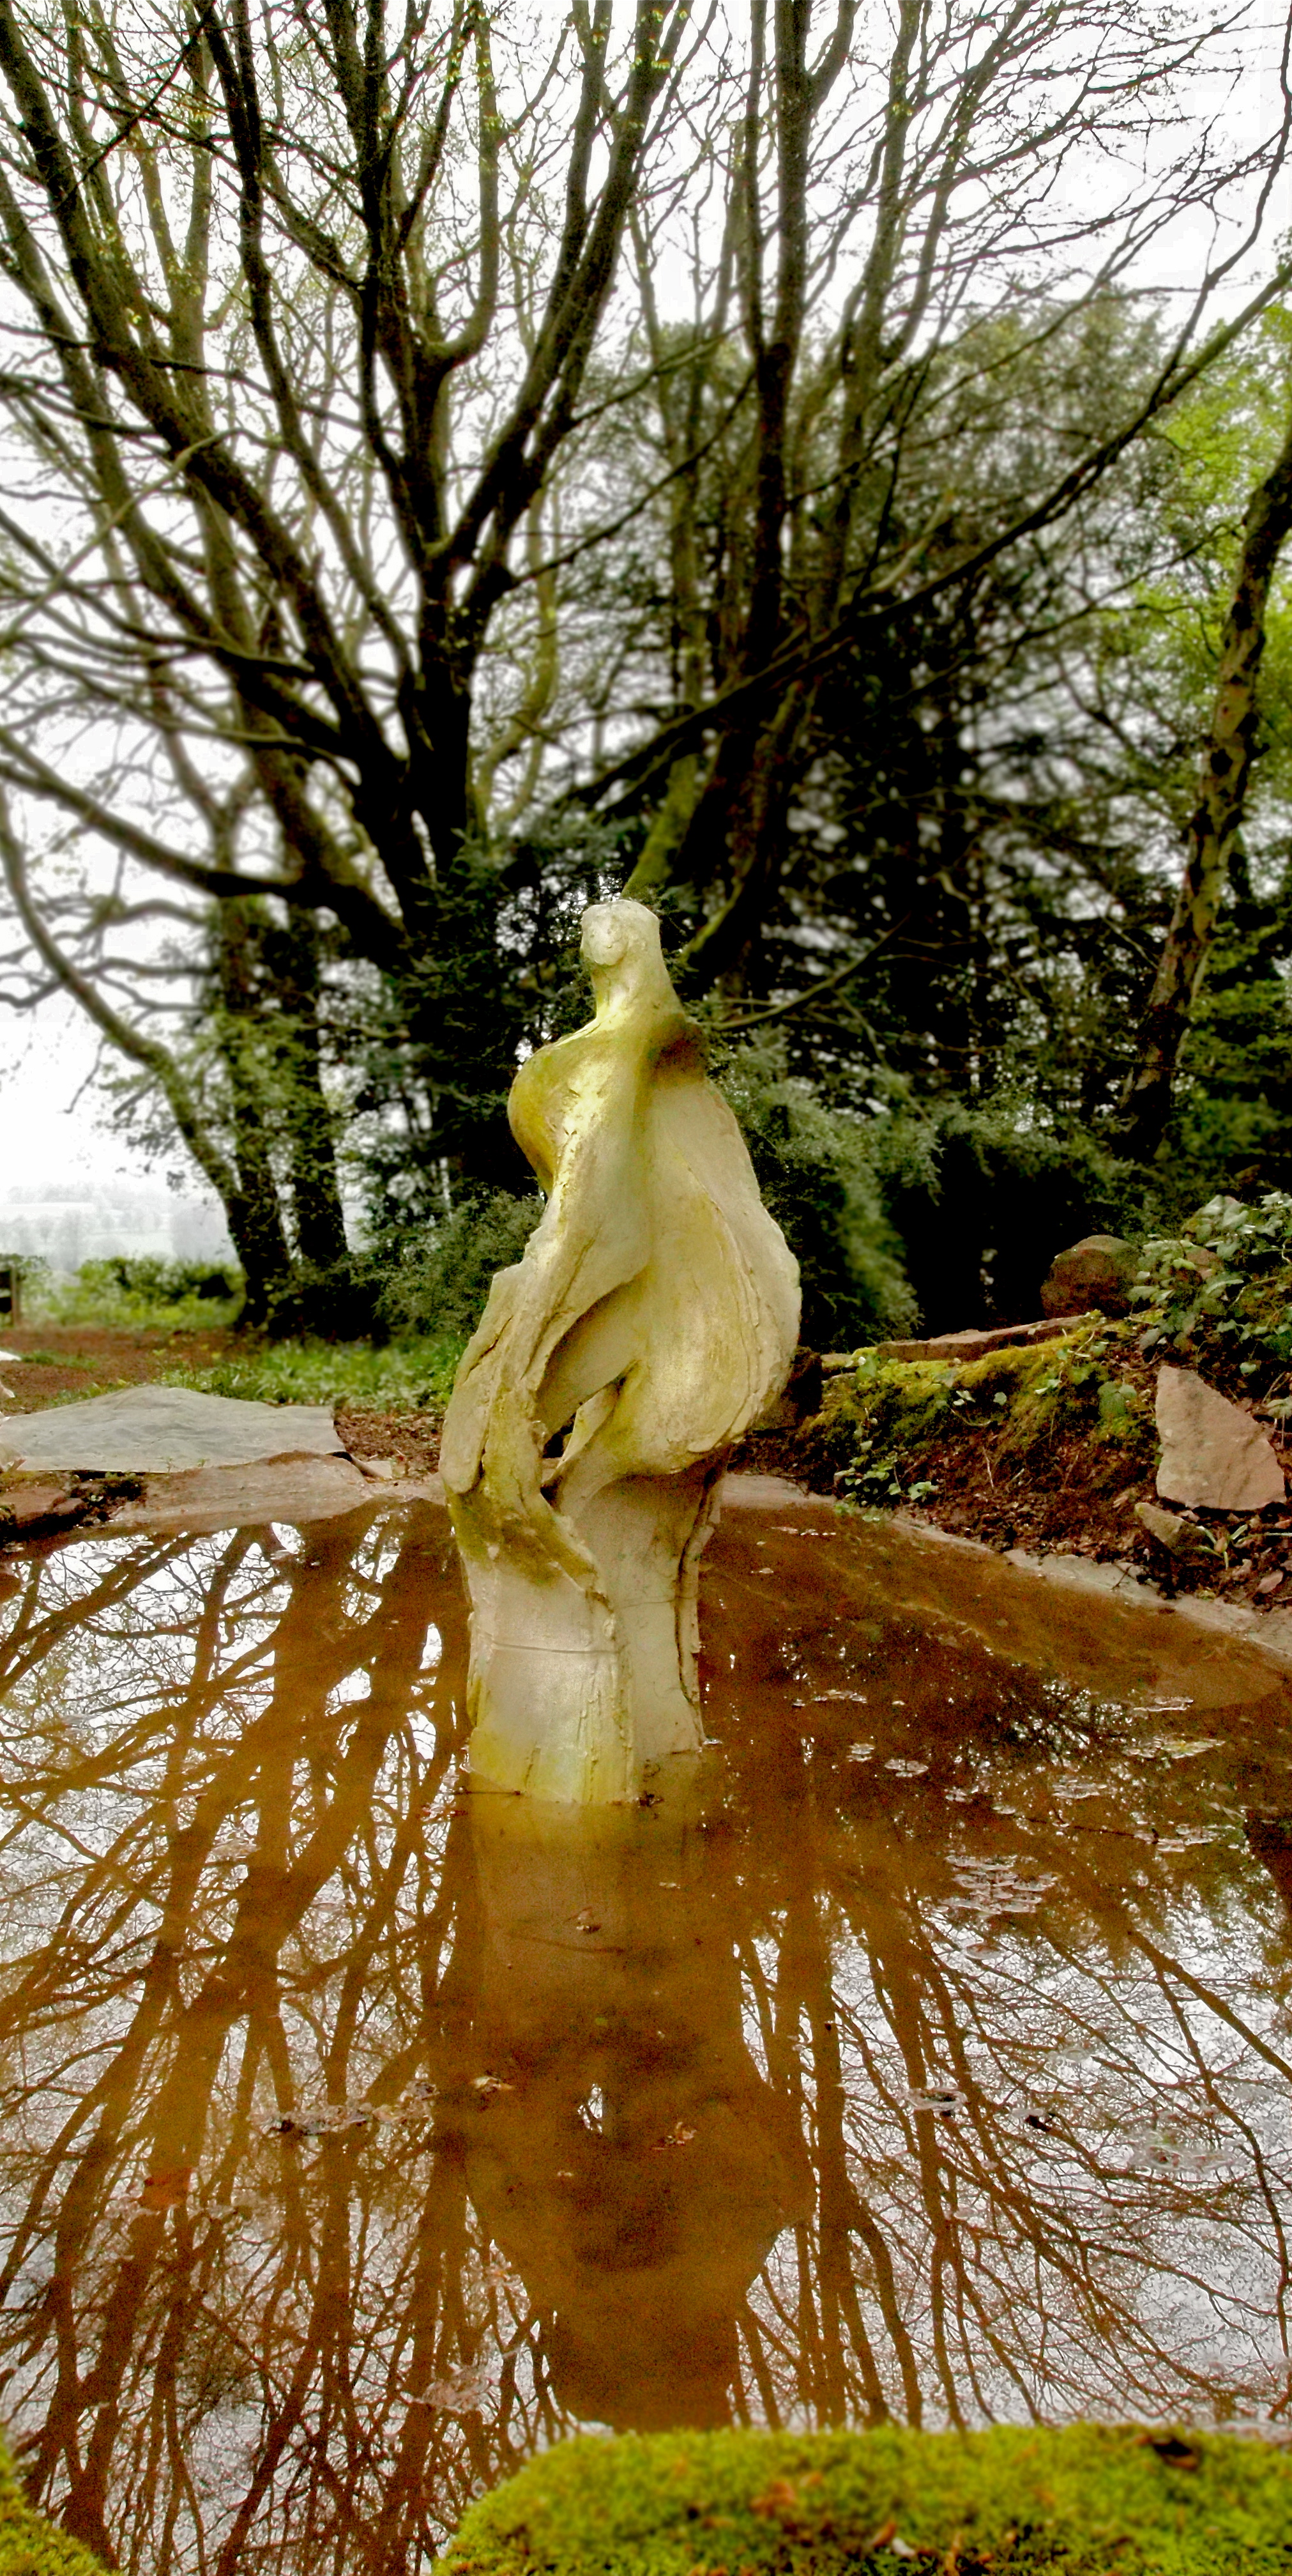
I spend as much time gazing into the garden in winter as I do in summer. I have a lot of bird feeders and I never tire of watching the birds. The Sculptures give the garden structure and a bit of drama, especially in winter.
I test pieces out to see how they look in the different light of the changing seasons. I know they are all completely weather-proof but it is reassuring to put them up against the harsh Brecon Beacons winter.
Parts of the garden that were loveliest in summer can look a random mess in winter and the Sculpture can detract from that.
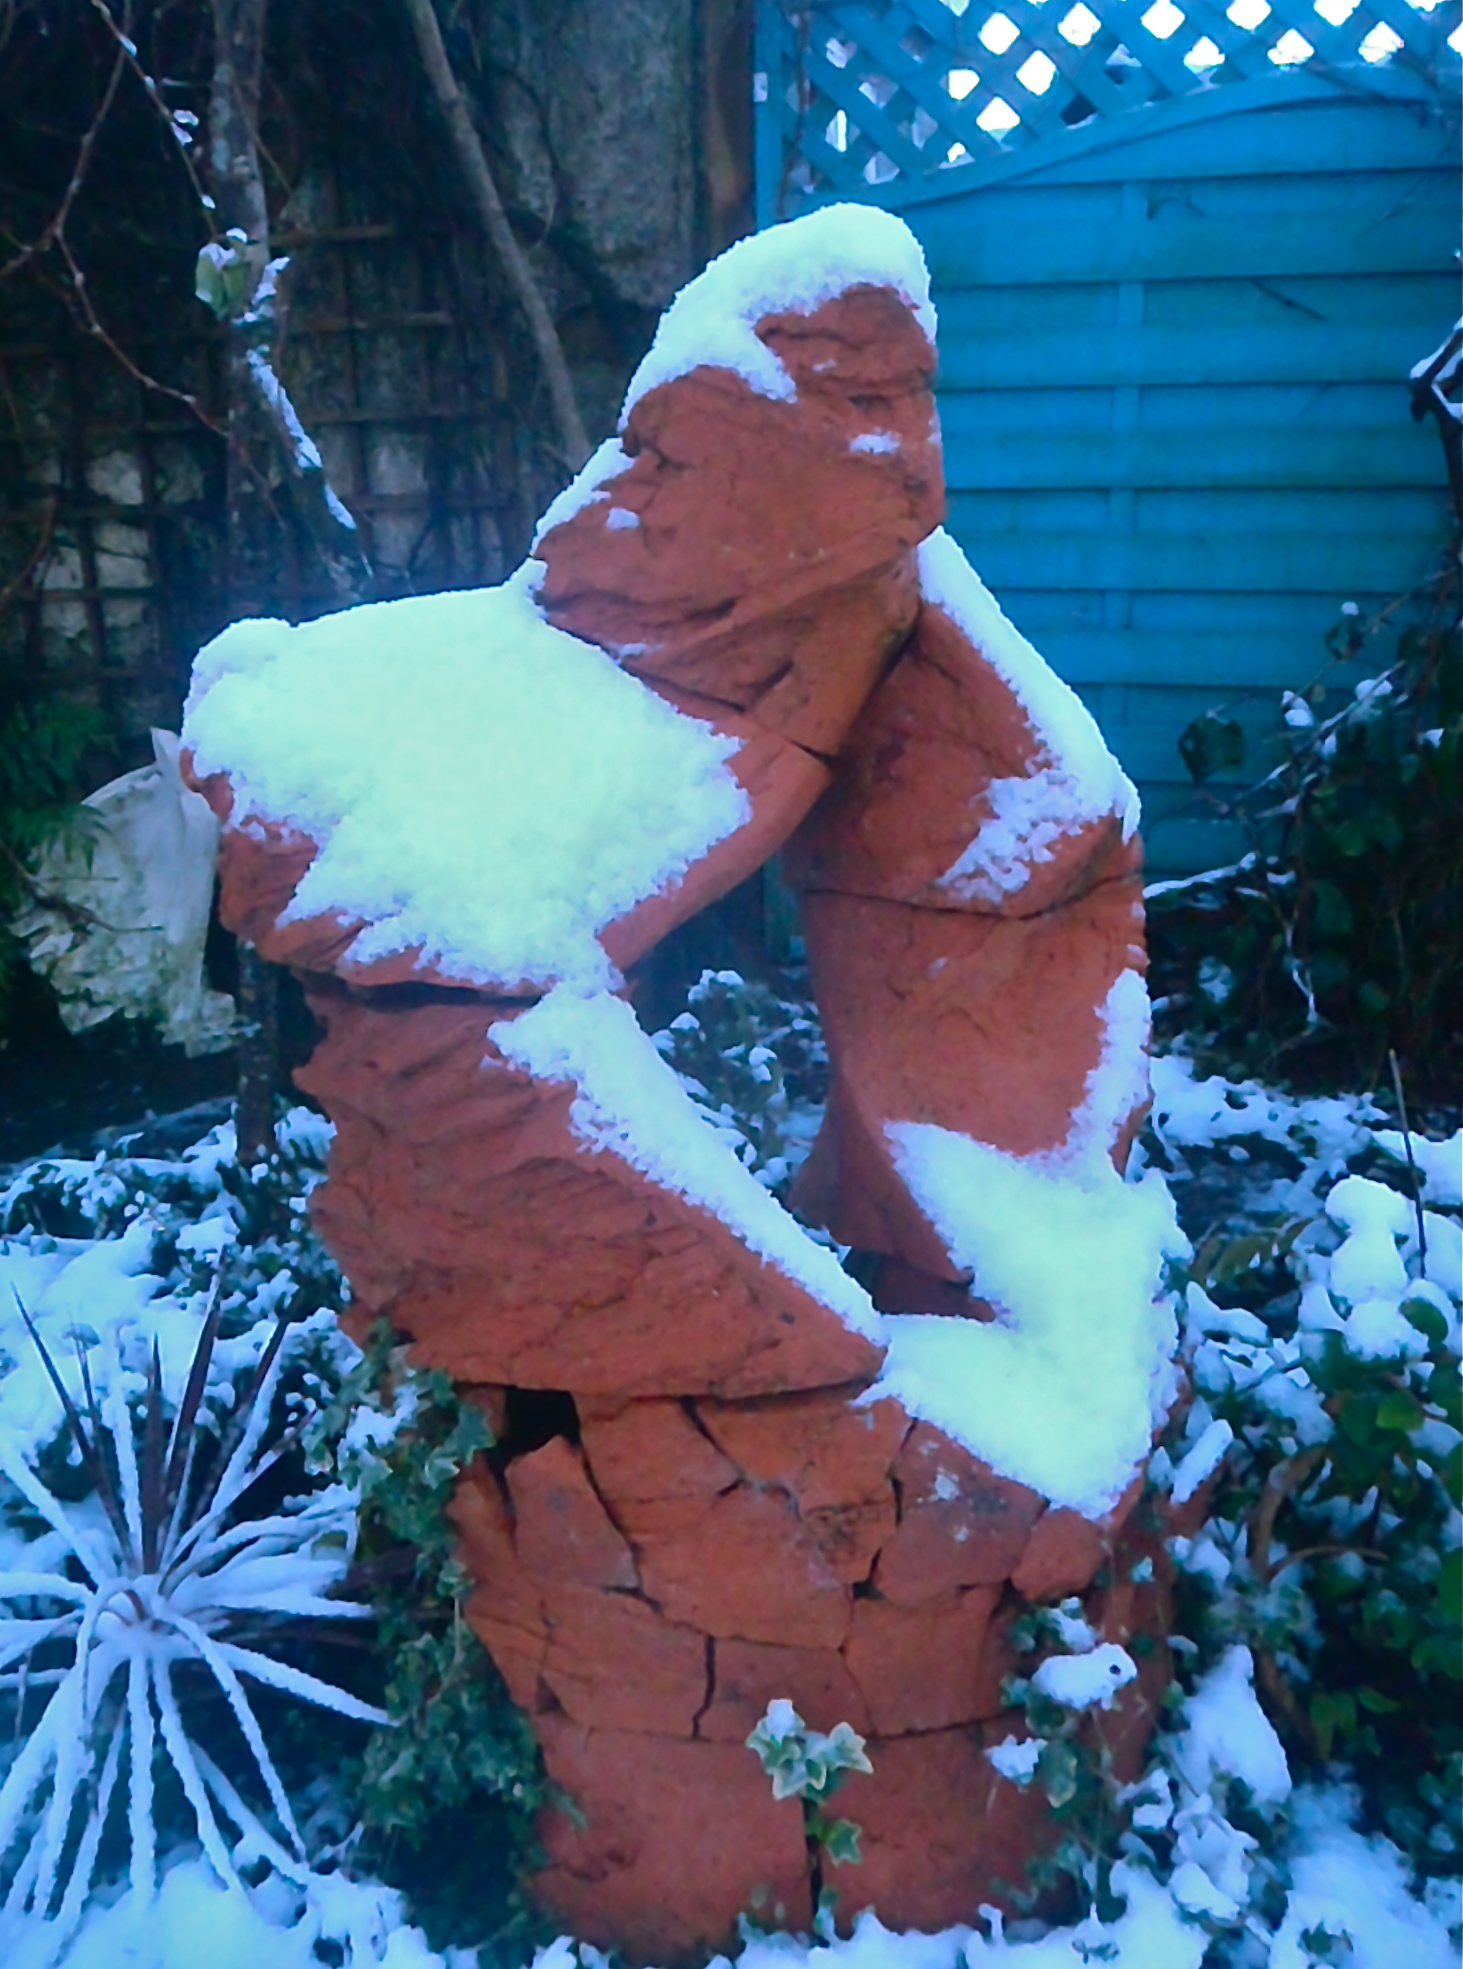
This slightly crazy looking Harbinger was a technical test piece that got exploded into smithereens subsequently giving me the opportunity to test some fixing-materials. Like all the sculptures it is hollow and I hope Bees might take it over. It is 130 cm high and stands straight on the earth. If a piece needs raising up I try and make the plinths double up as toad or hedgehog homes. It’s working because I have both living here and almost no problems with slugs at all! These days I add holes and spaces in all my sculptures for insects to rest in and my garden is always full of bees , especially Bumble Bees.
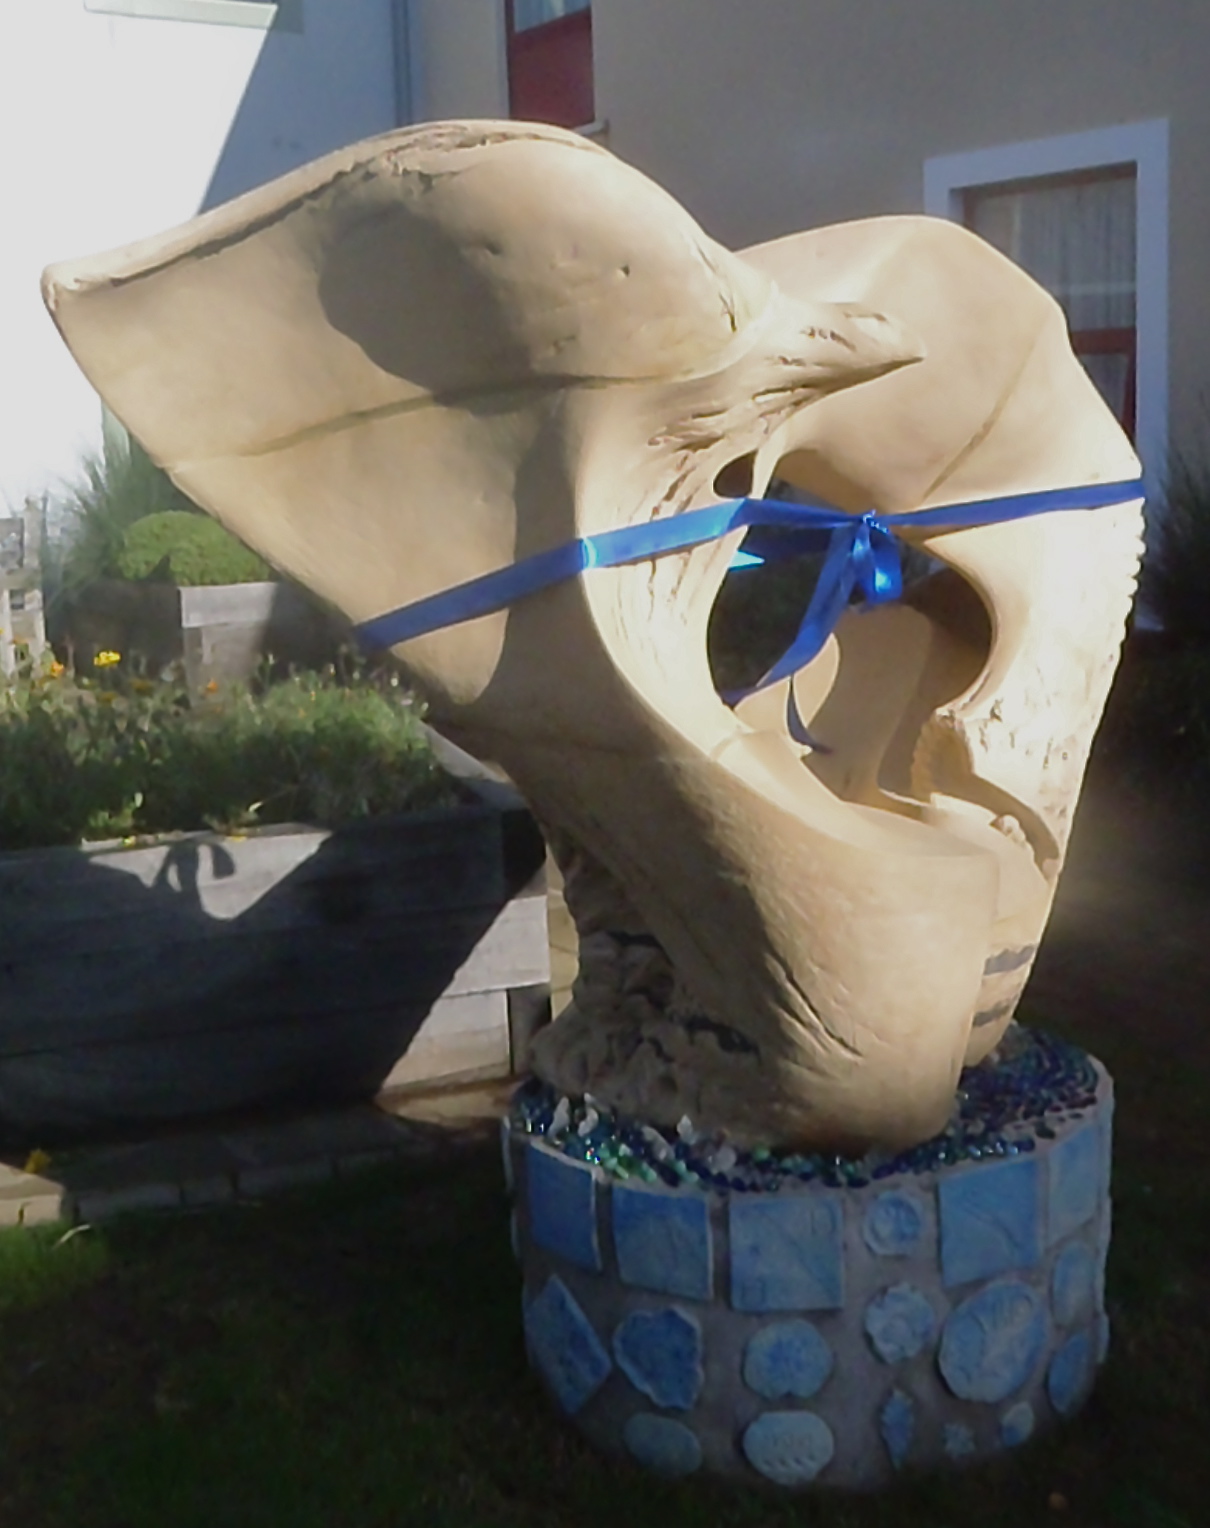
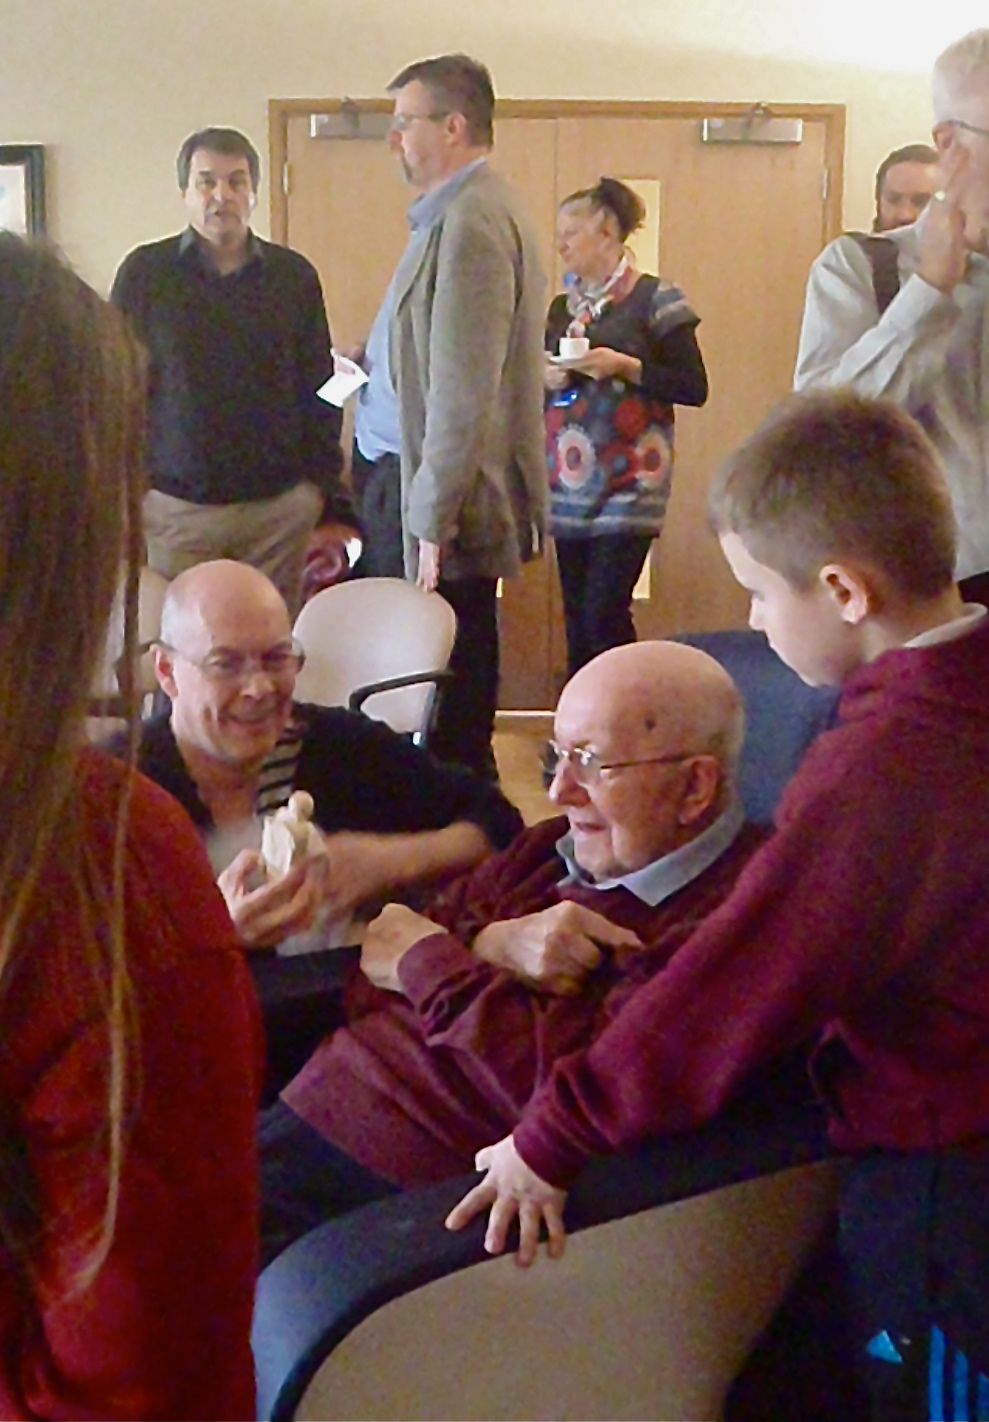
The Celebration Day at Gwalia Mynydd Mawr, 5 November 2014
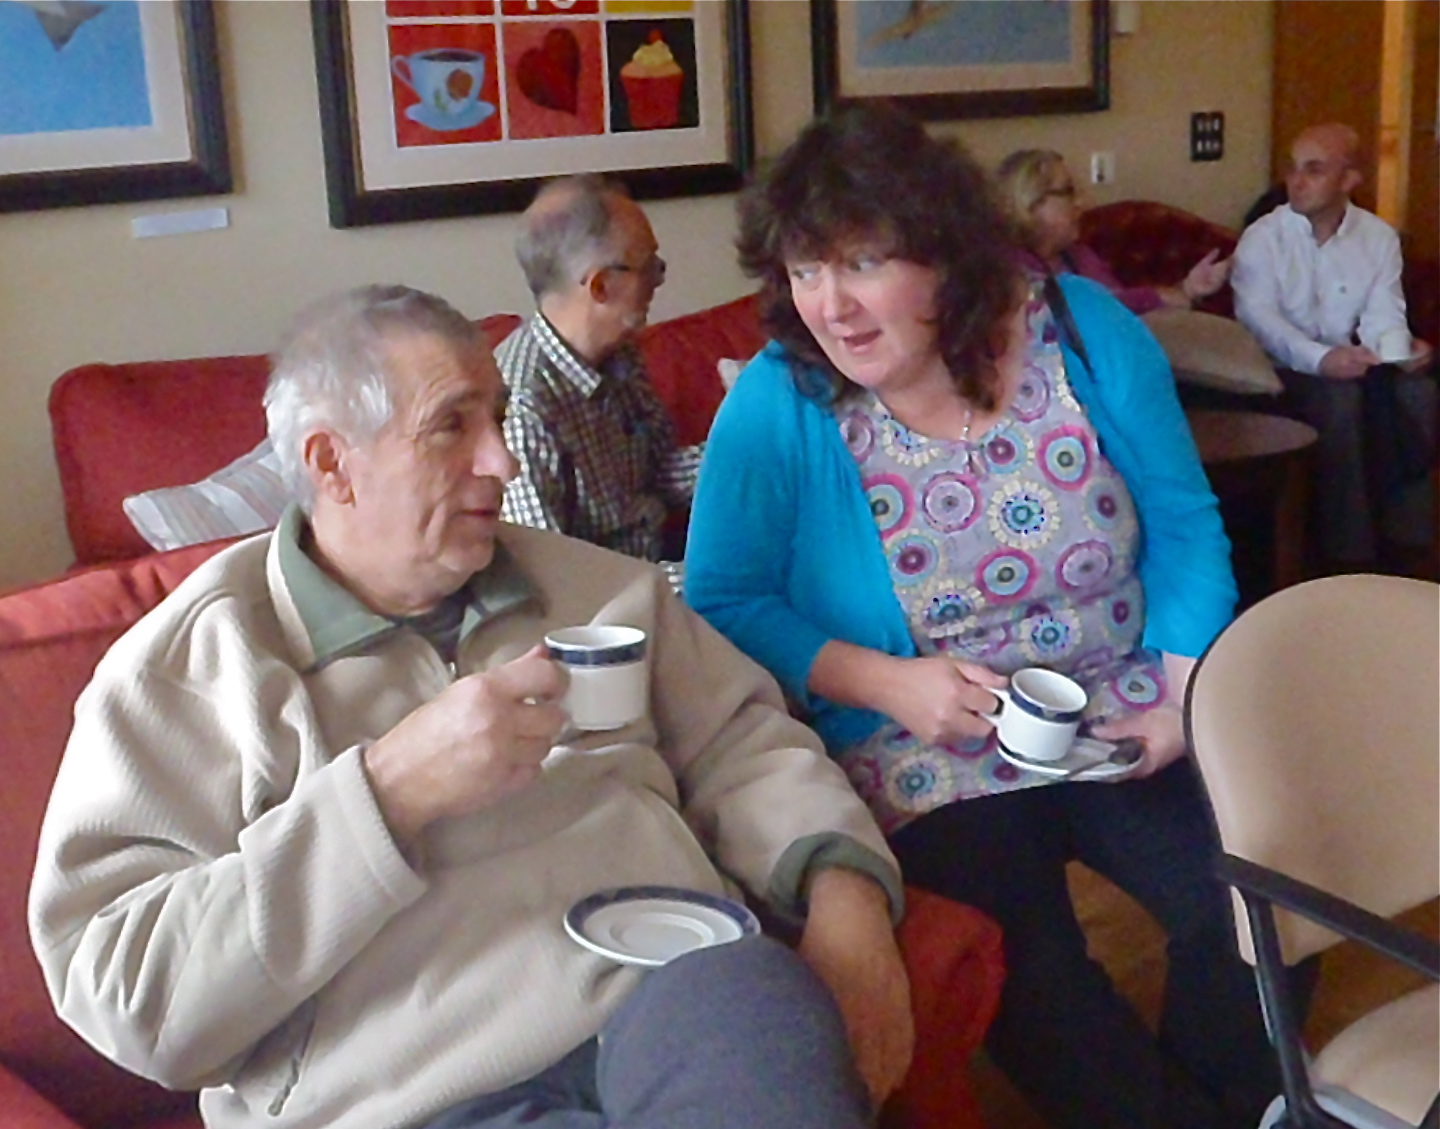
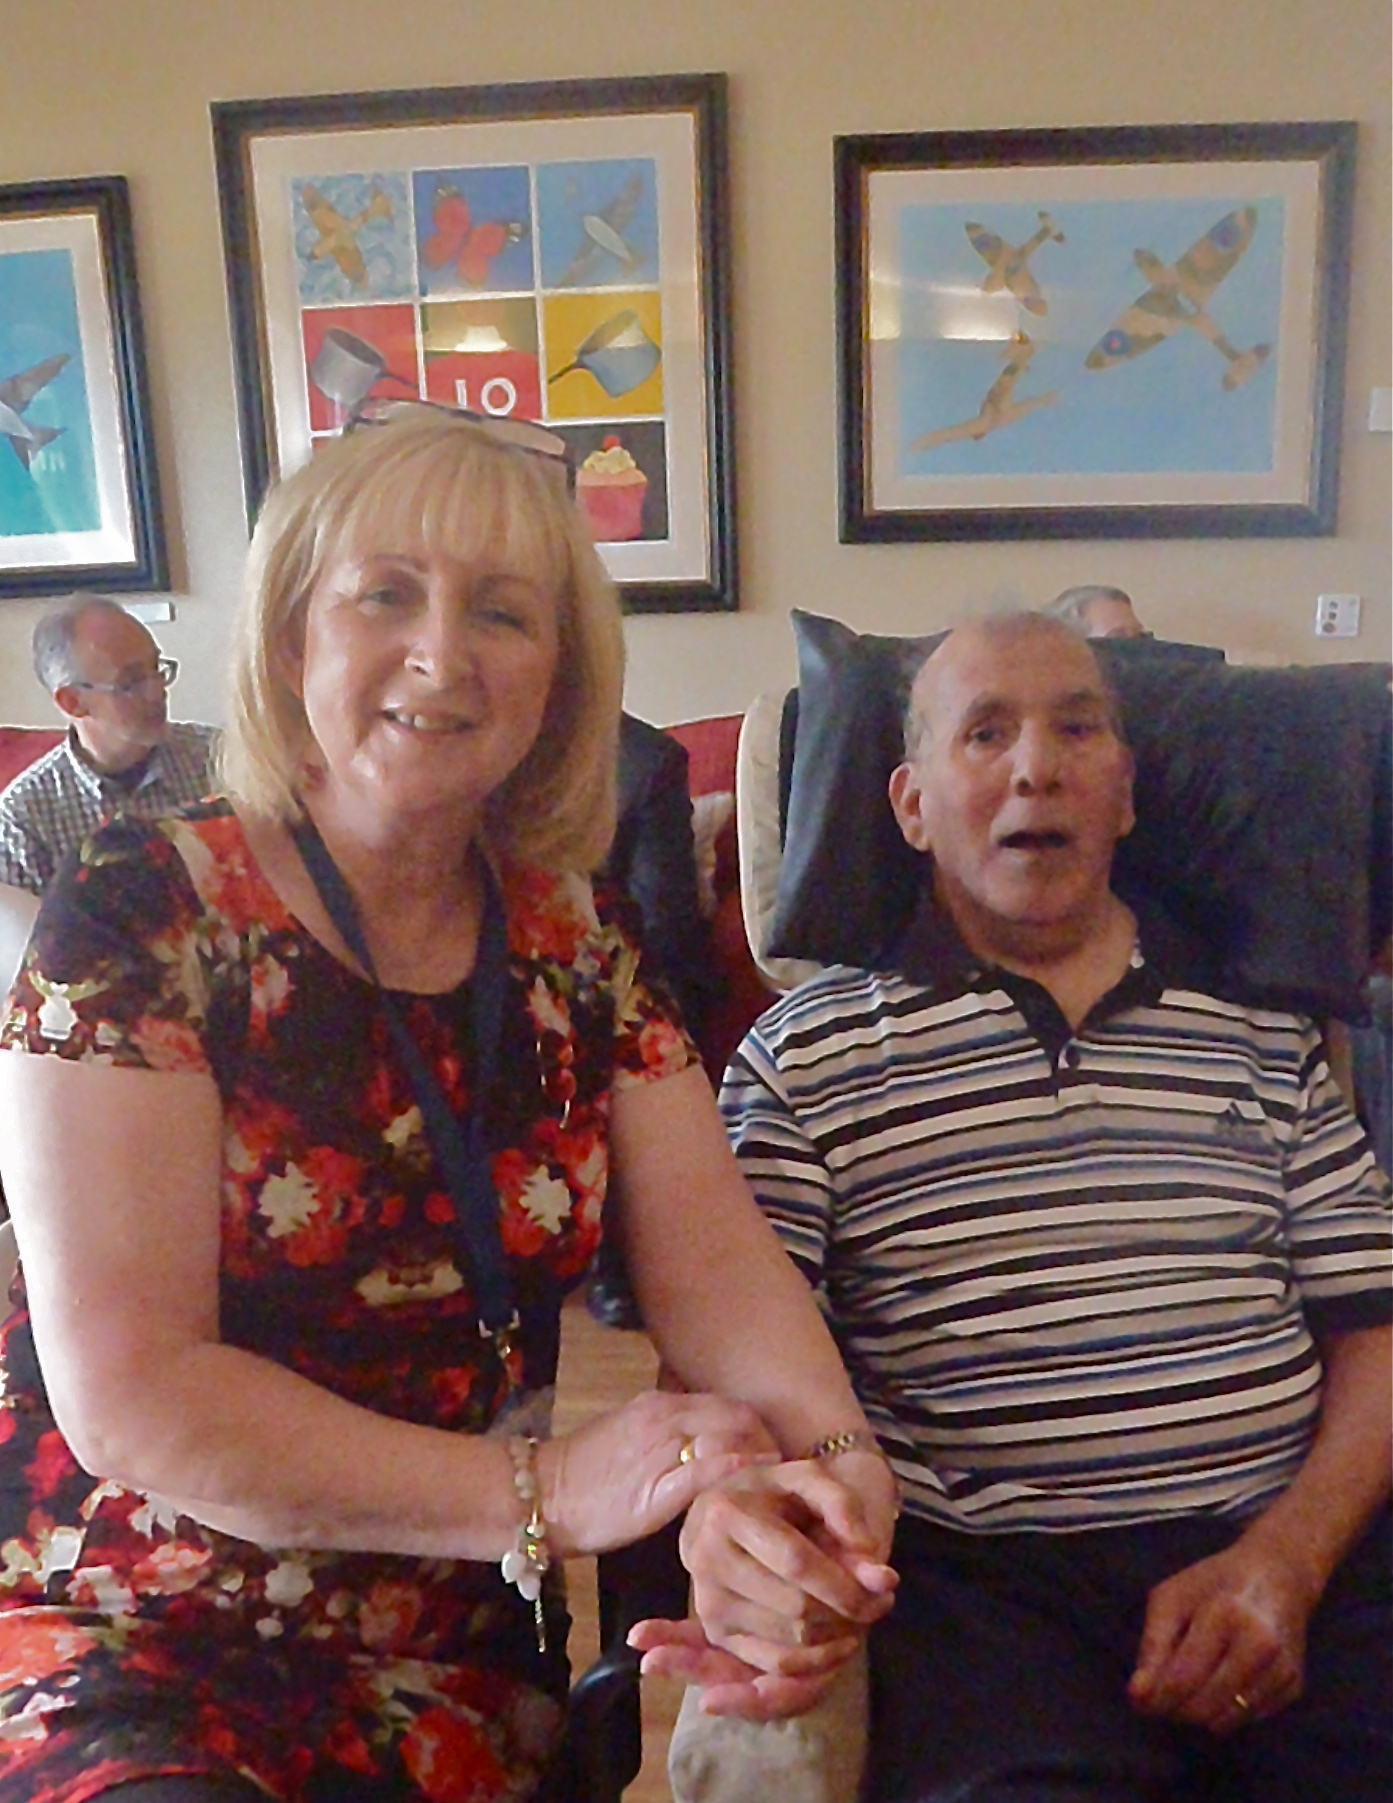
A perfect , clear blue day for the un-veiling of the Sculpture and a celebration of the whole Project and all the lovely, dedicated people who were involved from Arts Care Gofal Celf, Gwalia, the Primary schools in the area and the extraordinary Staff and Residents at Gwalia Mynydd Mawr.
The video here describes the whole project:
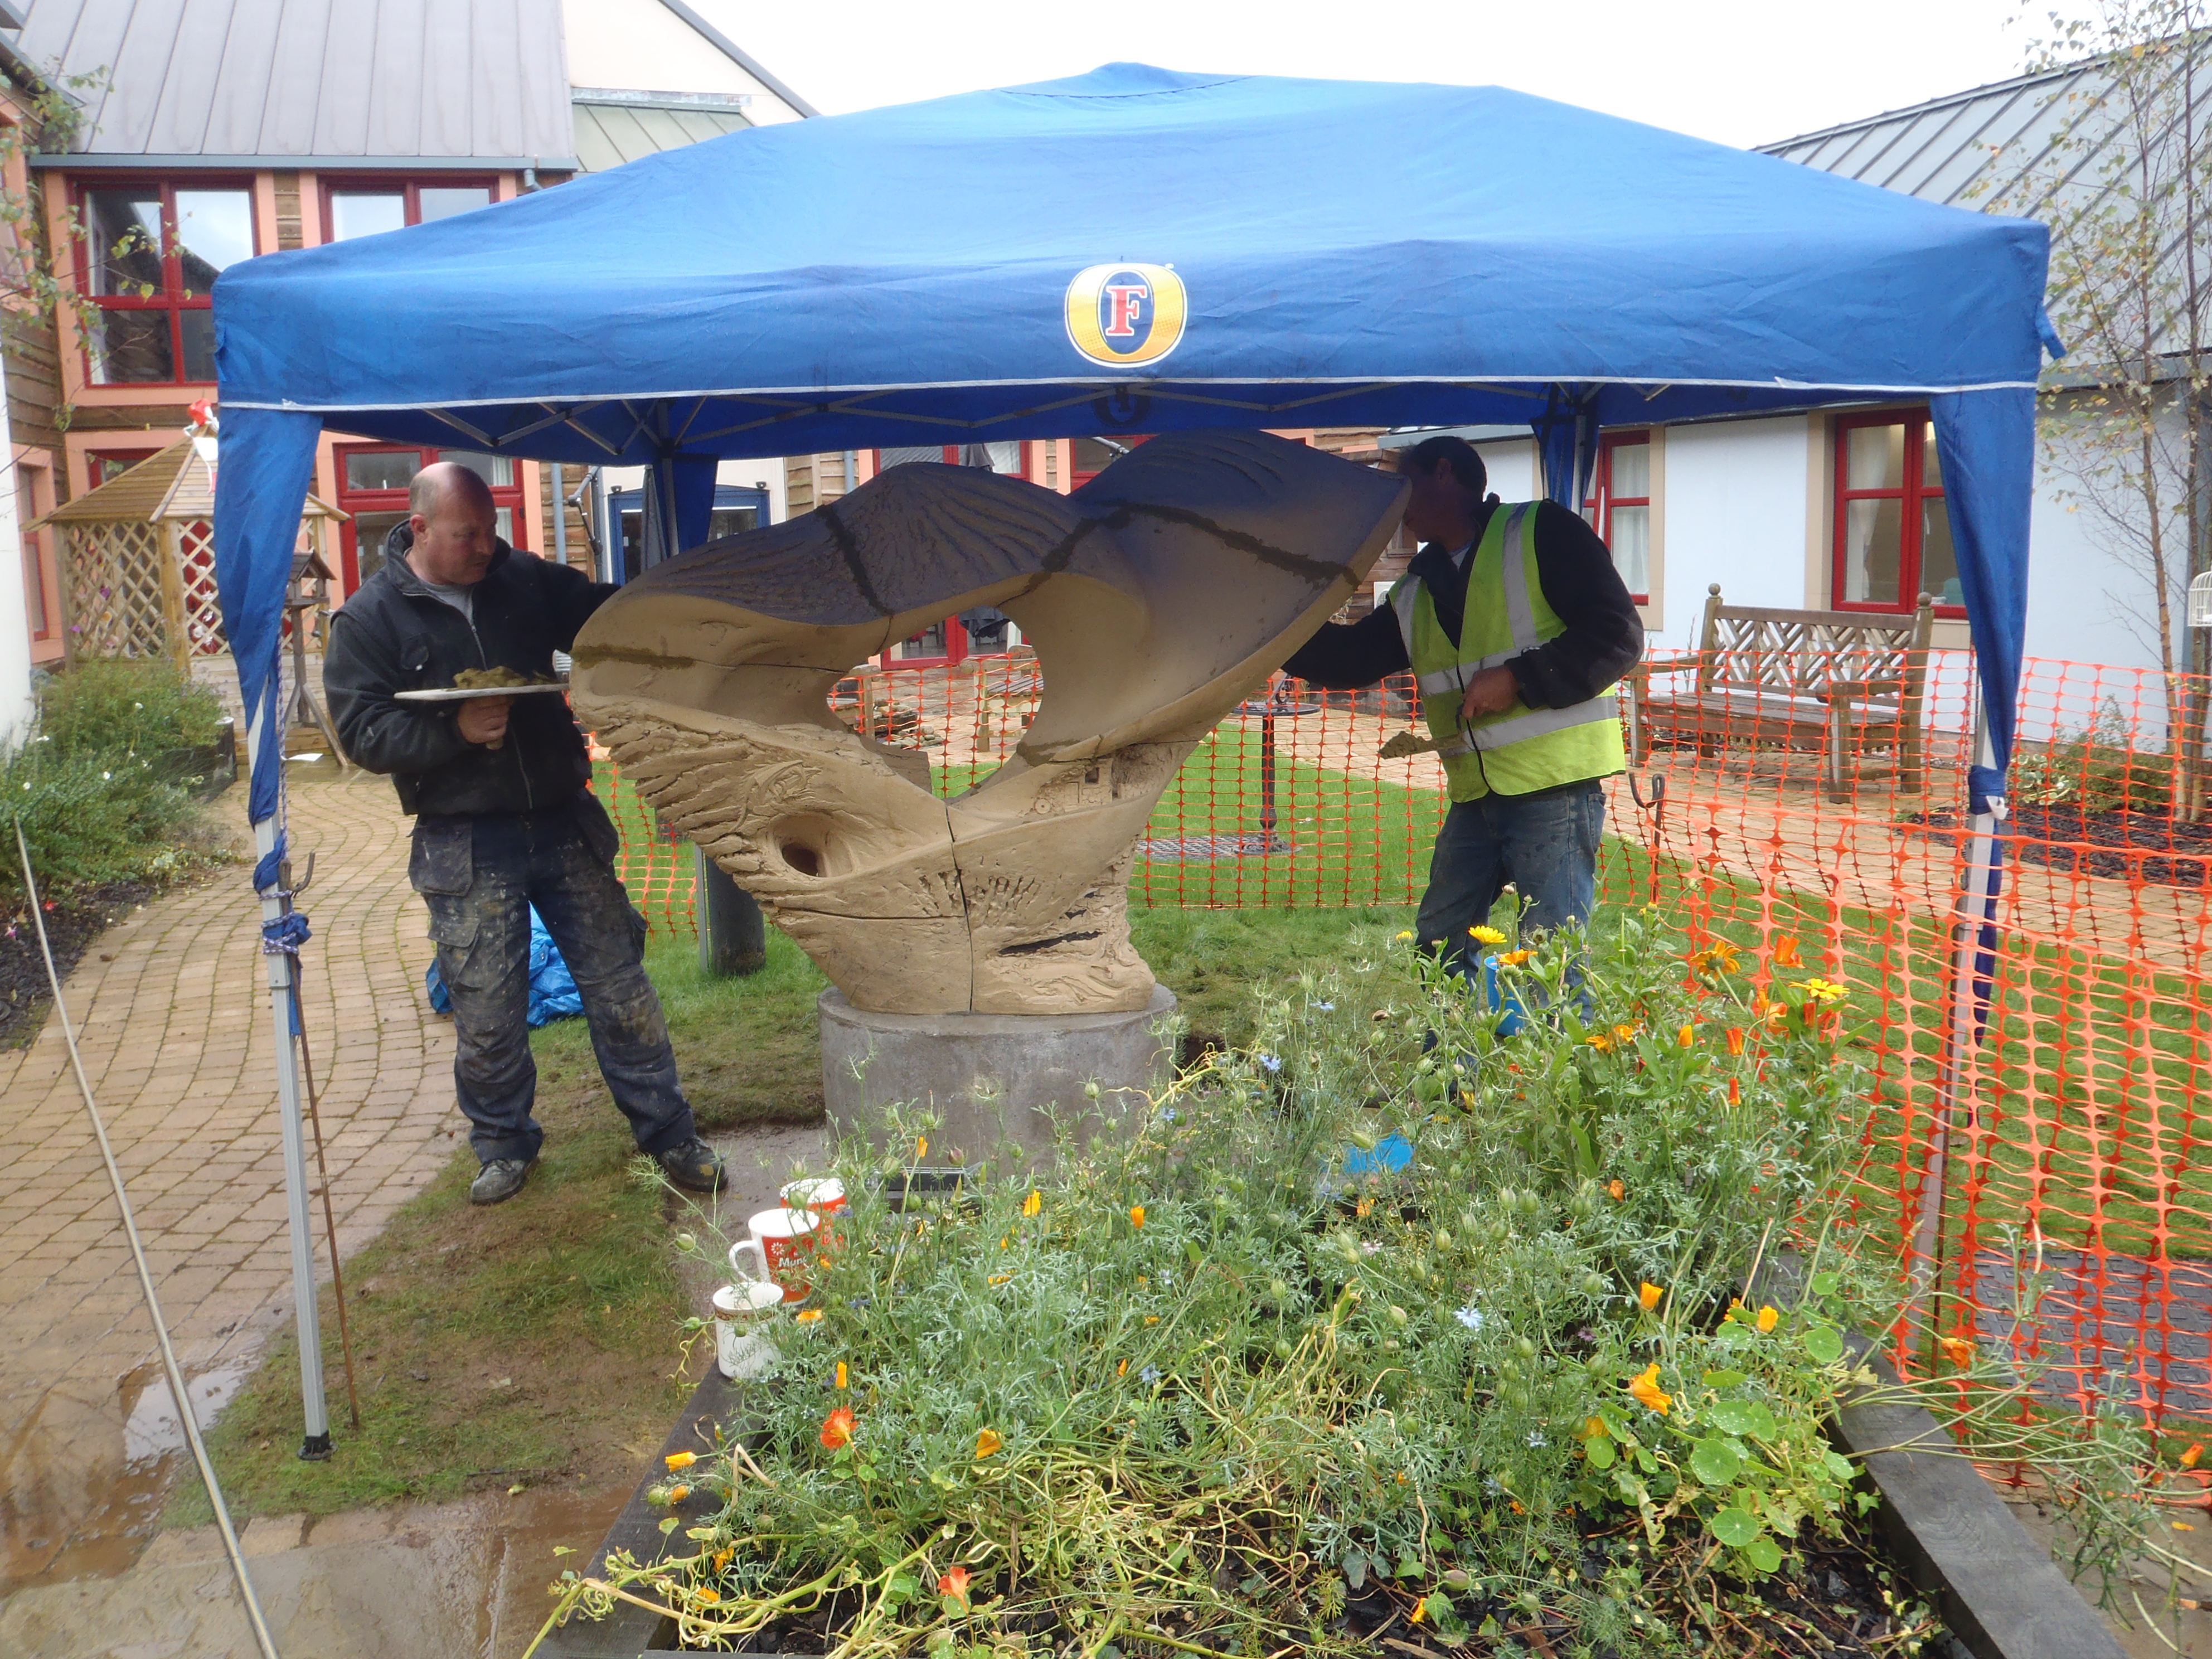
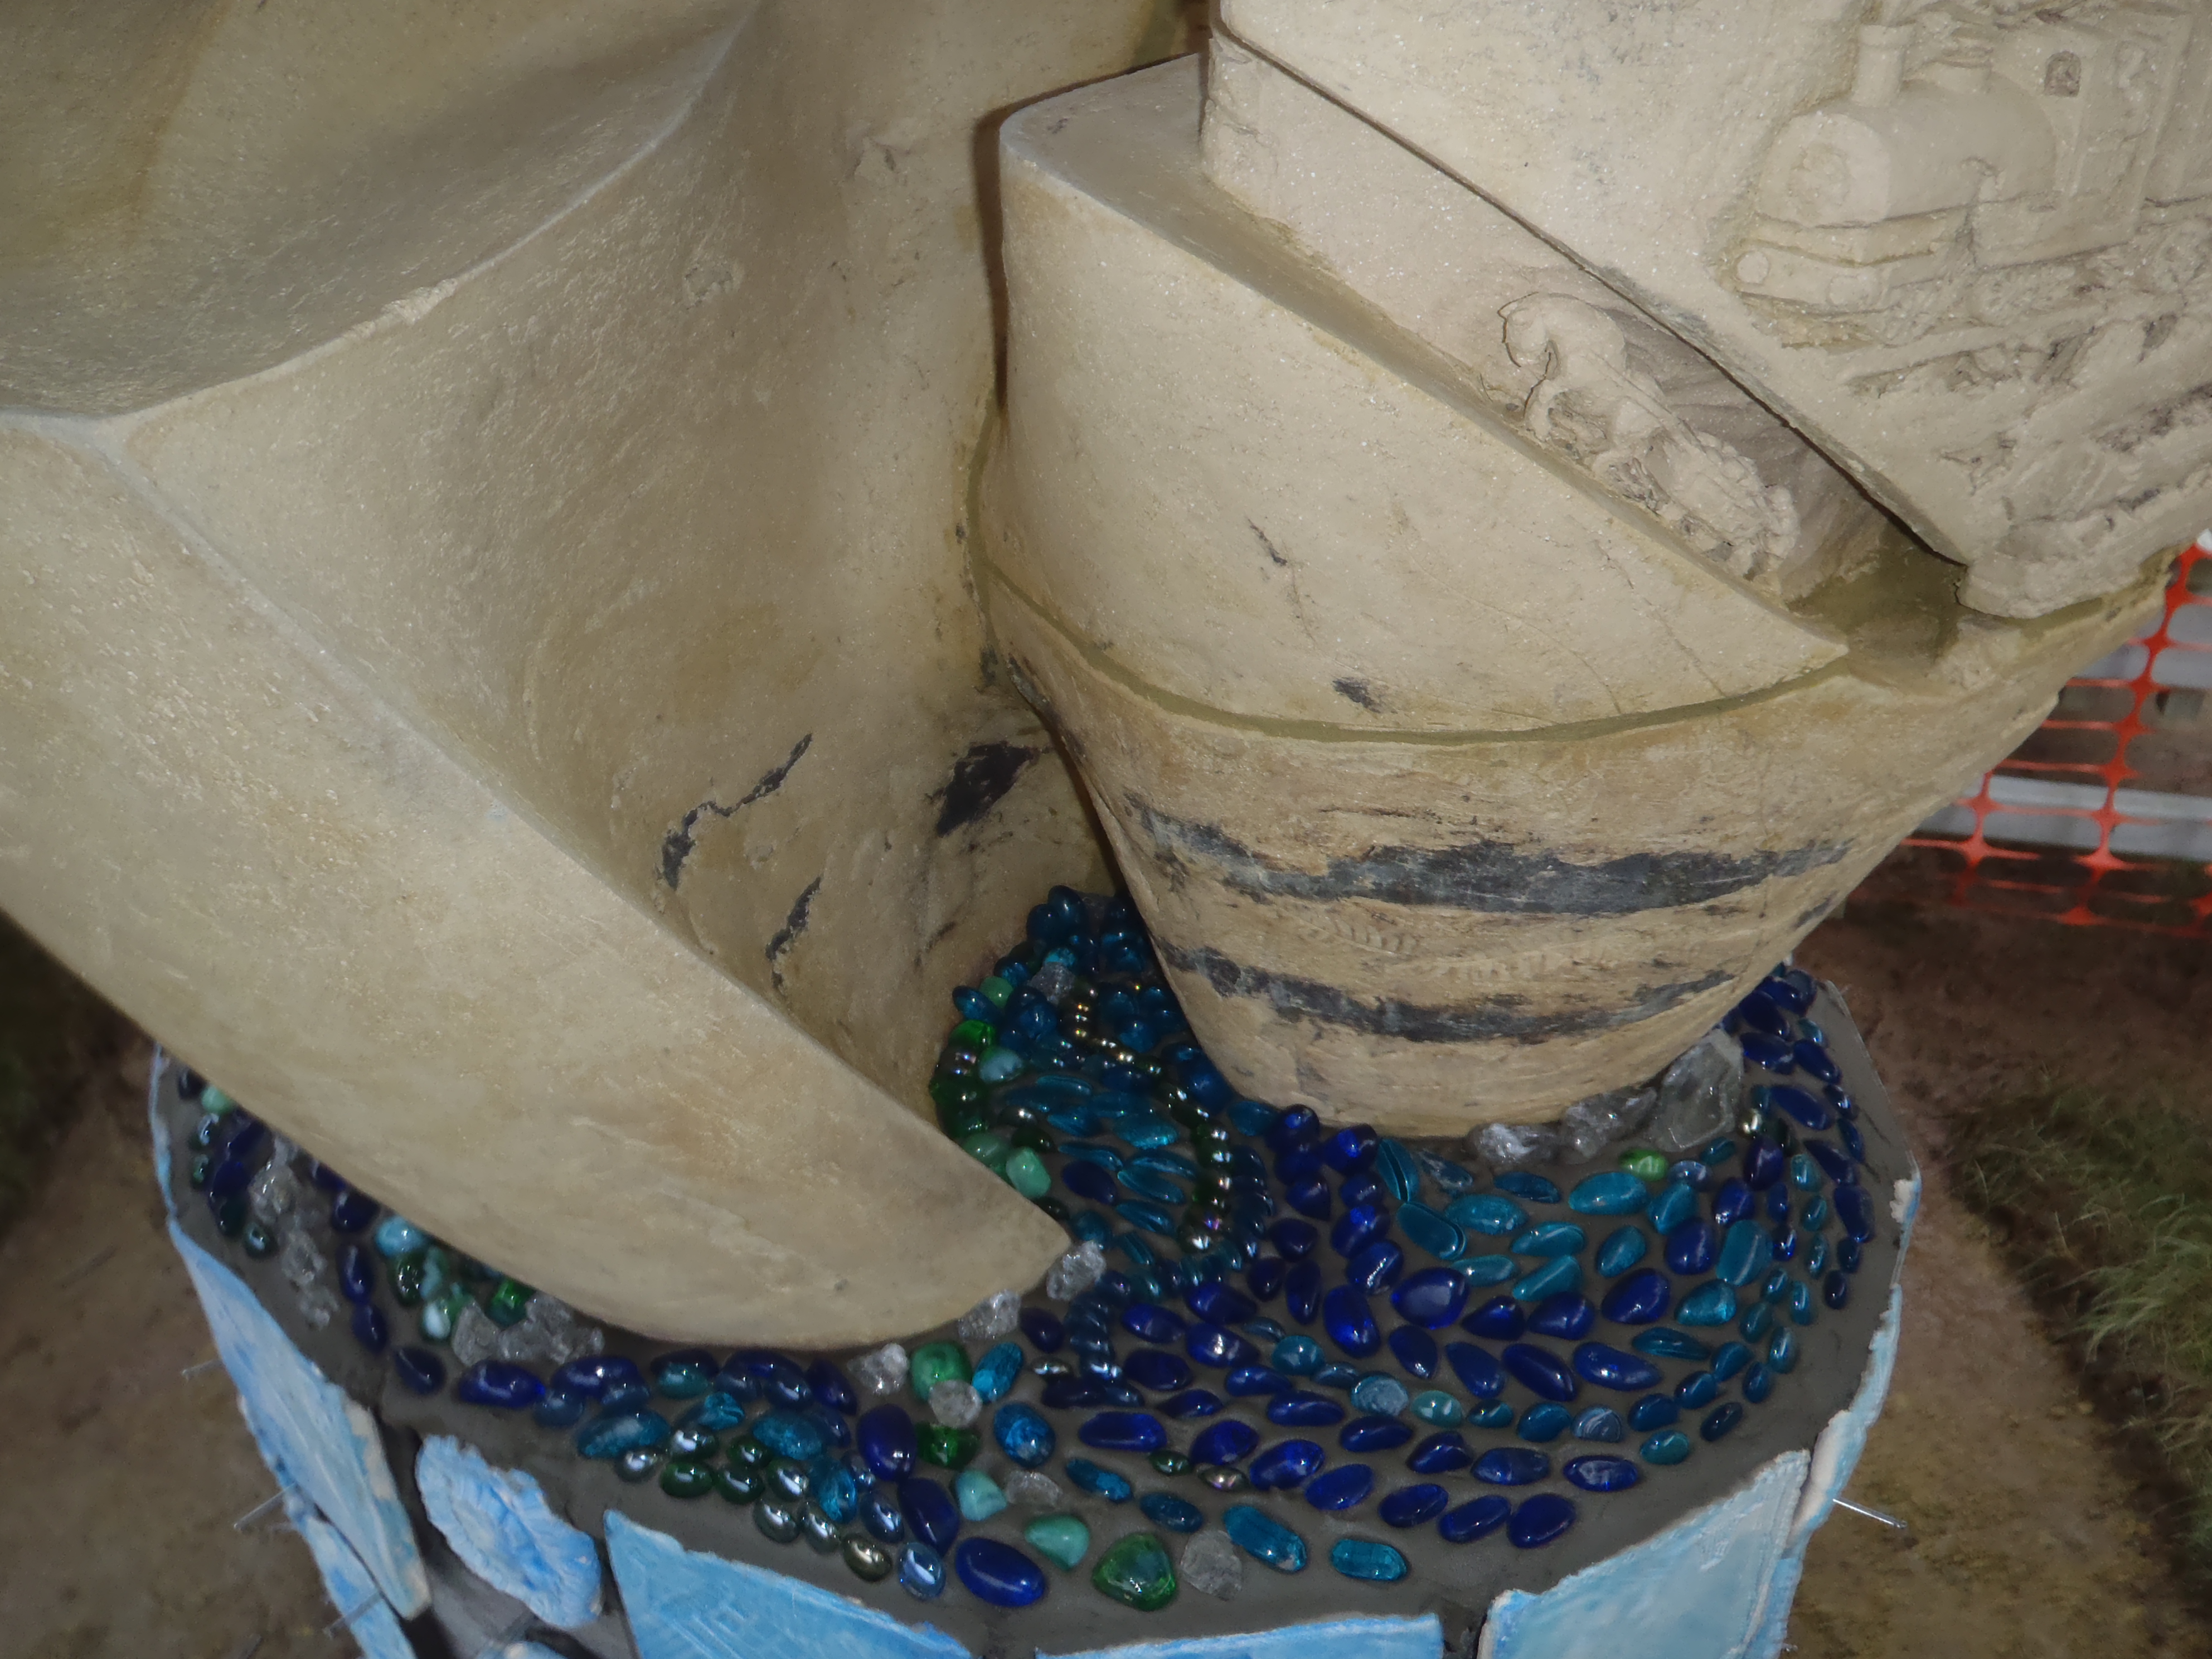
Mynydd Mawr Courtyard Sculpture, 2m h x 190cm w, 2014.
From the outset the many people from Arts Care Gofal Celf, Gwalia and Mynydd Marw involved in this 2 year , multi-fasceted, Baring Foundation ‘Yma a Nawr’ project have put in their all to make it out-standing. After the excellent Installation of the Sirhowy Wyvern I knew that Andrew Preece and his team at Smartfix Property Maintenance would also do whatever it takes to make this Sculpture look fantastic. They are incredibly picky and fastidious, it’s marvellous. Best materials,committed craftsmanship, and they always stick to the Budget no matter how much extra time they have to put in.
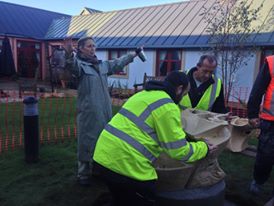
Smartfix Property Maintenance at Mynydd Mawr, Tumble
Moving the heavy sections around meant 4 men had to be on site.
The 2 bottom sections are lowered over rebars set into the solid plinth and foundations.
It was critical to get the position of these first sections correct.
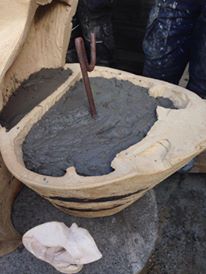
The sections are filled with concrete and left overnight to set.
Once everything has set the supports can be removed and the joints pointed.
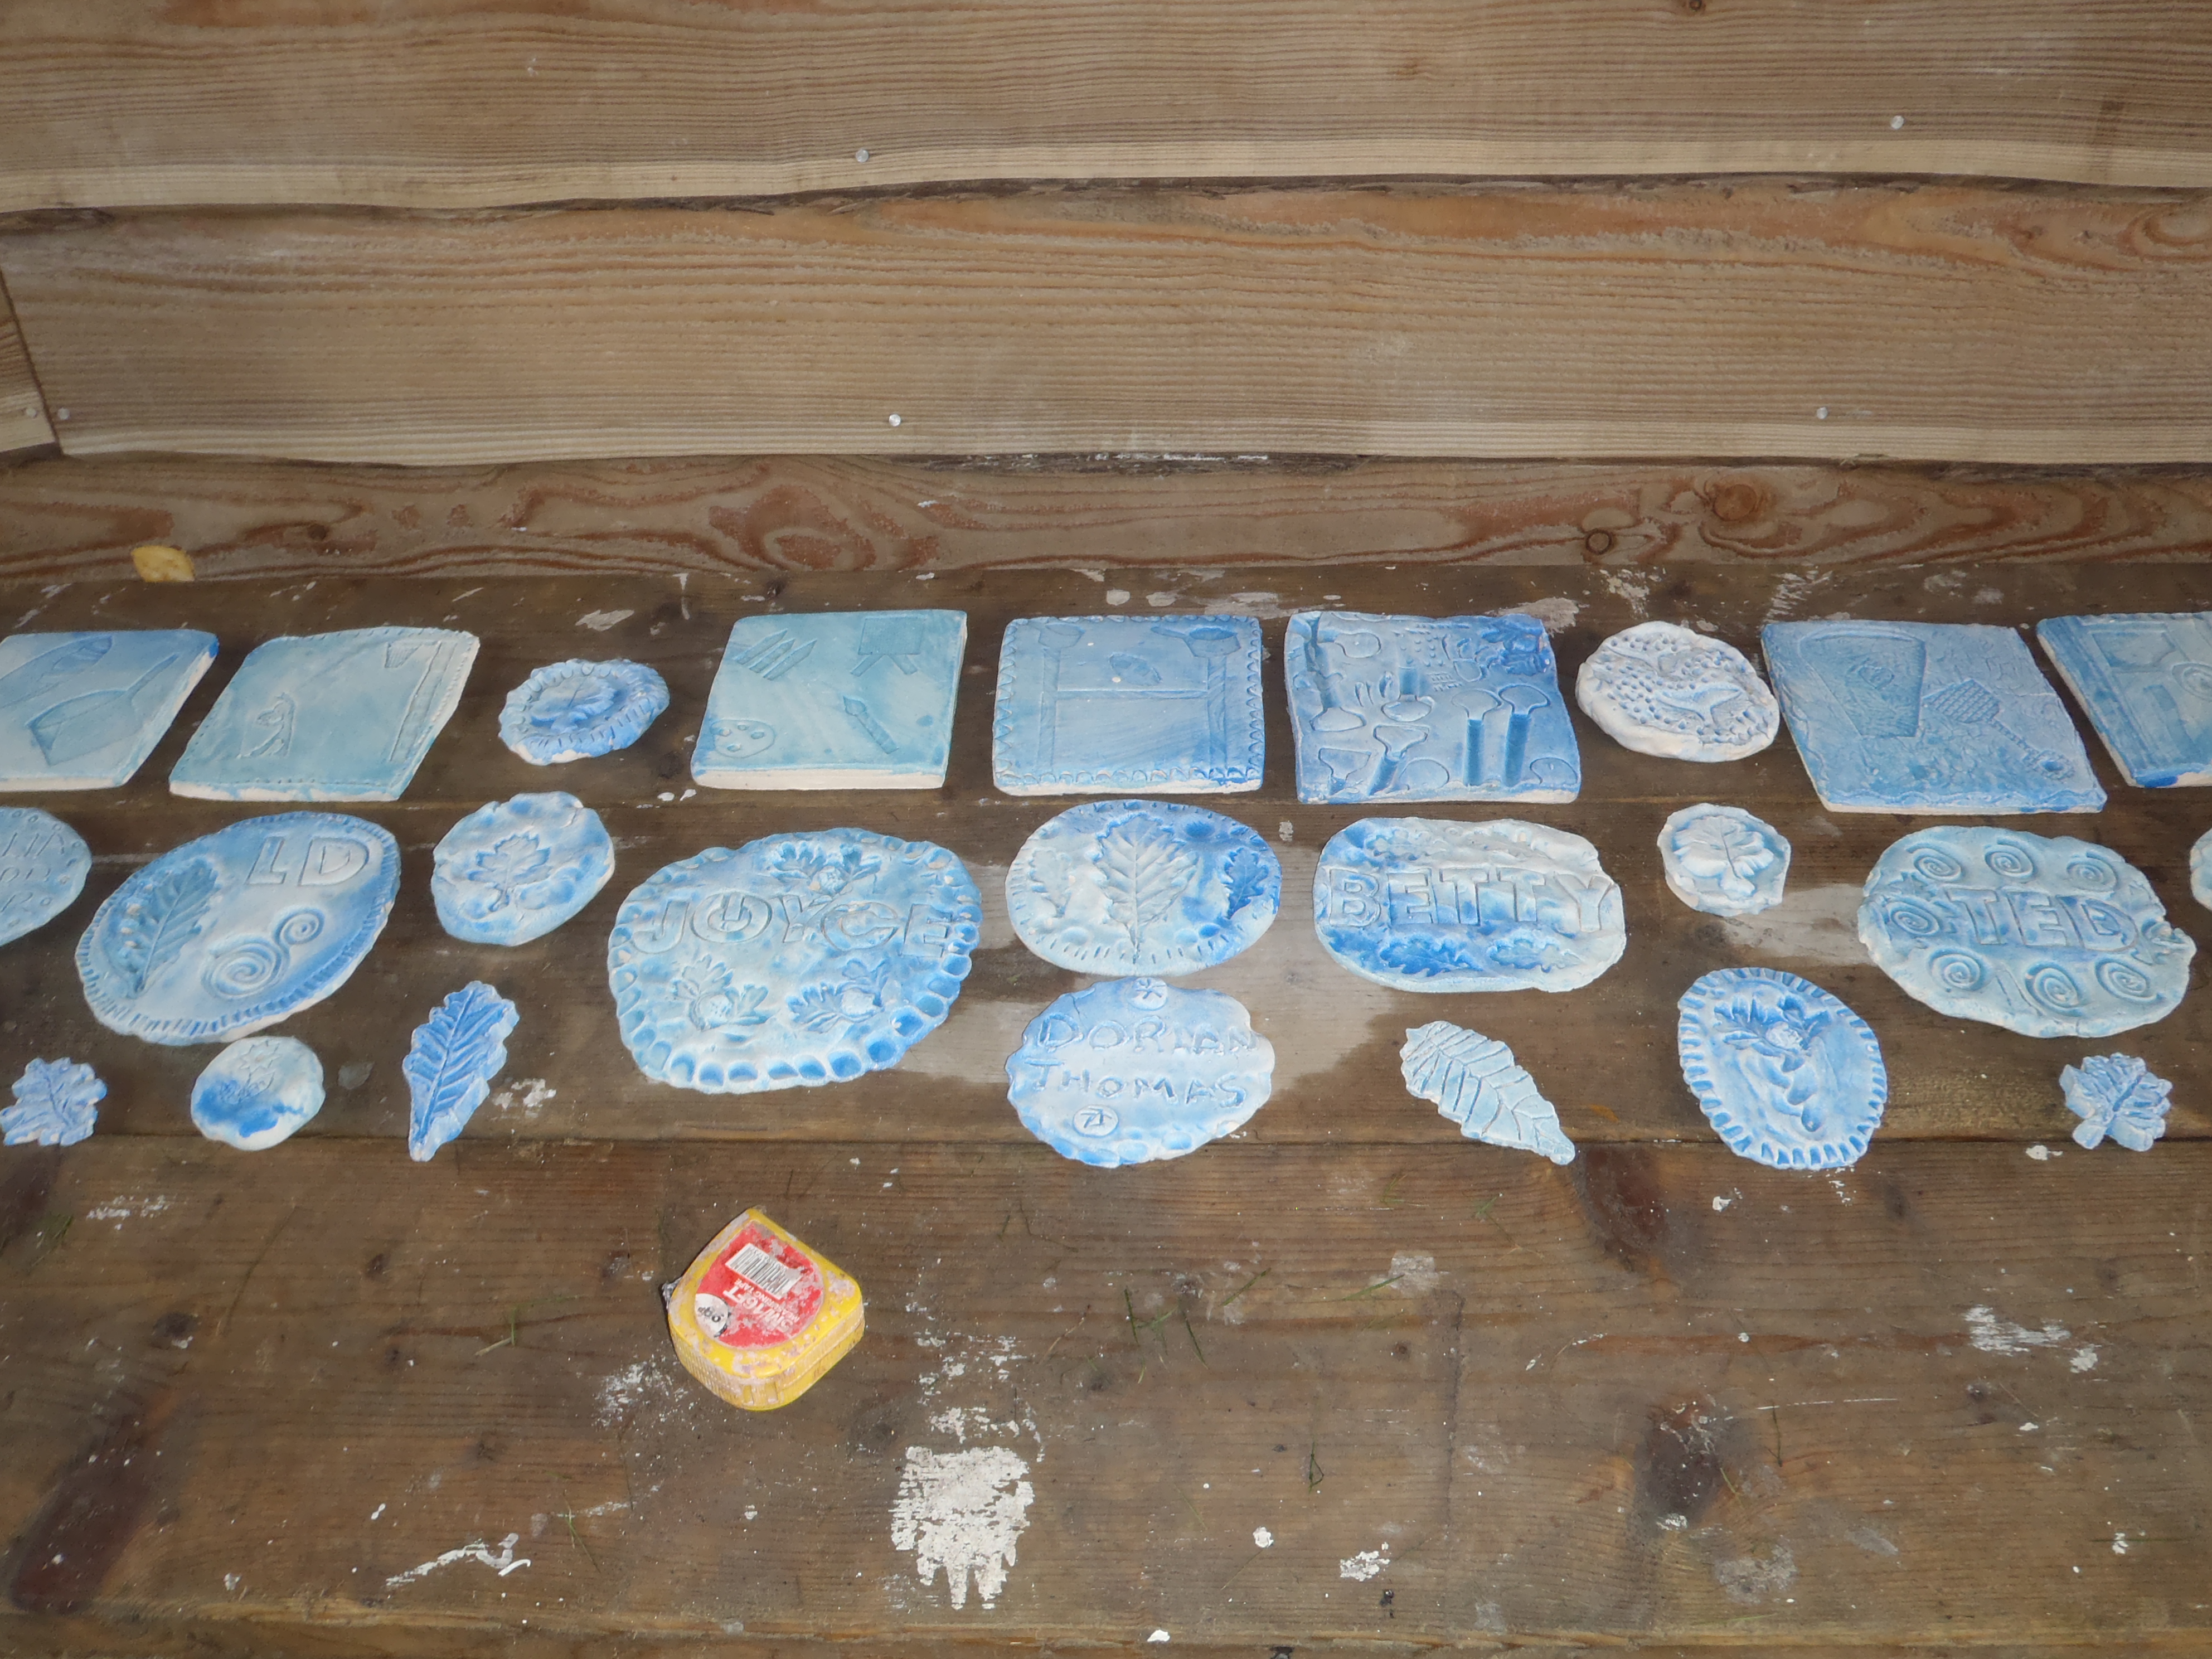
The charming tiles, made by pupils at Llannon Primary School and residents at Mynydd Mawr are laid out in a measured pattern.
Frame-works for The Wyvern IV and, in the back ground, The Leviathan.
The second framework has become the Leviathan, the guardian of the Aquasphere as The Wyvern is the guardian of the Lithosphere. I will make more versions. These will have a pale gold colour. Next I will make a larger Osprey, guardian of thew Atmosphere, in the same clay(Scarva ES50 Crank) and then move to the black clays and re-do the set.
The Leviathan in progress, Sept 2014.
The Wyvern and The Leviathan. in progress, Sept 2014.
The frame-work for this one was much more developed and lead the form. I made a second one so I could keep the flow going around the drying periods but I didn’t need to break from Wyvern IV; it was strong enough.
Frame-work for The Wyvern IV.
This is asking a lot of a clay. But this is Scarva ES50 again and reckon I’ll get away with it.
The story is coming together. My policy of don’t ask too many questions, let the work flow, put in the hours,review completed forms, is working well.
Porth Yr Ogof Cave, Brecon Beacons, by Steve Foote.This image and the memory of being down there is still key.
Balarat Pit Marker, 6m L x 2m H, Blaengarw, Wales.
The idea of the Wyvern, guardian within the land ,started with the Balarat Pit Marker although I didn’t know the name. The Wyvern is a force and can take many forms. The Harbingers I’ve made are similar figures.
River Harbinger,2012
The Wyvern III, 2014
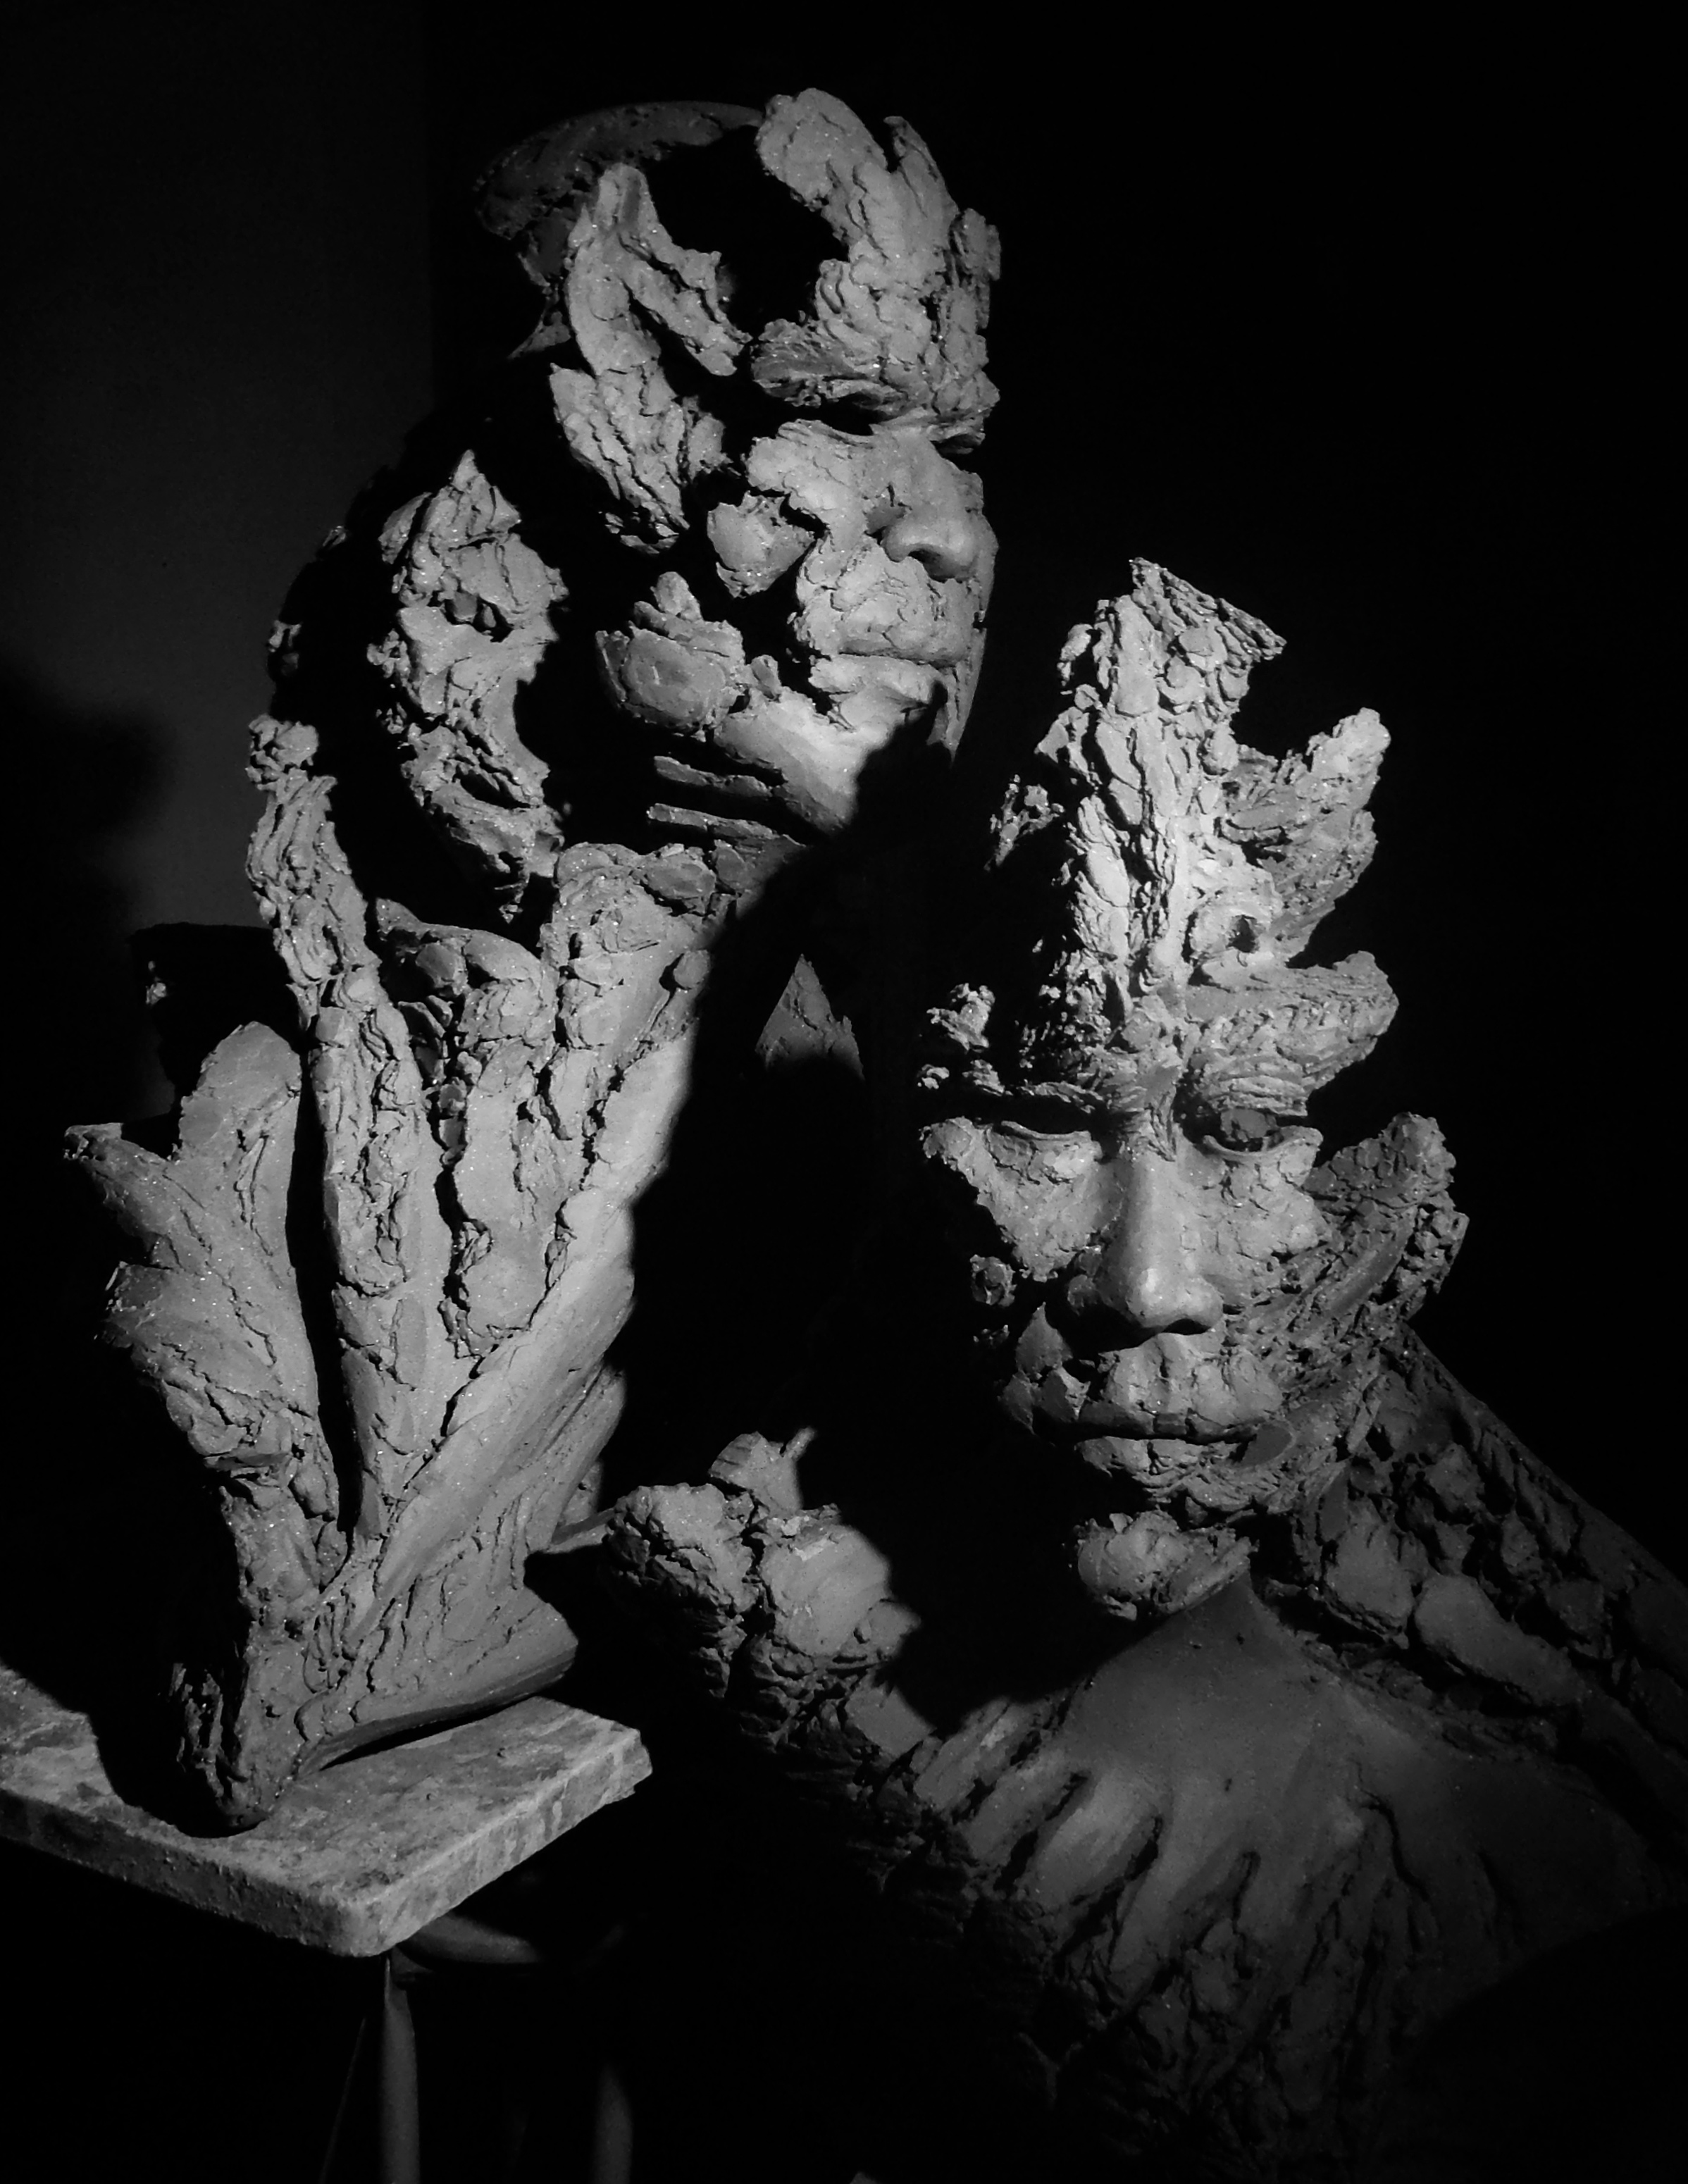
These busts are developing slowly as my portrait skills heat up and I can work more freely.


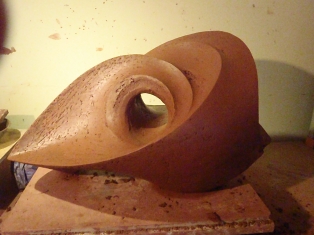


 Osprey.