How to Coil-build with clay from small to monumental.

There are lots of variations on the Coil-Building method. This one avoids all the pit-falls that cause your pots to go out of shape or break in the kiln.

I started out as a Coil-builder 34 years ago and I still turn to it regularly. All my monumental brick sculptures are coil-built. It’s all about understanding the clay and how joins are actually formed. The skills you gain from coil-building are extremely transferable making it a great place to start for beginners. There is a lovely rhythm to the work.

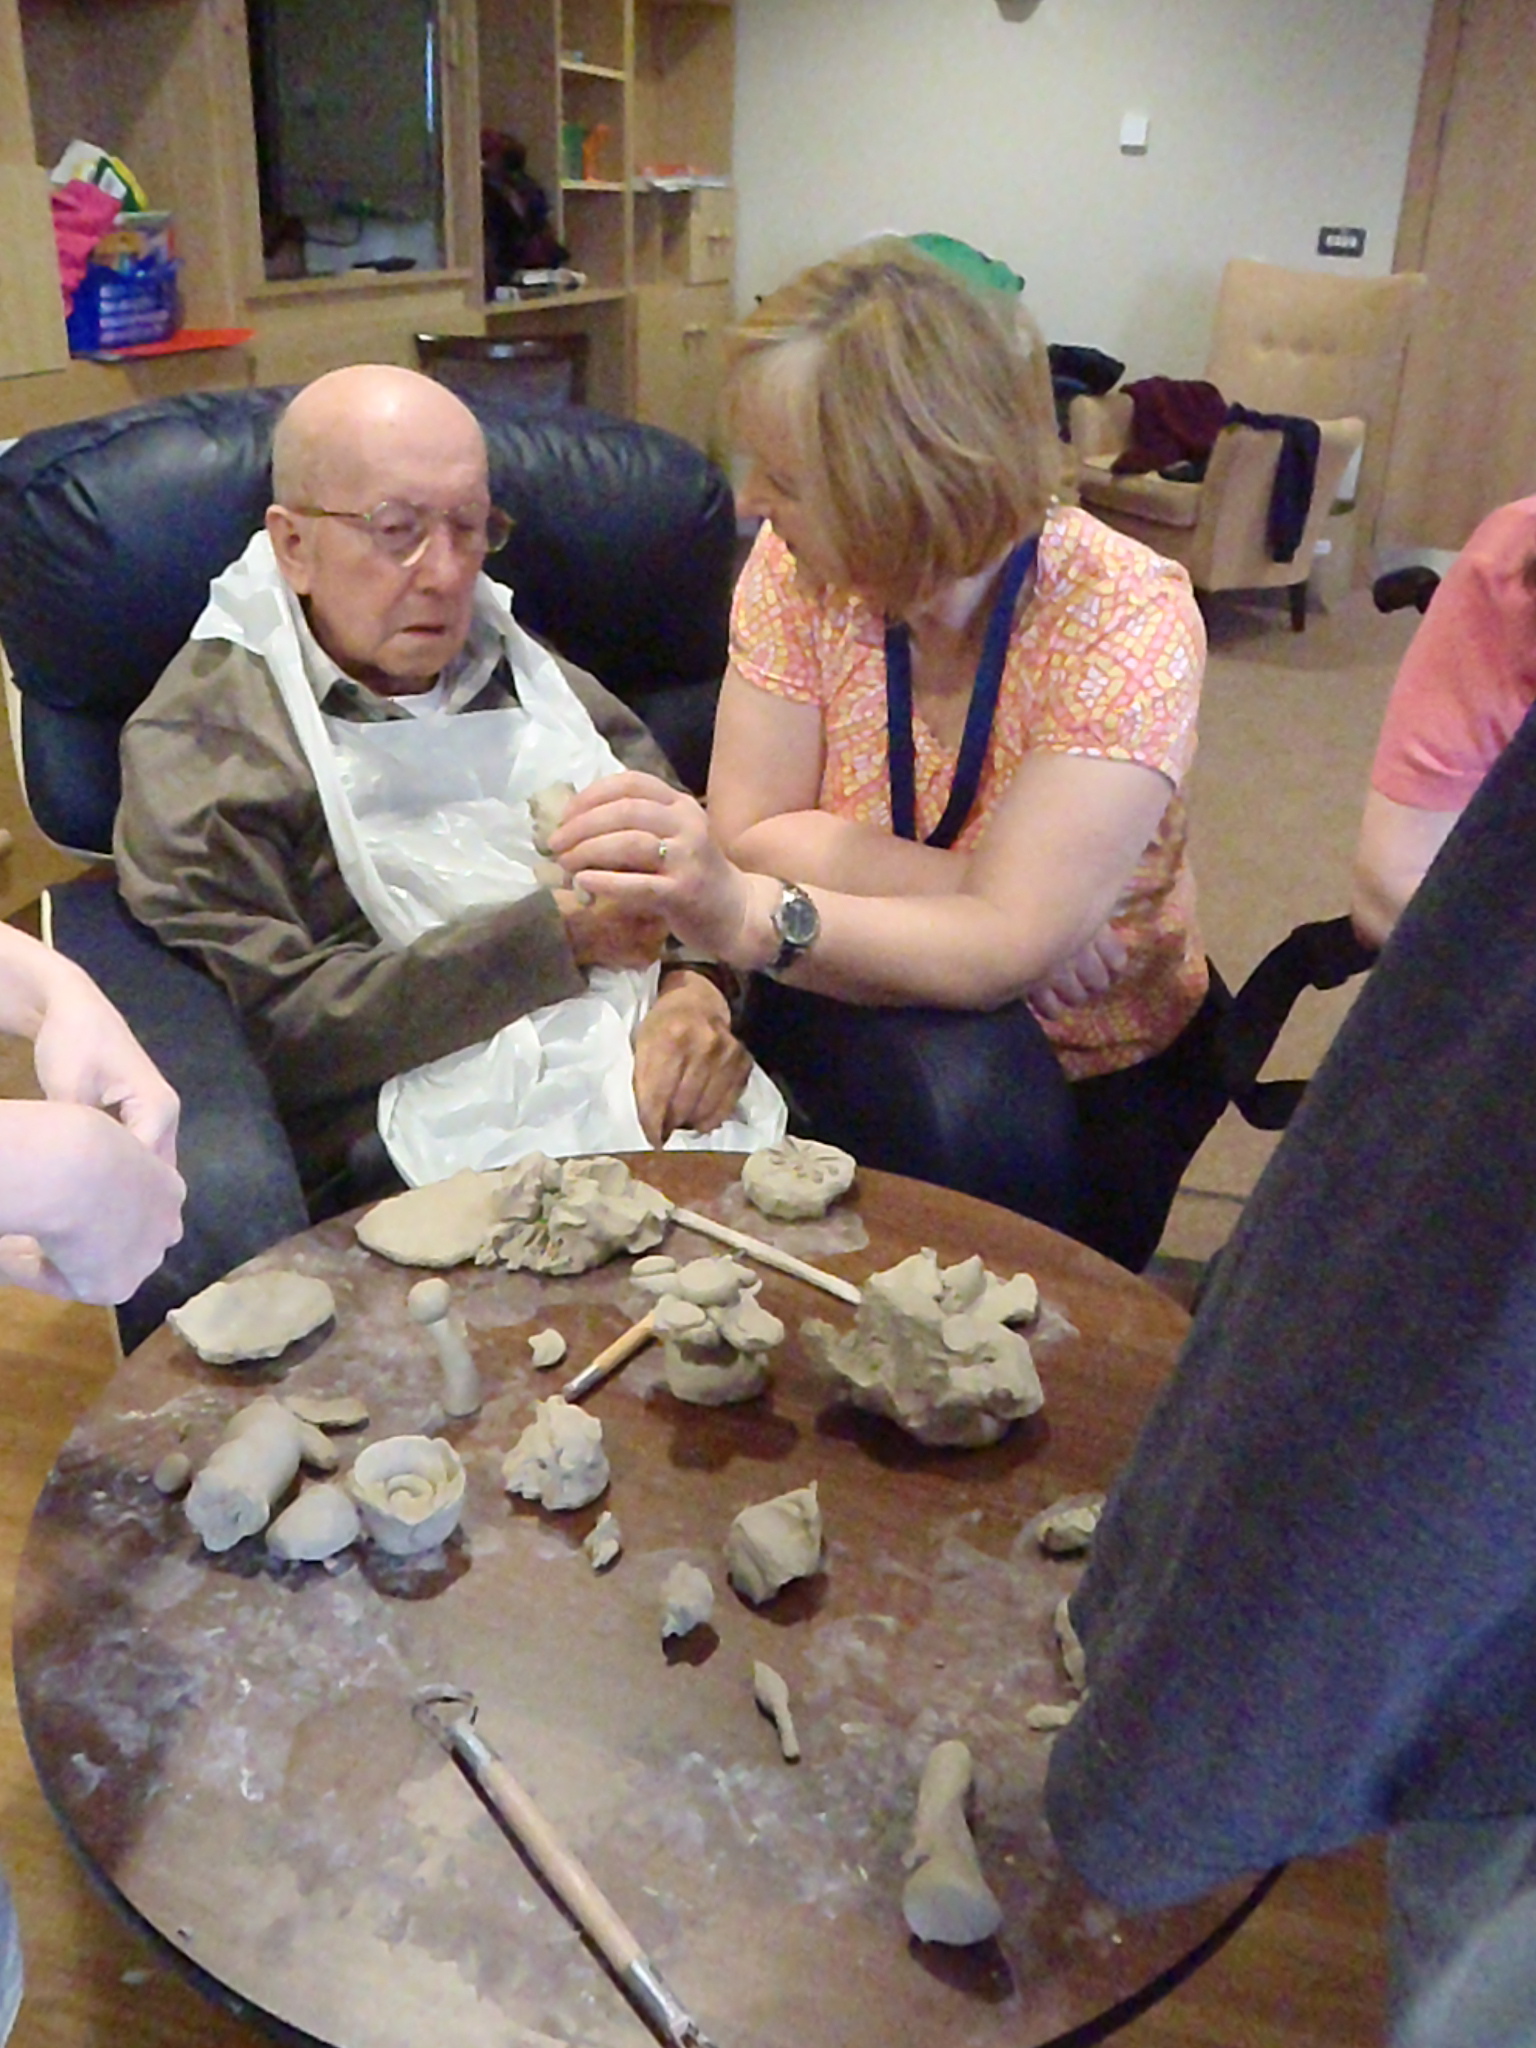
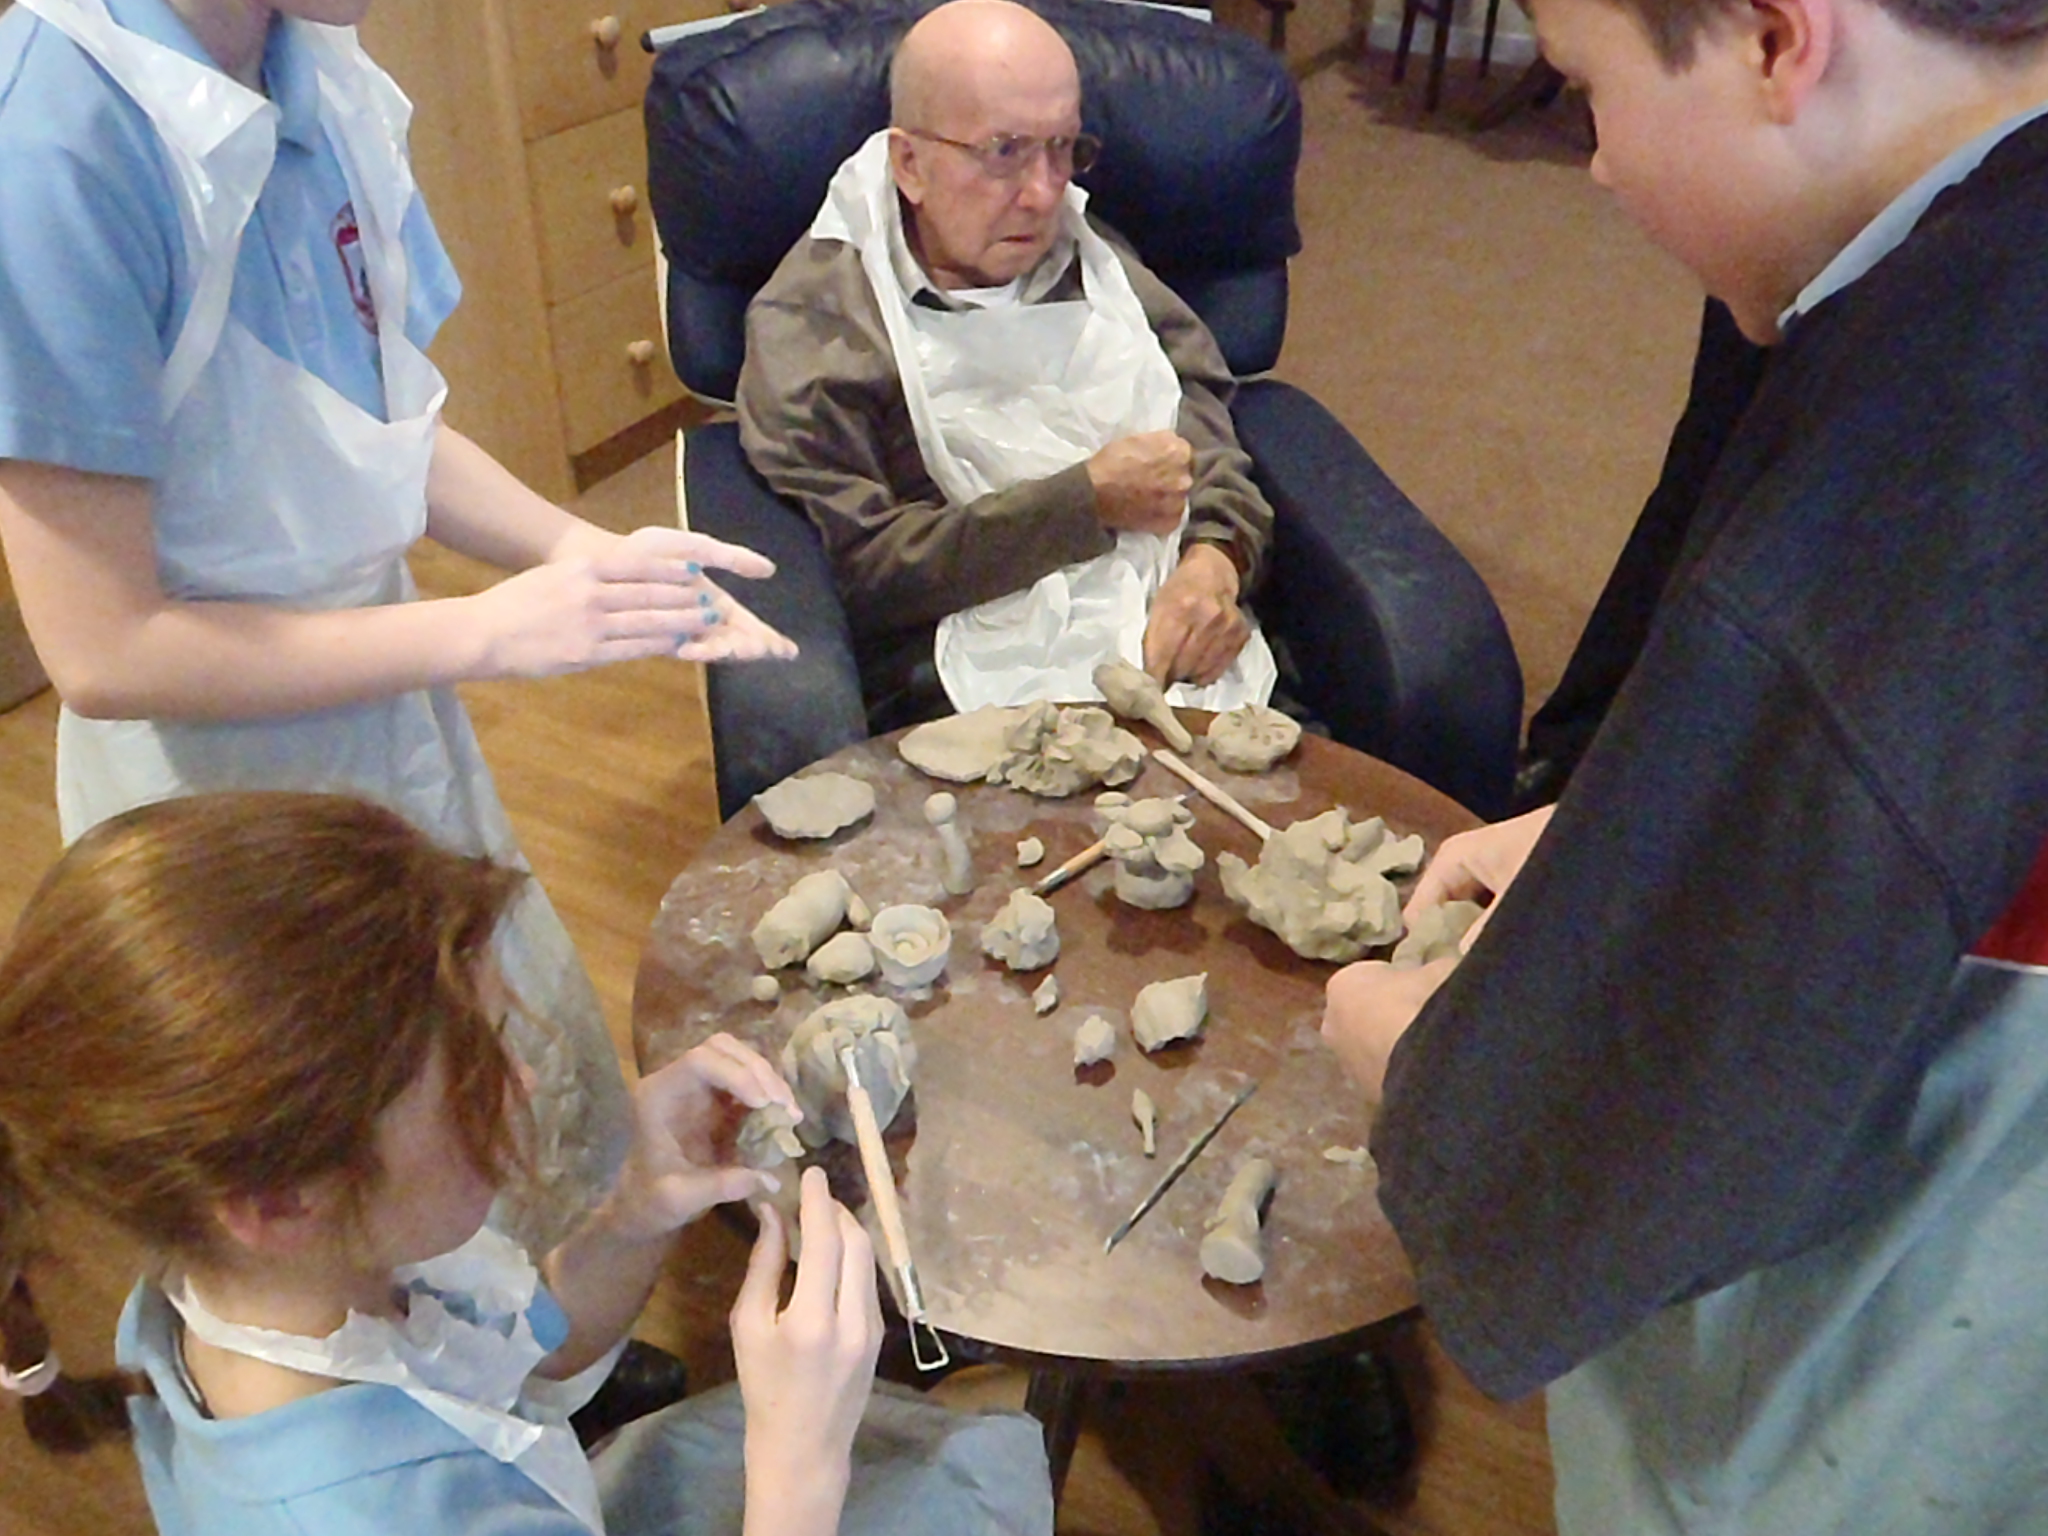
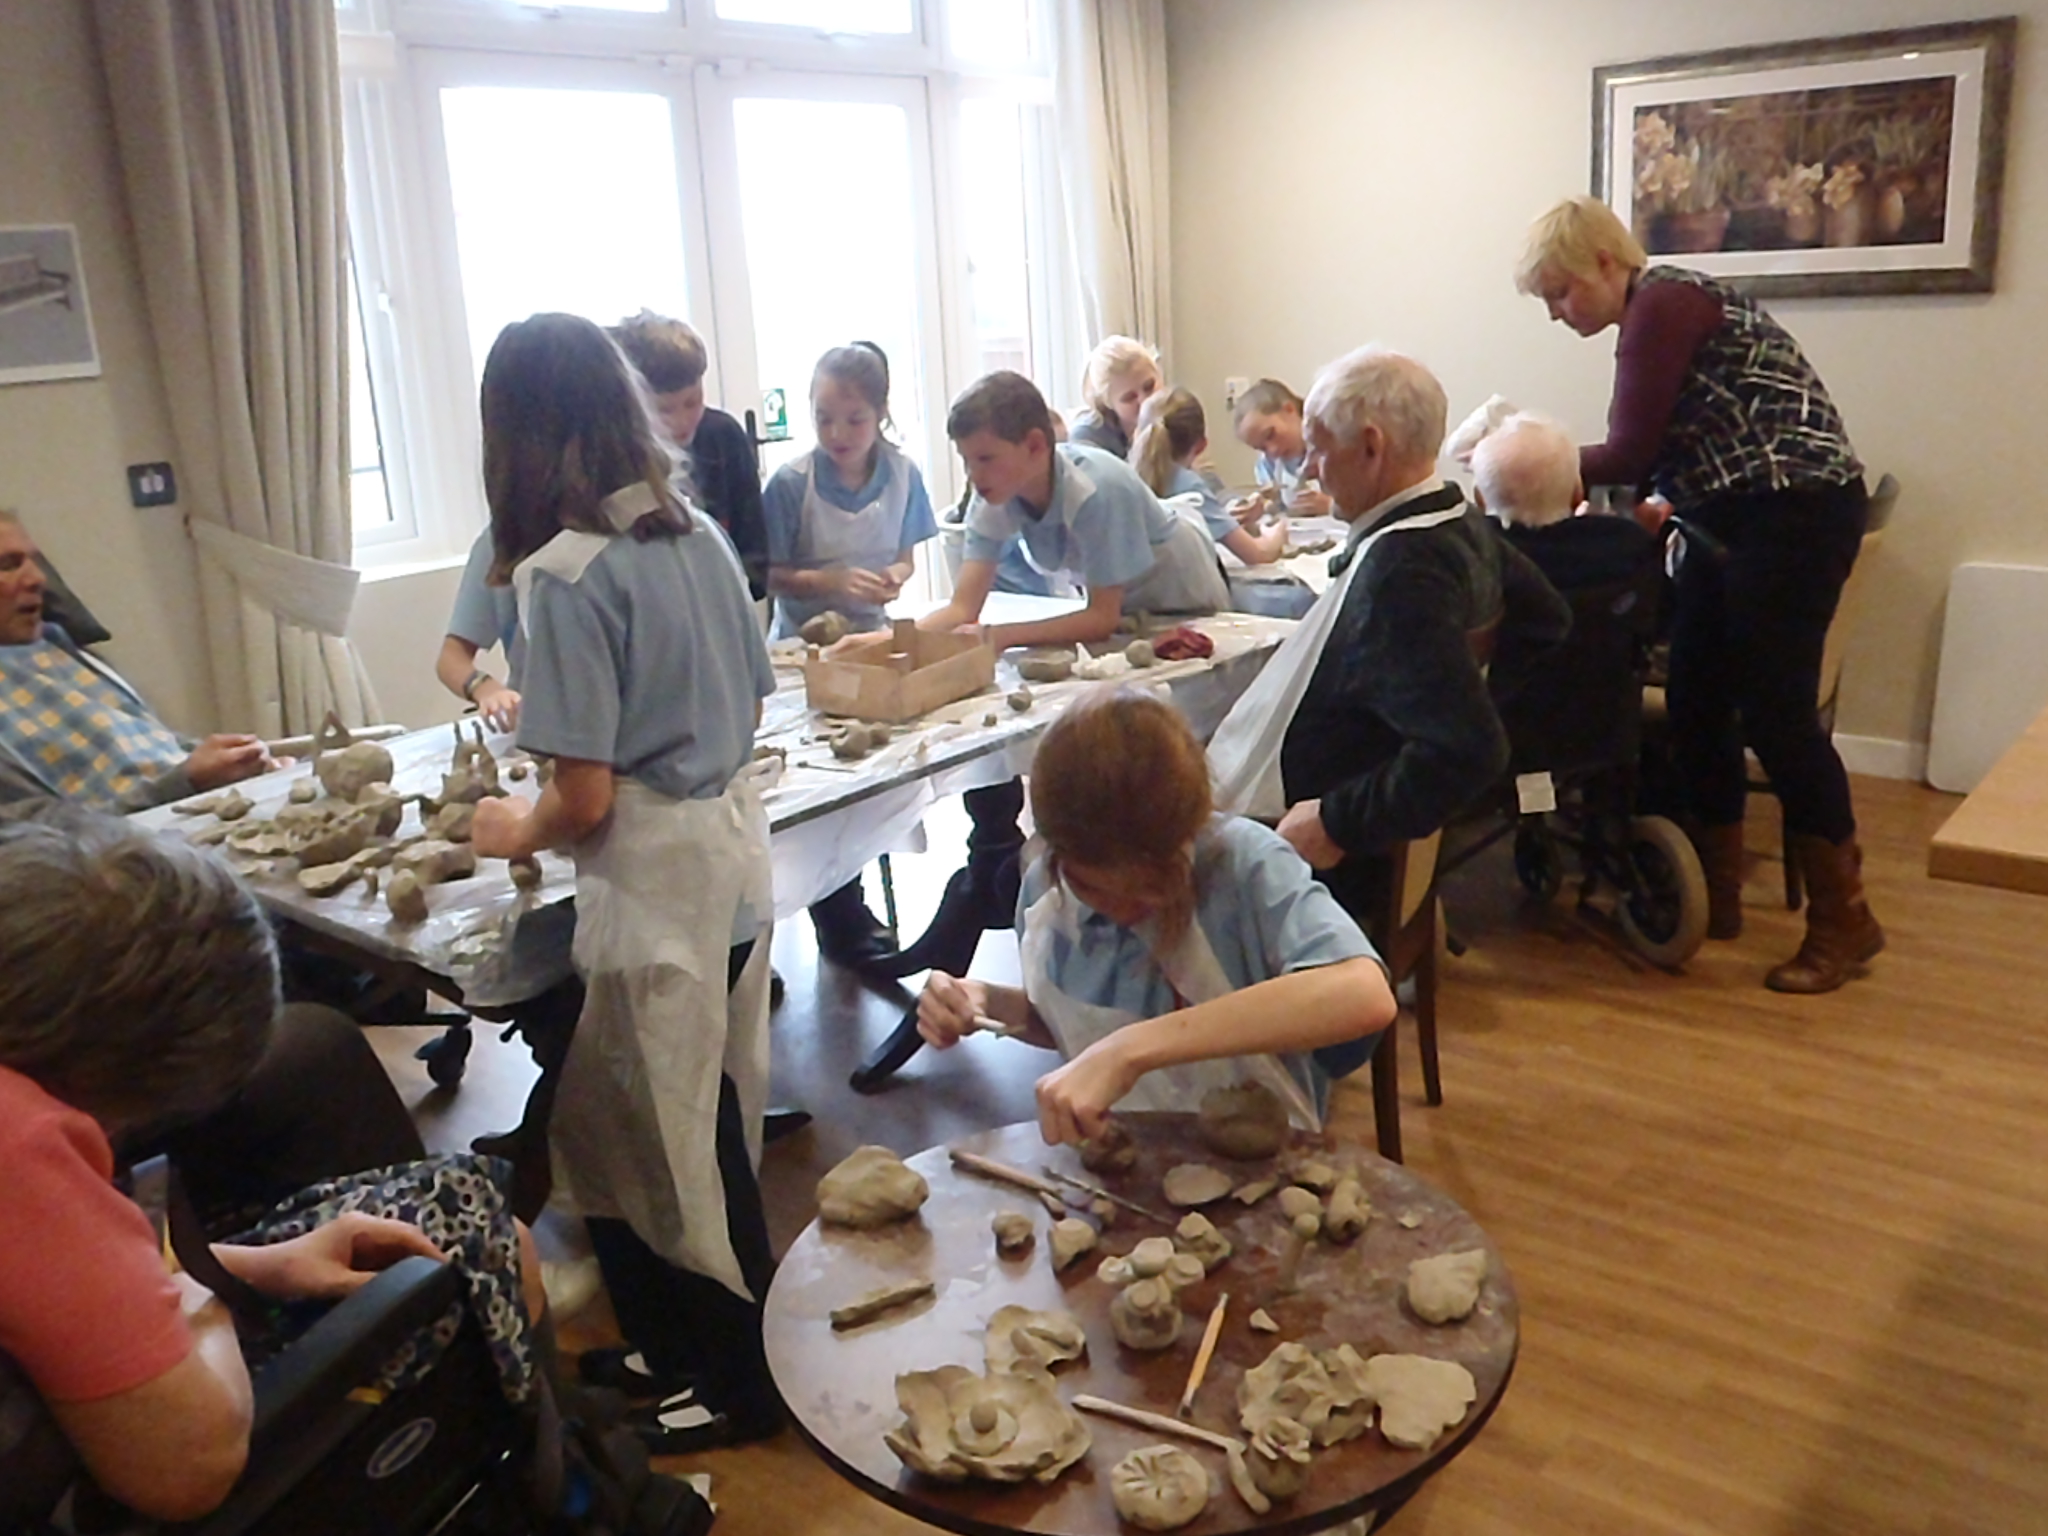
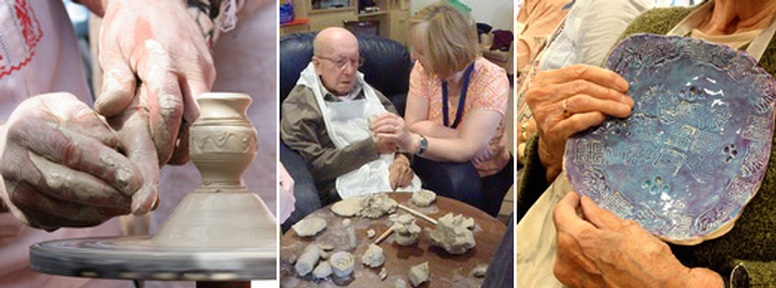
Here is the Coil-building Workshop that I run at Osprey Studios. Many thanks to my lovely students for being in these pictures.

How to do excellent Coil-Building.

Rebecca Buck, Osprey Studios.

Choose a clay with a medium to high percentage of multi-grade grog ( grit in different sizes from dust to medium sized bits). Scarva ES 50 Crank is ideal. Clays of this type will give you the best results.

Start with the biggest pinch-pot you can comfortably make. (Unless your piece is really too big.

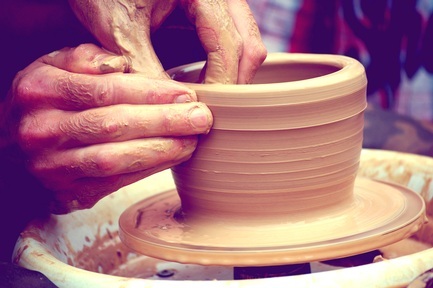
1.Start with the biggest pinch-pot you can comfortably make. (Unless your piece is really too big; leave out as much of the centre of the base as possible.)

Make it round.

2.Make it round.


The most important thing is an even thickness of up to 2cm at any point.

3.The most important thing is an even thickness of up to 2cm at any point.

Gently ease it into the shape of the first section of your pot.

4.Gently ease it into the shape of the first section of your pot.

Set it aside to stiffen up.

5.Set it aside to stiffen up.


Have several on the go at the same time so you are not tempted to rush each one.

6.Have several on the go at the same time so you are not tempted to rush each one.

Prepare the top edge to make a join.

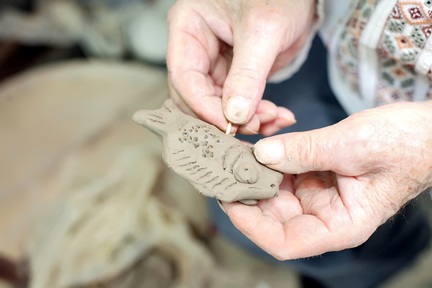
7.Prepare the top edge to make a join. NEVER use a pointy tool. Use a serrated tool so that the score marks are not too deep. Fill these ‘ditches’ with water and give it time to soak in. Dab on a little more. Then put on slip; slip is perfect for holding a lot of water in place.

Very important bit.

Genuine joins are formed when the chains of platelet-shaped particles from each section inter-lock. Imagine a magnified image of tangled hair.

Score marks do not give the surface ‘tooth’; they allow water into the clay-body. On vertical surfaces score marks and slip hold the water in place to give it time to sink in.

Slip is not ‘glue’. It is clay particles spread out in water and has little strength, especially when it has dried. It is ideal for holding a lot of water in place to give it time to be absorbed to soften the area of leather-hard clay.

Never use a needle tool. Your score marks will be too narrow and deep. They will get covered over, resulting in a ring of tiny but malevolent air-bubbles that will expand in the firing and a crack will zing along the joins. I have fired pots for poor, misinformed makers that have come apart at every coil! You could see the deep score marks and powdery slip.

Start making your coil from a generous block of clay. Squeeze it gently and repeatedly into a thick sausage shape.

8.Start making your coil from a generous block of clay. Squeeze it gently and repeatedly into a thick sausage shape.

Using 2 hands gently squeeze your coil until it is 2 or 3 cm thick. Do NOT roll your coil.

9.Using 2 hands gently, and rotating, squeeze your coil until it is 2 or 3 cm thick. Do NOT roll your coil.


Every join is an opportunity for a crack, every coil a point where you might loose control of your shape. So it makes sense to use coils that are large enough to handle well and will give you 4cms of height.

Rolling your coil on the table can cause 2 problems;

  1. The grog that would have helped create an excellent join is packed towards the centre of the coil and the finer particles of clay are packed together to form a ‘skin’ of tight platelet shaped particles that are reluctant to reach out and bond with the platelets of the pot.
  2. enthusiastic rolling often causes a tunnel to form at each end of the coil that would be a substantial, damaging air-bubble. This is why you often see coil-builders break off both tips of their coils with out even looking at them; they know that hazard is probably there.
Rub the softened score-marks and excess slip off the pot until the edge is sticky not slippery. Your platelets are raised and receptive.

10.Rub the softened score-marks and excess slip off the pot until the edge is sticky not slippery. Your platelets are raised and receptive.

Attach 1 end of your coil. Hold the other end high. Gradually lower the coil, expelling air and any surplus slip.

11.Attach 1 end of your coil. Hold the other end high. Gradually lower the coil, expelling air and any surplus slip.

Guide the coil downwards and forwards with a pinch. This action creates a friction between the 2 surfaces that causes the platelets to hook onto each other from the pot to the coil.

12.Guide the coil downwards and forwards with a pinch. This action creates a friction between the 2 surfaces that causes the platelets to hook onto each other from the pot to the coil.

Do not be tempted to push clay down the pot with this step. Go to the end of your coil and stop. Do NOT go up another layer!

pinch upwards gently only at the seam off the join. (your finger and thumb will touch pot and coil each time) I call this lining-up.

13.pinch upwards gently only at the seam off the join. (your finger and thumb will touch pot and coil each time) I call this lining-up. Do inside first; this may push the wall out. next do outside; this will correct a bulge.

The over-hang of the coil can trap air if hastily pressed down. Rushed building is why coil-pots have a very unfair reputation for being hideous.

Go around and move clay down with your thumb; 1st the inside, then the outside as above.

14.Go around and move clay down with your thumb; 1st the inside, then the outside as above.

With thumbs inside and fingers on outside ( for best control) gently pinch the clay in the desired direction for your shape. Use many light pinches not a few strong ones for best results. The most important thing is the thickness. Not the height.

15.With thumbs inside and fingers on outside ( for best control) gently pinch the clay in the desired direction for your shape. Use many light pinches not a few strong ones for best results. The most important thing is the thickness. Not the height.

Support with 1 hand on outside. Gently move clay in many directions to get that coil right where you want it. Inside first, of course.

16.Support with 1 hand on outside. Gently move clay in many directions to get that coil right where you want it. Inside first, of course.

Now the outside.

17.Now the outside.

Support hand on outside, use serrated kidney to improve inner surface. Go in many directions, gently combing the clay into place. Then do the outside.

18.Support hand on outside, use serrated kidney to improve inner surface. Go in many directions, gently combing the clay into place. Then do the outside.

Repeat this action with a firm rubber kidney creating a strong, smooth surface.

19.Repeat this action with a firm rubber kidney creating a strong, smooth surface.

Sit back and look at the outline of your form. Use a paddle (flat stick) to tap in bumps or bulges. Rotate around the whole form in stages so that the stress of this action is spread evenly through the clay. Paddling compacts the clay particles making your form very strong. But over-doing it on one area can lead to cracks because it alters the drying rate.

20.Sit back and look at the outline of your form. Use a paddle (flat stick) to tap in bumps or bulges. Rotate around the whole form in stages so that the stress of this action is spread evenly through the clay. Paddling compacts the clay particles making your form very strong. But over-doing it on one area can lead to cracks because it alters the drying rate.

Paddling can clarify your shape: it's really satisfying.

21.Paddling can clarify your shape: it’s really satisfying.

Use curved tools to paddle the inside.

22.Use curved tools to paddle the inside.

Soften any indented areas that you don't like and add clay to fill them. Add textures in the same way. Paddle them gently.

23.Soften any indented areas that you don’t like and add clay to fill them. Add textures in the same way. Paddle them gently.

Scrape /smooth with those kidneys again.

24.Scrape /smooth with those kidneys again.

Now even up the top edge by subtracting or adding clay. Let it stiffen. Go over it again with a surform blade.( these take off nice controllable layers.)

25.Now even up the top edge by subtracting or adding clay. Let it stiffen. Go over it again with a surform blade.( these take off nice controllable layers.)

Spend a lot of time on the edge. use firm tools to compact the clay and get every millimetre of that edge exactly how you want it: attention to this detail will transform your pot.

26.Spend a lot of time on the edge. use firm tools to compact the clay and get every millimetre of that edge exactly how you want it: attention to this detail will transform your pot. Also tidy up the bottom edge where your form meets the table.

Rebecca Buck, Osprey Studios.

27.My coil-building tools. The spray is water.

Coils are perfect for all sorts of applications.

 This bio-morphic head is being built on a clay armature with the techniques described in How to Make a Head. I use coils attached in exactly the same way as I would on a pot to get excellent joins. The coil is then pinched in the direction I want it to go.

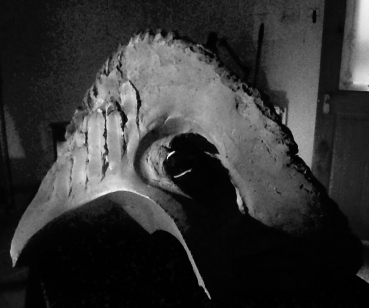
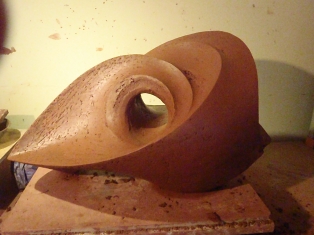
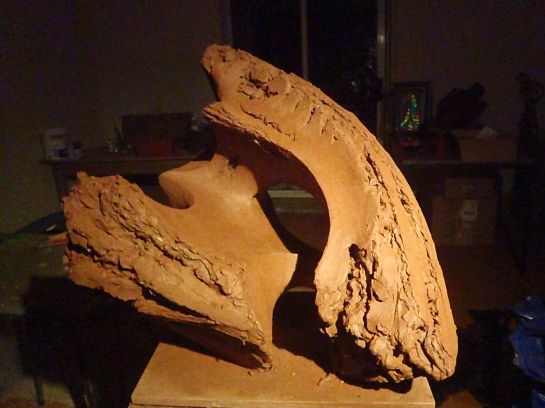
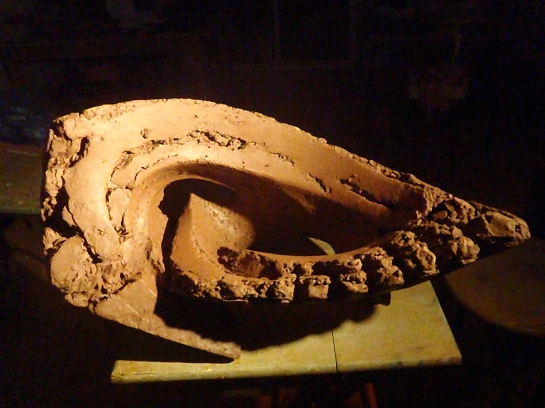
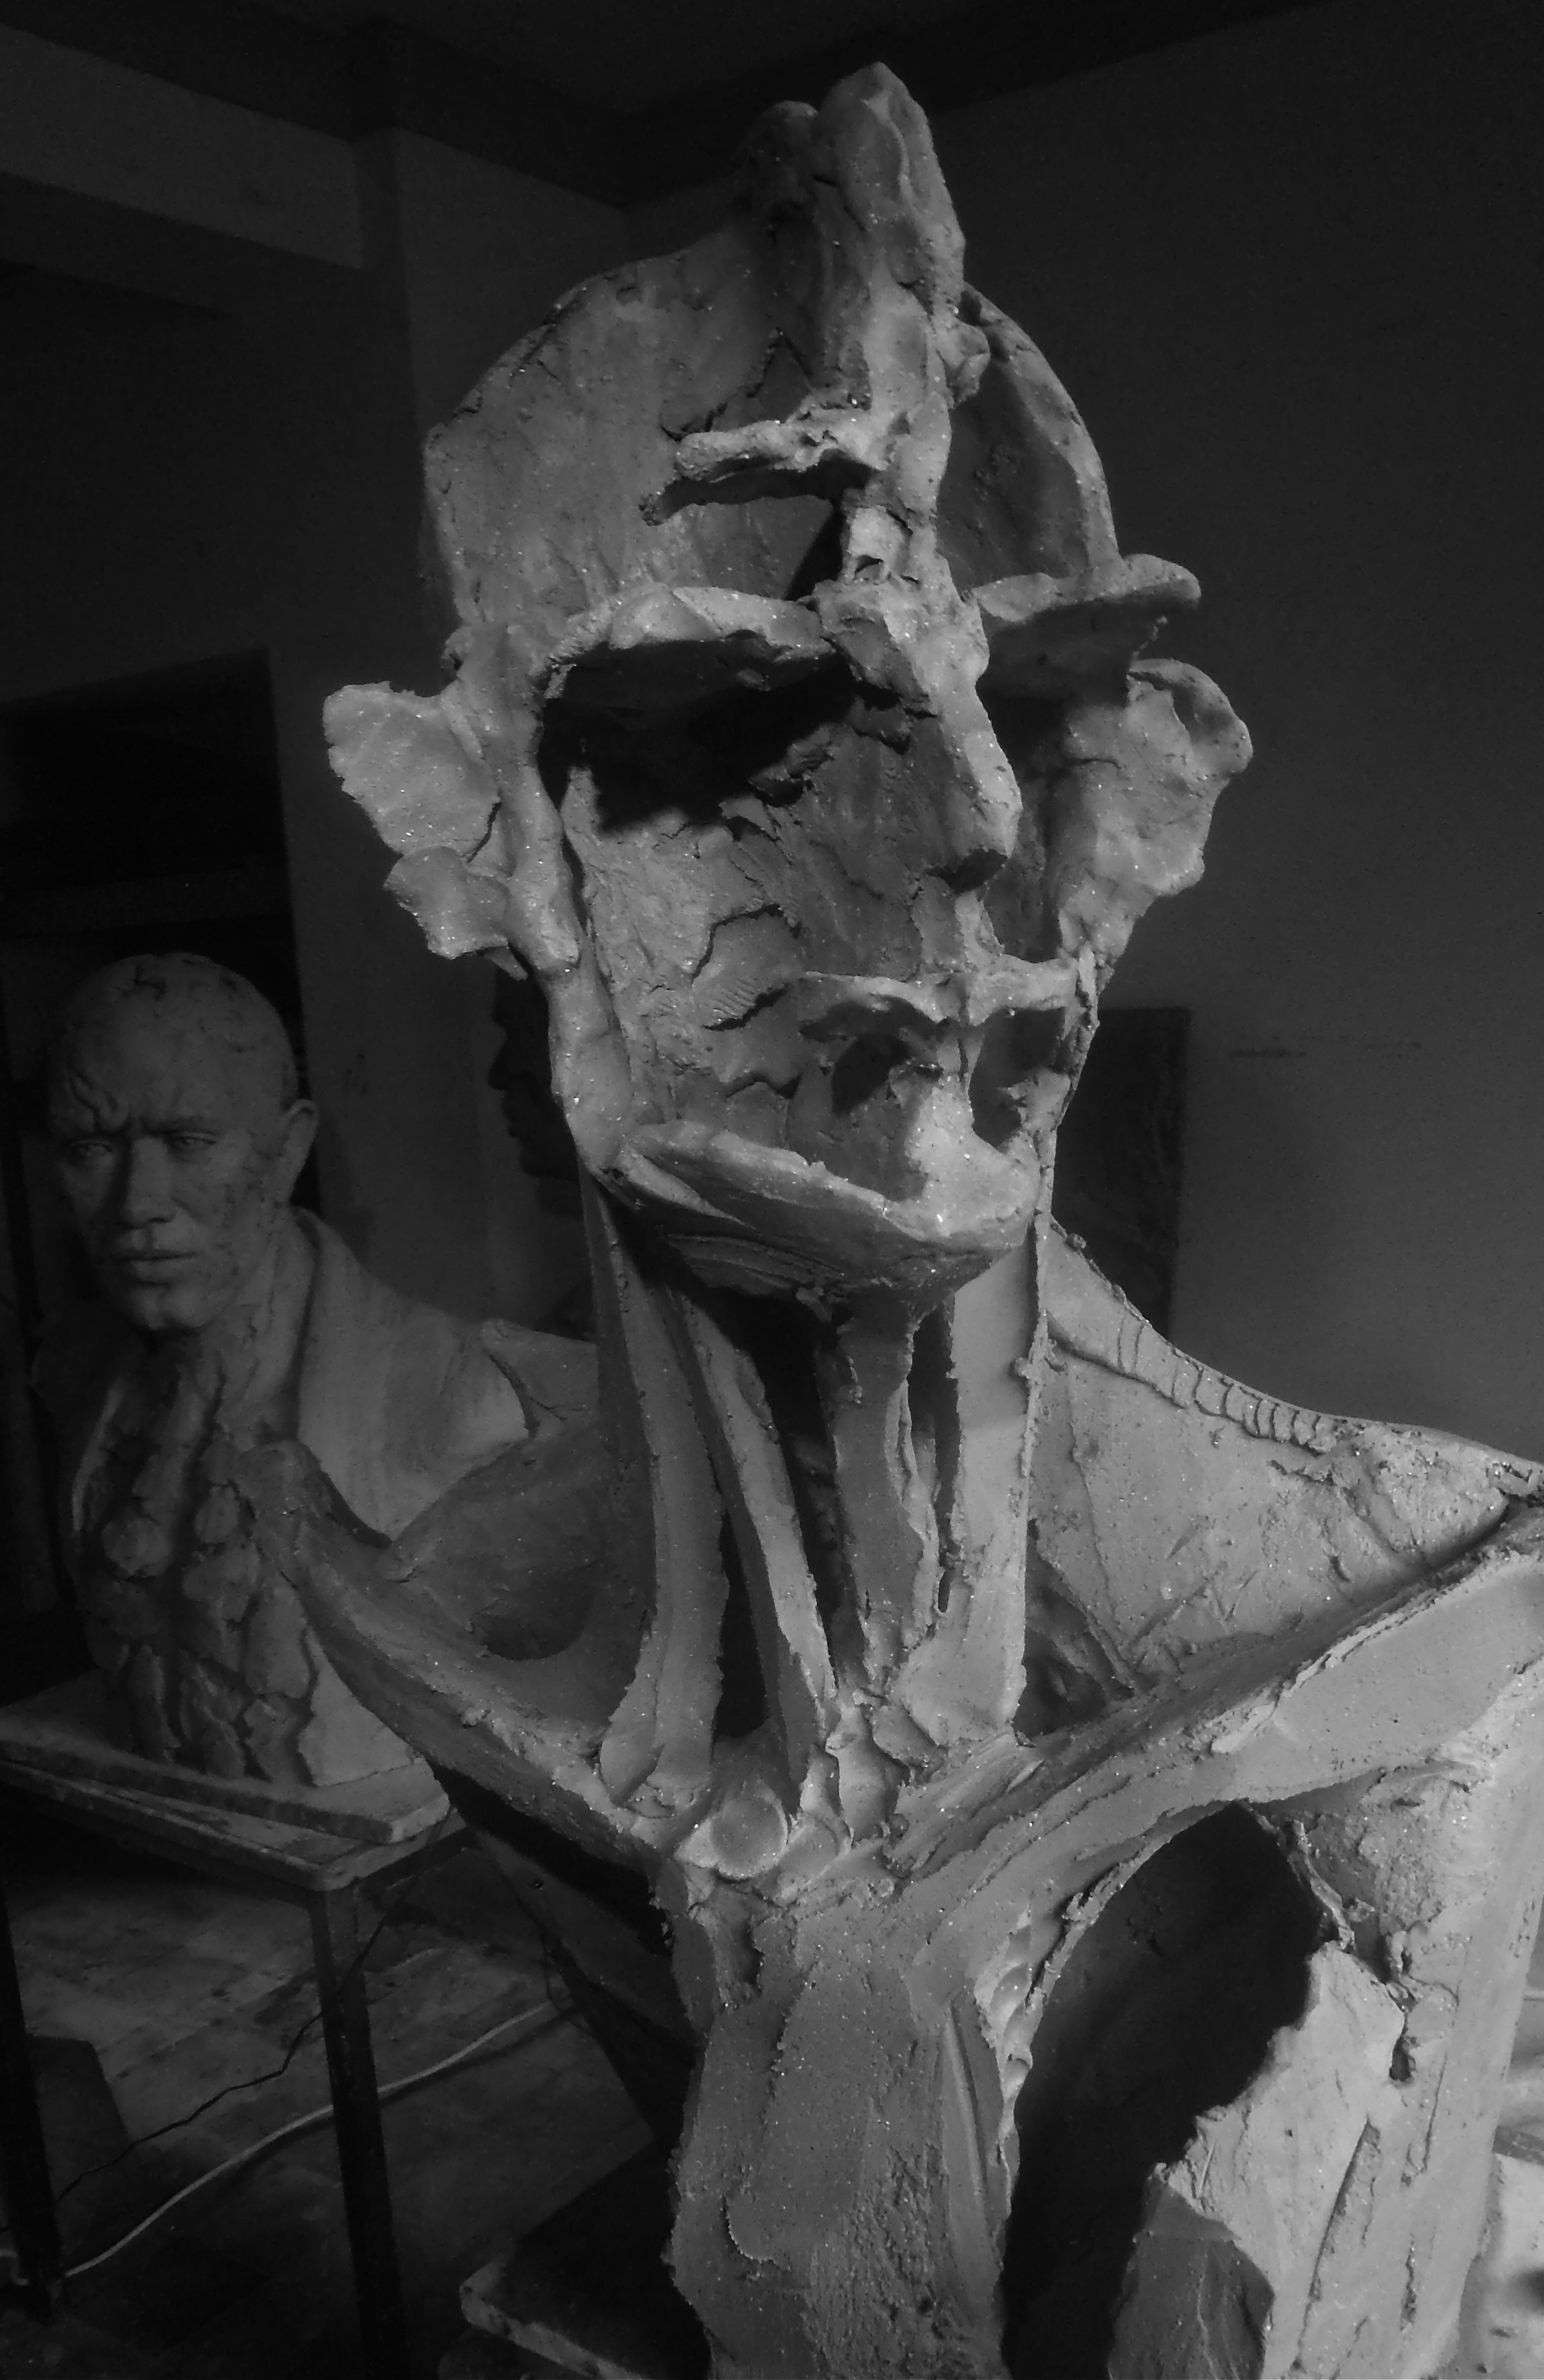
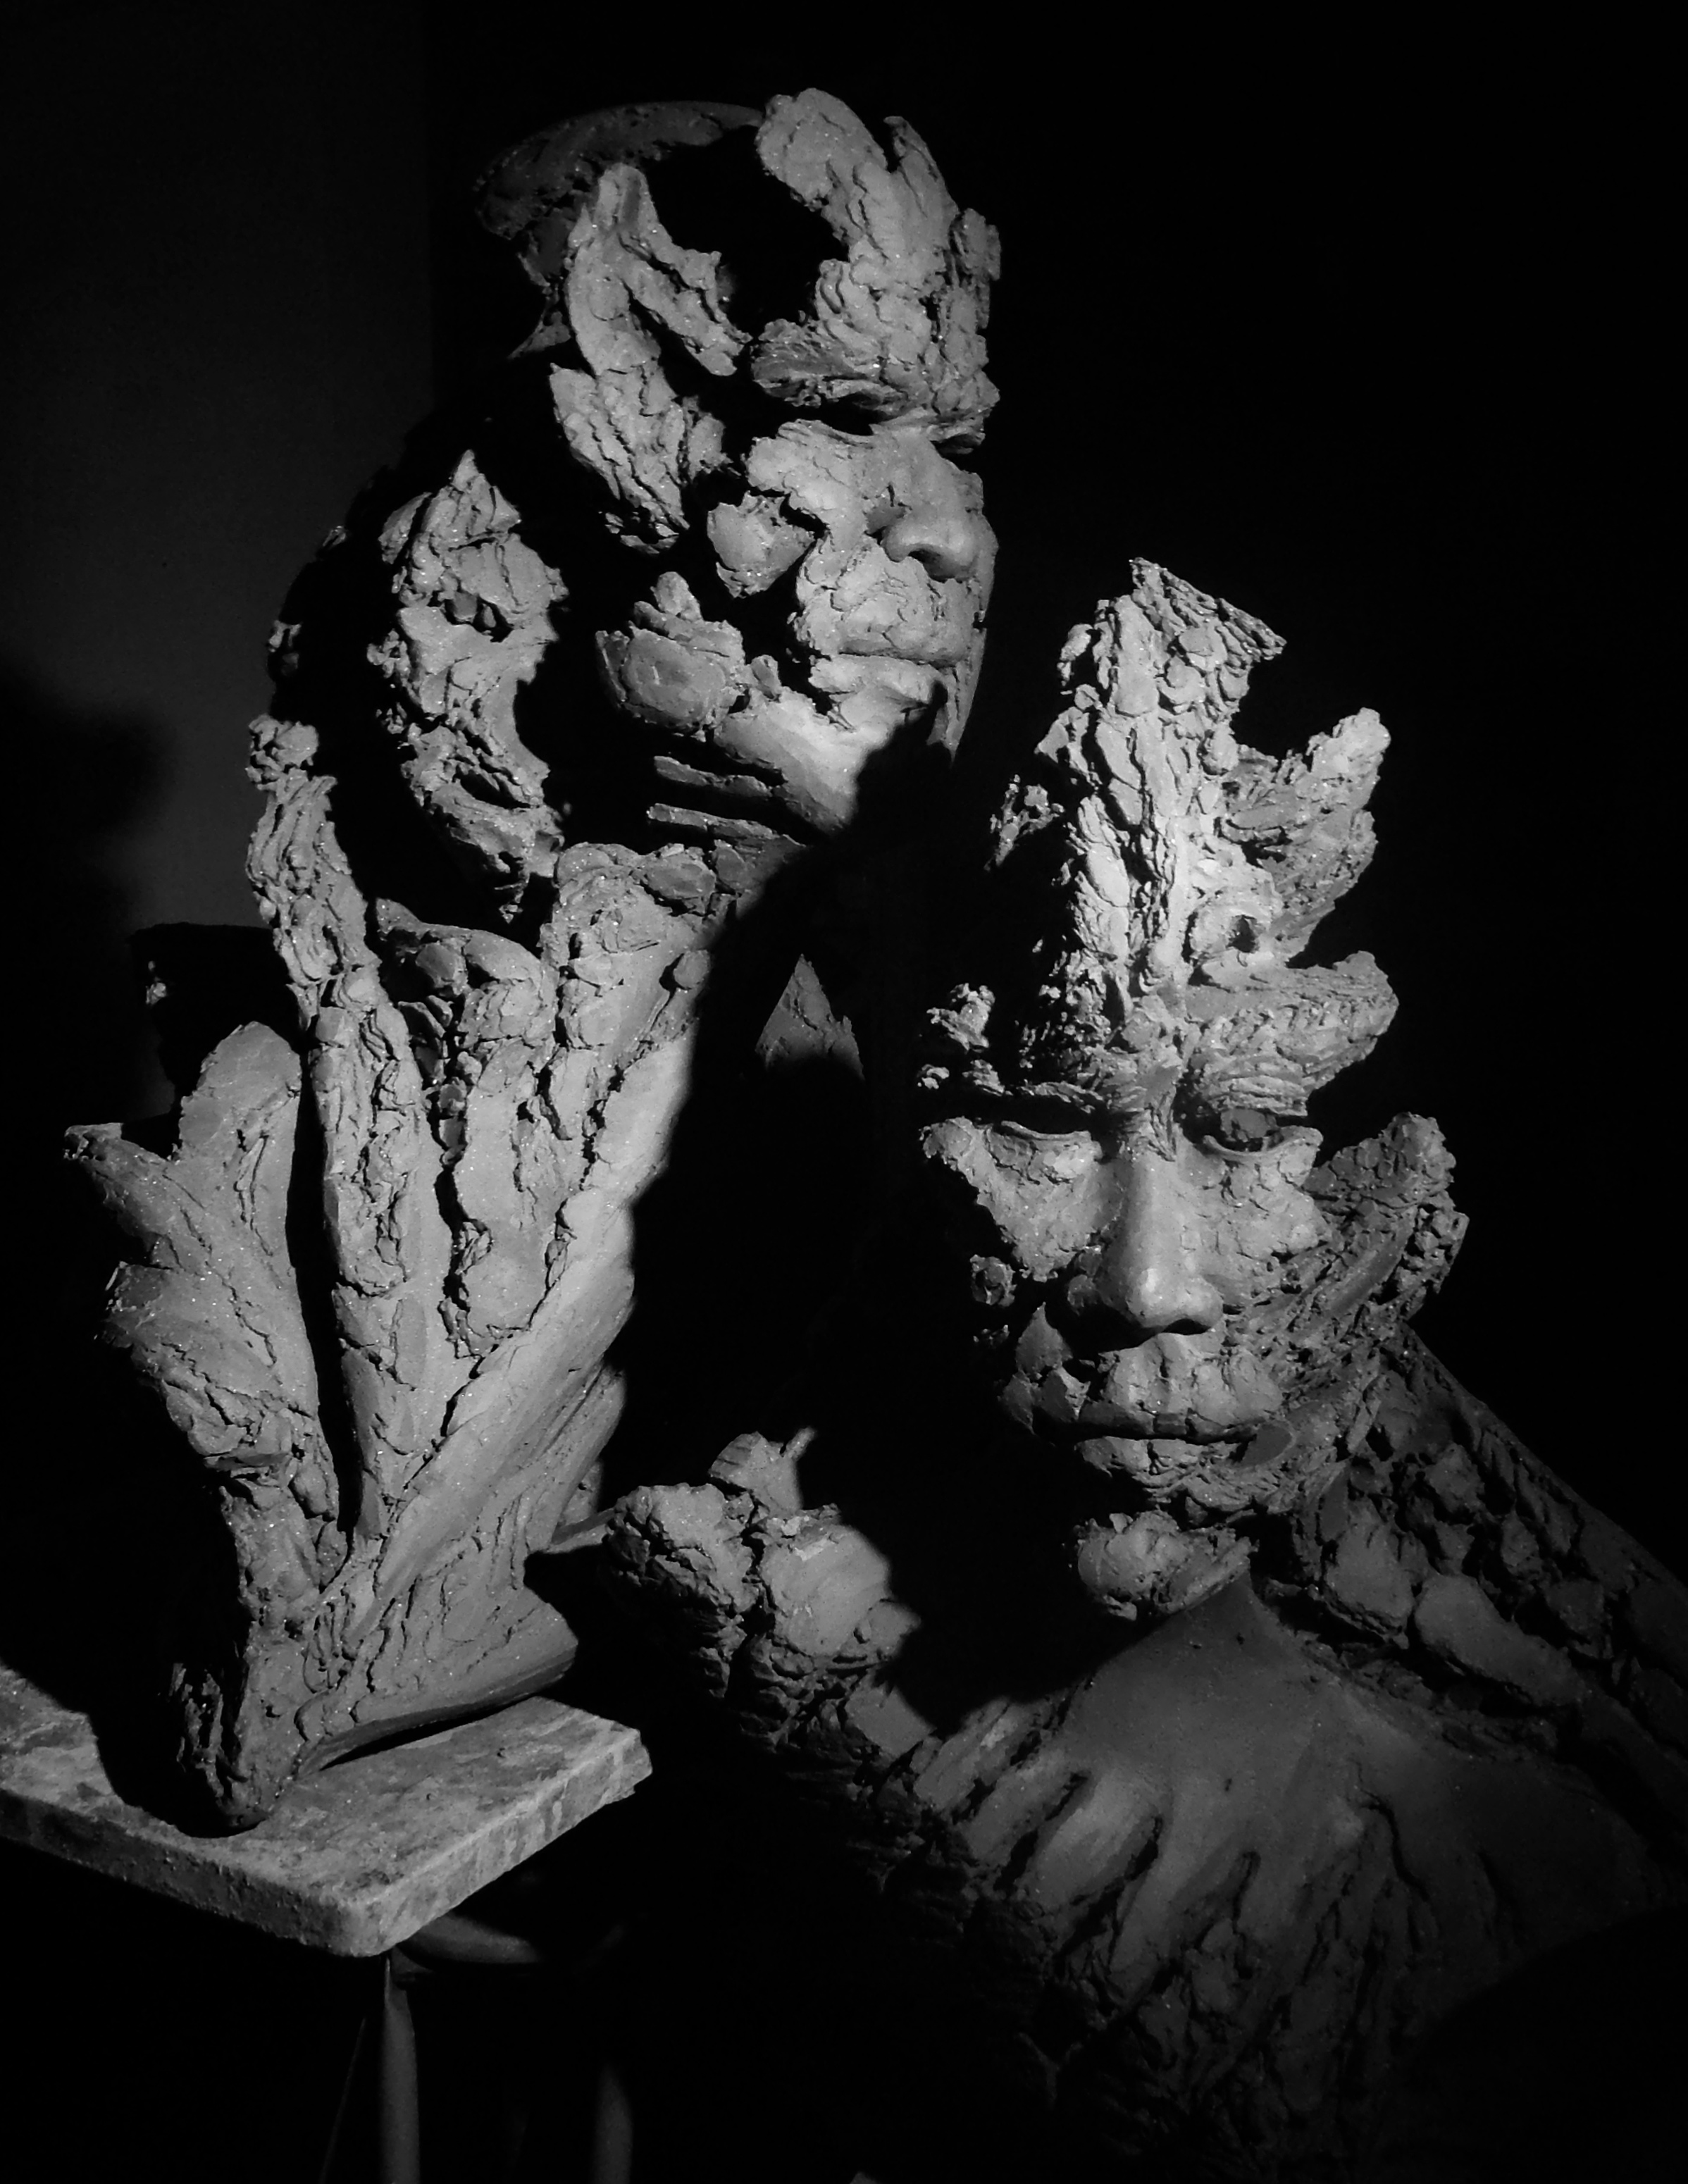
28.This bio-morphic head is being built on a clay armature with the techniques described in How to Make a Head. I use coils attached in exactly the same way as I would on a pot to get excellent joins. The coil is then pinched in the direction I want it to go.

Using Supports.

When you are making complicated shapes use temporary supports made of clay that will shrink with the form. Build in support walls and buttresses. Use rigid supports with care: plan to accommodate the shrinkage.

Here I am putting down the first layers of 2 big sculptures. I am using Coleford brick clay in a very soft state. My 'coils' are half bag blocks but they are applied and treated in the same way as any good coil. The walls are thicker at the base to support the considerable weight of the next layers. The internal support-walls are thinner. On very big sculptures these support walls will be discarded when the sculpture is cut into sections. On medium sized sculptures, that will be cut into parts not panels, the internal support walls will be left in to maintain the shapes during firing.

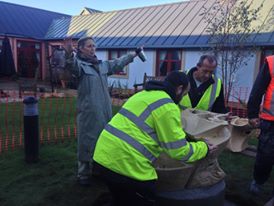
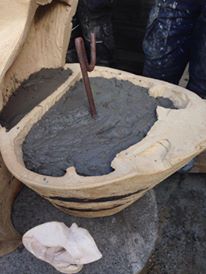
29.Here I am putting down the first layers of 2 big sculptures.
I am using Coleford brick clay in a very soft state. My ‘coils’ are half bag blocks but they are applied and treated in the same way as any good coil.
The walls are thicker at the base to support the considerable weight of the next layers.
The internal support-walls are thinner.
On very big sculptures these support walls will be discarded when the sculpture is cut into sections.
On medium sized sculptures, that will be cut into parts not panels, the internal support walls will be left in to maintain the shapes of the sections during firing.

30.Note the finger marks left by the process: these are just like the marks of a serrated-kidney on a smaller pot. Like corrugation, they add strength to the wet clay wall and will be left on until the clay is firm enough to hold it’s shape.


The same layer of the fired panel-sections of the same sculpture during installation.

The same layer of the fired panel-sections of Bruce during installation.

Bruce in progress. There is a clay support wall under his head and the stack of blokes.

31.Bruce in progress, 3m wide x 2 m high. There is a clay support wall under his head and the stack of blocks was added later and removed as soon as the head was firm enough to cut apart.

Here’s some good examples of rigid supports in action:

Mynydd Mawr Courtyard Sculpture, Tumble, Carmarthen, Wales, 2m H x 190cm W.

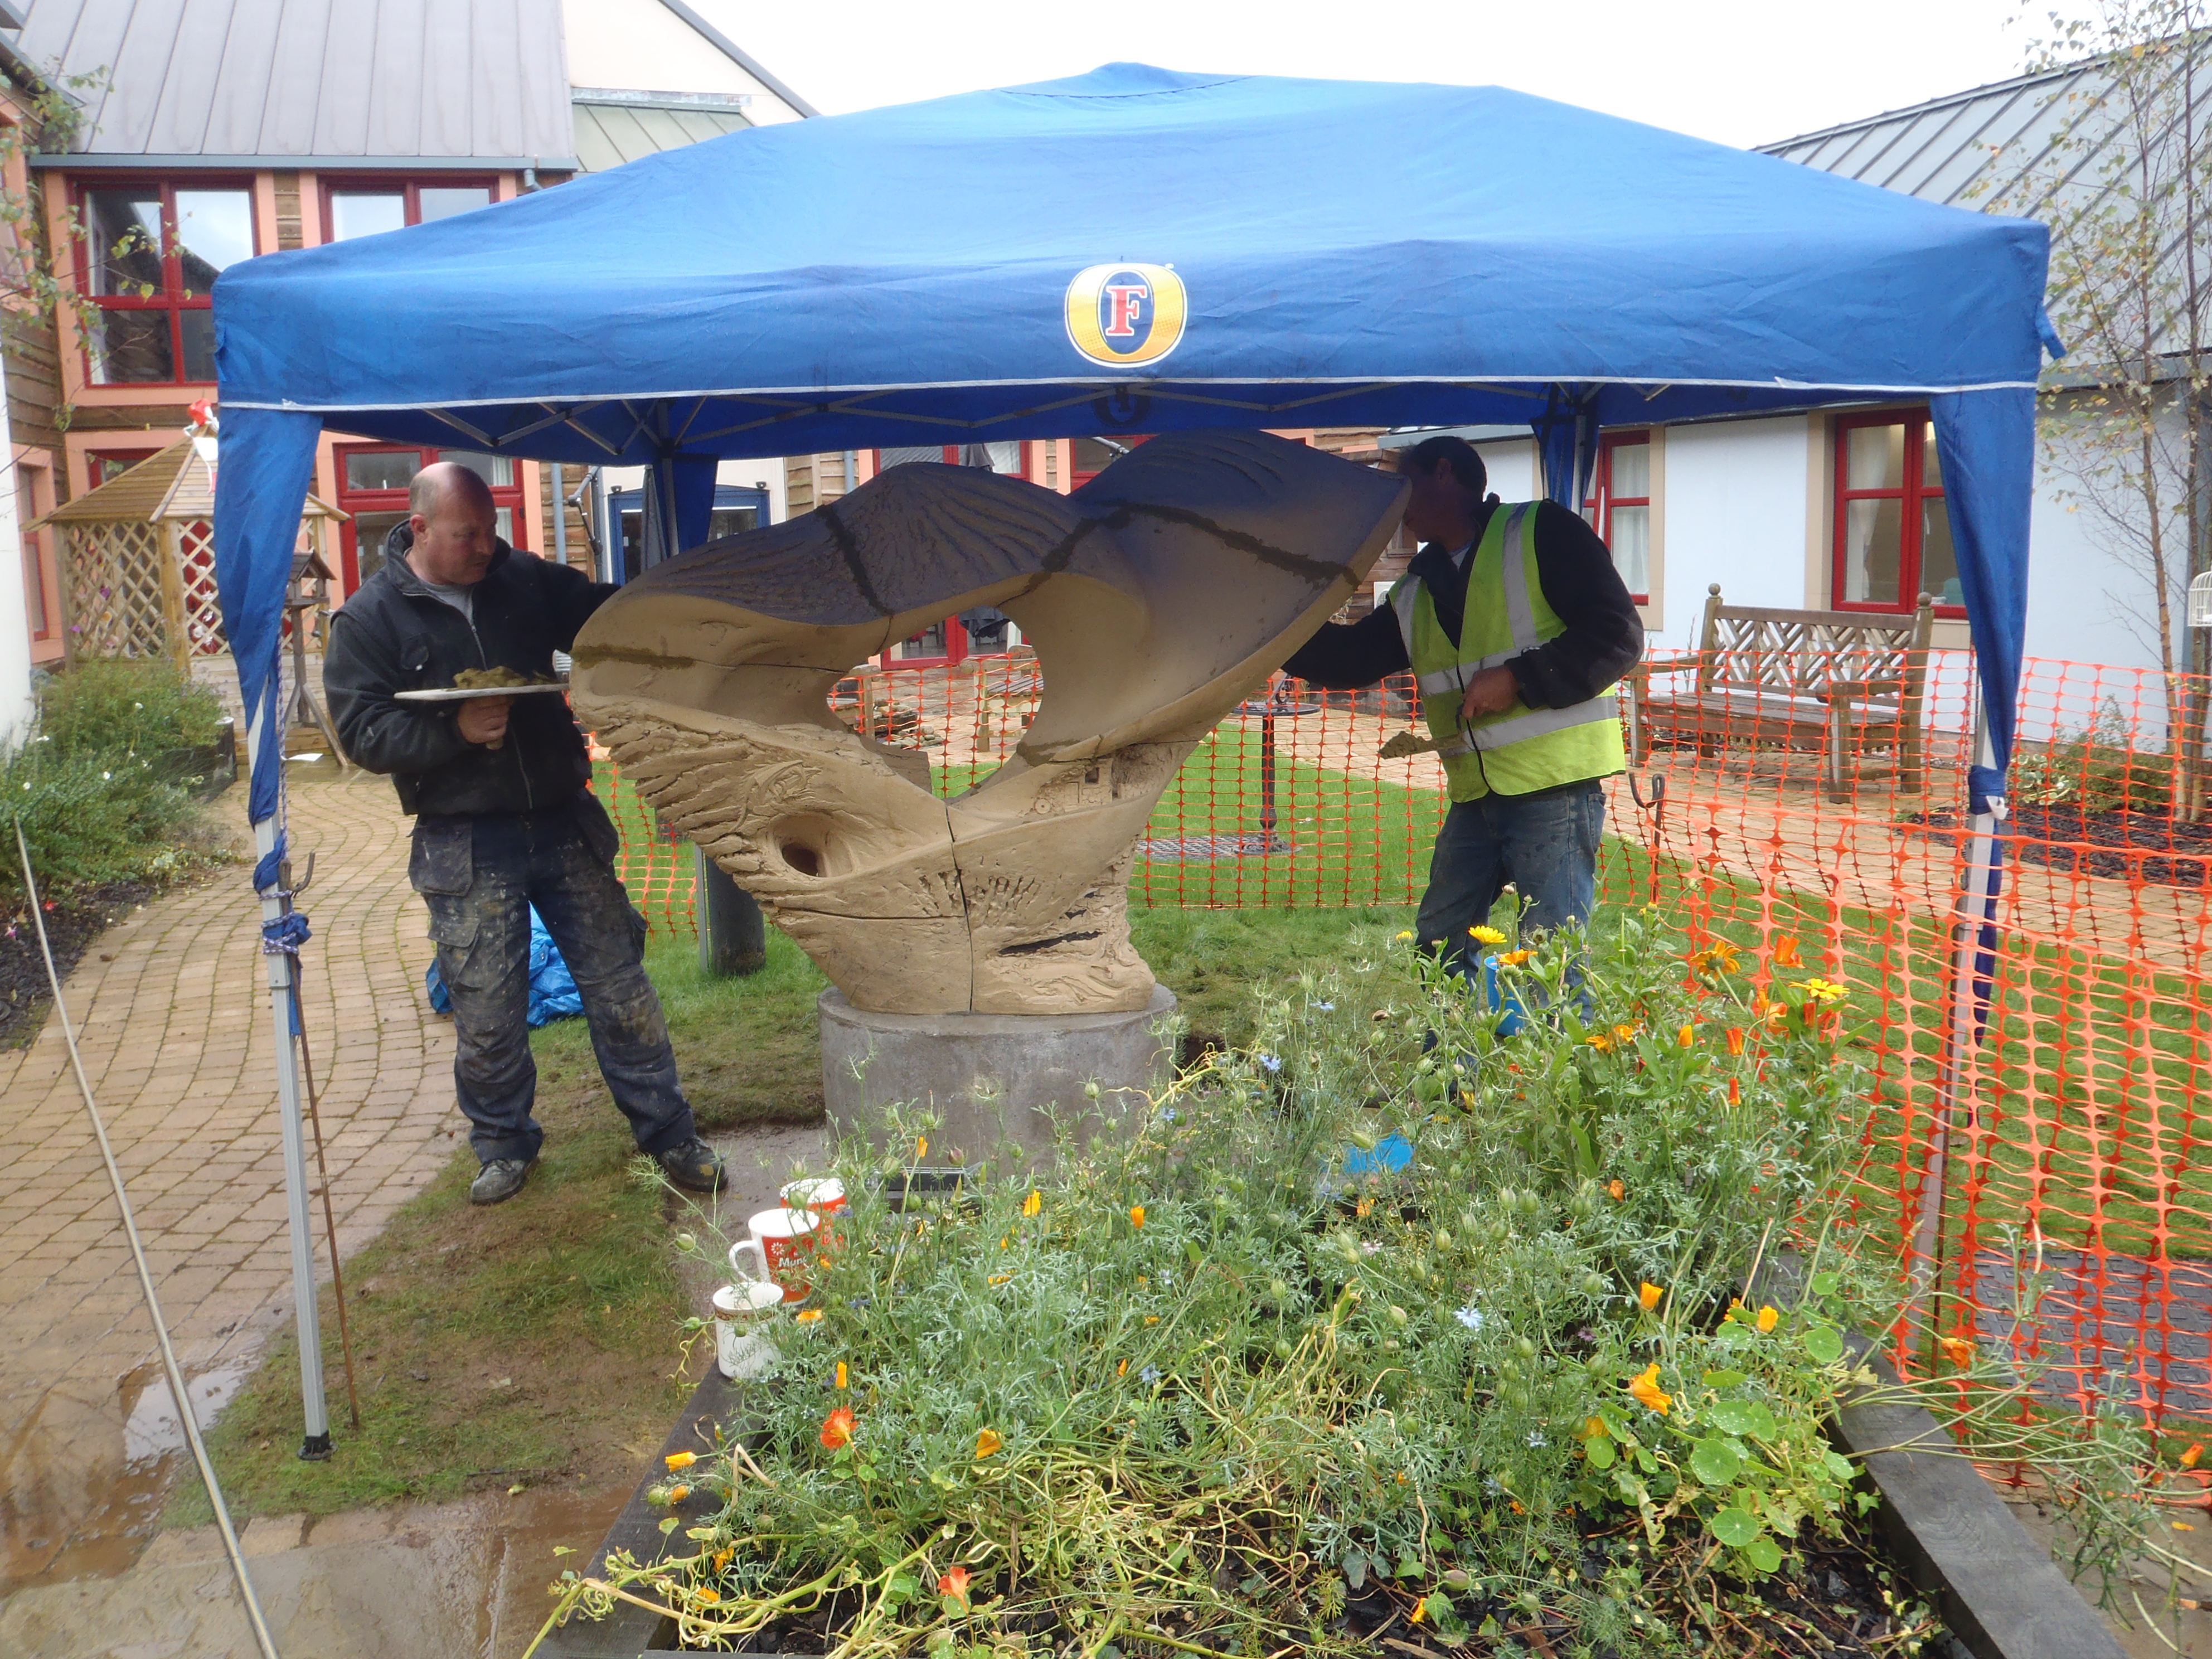
32.  Mynydd Mawr Courtyard Sculpture, Tumble, Carmarthen, Wales, 2m H x 190cm W. The big blocks are firm memory foam which will accommodate the shrinkage. I often use it inside a piece to support ceilings. It gets removed when the piece is cut up.

Rebecca Buck, Osprey Studios.

33.Because this rigid support leans outwards it will not constrict the shrinkage. It was adjusted repeatedly during the build.

Mynydd Mawr, Tumble, nearly complete. Larger sculptures are always built from a scale model. The internal support walls are worked out in advance and the cutting of sections planned so that those walls will support the section's shape during firing.

34.Mynydd Mawr, Tumble, nearly complete. Larger sculptures are always built from a scale model. The internal support walls are worked out in advance and the cutting of sections planned so that those walls will support the section’s shape during firing.

front view. That broom was a good buy.

front view. That broom was a good buy.

Balarat Pit Marker,in progress, 6m L x 2m H.

35.Balarat Pit Marker,in progress, 6m L x 2m H. ( Ocean Colliery Pit Marker in background.) Memory foam on top of clay support walls inside the sculpture supports that long roof and accommodates the shrinkage.

The Sirhowy Wyvern in progress, 3m L x 2 m H. A tunnel runs under the horse with carved images on it's walls so we needed access to it. A thin support wall blocks the tunnel half way. It supports the structure but allows us to crawl in do the art-work ( a lot was done by some fab children) The support was discarded when we cut the sections. We didn't get to see the tunnel right through until it was installed on site.

36.The Sirhowy Wyvern in progress, 3m L x 2 m H. A tunnel runs under the horse with carved images on it’s walls so we needed access to it. A thin support wall blocks the tunnel half way. It supports the structure but allows us to crawl in do the art-work ( a lot was done by some fab children) The support was discarded when we cut the sections. We didn’t get to see the tunnel right through until it was installed on site.

Bucket and stool supporting the tunnel roof while we built it. The board to the left of the picture is there to protect some intricate carving about the Sirhowy Iron Works during the build.

37.Bucket and stool supporting the tunnel roof while we built it. The board to the left of the picture is there to protect some intricate carving about the Sirhowy Iron Works during the build.

Adding clay on to the surface.

38.All the big coiled sculptures have artwork added onto the surface once it is firm. Exactly like the smaller pot, the area is softened using scored ‘ditches’ and slip to hold the water in place, allowing it to soak in to the firm clay and raise up those platelet shaped clay particles ready to join with soft clay.

Once a good join is achieved the added clay is modelled and carved in stages as the clay firms up. The drying ( and shrinking) is kept slow using plastic covers to allow that vulnerable join to set as the water moves from the soft added clay into the firm wall.

Remember that water will always want to be level and will travel down the form over time as well as evaporating from the surface. This passage of water past those platelets completes the join. If there is too much water it will collect and run down  the join, destroying the bond.

With that in mind add as much clay as your artwork needs. If it becomes more that 2 cm thick hollow it from the inside even if this means cutting the section out of the form, hollowing it and reassembling it. The important thing is to find a way to get the look you want. For advice on this process click here: Working solid and hollowing sections out.

Drying coil-built forms.

39.Use plastic to shield firm parts from drying while you work on new parts. e.g. a strip of plastic sheet to keep the top edge soft while you put art-work on a lower area before it gets to hard. And visa-versa.

Slow the drying as much as possible to allow all those joins to set using plastic sheets.

Cover the piece in a shield of newspaper ( 5 sheets thick) or a cardboard box or fabric sheets (not wet) to create a  damp micro-climate that will slowly release the water from the clay and protect from drafts that would cause un-even drying (and maybe, consequently, cracking)


Related info on this site.

For a full description of how the really big sculptures are done click here: Building Brick Sculptures on a monumental scale.

The whole story of the fab Gwalia Mynydd Mawr Care and Nursing Home Courtyard Sculpture designed with local primary school children and staff and residents of the Home, run by Arts Care Gofal Celf in Carmarthen, Wales: Studio Diary, The Tumble Commission, parts 1-8. 

Using clay armatures and coils: How to Make a Head: Clay Armatures and Building Hollow.

Questions?

put your questions in the Comments below and I will do my best to answer them.

If you follow this site you will get an e-mail each time I put up a new post. I hope these ‘How to..’ posts are useful. Pass them on freely. Share pictures of what you make  on my Facebook. I would love to see it.


Coil-Building Master-Class.

Rebecca BuckThere are lots of variations on the Coil-Building method. I started out as a Coil-builder 34 years ago and I still turn to it regularly. All my monumental brick sculptures are coil-built. It’s all about understanding the clay and how joins are actually formed.

At this fun and very informative Workshop I will teach you  my method and explain why I do it this way, including my scintillating views (rant) on slipping and scoring. We’ll start a planter and  cover different clays and scales, the use of supports, adding carving and scale models. Everyone, from complete beginners to professionals, sculptors, modellers, teachers and potters will get a lot out of this day.

Bring something to share for a relaxed lunch where we can chat and exchange ideas. I’ll have tea, coffee, juice and cake ready for you.

If you want to take your planter home to finish it, it will cost £1.50p/kg or I can just recycle everything after we have photos. I’ll take pictures during the day and do a step-by-step post about the Workshop.

For directions and more info about the Studio click here.

To see an over-view of my work click here.

To see what else might be useful for you on this site cluck here.

To see how to coil-build on a monumental scale click here.

How to; Recycling Clay Made Easy and Manageable.

Recycling clay can be such a nightmare. No-one likes doing it. Popular methods include gradually building a huge stack of bags of hard clay against the shed until they are covered in slime, bugs and budleas and then moving house. Or the dreaded dust-bin filled to the brim with clay scraps and left for years, then you end up being the sucker who gets clay caked on top of their head as they lean in to scoop out the  endless goo, until they reach the  bottom that has weirdly gone rock hard dreaming all the while of the fantasy pug-mill that never needs cleaning out as opposed to real ones that always do.

Serious Potters using the Wheel need to treat their clays in certain ways. Everyone else, like Hand-builders, Sculptors, schools and community studios can use this less harrowing method.

– 1/2 fill clay-bags with scrap clay, no matter how wet/dry (pref small pieces), close firmly w/ twisty, cover w/ water( so bags fill up ) in Bin outside. Leave ’till lumps have broken down. A clay plenty of grog (gritty bits) may only take a few days. In Japan they let their clay soak for a generation but here a week should do it.
– Have separate bin for white/ red clays.(I don’t, TBH)430068_255359921215212_934182331_n

– Lift bags out and stack  facing open end down to drain. Frost is your ally here. Avoid raw ground so worms are less likely to crawl in the bags, die(tragic) and stink (also upsetting)…..I once found a Newt alive in a wet bag that had not been closed, true story.
Drag drained (firmer-feeling) bag off pile to ground and step back/close eyes while spiders run away. Pick/hose off Slugs etc425991_255360004548537_1084689641_n

– Stack bags in warm ( only so it’s not cold on your poor hands), unavoidable spot and turn small quantities at a time onto plaster blocks* (or wood up on bricks), turn regularly through the day(s), return to bag and close tightly w/ a twisty. If it gets too hard return to step 1.

I sometimes use it v. soft or deliberately harden bags to act as ‘armature’ supports.This is a great time to blend odd bags of different clays to make your own ‘Crank’428362_255360091215195_561760018_n


! Whole bag gone rock-hard; remove from bag, dry completely, drop on hard floor to break into bits, recycle.

! Whole bag too hard to use; remove from bag, knock holes all over w/ screw-driver and hammer (oddly satisfying), return to bag, recycle.

* make your own plaster blocks; line a cardboard box w/ new garbage bag + pour in Plaster of Paris. Leave top set. Trim off edges w/ a sur-form  blade (looks like a small cheese-grater). If chips of plaster get in your clay they will turn to lime in the firing and cause ‘lime-spots’; they absorb atmospheric water, expand and spit off a chip of ceramic, invariably from the most noticeable place like the end of a nose, sometimes months after a firing, usually after you have delivered a piece to a Gallery you are desperately trying to impress.


How to use clay in a Care-home setting.


There is plenty of documentation about how arts and crafts can play a huge role in health and well being in Care Homes. But fitting activities into a busy, often stressful day can be daunting. Hiring in professional Artists experienced in working in health-care settings to assess the options and train staff can be great fun and very rewarding. But it might be beyond your budget.

Carers have the most important skills needed; they know their Residents well and want them to enjoy their day. In-coming teachers might not be able to spot the subtle signs that a Resident is having a rewarding experience or that they are getting bored or distressed. Residents often wont open up to new people. The only thing that matters is that the activity, even if it is just loosening stiff hands by playing with tools or being intrigued by the squishy feel of the clay, is that it adds stimulus, and hopefully fun, to the day.

I’m thinking mainly of people with Dementia here but Clay Modelling will be very popular with all sorts of Elderly Residents. Be prepared for lots of very rude models and lots of laughs!!

These basic principles can be used for all arts and crafts- and the results will always be just as good.

OLYMPUS DIGITAL CAMERA

Carers often undervalue their skills and can be shy about providing craft-skills. They just need encouragement, sensible, efficient Craft-packs and storage and a well managed schedule.

Clay Modelling in Care Homes; Low cost, straight-forward, self-hardening, recyclable.

Clay Modelling kit- One time purchases, max £60

You will need;

-1 x 12.5kg bag of Scarva Earthstone ES70  Architectural Body Clay a professional quality white clay from Scarva, my favourite supplier of outstanding sculpture clays. Including delivery you will spend about £25-£30.

-A bucket (the clay bag always leaks!)

-a choice of tools; Wooden Modelling Tools and Ribbon Tools will be the most popular.Scarva have a good range  but I buy them from Top Pot Supplies ( best quality yet lowest prices!) Amazon has affordable letter stamps (Small or larger) that will be very useful. 

-Re-usable plastic table-cloth cover if you are worried about scratches on your tables as this clay has small grit in it.

-a few micro-cloths. They are the quickest, easiest cloths for cleaning tables and hands.

-Boards are optional. B&Q will custom-cut a sheet of MDF for you. A board wide enough to fit across a wheel chair is great for some people.

Approx cost, incl. sheet MDF; £60. You don’t need all these items to start off.

The quality clay is the important item. Clays are made with recipes and therefor there is an infinite number of types of clay, each with particular properties. ES70 is absolutely lovely to use; it feels very nice, it’s not sticky, it doesn’t stain, it’s easy to clean up ( on carpet let it dry + brush out), it’s not irritating to sensitive skin and you can eat it! Most importantly it is very easy to use so people get good, rewarding results quickly. Beginners deserve a great material that will reward their bravery for trying something new and give them fab results that will spur them on.

ES70 works very well as a self hardening clay and can be decorated with poster paints once it’s dry. Residents can keep favourite pieces in their rooms for a while. It can mean a great deal to visiting families to see nice things their loved one has made.

Plan to recycle all the clay, even if it’s painted or has dried completely. Explain that the clay is expensive so you need to keep it for next time so that they don’t think it’s because you assume they will make rubbish! People are usually perfectly happy to get a photo of their work and then let it go. Often it takes the pressure off to make a ‘product’ and they can relax and enjoy the making part more.

What To Make?

Anything and nothing! Just try out the material, let your-self and your Resident play around, feel the material, flatten it, poke it! Put a little water on it and feel the smooth change in the texture. Letter stamps are great- get your resident to pick out the letters of their own or a family-member’s name. Press in every day objects. Try all the tools; it never matters what the tools are used for. Make models to get a conversation going. Give an enthusiastic resident some space and quiet to try things at their own pace. You don’t need to ‘teach’ you just need to share the experience. It’s a lovely thing to do.

Let people know that this is professional quality clay and tools; Residents are often very prickly about being treated like children and people forget that Adults are allowed to play too and that creativity is important for everyone’s well-being. We call it ‘A Hobby’ so it sounds mature! If you make your own things along side them and laugh about your mistakes it sets the right tone.

Work with a group or just one person for as much time as feels right. Have Art and Craft as part of any day, not just as a special occasion.

Gwalia Mynnydd Mawr Residential and Nursing Home in Carmarthenshire are aiming to bring creativity and fun into every day for their Residents. The kids had great success with asking Residents what hobbies they used to love or what pets they had and then making a model of that in front of curious Residents. Lots of warm conversations were started that way.

Gwalia Mynydd Mawr Residential and Nursing Home in Carmarthenshire are aiming to bring creativity and fun into every day for their Residents. The kids had great success with asking Residents what hobbies they used to love or what pets they had and then making a model of that in front of the now curious person. Lots of warm conversations were started that way.

Re-using the Clay

-At the end of a session drop all the clay back in the bag. (lots of people will love smashing the work up!)

-Put bag in Bucket

-slowly pour  a cup or so of water over the clay in the bag to soften the clay.

-Close bag w/ twisty

-leave minimum over night.

-place bag on floor and step on it a few times to “knead” the clay, turning bag a few times.

-Voila! It is ready for use. You can re-cycle your clay endlessly.

! Bag goes rock-hard; Allow to dry completely, drop lump on floor to break up, put pieces in bag and recycle

! Bag goes quite hard; knock holes all over lump.(hammer + screw driver= surprisingly satisfying task!) Return to bag and recycle.

! Bag goes too squishy; Tip clay onto a board and allow to dry until useable. “Knead” a few times over the day (or two) so that it dries evenly.

Storage

-Always close bag tightly w/ twisty

-Ideally store in a handy frost free place but it doesn’t matter  if the clay freezes.

-Ideally have the bucket on wheels as 12.5kg is quite heavy (plant pot wheels – Home-Bargains, £1.99.)

-Have all the kit together for quick access by everyone.

Homes need to be adaptable like ‘normal’ homes and organise a way for Carers and Residents to feel welcome to relax and make some mess. You wont get much with clay. Have a broom and a dust pan and brush handy. Enjoy!


Primary School children visiting the Care home for lovely afternoon of creative fun with Residents and carers. There was lots of singing, laughter and sharing. The residents lit up and the children were relaxed, charming and really enjoyed supporting their elders.

Primary School children visiting the Care home for lovely afternoon of creative fun with Residents and carers. There was lots of singing, laughter and sharing. The residents lit up and the children were relaxed, charming and really enjoyed supporting their elders. Family days like this are great fun. Take photos of the pieces and then re-cycle the clay.

You can see more about the wonderful, 2 year long, Arts Care Gofal Celf Project shown in the pictures here; The Tumble Commission, parts 1-8 

General information about Workshops with Osprey Studios.

More information about collaborative and community projects.

Interesting article:

Clay therapy offers pathways into communication and reminiscence for people with dementia

29-Jan-16

Article By: Melissa McAlees, News Editor

There is plenty of research about how arts and crafts can play a huge role in individual health and well-being in care homes. Clay modelling is a therapeutic activity that has become increasingly popular in the care sector.

Clay is cathartic in nature as it allows an individual to express an array of emotions. For older people and those living with dementia, clay therapy provides creative stimulation, social interaction and develops fine motor skills with a variety of positive outcomes, including increased confidence, concentration and motivation.

Rebecca Buck, professional sculptor at Osprey Studios has offered clay therapy to older people and those living with dementia as part of Arts Care Gofal Celf’s Gwalia project in Wales. She believes it is fundamental for older people and those with dementia to experience varied activities such as clay therapy.

“It’s fun, soothing and engrossing. Being creative might have played a huge part in a person’s life, happiness and self-expression. Even for those who are living with dementia, they still need an outlet,” she said.

“Clay therapy can replace the verbal language that has been lost in some individuals. Several of our participants who were non-speaking and prone to angry outbursts showed wonderful skill and contentment with drawing, clay and painting. That gave their families a way to link with their loved one, which resulted in happier residents.

“Arts and crafts can create a bridge between residents and their loved ones and offers pathways into communication and reminiscence. Making family visits relaxed is therefore very important as the focus can tend to concentrate on the individual’s condition.”

The qualities of clay have a calming effect on those living with dementia

A previous study, published by the American Academy of Neurology, revealed that individuals who participate in arts and craft based activities can experience a reduced risk of developing Mild Cognitive Impairment (MCI), which can often lead to dementia.

Research manager at Alzheimer’s Society, Dr Clare Walton, said: “Although this study looks at mild cognitive impairment rather than dementia, it does add to previous evidence that keeping your brain active during life with arts, crafts and social activities might reduce the risk of developing memory problems.”

According to Alzheimer’s Society, 80 per cent of people living in care homes have a form of dementia or severe memory problems. For some, clay therapy and arts and crafts activities can conjure up anxious feelings about their capability.

Similarly, although clay therapy sessions have been found to support the interactions between care staff and residents, Ms Buck believes that care workers can also often undervalue their skills and can be shy about providing craft-activities.

She suggests that, at times, care staff require ‘encouragement to feel confident that clay activities are about providing a sensory rich experience, rather than creating a piece of art’.

Clay gives shapes to formless entities of feelings and ideas

Since conducting extensive research, Sumita Chauhan, researcher at the University of Kent, found that clay is the most familiar material to make sculptures with and is currently used for therapeutic as well as creative purposes.

She said: “My workshops on clay modelling involve people with dementia and are organised to provide enjoyment through the creative process of making sculptures. Working with clay is a very effective way of individuals expressing themselves as it doesn’t restrict it to verbal communication only. I have realised the act of creation and involvement in the process is as important as the final creation.

“Creative activities have many benefits for people with dementia. The possibility of transforming a lump of clay into a form provides self-control and builds up confidence. Clay as a material has many qualities. Its softness and smoothness has a calming effect on people with dementia, and the process of using clay to make a sculpture offers individuals a wide variety of sensory experience.

“Preparation of the clay starts with kneading first and this process requires a lot of force and pressure. Sometimes, while doing this, individuals living with dementia let out their pent up anxiety and, to a certain extent their frustration, as a non-verbal communication.”

‘Clay sculptures become a source of communication and reflection’

Clay modelling can also be a valuable social activity. Co-operation and sharing of ideas in groups can promote a sense of identity and a sense of belonging.

Commenting on the many benefits, Ms Chauhan said: “Clay modelling is a slow process and as the form starts building up, it takes a lot of patience to complete the details required on the surface. This allows individuals to leave a personal mark on their work. As a result, clay sculptures not only become a source of communication but also a source of reflection.

“Most of the participants in my workshop sessions instantaneously react to the material. I have found that the tactile contact of the material often becomes the starting point of conversation. An open discussion across the table makes it easy to know each other and be social.

“It is worth giving maximum time to develop individuals’ ideas of what they want to create, thus helping to build their identity. Instead of explaining the process, a demonstration is more effective.

“Watching others working with clay or making a sculptural form certainly stimulates individuals. There is a definite involvement and the outcome of such interaction is their response and comments about the sculptural form, such as their likes or dislikes. Sometimes people reminiscence a past experience which they associate with the material or the form they are seeing.”

Art projects in care homes rekindle imaginations and trigger memories

A two year arts care project involving residents at Gwalia Mynydd Mawr care home recently culminated in the unveiling of a new sculpture.

‘Yma a Nawr’ was funded by the Baring Foundation and delivered by Carmarthen-based Arts Care Gofal Celf. The project brought professional artists of various disciplines into Gwalia’s Mynydd Mawr care home to work with residents and their families.

The interactive sessions included printing, textiles and sketching.

Commenting on the success of the project, Jodie Boyd, occupational therapist at Gwalia, said: “The arts are proven to have numerous benefits within residential and nursing care settings, the storytelling and reminiscence work is particularly successful when a person’s short-term memory has started to deteriorate but their memories from years ago remain intact.

“Arts Care Gofal Celf’s work has rekindled imaginations, triggered memories, provided opportunities for socialising and conversation and increased self-esteem.”

How to Make Abstract Sculpture in Clay; working solid and hollowing out.


Over Half a Century III.

Half a Century VIII.

The Edge VII

Wyvern VIII, 2015, 39cm H x 71cm L x 34cm D, ceramic.

Up is Down VII, back view

Up is Down V, 44cm H x 58cm L x 50cm D,

Up is Down VI, second view.

Up is Down V, back view

Making Abstract Sculpture can feel very elusive; where to start, when to stop? This post aims to de-mystify the process and give you an ideal technique that will allow you to go with your flow to make beautiful Abstract forms that express those things that are not easily put into words or naturalistic art.

Because there is no right or wrong with Abstracts you are better off with a technique that allows you to feel your way around the form and to change your mind any time you want to. Building the piece in solid clay allows you to separate the ceramic-technical needs from the flow of creativity for the most part. You do need to make good joins as you go along but with the right clay that is not a distraction. It’s a great method for pieces up to 1 metre. For larger Sculptures I often use it over a hollow clay-armature to reduce the over-all weight. Use a clay designed for sculpture and hand-building with plenty of grog (gritty bits like sand). Scarva’s ES 50 is fab and excellent value for money.

I work to music and usually have a theme I am following.  When you start out with Abstracts you need to put some boundaries in place; have a theme (an emotion, geometry, etc) or abstract a known form like a figure or an animal. All the pieces above were made using this technique. All but one are made in combinations of Scarva’s black clays.

Gill Tennant-Eyles, Emma Bevan and Tez Roberts came to Osprey Studios for a Workshop. We had an excellent day going over this technique and sharing each other’s ideas.

Make a block of clay that has the approximate hight/width/depth you feel you need at this point. Rough out the beginnings of a form.

Make a block of clay that has the approximate hight/width/depth you feel you need at this point. Rough out the beginnings of a form.

Work all around the form in stages, giving each area equal attention, refining with each rotation.

Work all around the form in stages, giving each area equal attention, refining with each rotation.

Add or subtract clay. A paddle will be very useful.

Add or subtract clay. A paddle will be very useful.

When the piece starts sagging leave it to harden up a bit. Use plastic to keep the drying even.

When the piece starts sagging leave it to harden up a bit. Use plastic to keep the drying even.

For larger pieces the process is the same. Use props or leave temporary supports of clay to hold up the form until it hardens. These might stay there until you have hollowed out the sculpture and reduced the weight.

OLYMPUS DIGITAL CAMERAOLYMPUS DIGITAL CAMERAOLYMPUS DIGITAL CAMERA

Once the piece is leather-hard carve/scrape the surface. You can still add clay but pay attention to the joins.

Once the piece is leather-hard carve/scrape the surface. You can still add clay but pay attention to the joins.

At the point where the form is complete apart from finishing the surface stop building and get ready to hollow -out. The piece should be firm enough to resist a thumb-print. On very large pieces you might start hollowing the top while the lower parts are still too damp; the hollowed clay walls will need to be able to support themselves with-out distorting. Don't let the form get to hard or you wont be able to cut it open.

At the point where the form is complete apart from finishing the surface, stop building and get ready to hollow-out. The piece should be firm enough to resist a thumb-print. On very large pieces you might start hollowing the top while the lower parts are still too damp; the hollowed clay walls will need to be able to support themselves with-out distorting. Don’t let the form get too hard or you wont be able to cut it open.

How thick the clay can be to fire well depends on the amount of grog, the denseness of your modelling style, drying time and the speed of your firing.

Air bubbles trapped in the clay will expand with the heat. Grog and/or a loose surface will allow the air to seep through the clay. The same is true with water but steam expands fast. If your piece breaks into big bits during the fire it was trapped air and you will be able to see where the bubbles were in the shards. If it blows up into a trillion smithereens it wasn’t properly dry!

I dry thick sculptures slowly under plastic which I turn daily for 4 weeks minimum and then 1-2 weeks in a plastic tent with a dehumidifier. A long dry allows the water to level out as water loves to do and that will enhance the structure of the clay within it’s new sculpture shape. You will get less cracks or distorting in the fire.

I fire very slowly with an 18 degree C rise until 600 degrees C.

Generally 3cm is a fair maximum thickness for a well grogged clay.

Choosing where to cut is easy: Starting at the top make the first cut at the point where you can  reach all the parts that need hollowing to leave 1-3cm walls. That may mean cutting off a very small piece and hollowing barely a few scoops, for example the head of a figure: drill a tool down the neck and then your next cut would be low on the chest, etc. Always ensure there is an air outlet for each hollowed area. Hard to reach areas can be skewerd from the inside or outside to make channels for the air/water to escape.

Horizontal cuts are best because gravity is on your side while the piece is drying.

Horizontal cuts are best because gravity is on your side while the piece is drying. Lay the cut section on foam.

Hollow the cut section first, score the edges with a serrated kidney (NEVER make deep scores) moisten w/ water and /or slip so that that edge can soften while the section is upside-down. The hollow into the rest of the form going as far as you can reach. Mark how far you reached on the surface to help you decide where to make the next cut.

Hollow the cut section first, leaving a wall approx 1.5-2cm thick. Do not smooth this inner surface: it will make it difficult for any trapped air to pass through the clay during firing. You can leave ‘buttress’ type support walls. Score the edges with a serrated kidney (NEVER make deep scores with a pointy tool. Tiny bubbles of air will get trapped there all along your join and possibly cause a crack.) Moisten w/ water/slip so that the edge can soften while the section is upside-down. Then hollow into the rest of the form going as far as you can reach. Mark how far you reached on the surface to help you decide where to make the next cut.


Once both edges are softened put the pieces back together and move back and forth until you feel the edges lock together. Genuine joins are formed when the chains of platelet-shaped particles from each section inter-lock. Picture a magnified image of hair. Score marks do not give the surface 'tooth'; they allow water into the clay-body. On vertical surfaces they hold the water in place to give it time to sink in. Slip is not 'glue', it is clay particles spread out in water and has little strength, especially when it has dried. It is ideal for holding a lot of water in place to give it time to be absorbed to soften the area of leather-hard clay. Manipulate the softened clay at the join to encourge further integration of those particle-chains and to disturb the straight line of the join; cracks love to zing along a nice straight slip-weakened join during the firing when the pull of shrinking stresses the sculpture.

Quality Joints:  Once both edges are softened put the pieces back together and move back and forth until you feel the edges lock together. Genuine joins are formed when the chains of platelet-shaped particles from each section inter-lock. Picture a magnified image of hair. Score marks do not give the surface ‘tooth’; they allow water into the clay-body. On vertical surfaces they hold the water in place to give it time to sink in. Slip is not ‘glue’, it is clay particles spread out in water and has little strength, especially when it has dried. It is ideal for holding a lot of water in place to give it time to be absorbed to soften the area of leather-hard clay.                                         Once both edges are softened put the pieces back together and move back and forth until you feel the edges lock together.        
Manipulate the softened clay at the join to encourage further integration of those particle-chains and to disturb the straight line of the join; cracks love to zing along a nice straight slip-weakened join during the firing when the pull of shrinking stresses the sculpture.


Smooth the now recessed join with water + rub until a slip is lifted from the join's surface. Make a coil 1.5cm thick by squeezing. Do not roll your coils; it packs the finer particles on the coils's surface making it resistant to joining. Attach one end and inch the coil into the join; press in then squeeze the coil to force it to inch forward along the join; this friction creates the bond.

Smooth the now recessed join with water + rub until a slip is lifted from the join’s surface. Make a coil 1.5cm thick by squeezing. Do not roll your coils; it packs the finer particles on the coils’s surface making them resistant to joining. Attach one end and inch the coil into the join; press in then squeeze the coil to force it to inch forward along the join; this friction creates the bond between the surfaces. Coiling explained here.

Blend the coil in, leaving it raised. The excess clay will slowly release it's water into the join, slowing drying. Wrap the piece in plastic and leave for week or so until the coil has the same hardness as the rest of the form. Then you can scrape it away, compressing the clay as you go to leave a strong join that wont recess during the firing.

Blend the coil in, leaving it raised. The excess clay will slowly release it’s water into the join, slowing drying. Wrap the piece in plastic and leave for week or so until the coil has the same hardness as the rest of the form. Then you can scrape it away, compressing the clay as you go to leave a strong join that wont recess during the firing.

Make you next cut and repeat.

Make your next cut and repeat.

Once those coils have hardened under plastic you can complete the Sculptures surface and edges.Once those coils have hardened under plastic you can complete the Sculptures surface and edges. Then set to dry very slowly (min 4 weeks) under a 5-sheets-thick-newspaper or cardboard box. For very large forms you can use a double layer of bed-sheets. If you use plastic turn it regularly so that condensation doesn't drip onto the clay and spoil it.

Once those coils have hardened under plastic you can complete the Sculpture’s surface and edges.   Then set to dry very slowly (min 4 weeks) under a 5-sheets-thick-newspaper or cardboard box. For very large forms you can use a double layer of bed-sheets. If you use plastic turn it regularly so that condensation doesn’t drip onto the clay and spoil it. Or stick plastic over your selves to make a micro drying-room.

Work in progress by Gill Tennant-Eyles

OLYMPUS DIGITAL CAMERA

Work in progress by Emma Bevan

OLYMPUS DIGITAL CAMERA

Work in progress by Tez Roberts

OLYMPUS DIGITAL CAMERA

These sculptures were all made with this excellent, versatile technique.

The Edge VIII, in progress.

The Edge VIII, in progress.

Up Is Down IV, in progress.

Up Is Down IV, in progress.

Up Is Down II, in progress.

Up Is Down II, in progress.

Up Is Down V, in progress.

Up Is Down V, in progress.

Up Is Down X, in progress.

Up Is Down X, in progress.

Over Half a Century, in progress.

Over Half a Century, in progress.

Wyvern VIII, in progress.

Wyvern VIII, in progress.


What Was the First Abstract Artwork?

click on this title to see the original article. Artsy has some really interesting reviews and is a great place to see stunning art-work.

  • Wassily Kandinsky, Composition V, 1911. Image via Wikimedia Commons.

Who made the first Western abstract painting? That was the question that Wassily Kandinsky’s widow, accompanied by a team of researchers, set out to answer in 1946. Her late husband, a Russian painter who was among the pioneers of abstraction in the early 1910s, had himself been personally invested in the answer.

In 1935, Kandinsky had penned a letter to his gallerist in New York to insist on his preeminence. “Indeed,” he wrote of a 1911 work, “it’s the world’s first ever abstract picture, because back then not one single painter was painting in an abstract style. A ‘historic painting’, in other words.”

Kandinsky wasn’t the only artist interested in preserving his legacy. He and several early abstract painters—including Robert Delaunay, Mikhail Larionov, Natalia Goncharova, and Kazimir Malevich—backdated their works, in some cases several years before they were actually completed.

This artistic jostling reflects a focus on invention as an individual act, notes curator Leah Dickerman in an essay for MoMA’s 2012 show “Inventing Abstraction, 1910-1025: How a Radical Idea Changed Modern Art.” But, as she goes on to say, that approach is in some ways misguided. Rather than the work of a solitary genius, abstraction “was an invention with multiple first steps, multiple creators, multiple heralds, and multiple rationales.”

What Makes an Abstract Expressionist Painting Good?

At the turn of the 20th century, the world was becoming increasingly connected. Steamships, cars, and trains facilitated international travel, while telephones, telegraphs, and radios allowed for conversations between people on opposite ends of the globe.

Within the art world specifically, journals sprang up in droves; in Paris alone, some 200 reviews of art and culture appeared in the decade leading up to World War I. Subscribers were scattered across Europe and America, allowing a wide swath of creatives to stay abreast of the latest developments in art. And this period also saw the beginning of a traveling exhibition culture, led by the Italian Futurists.

“Historians talk about ‘conditions of possibility,’” Masha Chlenova, a curator who worked with Dickerman on “Inventing Abstraction,” told Artsy. “For example, photography was also invented by three people at the same time. Daguerre just happened to be the best at marketing and patenting.”

Similarly, while Kandinsky is today hailed as the father of abstract painting, he was by no means the only player in the development of non-representational painting. His work Komposition V did, admittedly, jumpstart public interest in abstract painting. Exhibited in Munich in December 1911, this monumental work was just barely representational.

It was the first such work to be put on display, and “for some artists and intellectuals, abstraction not only began to seem plausible, but also took on the character of an imperative,” Dickerman writes.

Kandinsky had been thinking about abstract art for years beforehand. His manifesto On the Spiritual in Art, which appeared as a draft in 1909 and was published the same month as Komposition V went on display, laid out the tenets of abstraction. But it would still be several years before Kandinsky would finally break free from recognizable forms in his art. As Chlenova put it, “he theorized abstraction before he made painting.”

  • František Kupka, Amorpha: Fugue in Two Colors, 1912. Courtesy of The Museum of Modern Art, NY. © 2017 Artists Rights Society (ARS), New York / ADAGP, Paris.
  • František Kupka Study for Amorpha, Warm Chromatic and for Fugue in two colors; Study for The Fugue, 1910–11. The Solomon R. Guggenheim Foundation Peggy Guggenheim Collection, Venice, 1976. © 2017 Artists Rights Society (ARS), New York/ADAGP, Paris.

Dickerman references Czech-born artist František Kupka as the first to display works that were a complete break from representational painting. His compositions Amorpha, Chromatique chaude and Amorpha, Fugue à deux couleurs were shown at the Salon d’Automne in Paris in October 1912, filmed for the newsreels, and then broadcast across Europe and America.

Dickerman believes that Kupka’s willingness to publicly defy convention was related to his personal history. Although he grew up in Prague and Vienna and started out as a Symbolist, he later moved to Paris and developed close ties with the city’s avant-garde—which, as Dickerman notes, granted “him an insider/outsider status that seems particularly fertile for paradigm-shifting thought.”

But further complicating the question of “first” is that it can be difficult to determine the threshold of abstraction. When, precisely, does a work go from “abstracted” to “abstraction”?

French avant-garde artist Francis Picabia, for example, is sometimes credited with the first abstract painting. His watercolor Caoutchouc (Rubber) was completed in 1909, which would predate even Kandinsky’s theories on abstraction. But other academics have pushed back, noting that the work still retains some semblance of form, reminiscent of a bouquet of flowers.

For “Inventing Abstraction,” Chlenova said she and Dickerman began by establishing clear criteria for what they considered abstract work. “Our main criterion was the artist’s own position and their statements that they’re doing something abstract,” she said. “The terminology is a slightly different question because the word ‘abstract’ would not necessarily be used. But there was a very clear awareness from the artists that were sensitive to what was happening.”

  • Hilma af Klint, The Large Figure Paintings, No. 5, Group III, 1907. Image via Wikimedia Commons.
  • Hilma af Klint, Svanen (The Swan) No. 17, Group IX/SUW, The SUW/UW Series, 1914-1915. Image via Wikimedia Commons.

This is why, she explained, Swedish artist Hilma af Klint was not represented in the MoMA exhibition. Since 2013, when Moderna Museetheld the first-ever retrospective of her work, af Klint’s oeuvre has received renewed attention from the public. Known in her lifetime as a landscape painter and portraitist, it was revealed decades after her death that she had also been experimenting with abstraction. As early as 1906, af Klint had been painting colorful works full of organic shapes, spirals, and curlicues.

This date places her several years before Kandinsky even theorized abstraction, let alone acted on his ideas. But af Klint’s works sprang from her interest in the occult—during the 1890s, she started organizing seances with four artist friends where they practiced automatic drawing and writing.

Later, when she began her largest body of non-representational paintings, she claimed that spiritual forces were directing her hand. And for an artist to be included in “Inventing Abstraction,” Chlenova explained, they had to “formulate their practice as a conscious rejection of any reference to the outside world.”

Others disagreed with this reading, arguing that a mystical approach should not negate her contribution to developing abstraction. “‘Spiritual’ is still a very dirty word in the art world,” curator Maurice Tuchman toldthe New York Times in 2013. “When the prejudice against the idea of the spiritual life in af Klint’s work is overcome, which will require scholarship, then perhaps she will really take hold in the broader conversation.”

But there’s no disagreement that the invention of Western abstraction revolutionized art production in the 20th century, nor that it was predated by centuries of abstracted forms and patterns in non-Western traditions.

“One can treat abstraction a little bit more abstractly, if you will,” Chlenova laughed, “without ultimately being too concerned about who was first.”

—Abigail Cain

Portraiture, Clay Armatures and building Hollow Workshop.

Portrait class 2015

The Bust

The key reason making heads is so hard is that the perception (the way we use our knowledge) that we have built up over our lifetime of what shape the head is, is based around communication and assessing each other. Making a head requires going against what ‘feels’ right and using information we are unlikely to have bothered with before. Portraiture has a system to organise the huge quantity of subtle details. Learning this system will broaden your knowledge, and your access to more knowledge, enormously. That’s why the study of Portraiture and Figurative Sculpture is traditionally the bed-rock of Art.

It is not rocket science and you can do it. The challenge will be fascinating and very rewarding.

The Technique

Because clay shrinks as it dries and is floppy when very wet a Clay Armature is invaluable.

Most techniques for building  hollow have a strong ‘voice’ of their own and will influence the final look of the piece. They can demand that you harden lower sections and are then unable to change them when you later realise they are wrong. This is a real disadvantage irregardless of your skill level. It is better to work solid over a clay armature especially if you are not using a scale-model and hollow out just before finishing touches. It’s not difficult.

Or you can use this technique of building out from a Clay Armature to make your sculpture hollow.

Clay armature for a bust, aug 2014

Clay armature for a bust, aug 2014

3rd Bust armature in progress, Aug 2014.

3rd Bust armature in progress, Aug 2014.

OLYMPUS DIGITAL CAMERAOLYMPUS DIGITAL CAMERAOLYMPUS DIGITAL CAMERAOLYMPUS DIGITAL CAMERA

in progress, Aug 2014.

in progress, Aug 2014.

Here I chose to leave gaps that show the Armature but of course you don’t have to. The step by step manner of this method and the fact that you work all over the head  in layers from the start  makes it ideally suited to learning to make Portraits and other Sculpture.

Frame-works for The Wyvern IV and, in the back ground, The Leviathan.

Frame-works for The Wyvern IV and, in the back ground, The Leviathan.

These Armatures or ‘frameworks’ were planned to be very much part of the fractured image. But the ‘corrugation’ and circular holes you can see are strengthening the Armature and would be very suitable to an armature that would ultimately be hidden. Playing around with these Armatures lead the Sculptures in un-anticipated directions (I frequently have no idea what I’m doing, just why!)

The Wyvern and The  Leviathan. in progress, Sept 2014.

The Wyvern and The Leviathan. in progress, Sept 2014.

In this Workshop we will build a strong Armature, work on the Skull loosely for the benefit of looking at that and then build on the external features of the head; the face, ears, hair etc.

The Skull. 2014

The Skull. 2014

The Weekend

We’ll cover Hollowing out too.  You will get my invaluable tirade on joins. We’ll look at some different clays and talk about choosing clays. And we’ll sit down to a relaxing bring and share lunch in true South Wales Potter’s Tradition and talk shop. There will be drinks available all day.

Everyone, from any level of experience, is welcome and will get a lot out of this challenging week-end.

The Fee is £130 which includes 25kg of Scarva Crank (an out-standing sculpture clay), a set of sculpture’s callipers and set of Skull and Skeleton images. The Workshop is to give you the Techniques so that you can develop your own way of using them. Just like learning to play an instrument, practice and adding your own style will give you the results. You are unlikely to complete your head on the week-end and I will encourage you to take it home to work on or break it down and have the clay to use on your next head where you can work more slowly. I can fire your sculpture if you like and we’ll sort that out separately.

It is easy to get here  and there is plenty of Parking and the Studio is not bad for accessibility.

Studio Diary ,The Tumble Commission pt 7; Installation.

From the outset the many people from Arts Care Gofal Celf, Gwalia and Mynydd Marw involved in this 2 year , multi-fasceted, Baring Foundation ‘Yma a Nawr’ project have put in their all to make it out-standing. After the excellent Installation of the Sirhowy Wyvern I knew that Andrew Preece and his team at Smartfix Property Maintenance would also do whatever it takes to make this Sculpture look fantastic. They are incredibly picky and fastidious, it’s marvellous. Best materials,committed craftsmanship, and they always stick to the Budget no matter how much extra time they have to put in.OLYMPUS DIGITAL CAMERA

Smartfix Property Maintenance at Mynnyd Mawr, Tumble

Smartfix Property Maintenance at Mynydd Mawr, Tumble

Moving the heavy sections around meant 4 men had to be on site.

Moving the heavy sections around meant 4 men had to be on site.

The 2 bottom sections are lowered over rebars set into the solid plinth and foundations.

The 2 bottom sections are lowered over rebars set into the solid plinth and foundations.

It was critical to get the position of these first sections correct.

It was critical to get the position of these first sections correct.

The sections are filled with concrete and left overnight to set.

The sections are filled with concrete and left overnight to set.

Once everything has set the supports can be removed and the joints pointed.

Once everything has set the supports can be removed and the joints pointed.

The charming tiles, made by pupils at Llannon Primary School and residents at Mynnyd Mawr are laid out in a measured pattern.

The charming tiles, made by pupils at Llannon Primary School and residents at Mynydd Mawr are laid out in a measured pattern.

Andrew and Phil set the tiles.

Andrew and Phil set the tiles.

I did the glass with Andrew.

I did the glass with Andrew.

OLYMPUS DIGITAL CAMERA OLYMPUS DIGITAL CAMERA OLYMPUS DIGITAL CAMERA OLYMPUS DIGITAL CAMERA OLYMPUS DIGITAL CAMERA07913743457_2014-10-14_14-1.32.501


Studio Diary, Landscape Project pt 4.

The Wyvern IV, Sept 2014

The Wyvern IV, Sept 2014

The frame-work for this one was much more developed and lead the form. I made a second one so I could keep the flow going around the drying periods but I didn’t need to break from Wyvern IV; it was strong enough.

Frame-work for The Wyvern IV.

Frame-work for The Wyvern IV.

This is asking a lot of a clay. But this is Scarva ES50 again and reckon I’ll get away with it.

OLYMPUS DIGITAL CAMERA OLYMPUS DIGITAL CAMERA OLYMPUS DIGITAL CAMERA

Studio Diary. Landscape Project, pt3

The Wyvern and the Osprey, 2014.

The Wyvern and the Osprey, 2014.

The story is coming together. My policy of don’t ask too many questions, let the work flow, put in the hours,review completed forms, is working well.

Porth Yr Ogof Cave, Brecon Beacons, by Steve Foote.

Porth Yr Ogof Cave, Brecon Beacons, by Steve Foote.This image and the memory of being down there is still key.

OLYMPUS DIGITAL CAMERA

Balarat Pit Marker, 6m L x 2m H, Blaengarw, Wales.

Balarat Pit Marker, 6m L x 2m H, Blaengarw, Wales.

The idea of the Wyvern, guardian within the land ,started with the Balarat Pit Marker although I didn’t know the name. The Wyvern is a force and can take many forms. The Harbingers I’ve made are similar figures.

River Harbinger,2012

River Harbinger,2012

The Wyvern III, 2014

The Wyvern III, 2014

These busts are developing slowly as my portrait skills heat up and I can work more freely.

Studio Diary, The Landscape Project, part 1

Busts in progress, Aug 2014.

Busts in progress, Aug 2014.

Lots of changes, lots of layers.This is the main photo I am  focussing on; The sky, the land and the ocean and man’s presence – everything is integrated.

Bracelet Bay, Mumbles, Swansea by Steve Foote.

Bracelet Bay, Mumbles, Swansea, by Stephen Foote, 2014.

These 2 pictures and the experience of being in both these places is never far from my mind these days.

Porth Yr Ogof Cave, Brecon Beacons, by Stephen Foote.2014

Porth Yr Ogof Cave, Brecon Beacons, by Stephen Foote.2014

A narrative is emerging that involves the passage of water from the Beacons’ sky to the ocean at the bottom of the Swansea Valley. The Tawe River passes the Studio and the ground beneath us is full of  tunnels from the rivers and from mining. The Wyvern, a dragon with a wonderful mythology about guarding the treasures of the subterranean world entered the picture when I was heavily involved with the history of local Coal Mining and  the Pit Marker Sculptures and it is re-emerging here. OLYMPUS DIGITAL CAMERAThe next clay-armature is more specific now that I have a clearer idea of where I’m going.

3rd Bust armature in progress, Aug 2014.

3rd Bust armature in progress, Aug 2014.

OLYMPUS DIGITAL CAMERA OLYMPUS DIGITAL CAMERA OLYMPUS DIGITAL CAMERA

in progress, Aug 2014.

in progress, Aug 2014.